12 KiB
如何在 Ubuntu 上用 Yocto 创建你自己的 Linux 发行版
本文内容
- [开发机的基本条件][1]
- [Yocto 编译和构建的过程][2]
In this article, our focus is the creation of a minimal Linux distribution using the Yocto project on the Ubuntu platform. The Yocto project is very famous in the embedded Linux world because of its flexibility and ease of use. The purpose of the Yocto project is to create a Linux distro for manufacturers of embedded hardware and software. A new minimal Linux distro will be created for qemu as the (qemu is a basic software emulator) target machine and we will run it in qemu.
本文的主要聚焦在如何使用 Yocto 在 Ubuntu 上穿件一个最小化的 Linux 发行版。Yocto 项目在嵌入式 Linux 的世界非常著名,这是因为它用户起来很灵活、方便。Yocto 的目标是为嵌入式软硬件开发商创建自己的 Linux 发行版。本文我们将会创建一个可以运行在 QEMU 上的最小化 Linux,并且在 QEMU 上实际运行。
开发机的基本条件
- 最少 4-6 GB 内存
- 最新版的 Ubuntu 系统(本文使用了 16.04 LTS)
- 磁盘剩余空间至少 60-80 GB
- 在创建 Linux 发行版之前先安装下面的软件包
- 下载最新的 Yocto(Poky 时最小开发环境)稳定分支
apt-get update

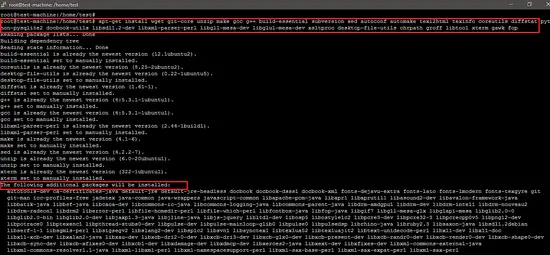
apt-get install wget git-core unzip make gcc g++ build-essential subversion sed autoconf automake texi2html texinfo coreutils diffstat python-pysqlite2 docbook-utils libsdl1.2-dev libxml-parser-perl libgl1-mesa-dev libglu1-mesa-dev xsltproc desktop-file-utils chrpath groff libtool xterm gawk fop
如下所示,开发环境要安装的软件包将近 1GB 大小。
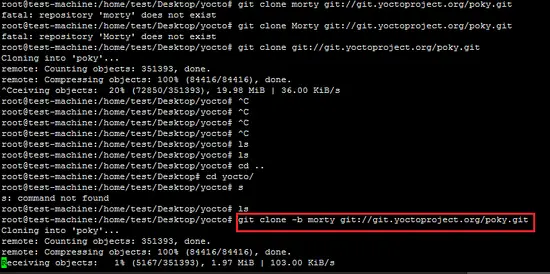
在这个教程中,系统上克隆的 poky 的分支时 morty 稳定分支。
git clone -b morty git://git.yoctoproject.org/poky.git
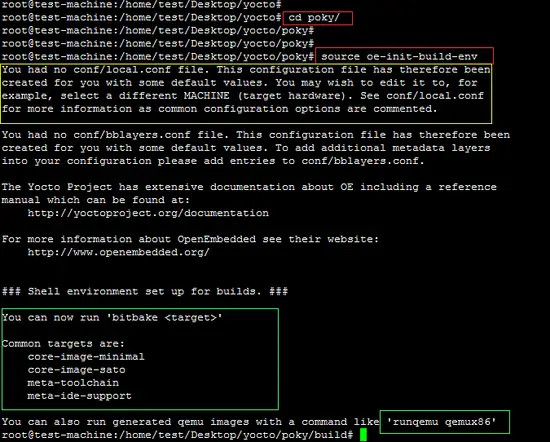
进入 poky 目录,然后运行下面的命令为 Yocto 开发环境设置(set/export)一些环境变量。
source oe-init-build-env
如下所示,在运行了 oepn embeded (oe) 的构建环境脚本之后,为了之后的配置和构建新版本,终端里的路径会自动切换到 build 目录。
The above screenshot shows that the "local.conf" file is created inside the "conf" directory. This is the configuration file for yocto which specifies details of the target machine and SDK for desired architecture etc.
下面的截屏展示了在 conf 目录下创建的文件 local.conf。这是 Yocto 用来设置目标机器细节和 SDK 的目标架构的配置文件。
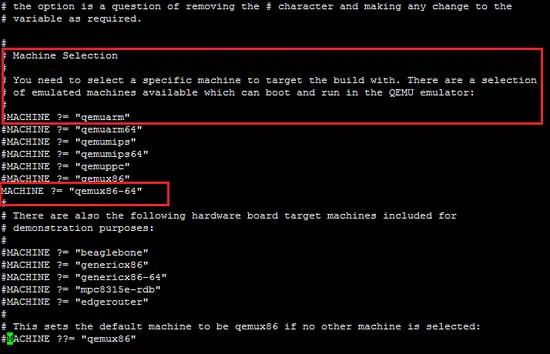
如下所示,这里设置的目标机器时 qemux86-64。
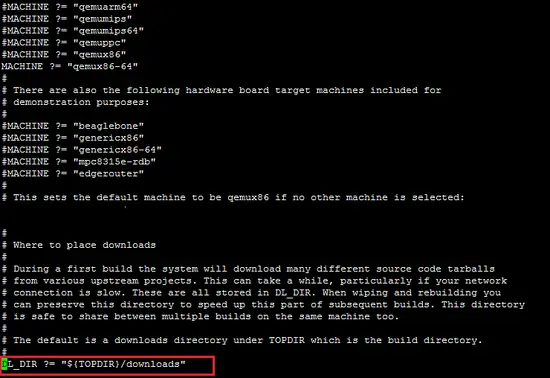
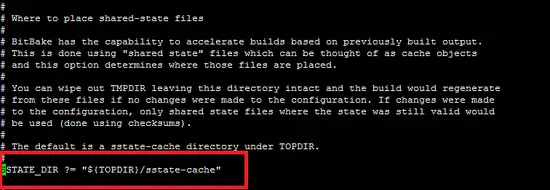
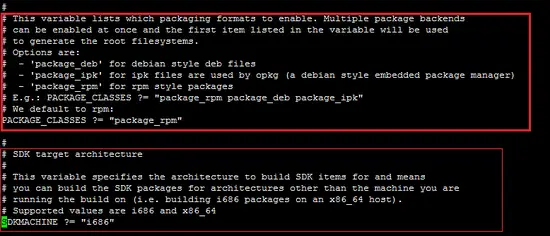
如下面截图所示,在 local.conf 中取消下面参数的注释符号。
DL_DIR ?= "${TOPDIR}/downloads"
SSTATE_DIR ?= "${TOPDIR}/sstate-cache"
TMPDIR ?= "${TOPDIR}/tmp"
`` PACKAGE_CLASSES ?= "package_rpm"
SDKMACHINE ?= "i686"
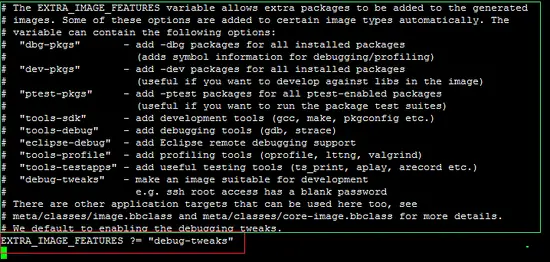
如下所示,在 `local.conf` 为基于 Yocto 的 Linux 设置空密码和后续的一些参数。否则的话用户就不能登录进新的发行版。
EXTRA_IMAGE_FEATURES ?= "debug-tweaks"
我们并不准备使用任何图形化工具来创建 Linux OS,比如 `toaster` (hob 已经不再被支持了)。
### Yocto 编译构建过程
现在运行下面的 bitbake 组件的命令开始为选定的目标机器下载和编译软件包。
bitbake core-image-minimal
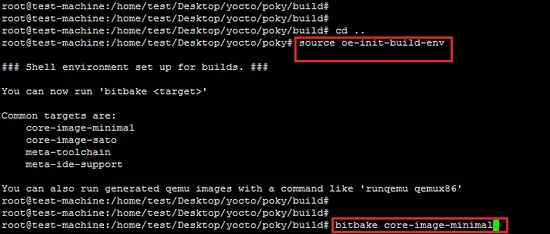
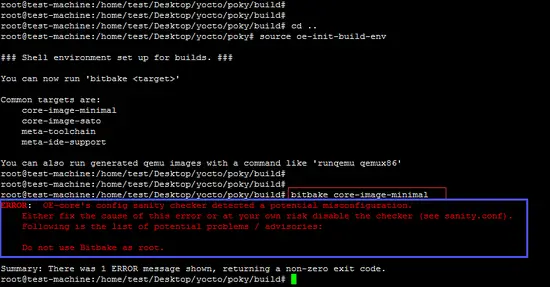
非常重要的是在普通 Linux 用户下运行上面的命令,而不是使用 root 用户。如下面截图所示,当你在 root 用户下运行 bitbake 命令会产生下卖弄所示的错误。
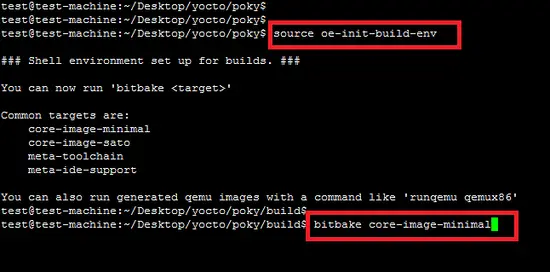
再一次运行导出环境变量的脚本(`oe-init-build-env`),重新执行相同的命令来启动下载和编译进程。
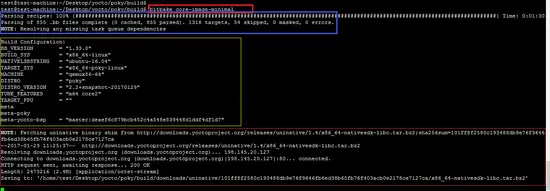
如下所示,构建脚本组件的第一步工作是解析配置(recipe)。

下面的截图展示了构建脚本的解析过程。同时也显示了你要构建的新的基于 yocto 的发行版的构建系统的细节。
After downloading the SDK and necessary libraries, the next step is to download and compile the packages. The following screenshot shows the task for the new distribution. This step will take 2-3 hours because first, it downloads the required packages and then compiles for the new Linux distribution.
在下载了 SDK 和必要的库之后,下一步是下载和编译软件包。如下的截图展示了为构建新发行版而执行的任务。这一步将会执行 2-3 小时,因为第一要下载需要的软件包,然后还要为新的 Linux 发行版编译这些软件包。
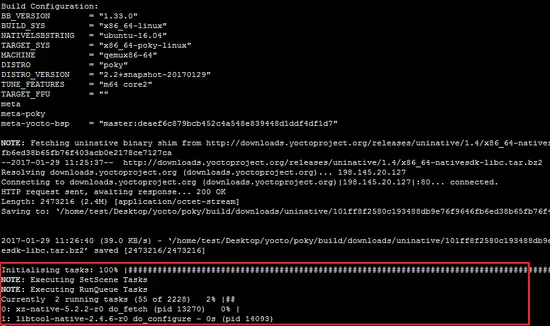
下面的截图显示了任务列表执行完毕。

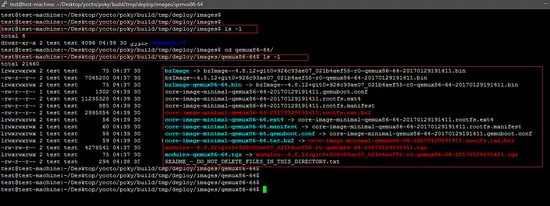
为目标机器类型 `qemux86-64` 编译好的新镜像位于 `build/tmp/deploy/images/qemux86-64`:
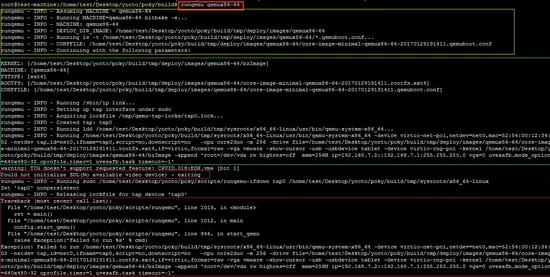
如下所示,上面的命令如果运行在 Putty 上会产生一个错误。
通过 rdp 在 Ubuntu 平台上再次运行上面的命令。
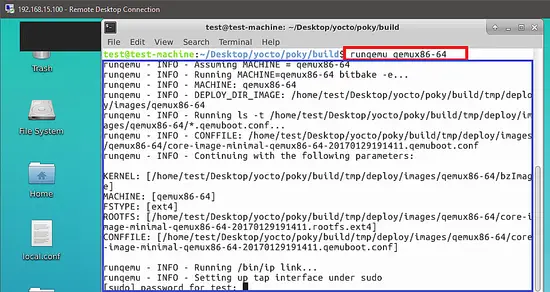
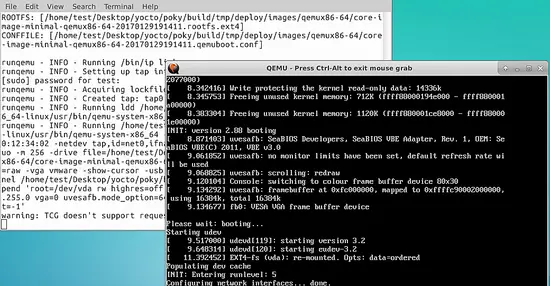
为运行新的基于 Yocto 的 Linux 发行版的 qemu 打开一个新屏幕。
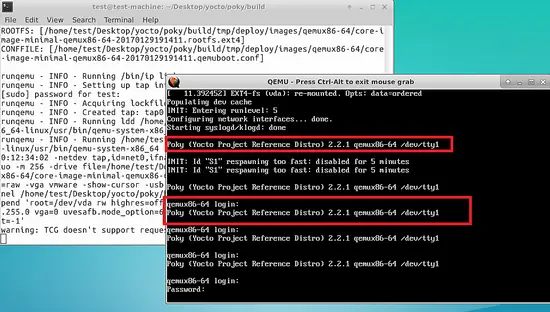
下面展示了新发行版的登录界面,同时也显示了使用的 yocto 项目的版本号。默认的用户名是 `root` ,密码为空。
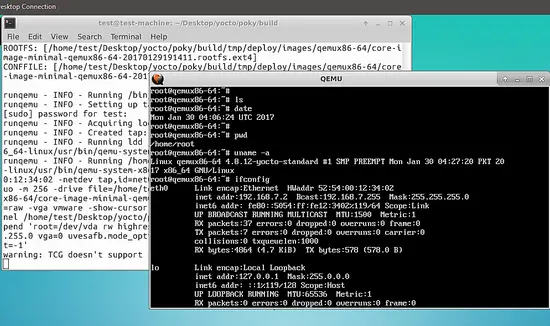
最后使用 root 用户名和空密码登录进新发行版。如下截图所示,在这个最小版本的 Linux 上运行了基本的命令(`data` 、 `ifconfig` 和 `uname`)。
本文的目标是理解使用 Yocto 创建新的 Linux 发行版的过程。
--------------------------------------------------------------------------------
via: https://www.howtoforge.com/tutorial/how-to-create-your-own-linux-distribution-with-yocto-on-ubuntu/
作者:[Ahmad][a]
译者:[Ezio](https://github.com/oska874)
校对:[校对者ID](https://github.com/校对者ID)
本文由 [LCTT](https://github.com/LCTT/TranslateProject) 原创编译,[Linux中国](https://linux.cn/) 荣誉推出
[a]:https://www.howtoforge.com/tutorial/how-to-create-your-own-linux-distribution-with-yocto-on-ubuntu/
[1]:https://www.howtoforge.com/tutorial/how-to-create-your-own-linux-distribution-with-yocto-on-ubuntu/#prerequisites-for-the-development-machinenbsp
[2]:https://www.howtoforge.com/tutorial/how-to-create-your-own-linux-distribution-with-yocto-on-ubuntu/#yocto-compilation-and-building-process
[3]:https://www.howtoforge.com/images/how-to-create-your-own-linux-distribution-with-yocto/big/1-pre_requisite_packages-1.png
[4]:https://www.howtoforge.com/images/how-to-create-your-own-linux-distribution-with-yocto/big/2-pre_requisite_packages-2.png
[5]:https://www.howtoforge.com/images/how-to-create-your-own-linux-distribution-with-yocto/big/download_morty_of_yocto.png
[6]:https://www.howtoforge.com/images/how-to-create-your-own-linux-distribution-with-yocto/big/source_environment_script.png
[7]:https://www.howtoforge.com/images/how-to-create-your-own-linux-distribution-with-yocto/big/selected_target.png
[8]:https://www.howtoforge.com/images/how-to-create-your-own-linux-distribution-with-yocto/big/uncheck_Download_parameters.png
[9]:https://www.howtoforge.com/images/how-to-create-your-own-linux-distribution-with-yocto/big/uncheck_sstate_parametes.png
[10]:https://www.howtoforge.com/images/how-to-create-your-own-linux-distribution-with-yocto/big/tempdir_uncheck_paramerter.png
[11]:https://www.howtoforge.com/images/how-to-create-your-own-linux-distribution-with-yocto/big/sdk_and_package_selection.png
[12]:https://www.howtoforge.com/images/how-to-create-your-own-linux-distribution-with-yocto/big/extra-features_for_blank_password.png
[13]:https://www.howtoforge.com/images/how-to-create-your-own-linux-distribution-with-yocto/big/bitbake_coreimageminimal.png
[14]:https://www.howtoforge.com/images/how-to-create-your-own-linux-distribution-with-yocto/big/dont_user_as_a_root.png
[15]:https://www.howtoforge.com/images/how-to-create-your-own-linux-distribution-with-yocto/big/runniing_bitbake_again-normal_user.png
[16]:https://www.howtoforge.com/images/how-to-create-your-own-linux-distribution-with-yocto/big/parsing-receipe.png
[17]:https://www.howtoforge.com/images/how-to-create-your-own-linux-distribution-with-yocto/big/output_of_parsing.png
[18]:https://www.howtoforge.com/images/how-to-create-your-own-linux-distribution-with-yocto/big/task_list.png
[19]:https://www.howtoforge.com/images/how-to-create-your-own-linux-distribution-with-yocto/big/downloaded-all_packages_and_compiled.png
[20]:https://www.howtoforge.com/images/how-to-create-your-own-linux-distribution-with-yocto/big/new_linux_compiled_under_qemux86_64.png
[21]:https://www.howtoforge.com/images/how-to-create-your-own-linux-distribution-with-yocto/big/error_on_putty.png
[22]:https://www.howtoforge.com/images/how-to-create-your-own-linux-distribution-with-yocto/big/runqemu_command.png
[23]:https://www.howtoforge.com/images/how-to-create-your-own-linux-distribution-with-yocto/big/new_linux_inside_the_qemu_.png
[24]:https://www.howtoforge.com/images/how-to-create-your-own-linux-distribution-with-yocto/big/reference_distro.png
[25]:https://www.howtoforge.com/images/how-to-create-your-own-linux-distribution-with-yocto/big/inside_new_linux_distro_running_on_qemu_3.png
