mirror of
https://github.com/LCTT/TranslateProject.git
synced 2025-01-04 22:00:34 +08:00
408 lines
16 KiB
Markdown
408 lines
16 KiB
Markdown
Getting started with a local OKD cluster on Linux
|
||
======
|
||
Try out OKD, the community edition of the OpenShift container platform, with this tutorial.
|
||

|
||
|
||
OKD is the open source upstream community edition of Red Hat's OpenShift container platform. OKD is a container management and orchestration platform based on [Docker][1] and [Kubernetes][2].
|
||
|
||
OKD is a complete solution to manage, deploy, and operate containerized applications that (in addition to the features provided by Kubernetes) includes an easy-to-use web interface, automated build tools, routing capabilities, and monitoring and logging aggregation features.
|
||
|
||
OKD provides several deployment options aimed at different requirements with single or multiple master nodes, high-availability capabilities, logging, monitoring, and more. You can create OKD clusters as small or as large as you need.
|
||
|
||
In addition to these deployment options, OKD provides a way to create a local, all-in-one cluster on your own machine using the oc command-line tool. This is a great option if you want to try OKD locally without committing the resources to create a larger multi-node cluster, or if you want to have a local cluster on your machine as part of your workflow or development process. In this case, you can create and deploy the applications locally using the same APIs and interfaces required to deploy the application on a larger scale. This process ensures a seamless integration that prevents issues with applications that work in the developer's environment but not in production.
|
||
|
||
This tutorial will show you how to create an OKD cluster using **oc cluster up** in a Linux box.
|
||
|
||
### 1\. Install Docker
|
||
|
||
The **oc cluster up** command creates a local OKD cluster on your machine using Docker containers. In order to use this command, you need Docker installed on your machine. For OKD version 3.9 and later, Docker 1.13 is the minimum recommended version. If Docker is not installed on your system, install it by using your distribution package manager. For example, on CentOS or RHEL, install Docker with this command:
|
||
|
||
```
|
||
$ sudo yum install -y docker
|
||
```
|
||
|
||
On Fedora, use dnf:
|
||
|
||
```
|
||
$ sudo dnf install -y docker
|
||
```
|
||
|
||
This installs Docker and all required dependencies.
|
||
|
||
### 2\. Configure Docker insecure registry
|
||
|
||
Once you have Docker installed, you need to configure it to allow the communication with an insecure registry on address 172.30.0.0/16. This insecure registry will be deployed with your local OKD cluster later.
|
||
|
||
On CentOS or RHEL, edit the file **/etc/docker/daemon.json** by adding these lines:
|
||
|
||
```
|
||
{
|
||
"insecure-registries": ["172.30.0.0/16"]
|
||
}
|
||
```
|
||
|
||
On Fedora, edit the file **/etc/containers/registries.conf** by adding these lines:
|
||
|
||
```
|
||
[registries.insecure]
|
||
registries = ['172.30.0.0/16']
|
||
```
|
||
|
||
### 3\. Start Docker
|
||
|
||
Before starting Docker, create a system group named **docker** and assign this group to your user so you can run Docker commands with your own user, without requiring root or sudo access. This allows you to create your OKD cluster using your own user.
|
||
|
||
For example, these are the commands to create the group and assign it to my local user, **ricardo** :
|
||
|
||
```
|
||
$ sudo groupadd docker
|
||
$ sudo usermod -a -G docker ricardo
|
||
```
|
||
|
||
You need to log out and log back in to see the new group association. After logging back in, run the **id** command and ensure you're a member of the **docker** group:
|
||
|
||
```
|
||
$ id
|
||
uid=1000(ricardo) gid=1000(ricardo) groups=1000(ricardo),10(wheel),1001(docker)
|
||
context=unconfined_u:unconfined_r:unconfined_t:s0-s0:c0.c1023
|
||
```
|
||
|
||
Now, start and enable the Docker daemon like this:
|
||
|
||
```
|
||
$ sudo systemctl start docker
|
||
$ sudo systemctl enable docker
|
||
Created symlink from /etc/systemd/system/multi-user.target.wants/docker.service to /usr/lib/systemd/system/docker.service.
|
||
```
|
||
|
||
Verify that Docker is running:
|
||
|
||
```
|
||
$ docker version
|
||
Client:
|
||
Version: 1.13.1
|
||
API version: 1.26
|
||
Package version: docker-1.13.1-75.git8633870.el7.centos.x86_64
|
||
Go version: go1.9.4
|
||
Git commit: 8633870/1.13.1
|
||
Built: Fri Sep 28 19:45:08 2018
|
||
OS/Arch: linux/amd64
|
||
|
||
Server:
|
||
Version: 1.13.1
|
||
API version: 1.26 (minimum version 1.12)
|
||
Package version: docker-1.13.1-75.git8633870.el7.centos.x86_64
|
||
Go version: go1.9.4
|
||
Git commit: 8633870/1.13.1
|
||
Built: Fri Sep 28 19:45:08 2018
|
||
OS/Arch: linux/amd64
|
||
Experimental: false
|
||
```
|
||
|
||
Ensure that the insecure registry option has been enabled by running **docker info** and looking for these lines:
|
||
|
||
```
|
||
$ docker info
|
||
... Skipping long output ...
|
||
Insecure Registries:
|
||
172.30.0.0/16
|
||
127.0.0.0/8
|
||
```
|
||
|
||
### 4\. Open firewall ports
|
||
|
||
Next, open firewall ports to ensure your OKD containers can communicate with the master API. By default, some distributions have the firewall enabled, which blocks required connectivity from the OKD containers to the master API. If your system has the firewall enabled, you need to add rules to allow communication on ports **8443/tcp** for the master API and **53/udp** for DNS resolution on the Docker bridge subnet.
|
||
|
||
For CentOS, RHEL, and Fedora, you can use the **firewall-cmd** command-line tool to add the rules. For other distributions, you can use the provided firewall manager, such as [UFW][3] or [iptables][4].
|
||
|
||
Before adding the firewall rules, obtain the Docker bridge network subnet's address, like this:
|
||
|
||
```
|
||
$ docker network inspect bridge | grep Subnet
|
||
"Subnet": "172.17.0.0/16",
|
||
```
|
||
|
||
Enable the firewall rules using this subnet. For CentOS, RHEL, and Fedora, use **firewall-cmd** to add a new zone:
|
||
|
||
```
|
||
$ sudo firewall-cmd --permanent --new-zone okdlocal
|
||
success
|
||
```
|
||
|
||
Include the subnet address you obtained before as a source to the new zone:
|
||
|
||
```
|
||
$ sudo firewall-cmd --permanent --zone okdlocal --add-source 172.17.0.0/16
|
||
success
|
||
```
|
||
|
||
Next, add the required rules to the **okdlocal** zone:
|
||
|
||
```
|
||
$ sudo firewall-cmd --permanent --zone okdlocal --add-port 8443/tcp
|
||
success
|
||
$ sudo firewall-cmd --permanent --zone okdlocal --add-port 53/udp
|
||
success
|
||
$ sudo firewall-cmd --permanent --zone okdlocal --add-port 8053/udp
|
||
success
|
||
```
|
||
|
||
Finally, reload the firewall to enable the new rules:
|
||
|
||
```
|
||
$ sudo firewall-cmd --reload
|
||
success
|
||
```
|
||
|
||
Ensure that the new zone and rules are in place:
|
||
|
||
```
|
||
$ sudo firewall-cmd --zone okdlocal --list-sources
|
||
172.17.0.0/16
|
||
$ sudo firewall-cmd --zone okdlocal --list-ports
|
||
8443/tcp 53/udp 8053/udp
|
||
```
|
||
|
||
Your system is ready to start the cluster. It's time to download the OKD client tools.
|
||
|
||
To deploy a local OKD cluster using **oc** , you need to download the OKD client tools package. For some distributions, like CentOS and Fedora, this package can be downloaded as an RPM from the official repositories. Please note that these packages may follow the distribution update cycle and usually are not the most recent version available.
|
||
|
||
For this tutorial, download the OKD client package directly from the official GitHub repository so you can get the most recent version available. At the time of writing, this was OKD v3.11.
|
||
|
||
Go to the [OKD downloads page][5] to get the link to the OKD tools for Linux, then download it with **wget** :
|
||
|
||
```
|
||
$ cd ~/Downloads/
|
||
$ wget https://github.com/openshift/origin/releases/download/v3.11.0/openshift-origin-client-tools-v3.11.0-0cbc58b-linux-64bit.tar.gz
|
||
```
|
||
|
||
Uncompress the downloaded package:
|
||
|
||
```
|
||
$ tar -xzvf openshift-origin-client-tools-v3.11.0-0cbc58b-linux-64bit.tar.gz
|
||
```
|
||
|
||
Finally, to make it easier to use the **oc** command systemwide, move it to a directory included in your **$PATH** variable. A good location is **/usr/local/bin** :
|
||
|
||
```
|
||
$ sudo cp openshift-origin-client-tools-v3.11.0-0cbc58b-linux-64bit/oc /usr/local/bin/
|
||
```
|
||
|
||
One of the nicest features of the **oc** command is that it's a static single binary. You don't need to install it to use it.
|
||
|
||
Check that the **oc** command is working:
|
||
|
||
```
|
||
$ oc version
|
||
oc v3.11.0+0cbc58b
|
||
kubernetes v1.11.0+d4cacc0
|
||
features: Basic-Auth GSSAPI Kerberos SPNEGO
|
||
```
|
||
|
||
### 6\. Start your OKD cluster
|
||
|
||
Once you have all the prerequisites in place, start your local OKD cluster by running this command:
|
||
|
||
```
|
||
$ oc cluster up
|
||
```
|
||
|
||
This command connects to your local Docker daemon, downloads all required images from Docker Hub, and starts the containers. The first time you run it, it takes a few minutes to complete. When it's finished, you will see this message:
|
||
|
||
```
|
||
... Skipping long output ...
|
||
|
||
OpenShift server started.
|
||
|
||
The server is accessible via web console at:
|
||
https://127.0.0.1:8443
|
||
|
||
You are logged in as:
|
||
User: developer
|
||
Password: <any value>
|
||
|
||
To login as administrator:
|
||
oc login -u system:admin
|
||
```
|
||
|
||
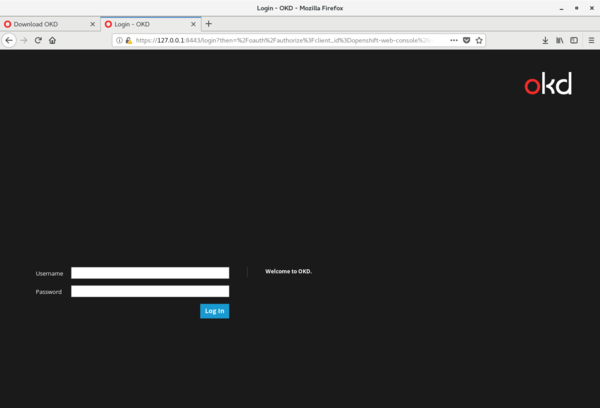
Access the OKD web console by using the browser and navigating to <https://127.0.0.1:8443:>
|
||
|
||

|
||
|
||
From the command line, you can check if the cluster is running by entering this command:
|
||
|
||
```
|
||
$ oc cluster status
|
||
Web console URL: https://127.0.0.1:8443/console/
|
||
|
||
Config is at host directory
|
||
Volumes are at host directory
|
||
Persistent volumes are at host directory /home/ricardo/openshift.local.clusterup/openshift.local.pv
|
||
Data will be discarded when cluster is destroyed
|
||
```
|
||
|
||
You can also verify your cluster is working by logging in as the **system:admin** user and checking available nodes using the **oc** command-line tool:
|
||
|
||
```
|
||
$ oc login -u system:admin
|
||
Logged into "https://127.0.0.1:8443" as "system:admin" using existing credentials.
|
||
|
||
You have access to the following projects and can switch between them with 'oc project <projectname>':
|
||
|
||
default
|
||
kube-dns
|
||
kube-proxy
|
||
kube-public
|
||
kube-system
|
||
* myproject
|
||
openshift
|
||
openshift-apiserver
|
||
openshift-controller-manager
|
||
openshift-core-operators
|
||
openshift-infra
|
||
openshift-node
|
||
openshift-service-cert-signer
|
||
openshift-web-console
|
||
|
||
Using project "myproject".
|
||
|
||
$ oc get nodes
|
||
NAME STATUS ROLES AGE VERSION
|
||
localhost Ready <none> 52m v1.11.0+d4cacc0
|
||
```
|
||
|
||
Since this is a local, all-in-one cluster, you see only **localhost** in the nodes list.
|
||
|
||
### 7\. Smoke-test your cluster
|
||
|
||
Now that your local OKD cluster is running, create a test app to smoke-test it. Use OKD to build and start the sample application so you can ensure the different components are working.
|
||
|
||
Start by logging in as the **developer** user:
|
||
|
||
```
|
||
$ oc login -u developer
|
||
Logged into "https://127.0.0.1:8443" as "developer" using existing credentials.
|
||
|
||
You have one project on this server: "myproject"
|
||
|
||
Using project "myproject".
|
||
```
|
||
|
||
You're automatically assigned to a new, empty project named **myproject**. Create a sample PHP application based on an existing GitHub repository, like this:
|
||
|
||
```
|
||
$ oc new-app php:5.6~https://github.com/rgerardi/ocp-smoke-test.git
|
||
--> Found image 92ed8b3 (5 months old) in image stream "openshift/php" under tag "5.6" for "php:5.6"
|
||
|
||
Apache 2.4 with PHP 5.6
|
||
-----------------------
|
||
PHP 5.6 available as container is a base platform for building and running various PHP 5.6 applications and frameworks. PHP is an HTML-embedded scripting language. PHP attempts to make it easy for developers to write dynamically generated web pages. PHP also offers built-in database integration for several commercial and non-commercial database management systems, so writing a database-enabled webpage with PHP is fairly simple. The most common use of PHP coding is probably as a replacement for CGI scripts.
|
||
|
||
Tags: builder, php, php56, rh-php56
|
||
|
||
* A source build using source code from https://github.com/rgerardi/ocp-smoke-test.git will be created
|
||
* The resulting image will be pushed to image stream tag "ocp-smoke-test:latest"
|
||
* Use 'start-build' to trigger a new build
|
||
* This image will be deployed in deployment config "ocp-smoke-test"
|
||
* Ports 8080/tcp, 8443/tcp will be load balanced by service "ocp-smoke-test"
|
||
* Other containers can access this service through the hostname "ocp-smoke-test"
|
||
|
||
--> Creating resources ...
|
||
imagestream.image.openshift.io "ocp-smoke-test" created
|
||
buildconfig.build.openshift.io "ocp-smoke-test" created
|
||
deploymentconfig.apps.openshift.io "ocp-smoke-test" created
|
||
service "ocp-smoke-test" created
|
||
--> Success
|
||
Build scheduled, use 'oc logs -f bc/ocp-smoke-test' to track its progress.
|
||
Application is not exposed. You can expose services to the outside world by executing one or more of the commands below:
|
||
'oc expose svc/ocp-smoke-test'
|
||
Run 'oc status' to view your app.
|
||
```
|
||
|
||
OKD starts the build process, which clones the provided GitHub repository, compiles the application (if required), and creates the necessary images. You can follow the build process by tailing its log with this command:
|
||
|
||
```
|
||
$ oc logs -f bc/ocp-smoke-test
|
||
Cloning "https://github.com/rgerardi/ocp-smoke-test.git" ...
|
||
Commit: 391a475713d01ab0afab700bab8a3d7549c5cc27 (Create index.php)
|
||
Author: Ricardo Gerardi <ricardo.gerardi@gmail.com>
|
||
Date: Tue Oct 2 13:47:25 2018 -0400
|
||
Using 172.30.1.1:5000/openshift/php@sha256:f3c95020fa870fcefa7d1440d07a2b947834b87bdaf000588e84ef4a599c7546 as the s2i builder image
|
||
---> Installing application source...
|
||
=> sourcing 20-copy-config.sh ...
|
||
---> 04:53:28 Processing additional arbitrary httpd configuration provided by s2i ...
|
||
=> sourcing 00-documentroot.conf ...
|
||
=> sourcing 50-mpm-tuning.conf ...
|
||
=> sourcing 40-ssl-certs.sh ...
|
||
Pushing image 172.30.1.1:5000/myproject/ocp-smoke-test:latest ...
|
||
Pushed 1/10 layers, 10% complete
|
||
Push successful
|
||
```
|
||
|
||
After the build process completes, OKD starts the application automatically by running a new pod based on the created image. You can see this new pod with this command:
|
||
|
||
```
|
||
$ oc get pods
|
||
NAME READY STATUS RESTARTS AGE
|
||
ocp-smoke-test-1-build 0/1 Completed 0 1m
|
||
ocp-smoke-test-1-d8h76 1/1 Running 0 7s
|
||
```
|
||
|
||
You can see two pods are created; the first one (with the status Completed) is the pod used to build the application. The second one (with the status Running) is the application itself.
|
||
|
||
In addition, OKD creates a service for this application. Verify it by using this command:
|
||
|
||
```
|
||
$ oc get service
|
||
NAME TYPE CLUSTER-IP EXTERNAL-IP PORT(S) AGE
|
||
ocp-smoke-test ClusterIP 172.30.232.241 <none> 8080/TCP,8443/TCP 1m
|
||
```
|
||
|
||
Finally, expose this service externally using OKD routes so you can access the application from a local browser:
|
||
|
||
```
|
||
$ oc expose svc ocp-smoke-test
|
||
route.route.openshift.io/ocp-smoke-test exposed
|
||
|
||
$ oc get route
|
||
NAME HOST/PORT PATH SERVICES PORT TERMINATION WILDCARD
|
||
ocp-smoke-test ocp-smoke-test-myproject.127.0.0.1.nip.io ocp-smoke-test 8080-tcp None
|
||
```
|
||
|
||
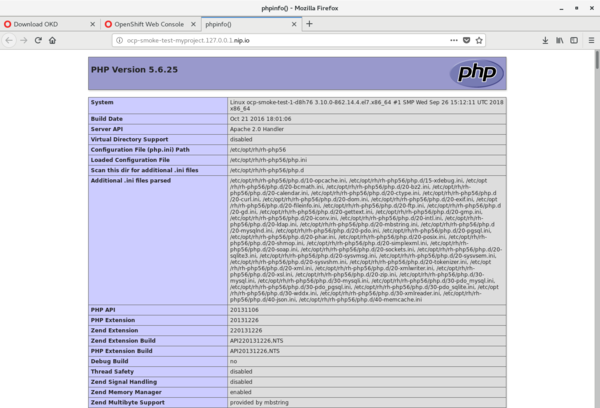
Verify that your new application is running by navigating to <http://ocp-smoke-test-myproject.127.0.0.1.nip.io> in a web browser:
|
||
|
||

|
||
|
||
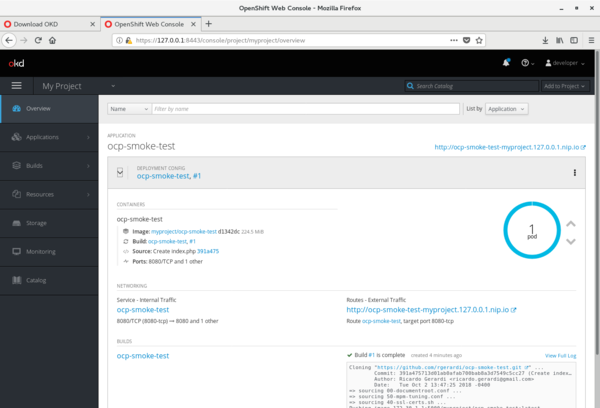
You can also see the status of your application by logging into the OKD web console:
|
||
|
||

|
||
|
||
### Learn more
|
||
|
||
You can find more information about OKD on the [official site][6], which includes a link to the OKD [documentation][7].
|
||
|
||
If this is your first time working with OKD/OpenShift, you can learn the basics of the platform, including how to build and deploy containerized applications, through the [Interactive Learning Portal][8]. Another good resource is the official [OpenShift YouTube channel][9].
|
||
|
||
--------------------------------------------------------------------------------
|
||
|
||
via: https://opensource.com/article/18/11/local-okd-cluster-linux
|
||
|
||
作者:[Ricardo Gerardi][a]
|
||
选题:[lujun9972][b]
|
||
译者:[译者ID](https://github.com/译者ID)
|
||
校对:[校对者ID](https://github.com/校对者ID)
|
||
|
||
本文由 [LCTT](https://github.com/LCTT/TranslateProject) 原创编译,[Linux中国](https://linux.cn/) 荣誉推出
|
||
|
||
[a]: https://opensource.com/users/rgerardi
|
||
[b]: https://github.com/lujun9972
|
||
[1]: https://www.docker.com/
|
||
[2]: https://kubernetes.io/
|
||
[3]: https://en.wikipedia.org/wiki/Uncomplicated_Firewall
|
||
[4]: https://en.wikipedia.org/wiki/Iptables
|
||
[5]: https://www.okd.io/download.html#oc-platforms
|
||
[6]: https://www.okd.io/
|
||
[7]: https://docs.okd.io/
|
||
[8]: https://learn.openshift.com/
|
||
[9]: https://www.youtube.com/openshift
|