mirror of
https://github.com/LCTT/TranslateProject.git
synced 2025-01-10 22:21:11 +08:00
156 lines
9.1 KiB
Markdown
156 lines
9.1 KiB
Markdown
用 Hugo 30 分钟搭建静态博客
|
||
======
|
||
> 了解 Hugo 如何使构建网站变得有趣。
|
||
|
||

|
||
|
||
你是不是强烈地想搭建博客来将自己对软件框架等的探索学习成果分享呢?你是不是面对缺乏指导文档而一团糟的项目就有一种想去改变它的冲动呢?或者换个角度,你是不是十分期待能创建一个属于自己的个人博客网站呢?
|
||
|
||
很多人在想搭建博客之前都有一些严重的迟疑顾虑:感觉自己缺乏内容管理系统(CMS)的相关知识,更缺乏时间去学习这些知识。现在,如果我说不用花费大把的时间去学习 CMS 系统、学习如何创建一个静态网站、更不用操心如何去强化网站以防止它受到黑客攻击的问题,你就可以在 30 分钟之内创建一个博客?你信不信?利用 Hugo 工具,就可以实现这一切。
|
||
|
||

|
||
|
||
Hugo 是一个基于 Go 语言开发的静态站点生成工具。也许你会问,为什么选择它?
|
||
|
||
* 无需数据库、无需需要各种权限的插件、无需跑在服务器上的底层平台,更没有额外的安全问题。
|
||
* 都是静态站点,因此拥有轻量级、快速响应的服务性能。此外,所有的网页都是在部署的时候生成,所以服务器负载很小。
|
||
* 极易操作的版本控制。一些 CMS 平台使用它们自己的版本控制软件(VCS)或者在网页上集成 Git 工具。而 Hugo,所有的源文件都可以用你所选的 VCS 软件来管理。
|
||
|
||
### 0-5 分钟:下载 Hugo,生成一个网站
|
||
|
||
直白的说,Hugo 使得写一个网站又一次变得有趣起来。让我们来个 30 分钟计时,搭建一个网站。
|
||
|
||
为了简化 Hugo 安装流程,这里直接使用 Hugo 可执行安装文件。
|
||
|
||
1. 下载和你操作系统匹配的 Hugo [版本][2];
|
||
2. 压缩包解压到指定路径,例如 windows 系统的 `C:\hugo_dir` 或者 Linux 系统的 `~/hugo_dir` 目录;下文中的变量 `${HUGO_HOME}` 所指的路径就是这个安装目录;
|
||
3. 打开命令行终端,进入安装目录:`cd ${HUGO_HOME}`;
|
||
4. 确认 Hugo 已经启动:
|
||
* Unix 系统:`${HUGO_HOME}/[hugo version]`;
|
||
* Windows 系统:`${HUGO_HOME}\[hugo.exe version]`,例如:cmd 命令行中输入:`c:\hugo_dir\hugo version`。
|
||
|
||
为了书写上的简化,下文中的 `hugo` 就是指 hugo 可执行文件所在的路径(包括可执行文件),例如命令 `hugo version` 就是指命令 `c:\hugo_dir\hugo version` 。(LCTT 译注:可以把 hugo 可执行文件所在的路径添加到系统环境变量下,这样就可以直接在终端中输入 `hugo version`)
|
||
|
||
如果命令 `hugo version` 报错,你可能下载了错误的版本。当然,有很多种方法安装 Hugo,更多详细信息请查阅 [官方文档][3]。最稳妥的方法就是把 Hugo 可执行文件放在某个路径下,然后执行的时候带上路径名
|
||
5. 创建一个新的站点来作为你的博客,输入命令:`hugo new site awesome-blog`;
|
||
6. 进入新创建的路径下: `cd awesome-blog`;
|
||
|
||
恭喜你!你已经创建了自己的新博客。
|
||
|
||
### 5-10 分钟:为博客设置主题
|
||
|
||
Hugo 中你可以自己构建博客的主题或者使用网上已经有的一些主题。这里选择 [Kiera][4] 主题,因为它简洁漂亮。按以下步骤来安装该主题:
|
||
|
||
1. 进入主题所在目录:`cd themes`;
|
||
2. 克隆主题:`git clone https://github.com/avianto/hugo-kiera kiera`。如果你没有安装 Git 工具:
|
||
* 从 [Github][5] 上下载 hugo 的 .zip 格式的文件;
|
||
* 解压该 .zip 文件到你的博客主题 `theme` 路径;
|
||
* 重命名 `hugo-kiera-master` 为 `kiera`;
|
||
3. 返回博客主路径:`cd awesome-blog`;
|
||
4. 激活主题;通常来说,主题(包括 Kiera)都自带文件夹 `exampleSite`,里面存放了内容配置的示例文件。激活 Kiera 主题需要拷贝它提供的 `config.toml` 到你的博客下:
|
||
* Unix 系统:`cp themes/kiera/exampleSite/config.toml .`;
|
||
* Windows 系统:`copy themes\kiera\exampleSite\config.toml .`;
|
||
* 选择 `Yes` 来覆盖原有的 `config.toml`;
|
||
|
||
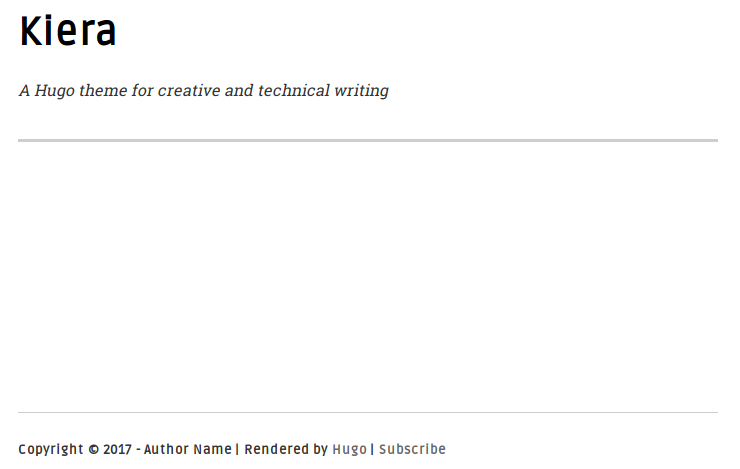
5. ( 可选操作 )你可以选择可视化的方式启动服务器来验证主题是否生效:`hugo server -D` 然后在浏览器中输入 `http://localhost:1313`。可用通过在终端中输入 `Crtl+C` 来停止服务器运行。现在你的博客还是空的,但这也给你留了写作的空间。它看起来如下所示:
|
||
|
||

|
||
|
||
你已经成功的给博客设置了主题!你可以在官方 [Hugo 主题][4] 网站上找到上百种漂亮的主题供你使用。
|
||
|
||
### 10-20 分钟:给博客添加内容
|
||
|
||
对于碗来说,它是空的时候用处最大,可以用来盛放东西;但对于博客来说不是这样,空博客几乎毫无用处。在这一步,你将会给博客添加内容。Hugo 和 Kiera 主题都为这个工作提供了方便性。按以下步骤来进行你的第一次提交:
|
||
|
||
1. archetypes 将会是你的内容模板。
|
||
2. 添加主题中的 archtypes 至你的博客:
|
||
* Unix 系统: `cp themes/kiera/archetypes/* archetypes/`
|
||
* Windows 系统:`copy themes\kiera\archetypes\* archetypes\`
|
||
* 选择 `Yes` 来覆盖原来的 `default.md` 内容架构类型
|
||
|
||
3. 创建博客 posts 目录:
|
||
* Unix 系统: `mkdir content/posts`
|
||
* Windows 系统: `mkdir content\posts`
|
||
|
||
4. 利用 Hugo 生成你的 post:
|
||
* Unix 系统:`hugo nes posts/first-post.md`;
|
||
* Windows 系统:`hugo new posts\first-post.md`;
|
||
|
||
5. 在文本编辑器中打开这个新建的 post 文件:
|
||
* Unix 系统:`gedit content/posts/first-post.md`;
|
||
* Windows 系统:`notepadd content\posts\first-post.md`;
|
||
|
||
此刻,你可以疯狂起来了。注意到你的提交文件中包括两个部分。第一部分是以 `+++` 符号分隔开的。它包括了提交文档的主要数据,例如名称、时间等。在 Hugo 中,这叫做前缀。在前缀之后,才是正文。下面编辑第一个提交文件内容:
|
||
|
||
```
|
||
+++
|
||
title = "First Post"
|
||
date = 2018-03-03T13:23:10+01:00
|
||
draft = false
|
||
tags = ["Getting started"]
|
||
categories = []
|
||
+++
|
||
|
||
Hello Hugo world! No more excuses for having no blog or documentation now!
|
||
```
|
||
|
||
现在你要做的就是启动你的服务器:`hugo server -D`;然后打开浏览器,输入 `http://localhost:1313/`。
|
||
|
||

|
||
|
||
### 20-30 分钟:调整网站
|
||
|
||
前面的工作很完美,但还有一些问题需要解决。例如,简单地命名你的站点:
|
||
|
||
1. 终端中按下 `Ctrl+C` 以停止服务器。
|
||
2. 打开 `config.toml`,编辑博客的名称,版权,你的姓名,社交网站等等。
|
||
|
||
当你再次启动服务器后,你会发现博客私人订制味道更浓了。不过,还少一个重要的基础内容:主菜单。快速的解决这个问题。返回 `config.toml` 文件,在末尾插入如下一段:
|
||
|
||
```
|
||
[[menu.main]]
|
||
name = "Home" #Name in the navigation bar
|
||
weight = 10 #The larger the weight, the more on the right this item will be
|
||
url = "/" #URL address
|
||
[[menu.main]]
|
||
name = "Posts"
|
||
weight = 20
|
||
url = "/posts/"
|
||
```
|
||
|
||
上面这段代码添加了 `Home` 和 `Posts` 到主菜单中。你还需要一个 `About` 页面。这次是创建一个 `.md` 文件,而不是编辑 `config.toml` 文件:
|
||
|
||
1. 创建 `about.md` 文件:`hugo new about.md` 。注意它是 `about.md`,不是 `posts/about.md`。该页面不是博客提交内容,所以你不想它显示到博客内容提交当中吧。
|
||
2. 用文本编辑器打开该文件,输入如下一段:
|
||
|
||
```
|
||
+++
|
||
title = "About"
|
||
date = 2018-03-03T13:50:49+01:00
|
||
menu = "main" #Display this page on the nav menu
|
||
weight = "30" #Right-most nav item
|
||
meta = "false" #Do not display tags or categories
|
||
+++
|
||
|
||
> Waves are the practice of the water. Shunryu Suzuki
|
||
```
|
||
|
||
当你启动你的服务器并输入:`http://localhost:1313/`,你将会看到你的博客。(访问我 Gihub 主页上的 [例子][6] )如果你想让文章的菜单栏和 Github 相似,给 `themes/kiera/static/css/styles.css` 打上这个 [补丁][7]。
|
||
|
||
--------------------------------------------------------------------------------
|
||
|
||
via: https://opensource.com/article/18/3/start-blog-30-minutes-hugo
|
||
|
||
作者:[Marek Czernek][a]
译者:[jrg](https://github.com/jrglinux)
校对:[wxy](https://github.com/wxy)
|
||
|
||
本文由 [LCTT](https://github.com/LCTT/TranslateProject) 原创编译,[Linux中国](https://linux.cn/) 荣誉推出
|
||
|
||
[a]:https://opensource.com/users/mczernek
|
||
[1]:https://gohugo.io/
|
||
[2]:https://github.com/gohugoio/hugo/releases
|
||
[3]:https://gohugo.io/getting-started/installing/
|
||
[4]:https://themes.gohugo.io/
|
||
[5]:https://github.com/avianto/hugo-kiera
|
||
[6]:https://m-czernek.github.io/awesome-blog/
|
||
[7]:https://github.com/avianto/hugo-kiera/pull/18/files
|