5.4 KiB
How to use Magit to manage Git projects
Emacs' Magit extension makes it easy to get started with Git version control.

Git is an excellent version control tool for managing projects, but it can be hard for novices to learn. It's difficult to work from the Git command line unless you're familiar with the flags and options and the appropriate situations to use them. This can be discouraging and cause people to be stuck with very limited usage.
Fortunately, most of today's integrated development environments (IDEs) include Git extensions that make using it a lot easier. One such Git extension available in Emacs is called Magit.
The Magit project has been around for 10 years and defines itself as "a Git porcelain inside Emacs." In other words, it's an interface where every action can be managed by pressing a key. This article walks you through the Magit interface and explains how to use it to manage a Git project.
If you haven't already, install Emacs, then install Magit before you continue with this tutorial.
Magit's interface
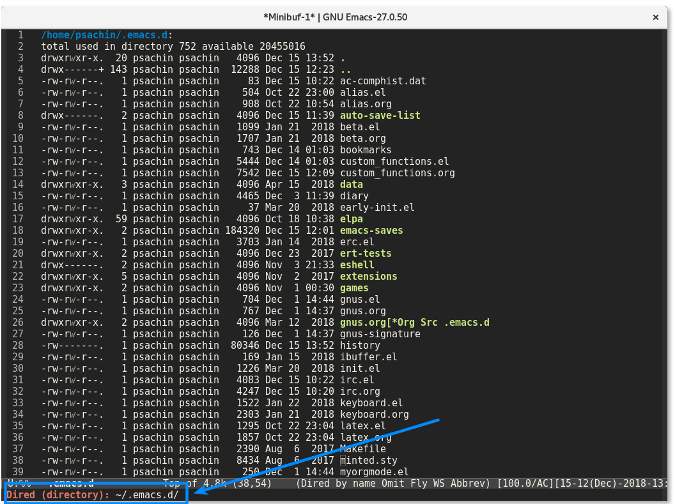
Start by visiting a project directory in Emacs' Dired mode. For example, all my Emacs configurations are stored in the ~/.emacs.d/ directory, which is managed by Git.
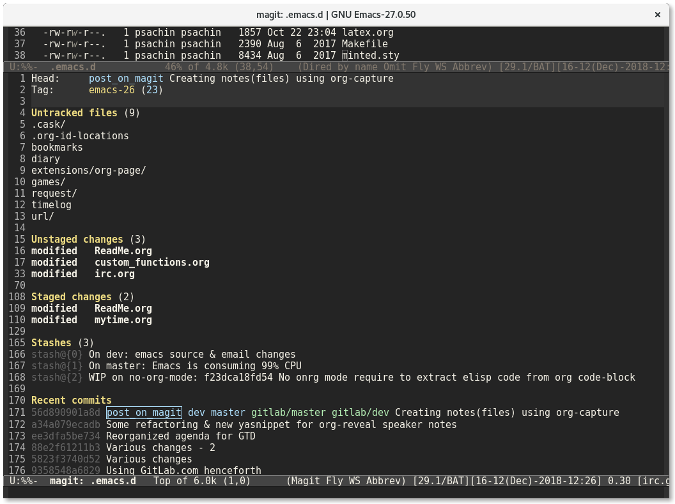
If you were working from the command line, you would enter git status to find a project's current status. Magit has a similar function: magit-status. You can call this function using M-x magit-status (short for the keystroke Alt+x magit-status ). Your result will look something like this:
Magit shows much more information than you would get from the git status command. It shows a list of untracked files, files that aren't staged, and staged files. It also shows the stash list and the most recent commits—all in a single window.
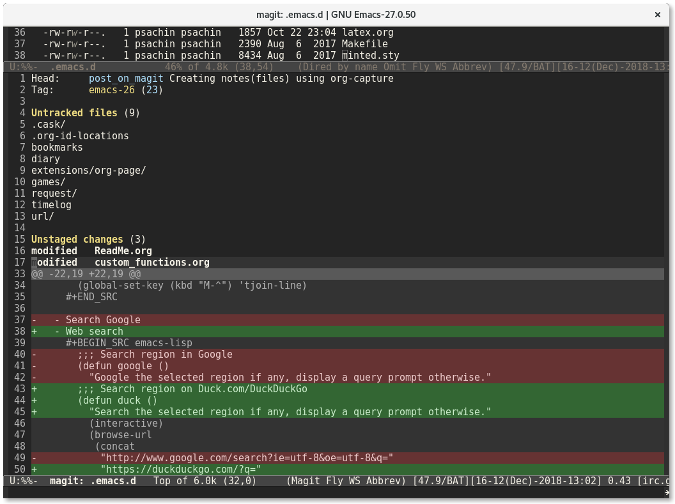
If you want to know what has changed, use the Tab key. For example, if I move my cursor over the unstaged file custom_functions.org and press the Tab key, Magit will display the changes:
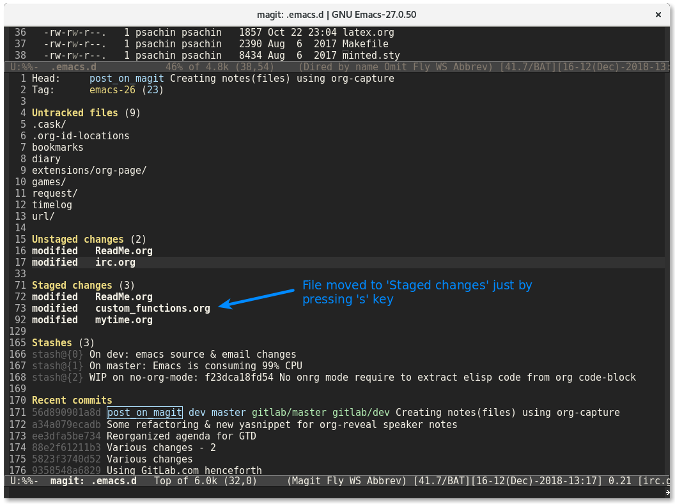
This is similar to using the command git diff custom_functions.org. Staging a file is even easier. Simply move the cursor over a file and press the s key. The file will be quickly moved to the staged file list:
To unstage a file, use the u key. It is quicker and more fun to use s and u instead of entering git add -u and git reset HEAD on the command line.
Commit changes
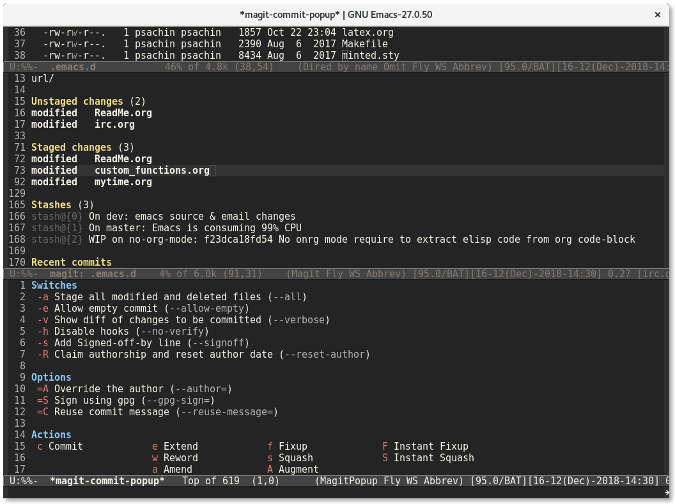
In the same Magit window, pressing the c key will display a commit window that provides flags like --all to stage all files or --signoff to add a signoff line to a commit message.
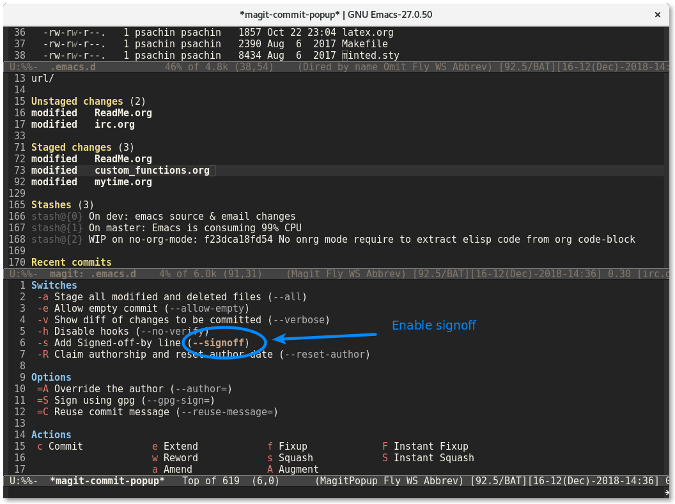
Move your cursor to the line where you want to enable a signoff flag and press Enter. This will highlight the --signoff text, which indicates that the flag is enabled.
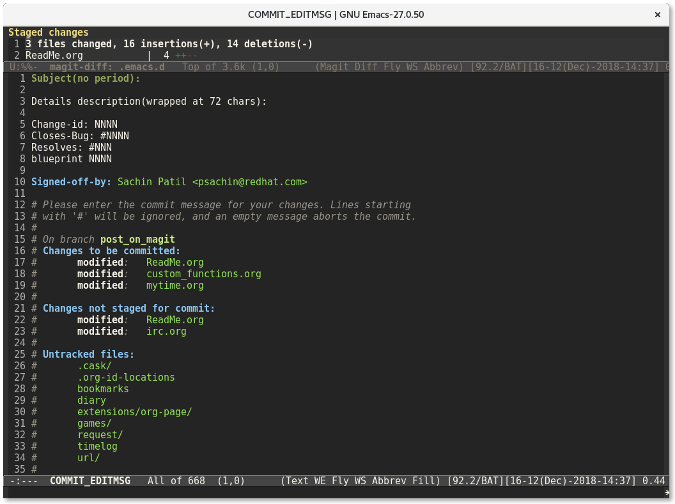
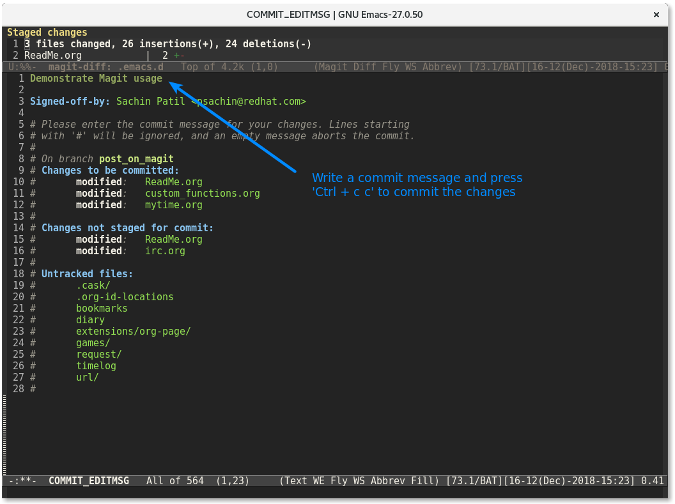
Pressing c again will display the window to write the commit message.
Finally, use **C-c C-c **(short form of the keys Ctrl+cc) to commit the changes.
Push changes
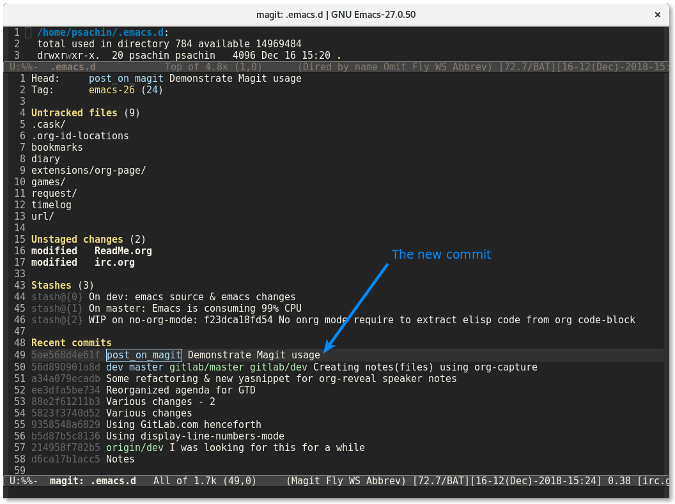
Once the changes are committed, the commit line will appear in the Recent commits section.
Place the cursor on that commit and press p to push the changes.
I've uploaded a demonstration on YouTube if you want to get a feel for using Magit. I have just scratched the surface in this article. It has many cool features to help you with Git branches, rebasing, and more. You can find documentation, support, and more linked from Magit's homepage.
via: https://opensource.com/article/19/1/how-use-magit
作者:Sachin Patil 选题:lujun9972 译者:译者ID 校对:校对者ID
