10 KiB
How to set up a CI pipeline on GitLab
Continuous integration (CI) means that code changes are built and tested
automatically. Here's how I set up a CI pipeline for my C++ project.

This article covers the configuration of a CI pipeline for a C++ project on GitLab. My previous articles covered how to set up a build system based on CMake and VSCodium and how to integrate unit tests based on GoogleTest and CTest. This article is a follow-up on extending the configuration by using a CI pipeline. First, I demonstrate the pipeline setup and then its execution. Next comes the CI configuration itself.
Continuous integration (CI) simply means that code changes, which get committed to a central repository, are built and tested automatically. A popular platform in the open source area for setting up CI pipelines is GitLab. In addition to a central Git repository, GitLab also offers the configuration of CI/CD pipelines, issue tracking, and a container registry.
Terms to know
Before I dive deeper into this area of the DevOps philosophy, I'll establish some common terms encountered in this article and the GitLab documentation:
- Continuous delivery (CD): Automatic provisioning of applications with the aim of deploying them.
- Continuous deployment (CD): Automatic publishing of software
- Pipelines: The top-level component for CI/CD, defines stages and jobs
- Stages: A collection of jobs that must execute successfully
- Jobs: Definition of tasks (e.g., compile, performing unit test)
- Runners: Services that are actually executing the Jobs
Set up a CI pipeline
I will reuse the example projects from previous articles, which are available on GitLab. To follow the steps described in the coming chapters, fork the example project by clicking on the Fork button, which is found on the top right:
Stephan Avenwedde (CC BY-SA 4.0)
Set up a runner
To get a feeling for how everything works together, start at the bottom by installing a runner on your local system.
Follow the installation instructions for the GitLab runner service for your system. Once installed, you have to register a runner.
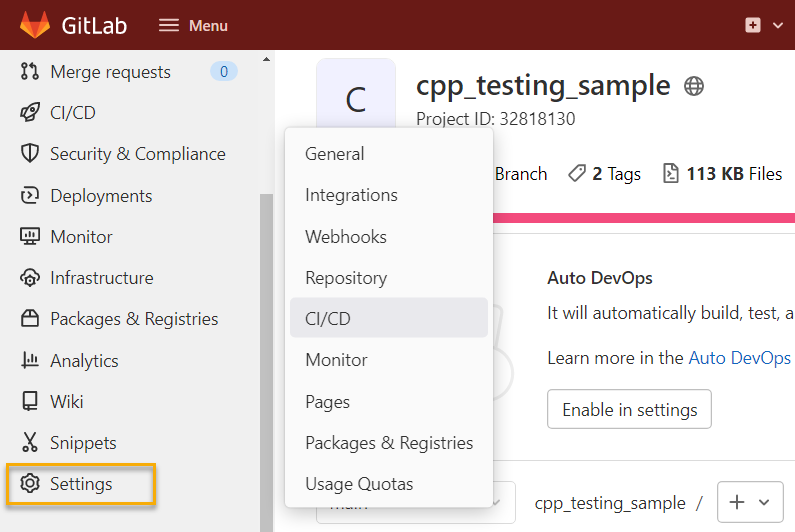
1. On the GitLab page, select the project and in the left pane, navigate to Settings and select CI/CD.
Stephan Avenwedde (CC BY-SA 4.0)
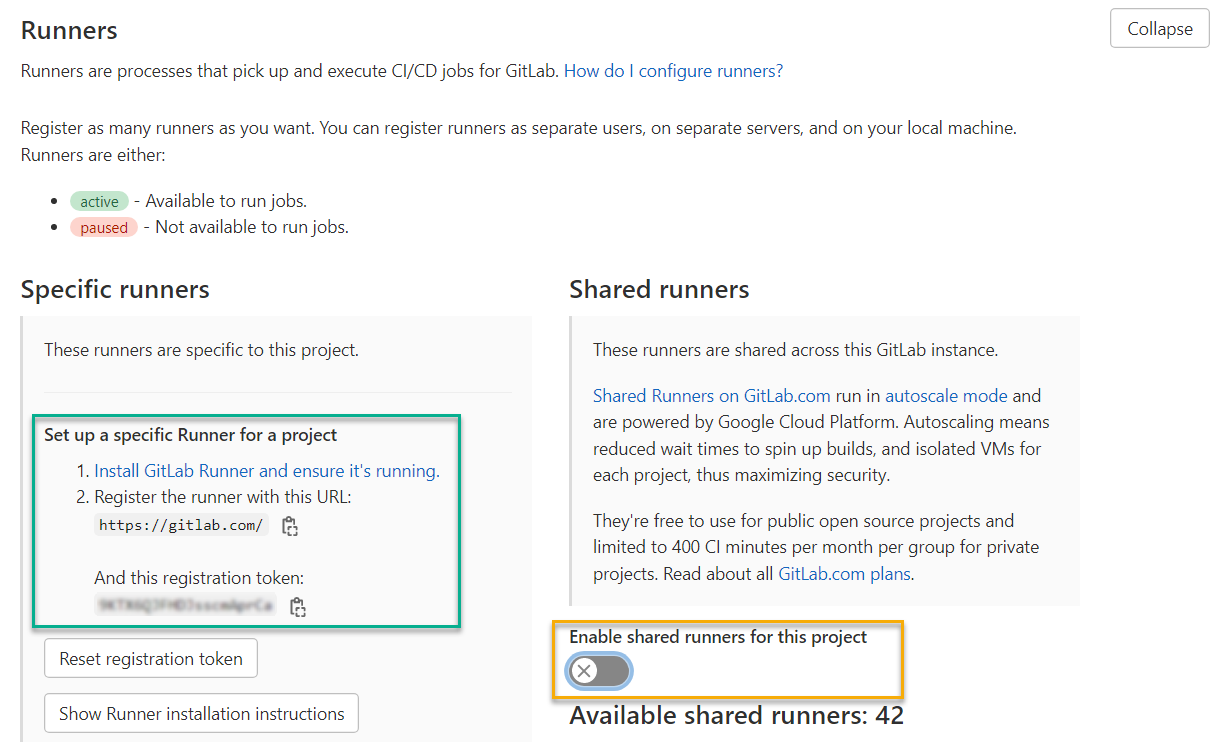
2. Expand the Runners section and switch Shared runners to off (yellow marker). Note the token and URL (green marker); we need them in the next step.
Stephan Avenwedde (CC BY-SA 4.0)
3. Now open a terminal and enter gitlab-runner register. The command invokes a script that asks for some input. Here are the answers:
- GitLab instance: https://gitlab.com/ (screenshot above)
- Registration token: Pick it from the Runners section (screenshot above)
- Description: Free selectable
- Tags: This is optional. You don't need to provide tags
- Executor: Choose Shell here
If you want to modify the configuration later, you can find it under ~/.gitlab-runner/config.toml.
4. Now, start the runner with the command gitlab-runner run. The runner is now waiting for jobs. Your runner is now available in the Runners section of the project settings on GitLab:
Stephan Avenwedde (CC BY-SA 4.0)
Execute a pipeline
As previously mentioned, a pipeline is a collection of jobs executed by the runner. Every commit pushed to GitLab generates a pipeline attached to that commit. If multiple commits are pushed together, a pipeline is created for the last commit only. To start a pipeline for demonstration purposes, commit and push a change directly over GitLab's web editor.
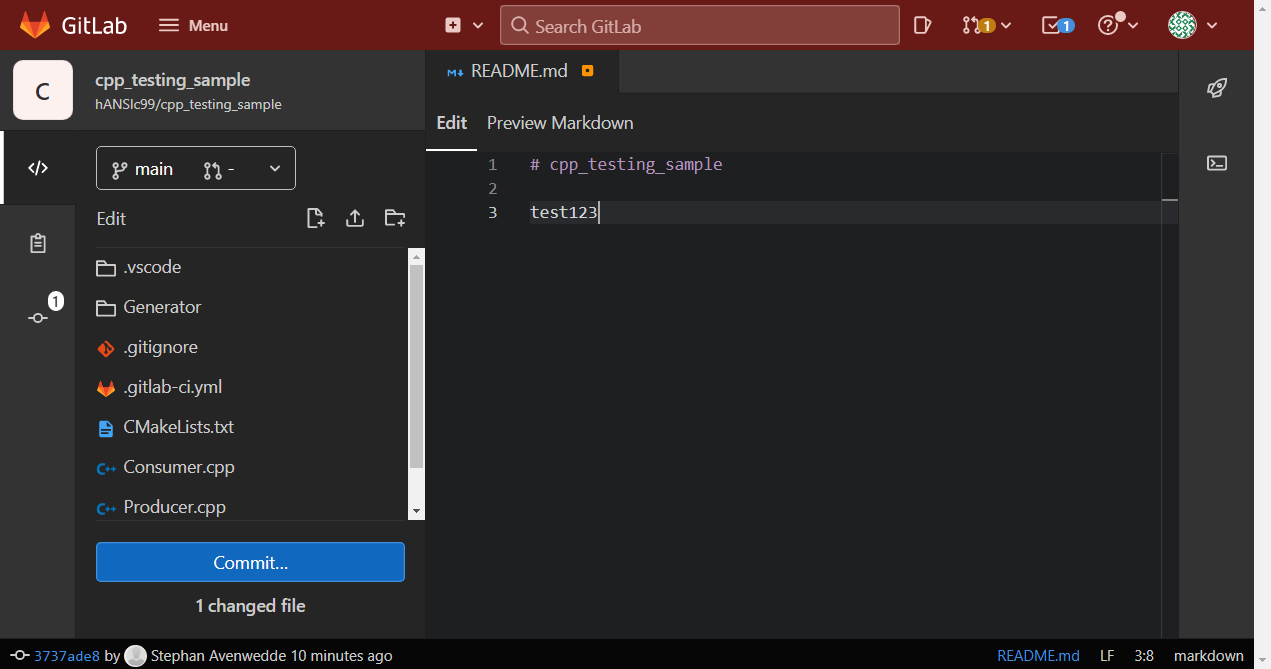
For the first test, open the README.md and add a additional line:
Stephan Avenwedde (CC BY-SA 4.0)
Now commit your changes.
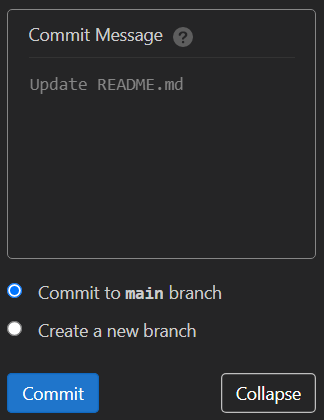
Note that the default is Create a new branch. To keep it simple, choose Commit to main branch.
Stephan Avenwedde (CC BY-SA 4.0)
A few seconds after the commit, you should notice some output in the console window where the GitLab runner executes:
Checking for jobs... received job=1975932998 repo_url=<https://gitlab.com/hANSIc99/cpp\_testing\_sample.git> runner=Z7MyQsA6

Job succeeded duration_s=3.866619798 job=1975932998 project=32818130 runner=Z7MyQsA6
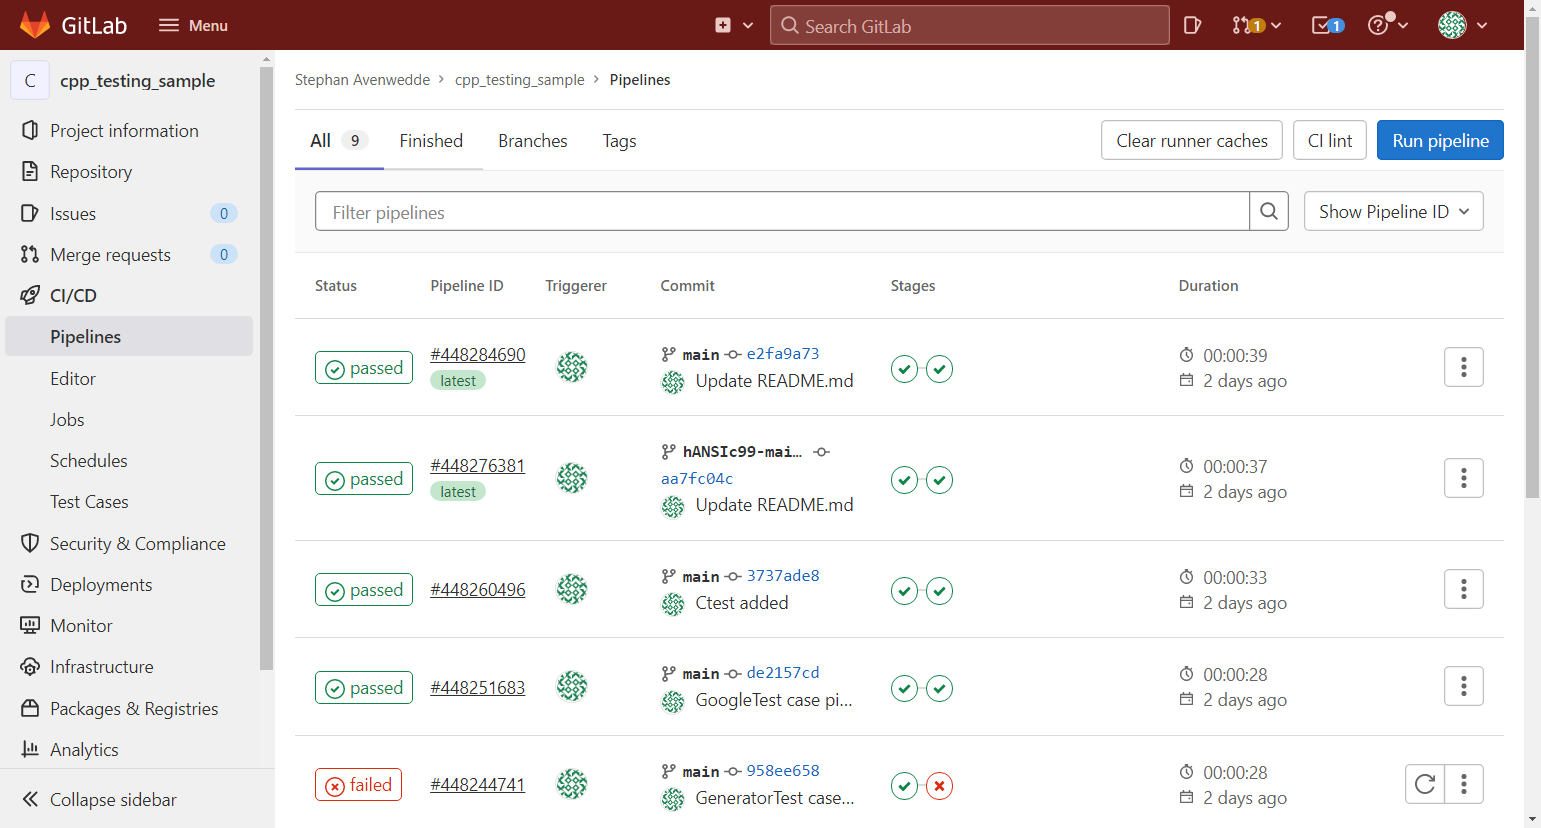
In the project overview in GitLab, select on the right pane CI/CD --> Pipelines. Here you can find a list of recently executed pipelines.
Stephan Avenwedde (CC BY-SA 4.0)
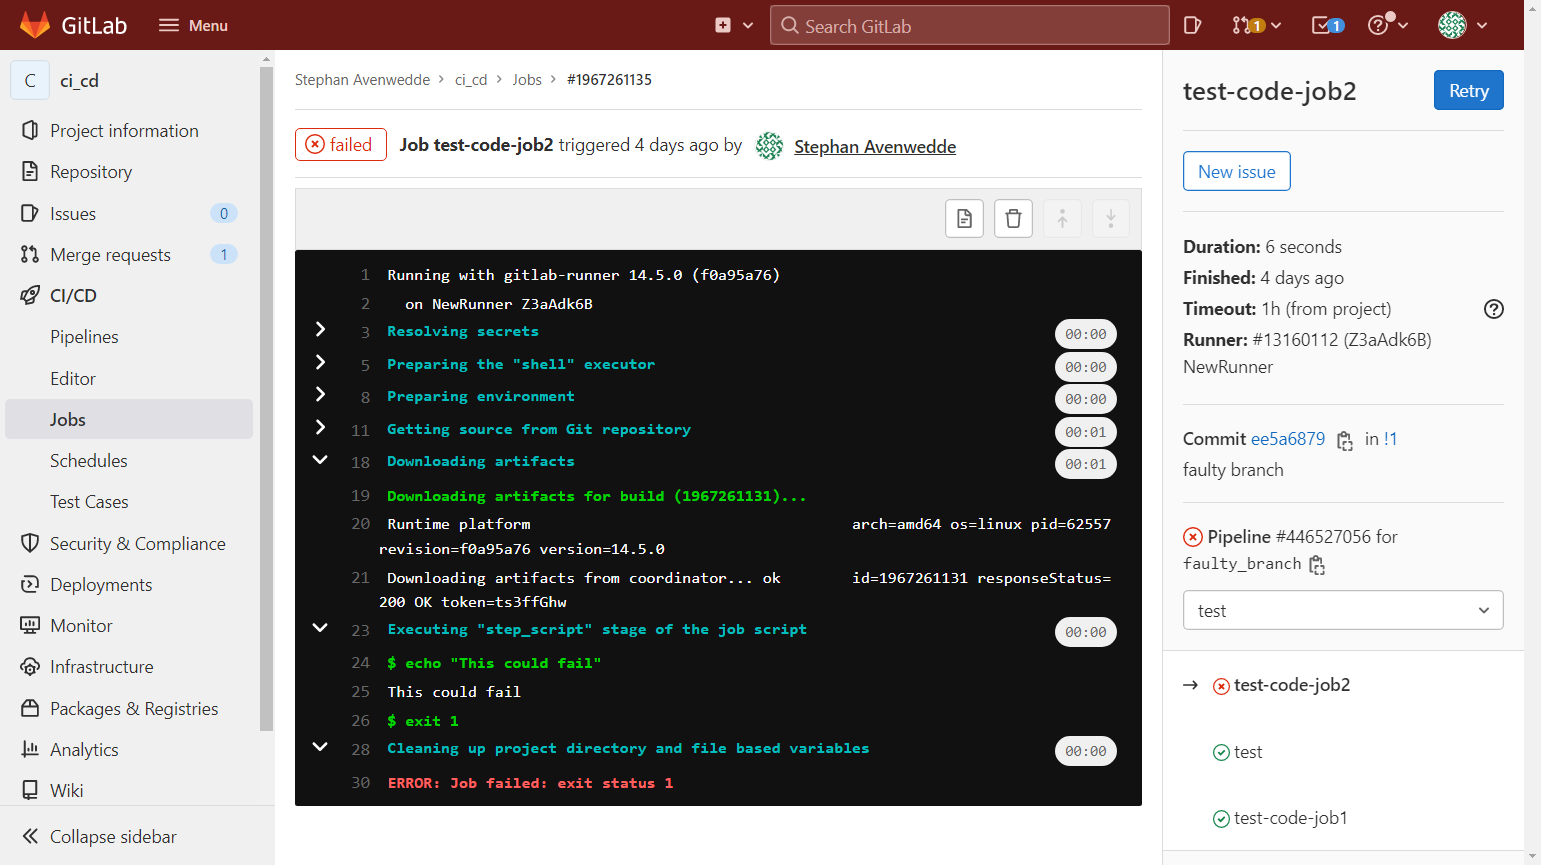
If you select a pipeline, you get a detailed overview where you can check which job failed (in case the pipeline failed) and see the output of individual jobs.
A job is considered to have failed if a non-zero value was returned. In the following case, I just invoked the bash command exit 1 (line 26) to let the job fail:
Stephan Avenwedde (CC BY-SA 4.0)
CI configuration
The stages, pipelines, and jobs configurations are made in the file .gitlab-ci.yml in the root of the repository. I recommend editing the configuration with GitLab's build-in Pipeline editor as it automatically checks for accuracy during editing.
stages:
\- build
\- test

build:
  stage: build
  script:
   - cmake -B build -S .
    - cmake --build build --target Producer
  artifacts:
    paths:
     - build/Producer

RunGTest:
  stage: test
  script:
   - cmake -B build -S .
    - cmake --build build --target GeneratorTest
    - build/Generator/GeneratorTest

RunCTest:
  stage: test
  script:
   - cmake -B build -S .
    - cd build
    - ctest --output-on-failure -j6
The file defines the stages build and test. Next, it defines three jobs: build, RunGTest and RunCTest. The build job is assigned to the eponymous stage, and the other jobs are assigned to the test stage.
The commands under the script section are ordinary shell commands. You can read them as if you were typing them line by line in the shell.
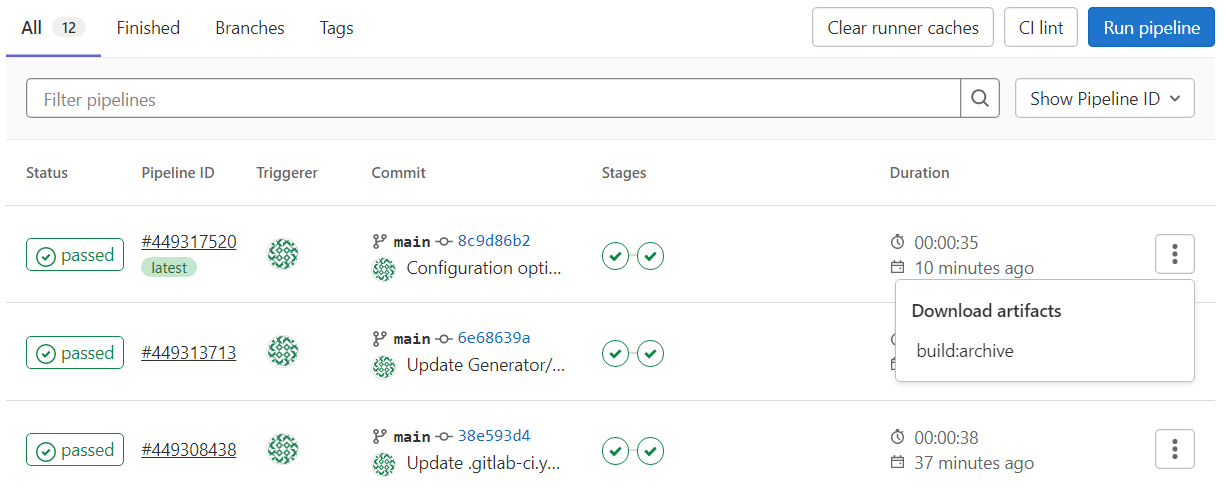
I want to point out one special feature: artifacts. In this case, I define the Producer binary as an artifact of the build job. Artifacts are uploaded to the GitLab server and can be downloaded from there:
Stephan Avenwedde (CC BY-SA 4.0)
By default, jobs in later stages automatically download all the artifacts created by jobs in earlier stages.
A gitlab-ci.yml reference is available on docs.gitlab.com.
Wrap up
The above example is an elementary one, but it shows the general principle of continuous integration. In the above section about setting up a runner I deactivated shared runners, although this is the actual strength of GitLab. You can build, test, and deploy your application in clean, containerized environments. In addition to the freely available runners for which GitLab provides a free monthly contingent, you can also provide your own container-based, self-hosted runners. Of course, there is also a more advanced way: You can orchestrate container-based runners using Kubernetes, which allows you to scale the processing of pipelines freely. You can read more about it on about.gitlab.com.
As I'm running Fedora, I have to mention that Podman is not yet supported as a container engine for GitLab runners. According to gitlab-runner issue #27119, Podman support is already on the list.
Describing the recurring steps as jobs and combining them in pipelines and stages enables you to keep track of their quality without causing additional work. Especially in large community projects where you have to decide whether merge requests get accepted or declined, a properly configured CI approach can tell you if the submitted code will improve or worsen the project.
via: https://opensource.com/article/22/2/setup-ci-pipeline-gitlab
作者:Stephan Avenwedde 选题:lujun9972 译者:译者ID 校对:校对者ID

