14 KiB
Intro to Corteza, an open source alternative to Salesforce
Learn how to use and get Corteza up and running.

Corteza is an open source, self-hosted digital work platform for growing an organization's productivity, enabling its relationships, and protecting its work and the privacy of those involved. The project was developed entirely in the public domain by Crust Technology. It has four core features: customer relationship management, a low-code development platform, messaging, and a unified workspace. This article will also explain how to get started with Corteza on the command line.
Customer relationship management
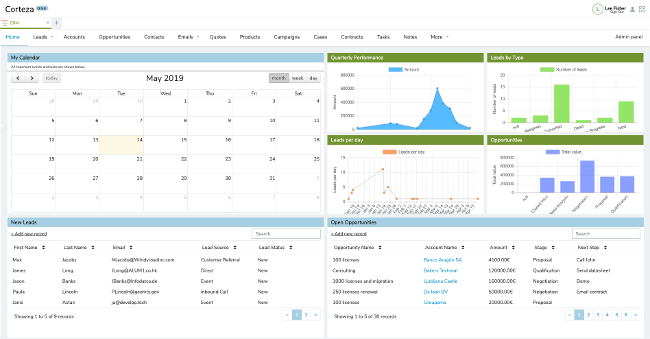
Corteza CRM is a feature-rich open source CRM platform that gives organizations a 360-degree overview of leads and accounts. It's flexible, can easily be tailored to any organization, and includes a powerful automation module to automate processes.
Low-code development platform
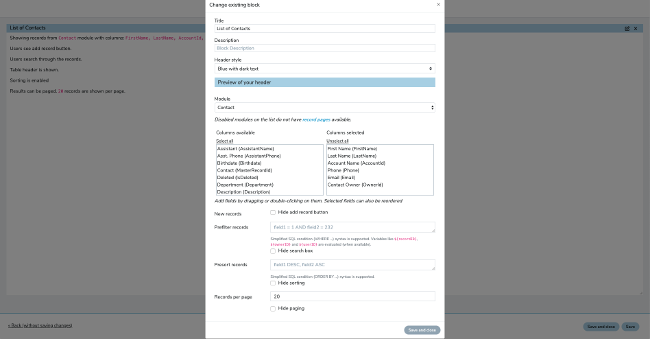
Corteza Low Code is an open source low-code development platform and alternative to Salesforce Lightning. It has an intuitive drag-and-drop builder and allows users to create and deploy record-based business applications with ease. Corteza CRM is built on Corteza Low Code.
Messaging
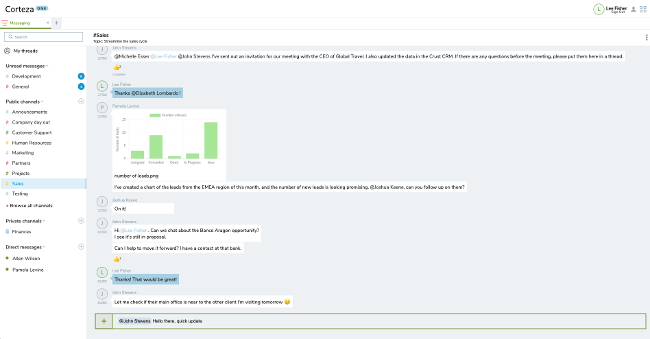
Corteza Messaging is an alternative to Salesforce Chatter and Slack. It is a secure, high-performance collaboration platform that allows teams to collaborate more efficiently and communicate safely with other organizations or customers. It integrates tightly with Corteza CRM and Corteza Low Code.
Unified workspace
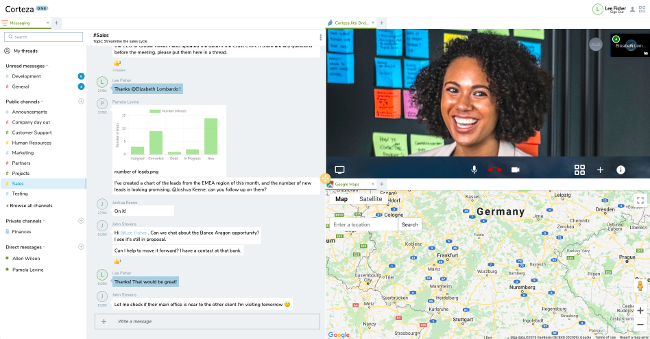
Corteza One is a unified workspace to access and run third-party web and Corteza applications. Centralized access management from a single console enables administrative control over who can see or access applications.
Set up Corteza
You can set up and run the Corteza platform with a set of simple command-line commands.
Set up Docker
If Docker is already set up on the machine where you want to use Corteza, you can skip this section. (If you are using a Docker version below 18.0, I strongly encourage you to update.)
If you're not sure whether you have Docker, open your console or terminal and enter:
`$> docker -v`
If the response is "command not found," download and install a Docker community edition for desktop or server or cloud that fits your environment.
Configure Corteza locally
By using Docker's command-line interface (CLI) utility docker-compose (which simplifies work with containers), Corteza's setup is as effortless as possible.
The following script provides the absolute minimum configuration to set up a local version of Corteza. If you prefer, you can open this file on GitHub. Note that this setup does not use persistent storage; you will need to set up container volumes for that.
version: '2.0'

services:
  db:
    image: percona:8.0
    environment:
      MYSQL_DATABASE:      corteza
      MYSQL_USER:          corteza
      MYSQL_PASSWORD:      oscom-tutorial
      MYSQL_ROOT_PASSWORD: supertopsecret

  server:
    image: cortezaproject/corteza-server:latest

    # Map internal 80 port (where Corteza API is listening)
    # to external port 10080. If you change this, make sure you change API_BASEURL setting below
    ports: [ "10080:80" ]

    environment:
      # Tell corteza-server where can it be reached from the outside
      VIRTUAL_HOST: localhost:10080

      # Serving the app from the localhost port 20080 is not very usual setup,
      # this will override settings auto-discovery procedure (provision) and
      # use custom values for frontend URL base
      PROVISION_SETTINGS_AUTH_FRONTEND_URL_BASE: <http://localhost:20080>

      # Database connection, make sure username, password, and database matches values in the db service
      DB_DSN: corteza:oscom-tutorial@tcp(db:3306)/corteza?collation=utf8mb4_general_ci

  webapp:
    image: cortezaproject/corteza-webapp:latest

    # Map internal 80 port (where we serve the web application)
    # to external port 20080.
    ports: [ "20080:80" ]

    environment:
      # Where API can be found
      API_BASEURL: localhost:10080

      # We're using one service for the API
      MONOLITH_API: 1
Run the services by entering:
`docker-compose up`
You'll see a stream of log lines announcing the database container initialization. Meanwhile, Corteza server will try (and retry) to connect to the database. If you change the database configuration (i.e., username, database, password), you'll get some errors.
When Corteza server connects, it initializes "store" (for uploaded files), and the settings-discovery process will try to auto-discover as much as possible. (You can help by setting the VIRTUAL_HOST and PROVISION_SETTINGS_AUTH_FRONTEND_URL_BASE variables just right for your environment.)
When you see "Starting HTTP server with REST API," Corteza server is ready for use.
Troubleshooting
If you misconfigure VIRTUAL_HOST, API_BASEURL, or PROVISION_SETTINGS_AUTH_FRONTEND_URL_BASE, your setup will most likely be unusable. The easiest fix is bringing all services down (docker-compose down) and back up (docker-compose up) again, but this will delete all data. See "Splitting services" below if you want to make it work without this purge-and-restart approach.
Log in and explore
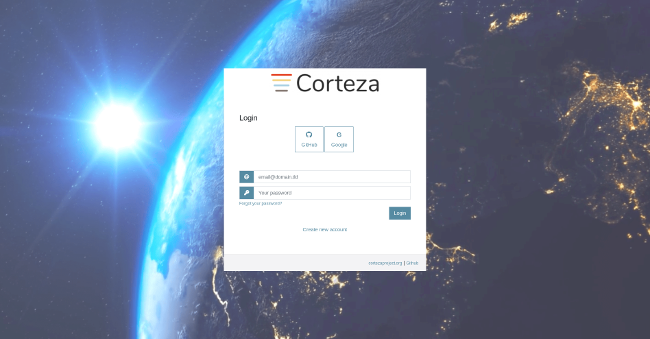
Open http://localhost:20080 in your browser, and give Corteza a try.
First, you'll see the login screen. Follow the sign-up link and register. Corteza auto-promotes the first user to the administrator role. You can explore the administration area and the messaging and low-code tools with the support of the user and administrator guides.
Run in the background
If you're not familiar with docker-compose, you can bring up the services with the -d flag and run them in the background. You can still access service logs with the docker-container logs command if you want.
Expose Corteza to your internal network and the world
If you want to use Corteza in production and with other users, take a look at Corteza's simple and advanced deployment setup examples.
Establish data persistency
If you use one of the simple or advanced examples, you can persist your data by uncommenting one of the volume line pairs.
If you want to store data on your local filesystem, you might need to pay special attention to file permissions. Review the logs when starting up the services if there are any related errors.
Proxy requests to containers
Both server and web-app containers listen on port 80 by default. If you want to expose them to the outside world, you need to use a different outside port. Unfortunately, this makes it not very user-friendly. We do not want to have to tell users to access Corteza on (for example) corteza.example.org:31337 but directly on corteza.example.org with an API served from api.corteza.example.org.
The easiest way to do this is with another Docker image: jwilder/nginx-proxy. You can find a configuration example in Corteza's docs. When you spin-up an nginx-proxy container, it listens for Docker events (e.g., when a container starts or stops), reads values from the container's VIRTUAL_HOST variable, and creates an Nginx configuration that proxies requests directed to the domain configured with VIRTUAL_HOST to the container using the domain.
Secure HTTP
Corteza server speaks only plain HTTP (and HTTP 2.0). It does not do any SSL termination, so you must set up the (reverse) proxy that handles HTTPS traffic and redirects it to internal HTTP ports.
If you use jwilder/nginx-proxy as your front end, you can use another image—jrcs/letsencrypt-nginx-proxy-companion—to take care of SSL certificates from Let's Encrypt. It listens for Docker events (in a similar way as nginx-proxy) and reads the LETSENCRYPT_HOST variable.
Configuration
Another ENV file holds configuration values. See the docs for details. There are two levels of configuration, with ENV variables and settings stored in the database.
Authentication
Along with its internal authentication capabilities (with usernames and encrypted passwords stored in the database), Corteza supports registration and authentication with GitHub, Google, Facebook, Linkedin, or any other OpenID Connect (OIDC)-compatible identity provider.
You can add any external OIDC provider using auto-discovery or by explicitly setting your key and secret. (Note that GitHub, Google, Facebook, and Linkedin require you to register an application and provide a redirection link.)
Splitting services
If you expect more load or want to separate services to fine-tune your containers, follow the advanced deployment example, which has more of a microservice-type architecture. It still uses a single database, but it can split into three parts.
Other types of setup
In the future, Corteza will be available for different distributions, appliances, container types, and more
If you have special requirements, you can always build Corteza as a backend service and the web applications from source.
Using Corteza
Once you have Corteza up and running, you can start using all its features. Here is a list of recommended actions.
Log in
Enter Corteza at, for example, your corteza.example.org link. You'll see the login screen.
As mentioned above, Corteza auto-promotes the first user to the administrator role. If you haven't yet, explore the administration area, messaging, and low-code tools.
Other tasks to get started
Here are some other tasks you'll want to do when you're setting up Corteza for your organization.
- Share the login link with others who will work in your Corteza instance so that they can sign up.
- Create roles, if needed, and assign users to the right roles. By default, only admins can do this.
- Corteza CRM has a complete list of modules. You can enter the CRM admin page to fine-tune the CRM to your needs or just start using it with the defaults.
- Enter Corteza Low Code and create a new low-code app from scratch.
- Create public and private channels in Corteza Messaging for your team. (For example a public "General" or a private "Sales" channel.)
For more information
If you or your users have any questions—or would like to contribute—please join the Corteza Community. After you log in, please introduce yourself in the #Welcome channel.
via: https://opensource.com/article/19/8/corteza-open-source-alternative-salesforce
