mirror of
https://github.com/LCTT/TranslateProject.git
synced 2025-01-19 22:51:41 +08:00
129 lines
8.1 KiB
Markdown
129 lines
8.1 KiB
Markdown
如何拯救一台没有成功通过Grub启动的Linux电脑
|
||
================================================================================
|
||

|
||
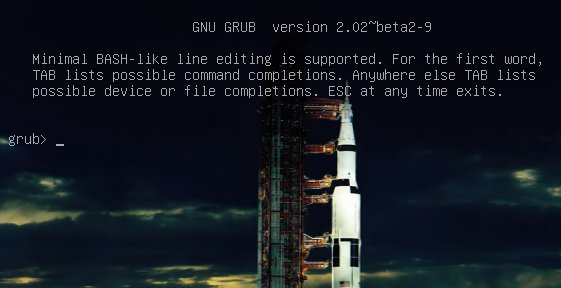
Figure 1: GRUB 2 menu with cool Apollo 17 background.
|
||
|
||
自从我们拥有GRUB以来,Linux Bootloader 0.97就开始了传奇的一生。尽管传统的GRUB有很多的有点,但是他开始陈旧了,并且他的开发者也开始添加更多的功能,于是,Grub2.0时代就要来了。
|
||
|
||
GRUB 2 做了几个明显的改进。它可以从移动存储设备上启动,并且可以有进入BIOS配置的选项。尽管它有着更复杂的脚本配置,但是一个简单的`/boot/grub/menu.lst`文件却一个地方集中了所有配置选项,默认的是存放在`/boot/grub/grub.cfg `。你不能直接编辑,这不是人做的事,太复杂,我们需要用简单的脚本实现。我们卑微的人类可以编辑`/etc/default/grub`文件来修改,它主要是控制Grub菜单。我们还可以修改` /etc/grub.d/ `。这些脚本可以启动操作系统,控制外部应用程序,如memtest 和 os_prober,还有theming `./boot/grub/grub.cfg`是建立在`/etc/default/grub`和`/etc/grub.d/*`的基础上的。当你修改了一个地方,你必须要运行更新GRUB的命令。
|
||
|
||
好消息是,update-grub脚本是可以可靠的检测内核,启动文件,并添加所有的操作系统的,自动生成你的启动菜单,所以你不必手动的修改他们。
|
||
|
||
我们还要学习如何解决两个常见的故障。当启动系统时,它会停在GRUB >提示上,这是完整的GRUB 2命令界面,所以不要惊慌。这意味着GRUB 2依旧可以正常启动和加载normal.mod模块(和其他模块分别位于/boot/grub/[arch]/),但没有找到你的grub.cfg文件。如果你看到grub rescue> 这意味着它无法找到normal.mod,因此它有可能找不到你的启动文件。
|
||
|
||
这是如何发生的?因为内核可能改变驱动器分配或您移动您的硬盘驱动器,或者你手动改变一些分区,或安装一个新的操作系统或者移动一些文件。在这些情况下你的启动文件仍然存在,但GRUB不能找到他们。所以你可以看看在GRUB提示符中启动文件,设置它们的位置,然后启动您的系统和修复您的grub配置。
|
||
|
||
### GRUB 2 命令行 ###
|
||
|
||
GRUB 2 命令是一个伟大的财富。你不仅可以用它来发现引导镜像,内核,和根文件系统。事实上,它给你完全访问本地计算机上的所有文件的系统权限。其中有些人可能会认为一个安全漏洞,但是你知道古老的UNIX的名言:有物理访问机器权限的人,就是拥有它的人。
|
||
|
||
当你在` GRUB > `提示时,你有许多类似的功能,如命令如历史和tab补全。但是`grub rescue> `模式是有限的,没有历史,没有tab补全。
|
||
|
||
如果你是在一个正常运作的系统上练习,那就当GRUB菜单打开GRUB命令行时,按C。你可以通过向上和向下滚动你的菜单条目箭头键停止启动倒计时。它是安全的,在此GRUB命令行下,你不会进行永久的修改,一切都是暂时的。如果你已经看到`grub > `或`grub rescue> `提示符,那就说明你的表现时刻到了。
|
||
|
||
接下来的几个命令可以在`grub>`和`grub rescue`模式下运行。同时,你应该第一个运行的命令如下:
|
||
|
||
grub> set pager=1
|
||
|
||
等号两侧必须不能出现空格。现在让我们做一点探讨。ls列出的所有分区:
|
||
|
||
grub> ls
|
||
(hd0) (hd0,msdos2) (hd0,msdos1)
|
||
|
||
MSDOS是什么?这意味着该系统具有老式的MS-DOS分区表,而不是全新的全局唯一标识符的分区表(GPT)。(见[Using the New GUID Partition Table in Linux (Goodbye Ancient MBR)][1]。如果你正在运行的GPT,它会出现(hd0,GPT1)。使用ls命令查看你的系统文件是什么:
|
||
|
||
grub> ls (hd0,1)/
|
||
lost+found/ bin/ boot/ cdrom/ dev/ etc/ home/ lib/
|
||
lib64/ media/ mnt/ opt/ proc/ root/ run/ sbin/
|
||
srv/ sys/ tmp/ usr/ var/ vmlinuz vmlinuz.old
|
||
initrd.img initrd.img.old
|
||
|
||
好的,我们已经找到了根文件系统。你可以省略MSDOS和GPT的标签。如果你无视打印的分区信息。你可以用cat命令读取文件系统上的文件:
|
||
|
||
grub> cat (hd0,1)/etc/issue
|
||
Ubuntu 14.04 LTS \n \l
|
||
|
||
从/etc/issue文件中,可以看到你的不同的Linux系统
|
||
|
||
### 从 grub> 中启动###
|
||
|
||
这是如何设置启动文件和启动从`GRUB>`提示中进入系统。我们知道,从运行ls命令有一个Linux根文件系统(hd0,1),你可以继续寻找直到你找到你的/boot/grub所在位置。然后运行这些命令,使用您自己的根分区,内核和initrd映像:
|
||
|
||
grub> set root=(hd0,1)
|
||
grub> linux /boot/vmlinuz-3.13.0-29-generic root=/dev/sda1
|
||
grub> initrd /boot/initrd.img-3.13.0-29-generic
|
||
grub> boot
|
||
|
||
第一行设置分区的根文件系统是。第二行告诉grub您想要使用的内核位置。开始输入/boot/vmli,然后使用tab完成填写。输入`root= /dev/sdX`设置根文件系统位置。是的,这似乎是多余的,但如果你忘记了输入你会得到一个kernel panic。你知道怎么正确的分区?hd0,1 = /dev/sda1。hd1,1 = /dev/sdb1。hd3,2 = /开发/ sdd2。我想你可以推出自己的。
|
||
|
||
第三行设置initrd文件,必须是和内核相同的版本号。
|
||
|
||
最后一行启动系统。
|
||
|
||
在一些Linux系统上,内核和initrds是被符号链接到当前的根文件系统的根目录,就像:
|
||
|
||
$ ls -l /
|
||
vmlinuz -> boot/vmlinuz-3.13.0-29-generic
|
||
initrd.img -> boot/initrd.img-3.13.0-29-generic
|
||
|
||
所以,你也可以这样输入命令:
|
||
|
||
grub> set root=(hd0,1)
|
||
grub> linux /vmlinuz root=/dev/sda1
|
||
grub> initrd /initrd.img
|
||
grub> boot
|
||
|
||
### 从grub-rescue> 中启动 ###
|
||
|
||
你必须要加载两个模块normal.mod 和 linux.mod,如果你的GRUB命令不同于大众。
|
||
|
||
grub rescue> set prefix=(hd0,1)/boot/grub
|
||
grub rescue> set root=(hd0,1)
|
||
grub rescue> insmod normal
|
||
grub rescue> normal
|
||
grub rescue> insmod linux
|
||
grub rescue> linux /boot/vmlinuz-3.13.0-29-generic root=/dev/sda1
|
||
grub rescue> initrd /boot/initrd.img-3.13.0-29-generic
|
||
grub rescue> boot
|
||
|
||
tab补全应该在你加载了这几个模块之后开始工作。
|
||
|
||
### 永久性的修复 ###
|
||
|
||
当你成功地启动你的系统,运行这些命令来永久修复GRUB:
|
||
|
||
# update-grub
|
||
Generating grub configuration file ...
|
||
Found background: /usr/share/images/grub/Apollo_17_The_Last_Moon_Shot_Edit1.tga
|
||
Found background image: /usr/share/images/grub/Apollo_17_The_Last_Moon_Shot_Edit1.tga
|
||
Found linux image: /boot/vmlinuz-3.13.0-29-generic
|
||
Found initrd image: /boot/initrd.img-3.13.0-29-generic
|
||
Found linux image: /boot/vmlinuz-3.13.0-27-generic
|
||
Found initrd image: /boot/initrd.img-3.13.0-27-generic
|
||
Found linux image: /boot/vmlinuz-3.13.0-24-generic
|
||
Found initrd image: /boot/initrd.img-3.13.0-24-generic
|
||
Found memtest86+ image: /boot/memtest86+.elf
|
||
Found memtest86+ image: /boot/memtest86+.bin
|
||
done
|
||
# grub-install /dev/sda
|
||
Installing for i386-pc platform.
|
||
Installation finished. No error reported.
|
||
|
||
当你运行 `grub-install` 时,记得grub是安装到硬盘驱动器的引导扇区而不是到一个具体分区,所以不要加上像/dev/sda1的分区号。
|
||
|
||
### 如果还是不能使用 ###
|
||
|
||
如果你的系统是如此的倒霉,而且这个方式没有能起作用,那就尝试[超级GRUB2现场救援磁盘][2]。[官方GNU GRUB手册][3]也应该是有帮助的。
|
||
|
||
--------------------------------------------------------------------------------
|
||
|
||
via: http://www.linux.com/learn/tutorials/776643-how-to-rescue-a-non-booting-grub-2-on-linux
|
||
|
||
译者:[MikeCoder](https://github.com/MikeCoder) 校对:[校对者ID](https://github.com/校对者ID)
|
||
|
||
本文由 [LCTT](https://github.com/LCTT/TranslateProject) 原创翻译,[Linux中国](http://linux.cn/) 荣誉推出
|
||
|
||
[1]:http://www.linux.com/learn/tutorials/730440-using-the-new-guid-partition-table-in-linux-good-bye-ancient-mbr-
|
||
[2]:http://www.supergrubdisk.org/
|
||
[3]:https://www.gnu.org/software/grub/manual/grub.html
|