8.8 KiB
Deploy Kubernetes cluster for Linux containers 部署Kubernetes 容器集群
在这个快速入门教程中,我们使用 Azure CLI 创建 Kubernetes 集群。 然后在集群上部署并运行由 Web 前端和 Redis 实例组成的多容器应用程序。 一旦部署完成,应用程序可以通过互联网访问。
这个快速入门教程假设你已经基本了解了Kubernetes 的概念,有关 Kubernetes 的详细信息,请参阅[ Kubernetes 文档] 3。
如果您没有 Azure 账号订阅,请在开始之前创建一个[免费帐户] 4。
登陆Azure 云控制台
Azure 云控制台是一个免费的 Bash shell ,你可以直接在 Azure 网站上运行。 它已经在你的账户中预先配置好了, 单击[ Azure 门户] 5右上角菜单上的 “Cloud Shell” 按钮;

该按钮启动一个交互式 shell,您可以使用它来运行本教程中的所有操作步骤。

此快速入门教程所用的 Azure CLI 的版本最低要求为 2.0.4 。如果您选择在本地安装和使用 CLI 工具,请运行`az --version' 来检查已安装的版本。 如果您需要安装或升级请参阅[安装 Azure CLI 2.0 ] 8。
创建一个资源组
使用 [az group create] 命令9创建一个资源组,一个 Azure 资源组是 Azure 资源部署和管理的逻辑组。
以下示例在 eastus 位置中创建名为 myResourceGroup 的资源组。
Azure CLICopyTry It
az group create --name myResourceGroup --location eastus
输出:
JSONCopy
{
  "id": "/subscriptions/00000000-0000-0000-0000-000000000000/resourceGroups/myResourceGroup",
  "location": "eastus",
  "managedBy": null,
  "name": "myResourceGroup",
  "properties": {
    "provisioningState": "Succeeded"
  },
  "tags": null
}
创建一个 Kubernetes 集群
使用 [az acs create] 10命令在 Azure 容器服务中创建 Kubernetes 集群。 以下示例使用一个 Linux 主节点和三个 Linux 代理节点创建一个名为 myK8sCluster 的集群。
Azure CLICopyTry It
az acs create --orchestrator-type=kubernetes --resource-group myResourceGroup --name=myK8sCluster --generate-ssh-keys
几分钟后,命令将完成并返回有关该集群的json格式的信息。
连接到 Kubernetes 集群
要管理 Kubernetes 群集,可以使用 Kubernetes 命令行工具 [kubectl] 11。
如果您使用 Azure CloudShell ,则已经安装了 kubectl 。 如果要在本地安装,可以使用[az acs kubernetes install-cli] 12命令。
要配置 kubectl 连接到您的 Kubernetes 群集,请运行 [az acs kubernetes get-credentials] 13 命令下载凭据并配置 Kubernetes CLI 以使用它们。
Azure CLICopyTry It
az acs kubernetes get-credentials --resource-group=myResourceGroup --name=myK8sCluster
要验证与集群的连接,请使用 [kubectl get] 14 命令查看集群节点的列表。
Azure CLICopyTry It
kubectl get nodes
输出:
bashCopy
NAME                    STATUS                     AGE       VERSION
k8s-agent-14ad53a1-0    Ready                      10m       v1.6.6
k8s-agent-14ad53a1-1    Ready                      10m       v1.6.6
k8s-agent-14ad53a1-2    Ready                      10m       v1.6.6
k8s-master-14ad53a1-0   Ready,SchedulingDisabled   10m       v1.6.6
运行应用程序
Kubernetes 清单文件为集群定义了一个所需的状态,包括了集群中应该运行什么样的容器镜像。 对于此示例,清单用于创建运行 Azure Vote 应用程序所需的所有对象。
创建一个名为 azure-vote.yaml ,将下面的内容拷贝到 YAML 中。
yamlCopy
apiVersion: apps/v1beta1
kind: Deployment
metadata:
  name: azure-vote-back
spec:
  replicas: 1
  template:
    metadata:
      labels:
        app: azure-vote-back
    spec:
      containers:
      - name: azure-vote-back
        image: redis
        ports:
        - containerPort: 6379
          name: redis
---
apiVersion: v1
kind: Service
metadata:
  name: azure-vote-back
spec:
  ports:
  - port: 6379
  selector:
    app: azure-vote-back
---
apiVersion: apps/v1beta1
kind: Deployment
metadata:
  name: azure-vote-front
spec:
  replicas: 1
  template:
    metadata:
      labels:
        app: azure-vote-front
    spec:
      containers:
      - name: azure-vote-front
        image: microsoft/azure-vote-front:redis-v1
        ports:
        - containerPort: 80
        env:
        - name: REDIS
          value: "azure-vote-back"
---
apiVersion: v1
kind: Service
metadata:
  name: azure-vote-front
spec:
  type: LoadBalancer
  ports:
  - port: 80
  selector:
    app: azure-vote-front
使用 kubectl create 命令来运行该应用程序。
Azure CLICopyTry It
kubectl create -f azure-vote.yaml
输出:
bashCopy
deployment "azure-vote-back" created
service "azure-vote-back" created
deployment "azure-vote-front" created
service "azure-vote-front" created
测试应用程序
当应用程序的跑起来之后,需要创建一个[ Kubernetes 服务] 16,将应用程序前端暴露在互联网上。 此过程可能需要几分钟才能完成。
要监控这个进程,使用 kubectl get service 命令时加上 --watch 参数。
Azure CLICopyTry It
kubectl get service azure-vote-front --watch
Initially the EXTERNAL-IP for the azure-vote-front service appears as pending . Once the EXTERNAL-IP address has changed from pending to an IP address , use CTRL-C to stop the kubectl watch process.
最初,azure-vote-front 服务的 EXTERNAL-IP 显示为 pending 。 一旦 EXTERNAL-IP 地址从 pending 变成一个具体的IP地址,请使用 “CTRL-C” 来停止 kubectl 监视进程。
bashCopy
azure-vote-front   10.0.34.242   <pending>     80:30676/TCP   7s
azure-vote-front   10.0.34.242   52.179.23.131   80:30676/TCP   2m
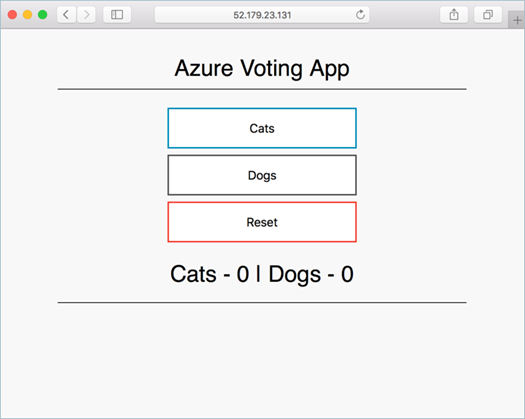
You can now browse to the external IP address to see the Azure Vote App. 现在你可以通过这个外网 IP 地址访问到 Azure Vote 这个应用了。
删除集群
当不再需要集群时,可以使用 [az group delete] 18命令删除资源组,容器服务和所有相关资源。
Azure CLICopyTry It
az group delete --name myResourceGroup --yes --no-wait
获取示例代码
在这个快速入门教程中,预先创建的容器镜像已被用于部署 Kubernetes 。相关应用程序代码 Dockerfile 和 Kubernetes 清单文件可在 GitHub 中获得。Github 仓库地址是 https://github.com/Azure-Samples/azure-voting-app-redis
下一步
在这个快速入门教程中,您部署了一个 Kubernetes 集群,并部署了一个多容器应用程序。
要了解有关 Azure 容器服务的更多信息,走完一个完整的从代码到部署的全流程,请继续阅读 Kubernetes 集群教程。
作者:neilpeterson ,mmacy 译者:rieonke 校对:校对者ID