mirror of
https://github.com/LCTT/TranslateProject.git
synced 2025-01-22 23:00:57 +08:00
132 lines
6.7 KiB
Markdown
132 lines
6.7 KiB
Markdown
How To Easily And Safely Manage Cron Jobs In Linux
|
||
======
|
||
|
||

|
||
|
||
When it comes to schedule tasks in Linux, which utility comes to your mind first? Yeah, you guessed it right. **Cron!** The cron utility helps you to schedule commands/tasks at specific time in Unix-like operating systems. We already published a [**beginners guides to Cron jobs**][1]. I have a few years experience in Linux, so setting up cron jobs is no big deal for me. But, it is not piece of cake for newbies. The noobs may unknowingly do small mistakes while editing plain text crontab and bring down all cron jobs. Just in case, if you think you might mess up with your cron jobs, there is a good alternative way. Say hello to **Crontab UI** , a web-based tool to easily and safely manage cron jobs in Unix-like operating systems.
|
||
|
||
You don’t need to manually edit the crontab file to create, delete and manage cron jobs. Everything can be done via a web browser with a couple mouse clicks. Crontab UI allows you to easily create, edit, pause, delete, backup cron jobs, and even import, export and deploy jobs on other machines without much hassle. Error log, mailing and hooks support also possible. It is free, open source and written using NodeJS.
|
||
|
||
### Installing Crontab UI
|
||
|
||
Installing Crontab UI is just a one-liner command. Make sure you have installed NPM. If you haven’t install npm yet, refer the following link.
|
||
|
||
Next, run the following command to install Crontab UI.
|
||
```
|
||
$ npm install -g crontab-ui
|
||
|
||
```
|
||
|
||
It’s that simple. Let us go ahead and see how to manage cron jobs using Crontab UI.
|
||
|
||
### Easily And Safely Manage Cron Jobs In Linux
|
||
|
||
To launch Crontab UI, simply run:
|
||
```
|
||
$ crontab-ui
|
||
|
||
```
|
||
|
||
You will see the following output:
|
||
```
|
||
Node version: 10.8.0
|
||
Crontab UI is running at http://127.0.0.1:8000
|
||
|
||
```
|
||
|
||
Now, open your web browser and navigate to **<http://127.0.0.1:8000>**. Make sure the port no 8000 is allowed in your firewall/router.
|
||
|
||
Please note that you can only access Crontab UI web dashboard within the local system itself.
|
||
|
||
If you want to run Crontab UI with your system’s IP and custom port (so you can access it from any remote system in the network), use the following command instead:
|
||
```
|
||
$ HOST=0.0.0.0 PORT=9000 crontab-ui
|
||
Node version: 10.8.0
|
||
Crontab UI is running at http://0.0.0.0:9000
|
||
|
||
```
|
||
|
||
Now, Crontab UI can be accessed from the any system in the nework using URL – **http:// <IP-Address>:9000**.
|
||
|
||
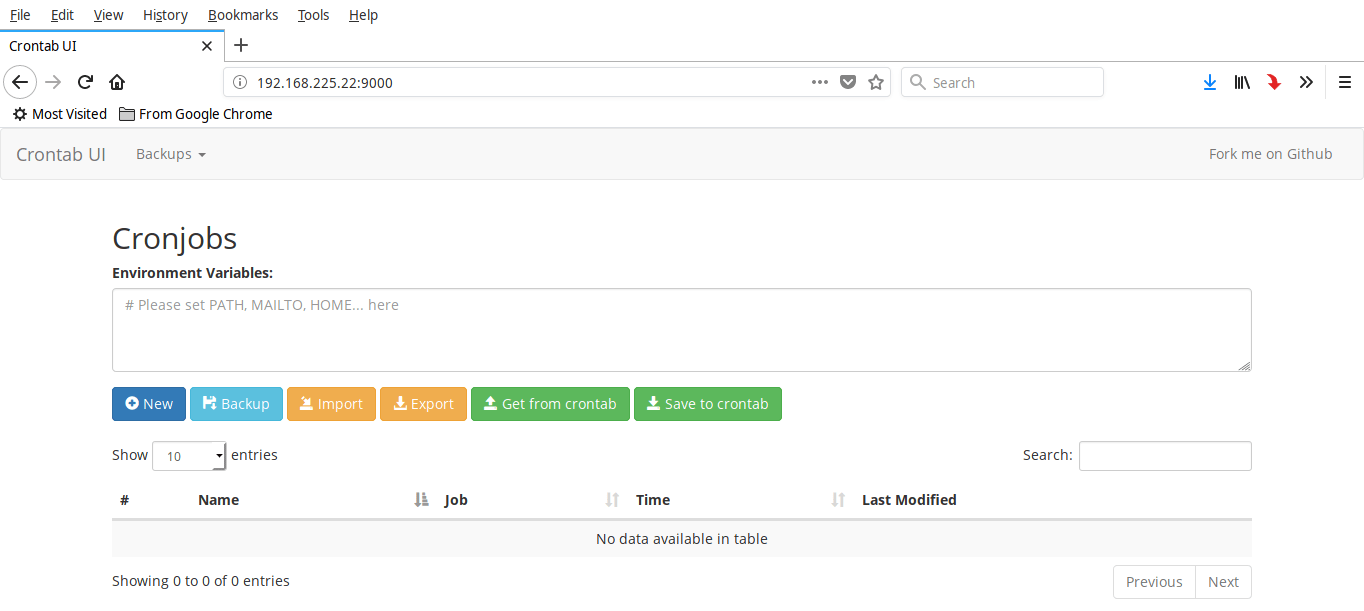
This is how Crontab UI dashboard looks like.
|
||
|
||

|
||
|
||
As you can see in the above screenshot, Crontab UI dashbaord is very simply. All options are self-explanatory.
|
||
|
||
To exit Crontab UI, press **CTRL+C**.
|
||
|
||
**Create, edit, run, stop, delete a cron job**
|
||
|
||
To create a new cron job, click on “New” button. Enter your cron job details and click Save.
|
||
|
||
1. Name the cron job. It is optional.
|
||
2. The full command you want to run.
|
||
3. Choose schedule time. You can either choose the quick schedule time, (such as Startup, Hourly, Daily, Weekly, Monthly, Yearly) or set the exact time to run the command. After you choosing the schedule time, the syntax of the cron job will be shown in **Jobs** field.
|
||
4. Choose whether you want to enable error logging for the particular job.
|
||
|
||
|
||
|
||
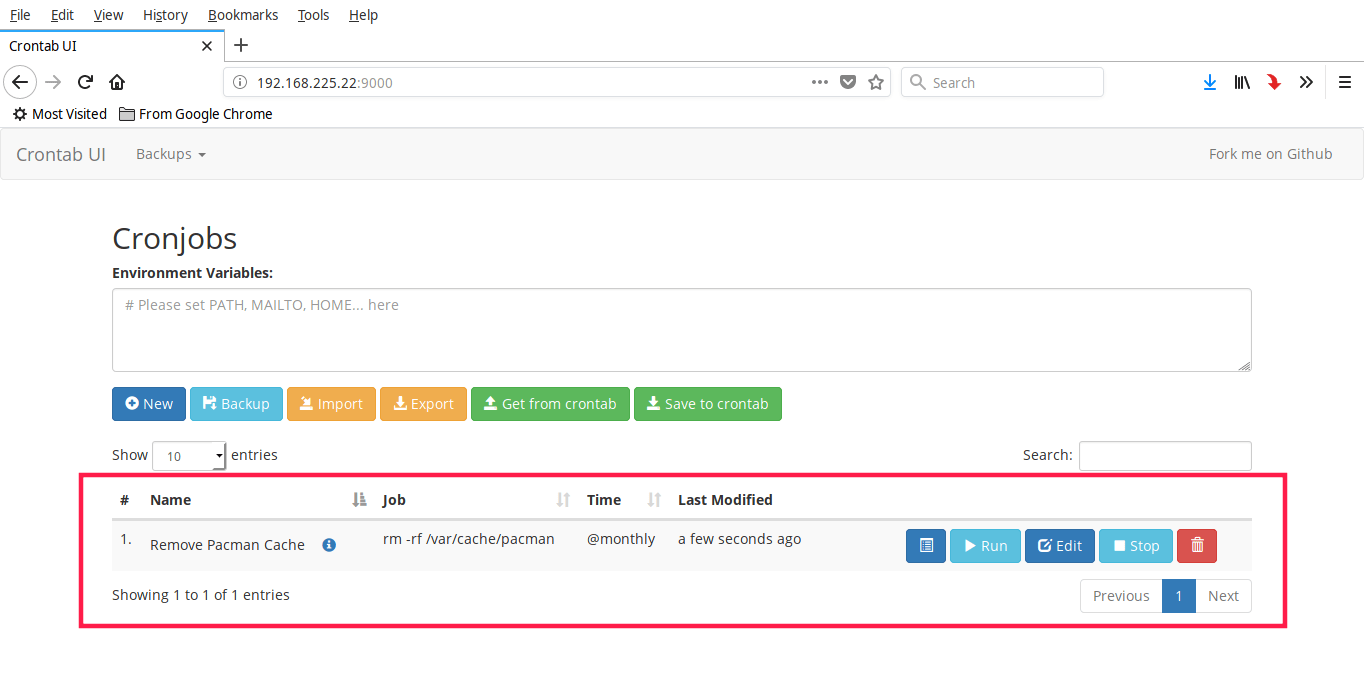
Here is my sample cron job.
|
||
|
||

|
||
|
||
As you can see, I have setup a cron job to clear pacman cache at every month.
|
||
|
||
Similarly, you can create any number of jobs as you want. You will see all cron jobs in the dashboard.
|
||
|
||

|
||
|
||
If you wanted to change any parameter in a cron job, just click on the **Edit** button below the job and modify the parameters as you wish. To run a job immediately, click on the button that says **Run**. To stop a job, click **Stop** button. You can view the log details of any job by clicking on the **Log** button. If the job is no longer required, simply press **Delete** button.
|
||
|
||
**Backup cron jobs**
|
||
|
||
To backup all cron jobs, press the Backup from main dashboard and choose OK to confirm the backup.
|
||
|
||

|
||
|
||
You can use this backup in case you messed with the contents of the crontab file.
|
||
|
||
**Import/Export cron jobs to other systems**
|
||
|
||
Another notable feature of Crontab UI is you can import, export and deploy cron jobs to other systems. If you have multiple systems on your network that requires the same cron jobs, just press **Export** button and choose the location to save the file. All contents of crontab file will be saved in a file named **crontab.db**.
|
||
|
||
Here is the contents of the crontab.db file.
|
||
```
|
||
$ cat Downloads/crontab.db
|
||
{"name":"Remove Pacman Cache","command":"rm -rf /var/cache/pacman","schedule":"@monthly","stopped":false,"timestamp":"Thu Aug 23 2018 10:34:19 GMT+0000 (Coordinated Universal Time)","logging":"true","mailing":{},"created":1535020459093,"_id":"lcVc1nSdaceqS1ut"}
|
||
|
||
```
|
||
|
||
Then you can transfer the entire crontab.db file to some other system and import its to the new system. You don’t need to manually create cron jobs in all systems. Just create them in one system and export and import all of them to every system on the network.
|
||
|
||
**Get the contents from or save to existing crontab file**
|
||
|
||
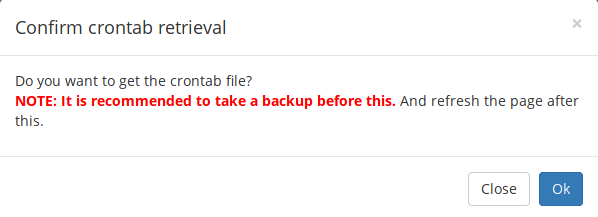
There are chances that you might have already created some cron jobs using **crontab** command. If so, you can retrieve contents of the existing crontab file by click on the **“Get from crontab”** button in main dashboard.
|
||
|
||

|
||
|
||
Similarly, you can save the newly created jobs using Crontab UI utility to existing crontab file in your system. To do so, just click **Save to crontab** option in the dashboard.
|
||
|
||
See? Managing cron jobs is not that complicated. Any newbie user can easily maintain any number of jobs without much hassle using Crontab UI. Give it a try and let us know what do you think about this tool. I am all ears!
|
||
|
||
And, that’s all for now. Hope this was useful. More good stuffs to come. Stay tuned!
|
||
|
||
Cheers!
|
||
|
||
|
||
|
||
--------------------------------------------------------------------------------
|
||
|
||
via: https://www.ostechnix.com/how-to-easily-and-safely-manage-cron-jobs-in-linux/
|
||
|
||
作者:[SK][a]
|
||
选题:[lujun9972](https://github.com/lujun9972)
|
||
译者:[译者ID](https://github.com/译者ID)
|
||
校对:[校对者ID](https://github.com/校对者ID)
|
||
|
||
本文由 [LCTT](https://github.com/LCTT/TranslateProject) 原创编译,[Linux中国](https://linux.cn/) 荣誉推出
|
||
|
||
[a]:https://www.ostechnix.com/author/sk/
|
||
[1]:https://www.ostechnix.com/a-beginners-guide-to-cron-jobs/
|