mirror of
https://github.com/LCTT/TranslateProject.git
synced 2024-12-29 21:41:00 +08:00
134 lines
6.0 KiB
Markdown
134 lines
6.0 KiB
Markdown
Dbxfs – Mount Dropbox Folder Locally As Virtual File System In Linux
|
||
======
|
||
|
||
|
||
|
||
A while ago, we summarized all the possible ways to **[mount Google drive locally][1]** as a virtual file system and access the files stored in the google drive from your Linux operating system. Today, we are going to learn to mount Dropbox folder in your local file system using **dbxfs** utility. The dbxfs is used to mount your Dropbox folder locally as a virtual filesystem in Unix-like operating systems. While it is easy to [**install Dropbox client**][2] in Linux, this approach slightly differs from the official method. It is a command line dropbox client and requires no disk space for access. The dbxfs application is free, open source and written for Python 3.5+.
|
||
|
||
### Installing dbxfs
|
||
|
||
The dbxfs officially supports Linux and Mac OS. However, it should work on any POSIX system that provides a **FUSE-compatible library** or has the ability to mount **SMB** shares. Since it is written for Python 3.5, it can installed using **pip3** package manager. Refer the following guide if you haven’t installed PIP yet.
|
||
|
||
And, install FUSE library as well.
|
||
|
||
On Debian-based systems, run the following command to install FUSE:
|
||
|
||
```
|
||
$ sudo apt install libfuse2
|
||
|
||
```
|
||
|
||
On Fedora:
|
||
|
||
```
|
||
$ sudo dnf install fuse
|
||
|
||
```
|
||
|
||
Once you installed all required dependencies, run the following command to install dbxfs utility:
|
||
|
||
```
|
||
$ pip3 install dbxfs
|
||
|
||
```
|
||
|
||
### Mount Dropbox folder locally
|
||
|
||
Create a mount point to mount your dropbox folder in your local file system.
|
||
|
||
```
|
||
$ mkdir ~/mydropbox
|
||
|
||
```
|
||
|
||
Then, mount the dropbox folder locally using dbxfs utility as shown below:
|
||
|
||
```
|
||
$ dbxfs ~/mydropbox
|
||
|
||
```
|
||
|
||
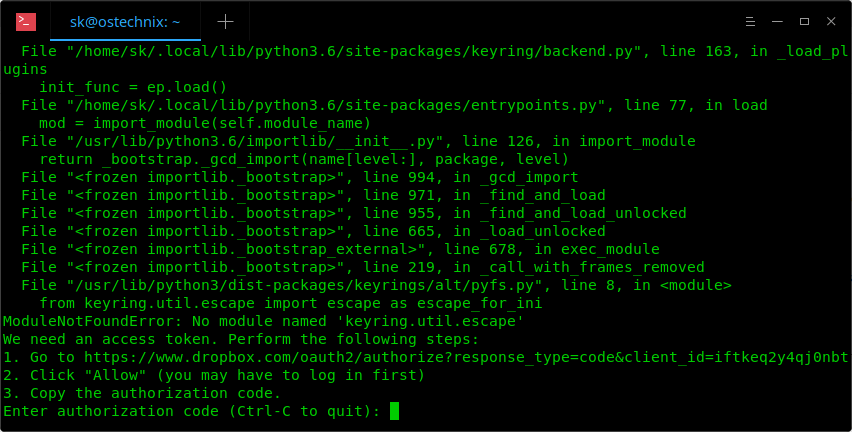
You will be asked to generate an access token:
|
||
|
||
|
||
|
||
To generate an access token, just navigate to the URL given in the above output from your web browser and click **Allow** to authenticate Dropbox access. You need to log in to your dropbox account to complete authorization process.
|
||
|
||
A new authorization code will be generated in the next screen. Copy the code and head back to your Terminal and paste it into cli-dbxfs prompt to finish the process.
|
||
|
||
You will be then asked to save the credentials for future access. Type **Y** or **N** whether you want to save or decline. And then, you need to enter a passphrase twice for the new access token.
|
||
|
||
Finally, click **Y** to accept **“/home/username/mydropbox”** as the default mount point. If you want to set different path, type **N** and enter the location of your choice.
|
||
|
||
[![Generate access token 2][3]][4]
|
||
|
||
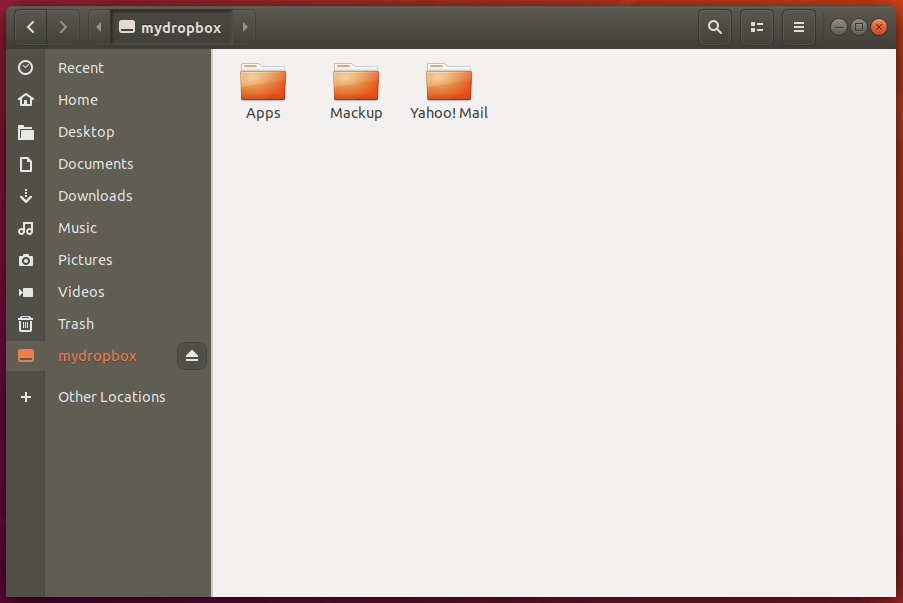
All done! From now on, you can see your Dropbox folder is locally mounted in your filesystem.
|
||
|
||
|
||
|
||
### Change Access Token Storage Path
|
||
|
||
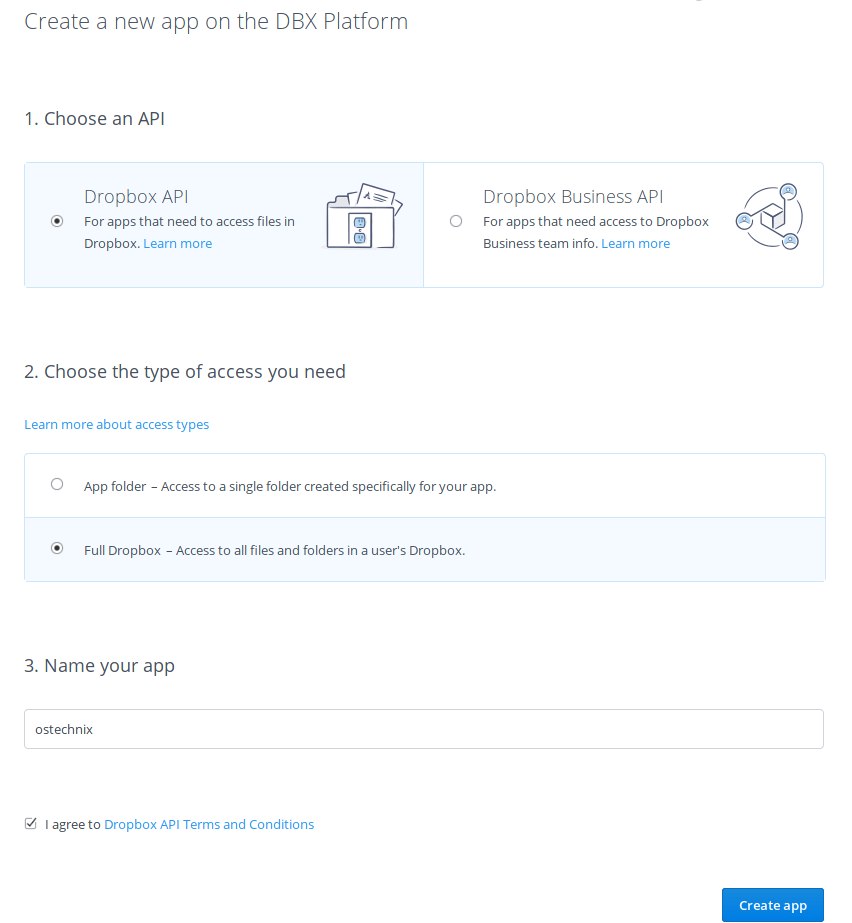
By default, the dbxfs application will store your Dropbox access token in the system keyring or an encrypted file. However, you might want to store it in a **gpg** encrypted file or something else. If so, get an access token by creating a personal app on the [Dropbox developers app console][5].
|
||
|
||
|
||
|
||
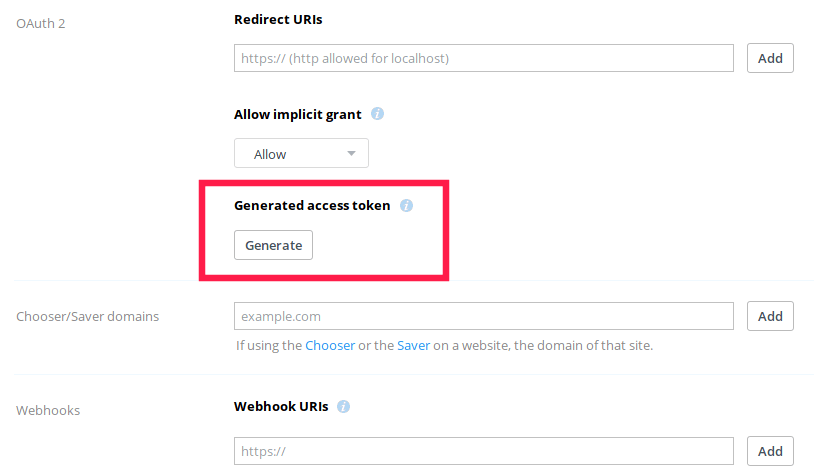
Once the app is created, click **Generate** button in the next button. This access token can be used to access your Dropbox account via the API. Don’t share your access token with anyone.
|
||
|
||
|
||
|
||
Once you created an access token, encrypt it using any encryption tools of your choice, such as [**Cryptomater**][6], [**Cryptkeeper**][7], [**CryptGo**][8], [**Cryptr**][9], [**Tomb**][10], [**Toplip**][11] and [**GnuPG**][12] etc., and store it in your preferred location.
|
||
|
||
Next edit the dbxfs configuration file and add the following line in it:
|
||
|
||
```
|
||
"access_token_command": ["gpg", "--decrypt", "/path/to/access/token/file.gpg"]
|
||
|
||
```
|
||
|
||
You can find the dbxfs configuration file by running the following command:
|
||
|
||
```
|
||
$ dbxfs --print-default-config-file
|
||
|
||
```
|
||
|
||
For more details, refer dbxfs help section:
|
||
|
||
```
|
||
$ dbxfs -h
|
||
|
||
```
|
||
|
||
As you can see, mounting Dropfox folder locally in your file system using Dbxfs utility is no big deal. As far tested, dbxfs just works fine as expected. Give it a try if you’re interested to see how it works and let us know about your experience in the comment section below.
|
||
|
||
And, that’s all for now. Hope this was useful. More good stuff to come. Stay tuned!
|
||
|
||
Cheers!
|
||
|
||
|
||
|
||
--------------------------------------------------------------------------------
|
||
|
||
via: https://www.ostechnix.com/dbxfs-mount-dropbox-folder-locally-as-virtual-file-system-in-linux/
|
||
|
||
作者:[SK][a]
|
||
选题:[lujun9972](https://github.com/lujun9972)
|
||
译者:[译者ID](https://github.com/译者ID)
|
||
校对:[校对者ID](https://github.com/校对者ID)
|
||
|
||
本文由 [LCTT](https://github.com/LCTT/TranslateProject) 原创编译,[Linux中国](https://linux.cn/) 荣誉推出
|
||
|
||
[a]: https://www.ostechnix.com/author/sk/
|
||
[1]: https://www.ostechnix.com/how-to-mount-google-drive-locally-as-virtual-file-system-in-linux/
|
||
[2]: https://www.ostechnix.com/install-dropbox-in-ubuntu-18-04-lts-desktop/
|
||
[3]: data:image/gif;base64,R0lGODlhAQABAIAAAAAAAP///yH5BAEAAAAALAAAAAABAAEAAAIBRAA7
|
||
[4]: http://www.ostechnix.com/wp-content/uploads/2018/10/Generate-access-token-2.png
|
||
[5]: https://dropbox.com/developers/apps
|
||
[6]: https://www.ostechnix.com/cryptomator-open-source-client-side-encryption-tool-cloud/
|
||
[7]: https://www.ostechnix.com/how-to-encrypt-your-personal-foldersdirectories-in-linux-mint-ubuntu-distros/
|
||
[8]: https://www.ostechnix.com/cryptogo-easy-way-encrypt-password-protect-files/
|
||
[9]: https://www.ostechnix.com/cryptr-simple-cli-utility-encrypt-decrypt-files/
|
||
[10]: https://www.ostechnix.com/tomb-file-encryption-tool-protect-secret-files-linux/
|
||
[11]: https://www.ostechnix.com/toplip-strong-file-encryption-decryption-cli-utility/
|
||
[12]: https://www.ostechnix.com/an-easy-way-to-encrypt-and-decrypt-files-from-commandline-in-linux/
|