mirror of
https://github.com/LCTT/TranslateProject.git
synced 2024-12-26 21:30:55 +08:00
111 lines
7.1 KiB
Markdown
111 lines
7.1 KiB
Markdown
在 Linux 上使用 Glyphr 设计自己的字体
|
||
=============
|
||
|
||
LibreOffice 提供了丰富的字体,并且用户可以自由选择和下载增加自己的字体。然而,就算是你想创造自己的字体,也可以非常容易地使用 Glyphr 来做到。Glyphr 是一个新开源的矢量字体设计器,通过直观而易用的图形界面和丰富的功能集可以完成字体设计的方方面面。虽然这个应用还在早期开发阶段,但是已经十分棒了。下面将会有一个简短的快速入门教你如何使用 Glyphr 创建字体并加入到 LibreOffice。
|
||
|
||
首先,从[官方 Git 库][14]下载 Glyphr。它提供 32 位和 64 位版本的二进制格式。完成下载后,进入下载文件夹, 解压文件,进入解压后的文件夹,右键点击 Glyphr Studio,选择“Run”。
|
||
|
||
[
|
||

|
||
][13]
|
||
|
||
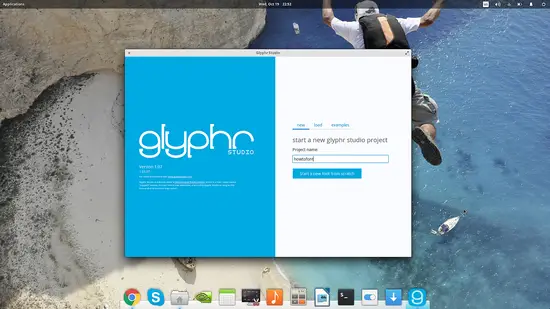
启动应用后会给你三个选项。一个是从头创建一个新的字体集;第二个是读取已经存在的项目,可以是 Glyphr Studio 项目文件,也可以是其他OpenType 字体(otf)或 TrueType 字体(ttf),甚至是 SVG 字体。第三个是读取已有的两个示例之一,然后可以在示例上修改创建。我将会选择第一个选项,并教你一些简单的设计概念。
|
||
|
||
[
|
||
|
||
][12]
|
||
|
||
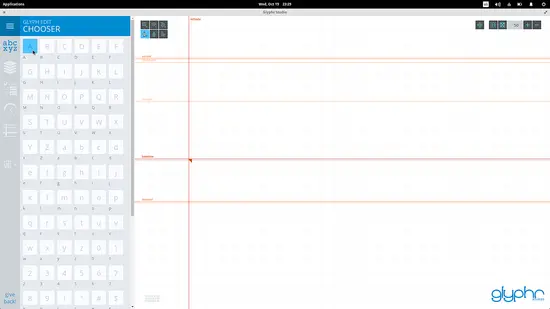
完成进入编辑界面后, 你可以从屏幕左边的面板中选择字母,然后在右边的绘制区域设计。我选择 A 字母的图标开始编辑它。
|
||
|
||
[
|
||
|
||
][11]
|
||
|
||
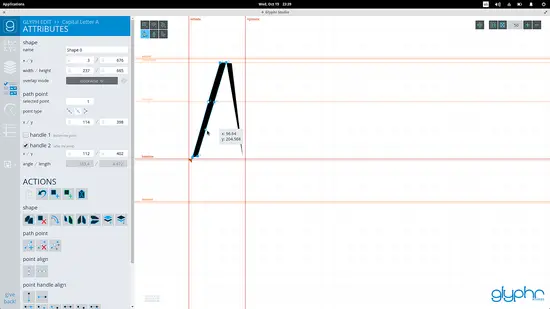
要在绘图板上设计一些东西,我们可以从该板的左上角选择矩形、椭圆形或者路径等同处的“形状”工具,也可以使用该工具的第二行的第一项的路径编辑工具。使用任意工具,开始在板上放路径点(path point)来创建形状。添加的点数越多,接下来步骤的形状选项就越多。
|
||
|
||
[
|
||
|
||
][10]
|
||
|
||
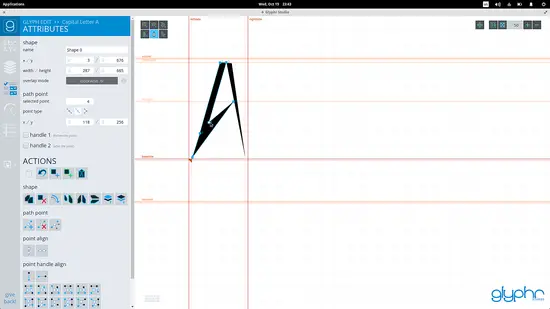
将点移动到不同位置可以获得不同的路径,可以使用路径编辑工具右边的路径编辑,点击形状会出现可编辑点。然后可以把这些点拖到你喜欢的任意位置。
|
||
|
||
[
|
||
|
||
][9]
|
||
|
||
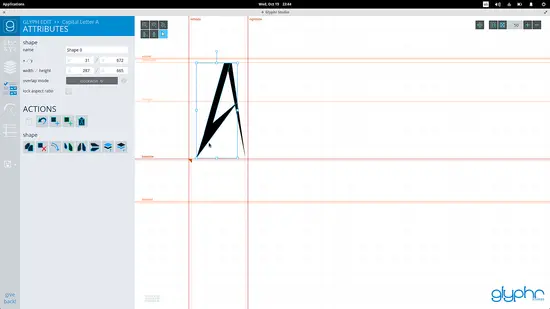
最后,形状编辑工具可以让你选择形状并将其拖动到其它位置、更改其尺寸以及旋转。
|
||
|
||
[
|
||
|
||
][8]
|
||
|
||
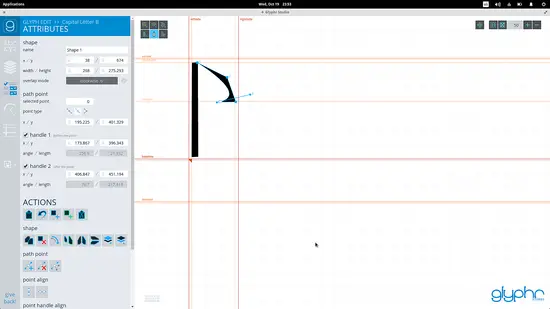
其它有用的设计动作集还有左侧面板提供的复制-粘贴、翻转-旋转操作。来看个例子,假设我现在正在创作 B 字母, 我要把已经创建好的上部分镜像到下半部分,保持设计的高度一致性。
|
||
|
||
[
|
||
|
||
][7]
|
||
|
||
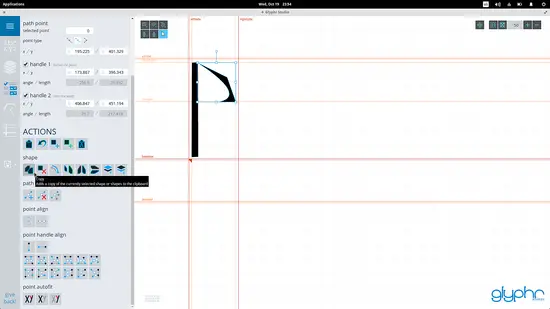
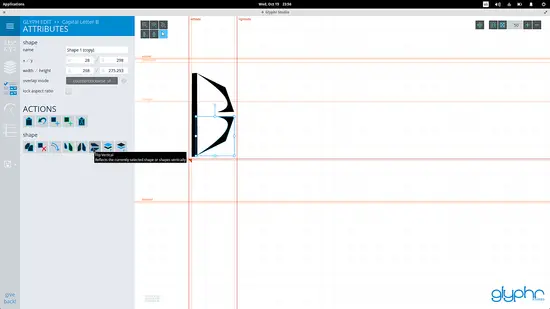
现在,为了达到这个目的,选择形状编辑工具,选中欲镜像的部分,点击复制操作,然后在其上点击图形,拖放粘帖的形状到你需要的位置,根据你的需要进行水平翻转或者垂直翻转。
|
||
|
||
[
|
||
|
||
][6]
|
||
|
||
[
|
||
|
||
][5]
|
||
|
||
这款应用在太多地方可以讲述。如果有兴趣深入,可以深入了解数字化编辑、弯曲和引导等等,
|
||
|
||
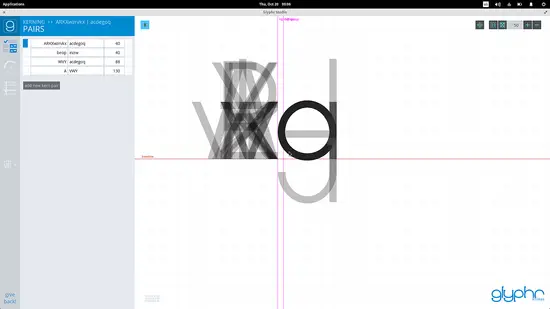
然而,字体并不是仅仅是单个字体的设计,还需要学习字体设计的其他方面。通过应用左上角菜单栏上的“导航”还可以设置特殊字符对之间的字间距、增加连字符、部件、和设置常规字体设置等。
|
||
|
||
[
|
||
|
||
][4]
|
||
|
||
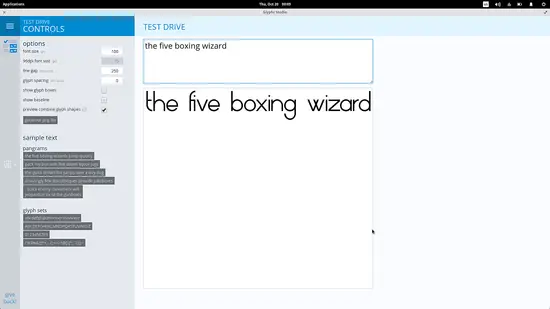
最棒的是你可以使用“测试驱动”来使用你的新字体,帮助你判断字体设计如何、间距对不对、尽量来优化你的字体。
|
||
|
||
[
|
||
|
||
][3]
|
||
|
||
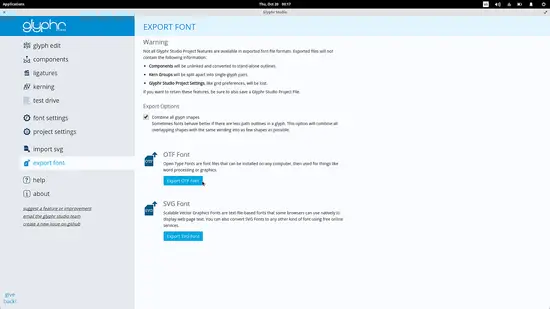
完成设计和优化后,我们还可以导出 ttf 和 svg 格式的字体。
|
||
|
||
[
|
||
|
||
][2]
|
||
|
||
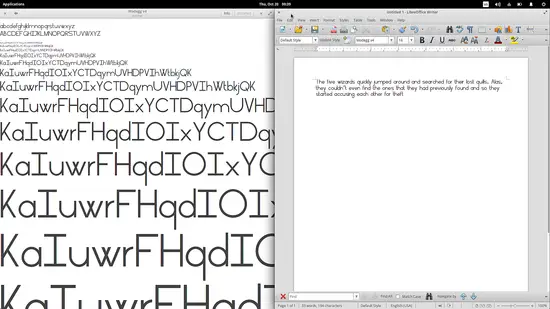
要将新的字体加入到系统中,打开字体浏览器并点击“安装”按钮。如果它不工作,可以在主目录下创建一个新的文件夹叫做`.fonts`,并将字体复制进去。也可以使用 root 用户打开文件管理器,进入 `/usr/share/fonts/opentype`, 创建一个新的文件夹并粘贴字体文件到里面。然后打开终端,输入命令重建字体缓存:`sudo fc-cache -f -v`。
|
||
|
||
在 LibreOffice 中已经可以看见新的字体咯,同样也可以使用你系统中的其它文本应用程序如 Gedit 来测试新字体。
|
||
|
||
[
|
||
|
||
][1]
|
||
|
||
--------------------------------------------------------------------------------
|
||
|
||
via: https://www.howtoforge.com/tutorial/how-to-design-and-add-your-own-font-on-linux-with-glyphr/
|
||
|
||
作者:[Bill Toulas][a]
|
||
译者:[VicYu/Vic020](http://vicyu.net)
|
||
校对:[wxy](https://github.com/wxy)
|
||
|
||
本文由 [LCTT](https://github.com/LCTT/TranslateProject) 原创编译,[Linux中国](https://linux.cn/) 荣誉推出
|
||
|
||
[a]:https://twitter.com/howtoforgecom
|
||
[1]:https://www.howtoforge.com/images/how-to-design-and-add-your-own-font-on-linux-with-glyphr/big/pic_13.png
|
||
[2]:https://www.howtoforge.com/images/how-to-design-and-add-your-own-font-on-linux-with-glyphr/big/pic_12.png
|
||
[3]:https://www.howtoforge.com/images/how-to-design-and-add-your-own-font-on-linux-with-glyphr/big/pic_11.png
|
||
[4]:https://www.howtoforge.com/images/how-to-design-and-add-your-own-font-on-linux-with-glyphr/big/pic_10.png
|
||
[5]:https://www.howtoforge.com/images/how-to-design-and-add-your-own-font-on-linux-with-glyphr/big/pic_9.png
|
||
[6]:https://www.howtoforge.com/images/how-to-design-and-add-your-own-font-on-linux-with-glyphr/big/pic_8.png
|
||
[7]:https://www.howtoforge.com/images/how-to-design-and-add-your-own-font-on-linux-with-glyphr/big/pic_7.png
|
||
[8]:https://www.howtoforge.com/images/how-to-design-and-add-your-own-font-on-linux-with-glyphr/big/pic_6.png
|
||
[9]:https://www.howtoforge.com/images/how-to-design-and-add-your-own-font-on-linux-with-glyphr/big/pic_5.png
|
||
[10]:https://www.howtoforge.com/images/how-to-design-and-add-your-own-font-on-linux-with-glyphr/big/pic_4.png
|
||
[11]:https://www.howtoforge.com/images/how-to-design-and-add-your-own-font-on-linux-with-glyphr/big/pic_3.png
|
||
[12]:https://www.howtoforge.com/images/how-to-design-and-add-your-own-font-on-linux-with-glyphr/big/pic_2.png
|
||
[13]:https://www.howtoforge.com/images/how-to-design-and-add-your-own-font-on-linux-with-glyphr/big/pic_1.png
|
||
[14]:https://github.com/glyphr-studio/Glyphr-Studio-Desktop
|