56 KiB
BUILDING A FULL-TEXT SEARCH APP USING DOCKER AND ELASTICSEARCH
How does Wikipedia sort though 5+ million articles to find the most relevant one for your research?
How does Facebook find the friend who you're looking for (and whose name you've misspelled), across a userbase of 2+ billion people?
How does Google search the entire internet for webpages relevant to your vague, typo-filled search query?
In this tutorial, we'll walk through setting up our own full-text search application (of an admittedly lesser complexity than the systems in the questions above). Our example app will provide a UI and API to search the complete texts of 100 literary classics such as Peter Pan , Frankenstein , and Treasure Island .
You can preview a completed version of the tutorial app here - https://search.patricktriest.com
The source code for the application is 100% open-source and can be found at the GitHub repository here - https://github.com/triestpa/guttenberg-search
Adding fast, flexible full-text search to apps can be a challenge. Most mainstream databases, such as PostgreSQL and MongoDB, offer very basic text searching capabilities due to limitations on their existing query and index structures. In order to implement high quality full-text search, a separate datastore is often the best option. Elasticsearch is a leading open-source datastore that is optimized to perform incredibly flexible and fast full-text search.
We'll be using Docker to setup our project environment and dependencies. Docker is a containerization engine used by the likes of Uber, Spotify, ADP, and Paypal. A major advantage of building a containerized app is that the project setup is virtually the same on Windows, macOS, and Linux - which makes writing this tutorial quite a bit simpler for me. Don't worry if you've never used Docker, we'll go through the full project configuration further down.
We'll also be using Node.js (with the Koa framework), and Vue.js to build our search API and frontend web app respectively.
1 - WHAT IS ELASTICSEARCH?
Full-text search is a heavily requested feature in modern applications. Search can also be one of the most difficult features to implement competently - many popular websites have subpar search functionality that returns results slowly and has trouble finding non-exact matches. Often, this is due to limitations in the underlying database: most standard relational databases are limited to basic CONTAINS or LIKESQL queries, which provide only the most basic string matching functionality.
We'd like our search app to be :
-
Fast - Search results should be returned almost instantly, in order to provide a responsive user experience.
-
Flexible - We'll want to be able to modify how the search is performed, in order to optimize for different datasets and use cases.
-
Forgiving - If a search contains a typo, we'd still like to return relevant results for what the user might have been trying to search for.
-
Full-Text - We don't want to limit our search to specific matching keywords or tags - we want to search everything in our datastore (including large text fields) for a match.
In order to build a super-powered search feature, it’s often most ideal to use a datastore that is optimized for the task of full-text search. This is where Elasticsearchcomes into play; Elasticsearch is an open-source in-memory datastore written in Java and originally built on the Apache Lucene library.
Here are some examples of real-world Elasticsearch use cases from the official Elastic website.
-
Wikipedia uses Elasticsearch to provide full-text search with highlighted search snippets, and search-as-you-type and did-you-mean suggestions.
-
The Guardian uses Elasticsearch to combine visitor logs with social -network data to provide real-time feedback to its editors about the public’s response to new articles.
-
Stack Overflow combines full-text search with geolocation queries and uses more-like-this to find related questions and answers.
-
GitHub uses Elasticsearch to query 130 billion lines of code.
What makes Elasticsearch different from a "normal" database?
At its core, Elasticsearch is able to provide fast and flexible full-text search through the use of inverted indices .
An "index" is a data structure to allow for ultra-fast data query and retrieval operations in databases. Databases generally index entries by storing an association of fields with the matching table rows. By storing the index in a searchable data structure (often a B-Tree), databases can achieve sub-linear time on optimized queries (such as “Find the row with ID = 5”).
We can think of a database index like an old-school library card catalog - it tells you precisely where the entry that you're searching for is located, as long as you already know the title and author of the book. Database tables generally have multiple indices in order to speed up queries on specific fields (i.e. an index on the namecolumn would greatly speed up queries for rows with a specific name).
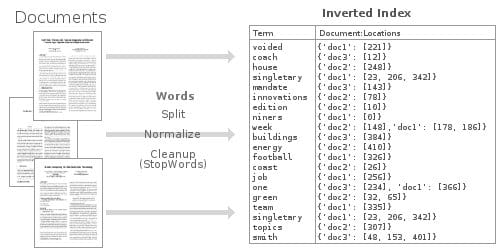
Inverted indexes work in a substantially different manner. The content of each row (or document) is split up, and each individual entry (in this case each word) points back to any documents that it was found within.
This inverted-index data structure allows us to very quickly find, say, all of the documents where “football” was mentioned. Through the use of a heavily optimized in-memory inverted index, Elasticsearch enables us to perform some very powerful and customizable full-text searches on our stored data.
2 - PROJECT SETUP
2.0 - Docker
We'll be using Docker to manage the environments and dependencies for this project. Docker is a containerization engine that allows applications to be run in isolated environments, unaffected by the host operating system and local development environment. Many web-scale companies run a majority of their server infrastructure in containers now, due to the increased flexibility and composability of containerized application components.
The advantage of using Docker for me, as the friendly author of this tutorial, is that the local environment setup is minimal and consistent across Windows, macOS, and Linux systems. Instead of going through divergent installation instructions for Node.js, Elasticsearch, and Nginx, we can instead just define these dependencies in Docker configuration files, and then run our app anywhere using this configuration. Furthermore, since each application component will run in it's own isolated container, there is much less potential for existing junk on our local machines to interfere, so "But it works on my machine!" types of scenarios will be much more rare when debugging issues.
2.1 - Install Docker & Docker-Compose
The only dependencies for this project are Docker and docker-compose, the later of which is an officially supported tool for defining multiple container configurations to compose into a single application stack.
Install Docker - https://docs.docker.com/engine/installation/ Install Docker Compose - https://docs.docker.com/compose/install/
2.2 - Setup Project Directories
Create a base directory (say guttenberg_search) for the project. To organize our project we'll work within two main subdirectories.
-
/public- Store files for the frontend Vue.js webapp. -
/server- Server-side Node.js source code
2.3 - Add Docker-Compose Config
Next, we'll create a docker-compose.yml file to define each container in our application stack.
-
gs-api- The Node.js container for the backend application logic. -
gs-frontend- An Ngnix container for serving the frontend webapp files. -
gs-search- An Elasticsearch container for storing and searching data.
version: '3'

services:
  api: # Node.js App
    container_name: gs-api
    build: .
    ports:
      - "3000:3000" # Expose API port
      - "9229:9229" # Expose Node process debug port (disable in production)
    environment: # Set ENV vars
     - NODE_ENV=local
     - ES_HOST=elasticsearch
     - PORT=3000
    volumes: # Attach local book data directory
      - ./books:/usr/src/app/books

  frontend: # Nginx Server For Frontend App
    container_name: gs-frontend
    image: nginx
    volumes: # Serve local "public" dir
      - ./public:/usr/share/nginx/html
    ports:
      - "8080:80" # Forward site to localhost:8080

  elasticsearch: # Elasticsearch Instance
    container_name: gs-search
    image: docker.elastic.co/elasticsearch/elasticsearch:6.1.1
    volumes: # Persist ES data in seperate "esdata" volume
      - esdata:/usr/share/elasticsearch/data
    environment:
      - bootstrap.memory_lock=true
      - "ES_JAVA_OPTS=-Xms512m -Xmx512m"
      - discovery.type=single-node
    ports: # Expose Elasticsearch ports
      - "9300:9300"
      - "9200:9200"

volumes: # Define seperate volume for Elasticsearch data
  esdata:
This file defines our entire application stack - no need to install Elasticsearch, Node, or Nginx on your local system. Each container is forwarding ports to the host system (localhost), in order for us to access and debug the Node API, Elasticsearch instance, and fronted web app from our host machine.
2.4 - Add Dockerfile
We are using official prebuilt images for Nginx and Elasticsearch, but we'll need to build our own image for the Node.js app.
Define a simple Dockerfile configuration in the application root directory.
# Use Node v8.9.0 LTS
FROM node:carbon

# Setup app working directory
WORKDIR /usr/src/app

# Copy package.json and package-lock.json
COPY package*.json ./

# Install app dependencies
RUN npm install

# Copy sourcecode
COPY . .

# Start app
CMD [ "npm", "start" ]
This Docker configuration extends the official Node.js image, copies our application source code, and installs the NPM dependencies within the container.
We'll also add a .dockerignore file to avoid copying unneeded files into the container.
node_modules/
npm-debug.log
books/
public/
Note that we're not copying the
node_modulesdirectory into our container - this is because we'll be runningnpm installfrom within the container build process. Attempting to copy thenode_modulesfrom the host system into a container can cause errors since some packages need to be specifically built for certain operating systems. For instance, installing thebcryptpackage on macOS and attempting to copy that module directly to an Ubuntu container will not work becausebcyrptrelies on a binary that needs to be built specifically for each operating system.
2.5 - Add Base Files
In order to test out the configuration, we'll need to add some placeholder files to the app directories.
Add this base HTML file at public/index.html
<html><body>Hello World From The Frontend Container</body></html>
Next, add the placeholder Node.js app file at server/app.js.
const Koa = require('koa')
const app = new Koa()

app.use(async (ctx, next) => {
  ctx.body = 'Hello World From the Backend Container'
})

const port = process.env.PORT || 3000

app.listen(port, err => {
  if (err) console.error(err)
  console.log(`App Listening on Port ${port}`)
})
Finally, add our package.json Node app configuration.
{
  "name": "guttenberg-search",
  "version": "0.0.1",
  "description": "Source code for Elasticsearch tutorial using 100 classic open source books.",
  "scripts": {
    "start": "node --inspect=0.0.0.0:9229 server/app.js"
  },
  "repository": {
    "type": "git",
    "url": "git+https://github.com/triestpa/guttenberg-search.git"
  },
  "author": "patrick.triest@gmail.com",
  "license": "MIT",
  "bugs": {
    "url": "https://github.com/triestpa/guttenberg-search/issues"
  },
  "homepage": "https://github.com/triestpa/guttenberg-search#readme",
  "dependencies": {
    "elasticsearch": "13.3.1",
    "joi": "13.0.1",
    "koa": "2.4.1",
    "koa-joi-validate": "0.5.1",
    "koa-router": "7.2.1"
  }
}
This file defines the application start command and the Node.js package dependencies.
Note - You don't have to run
npm install- the dependencies will be installed inside the container when it is built.
2.6 - Try it Out
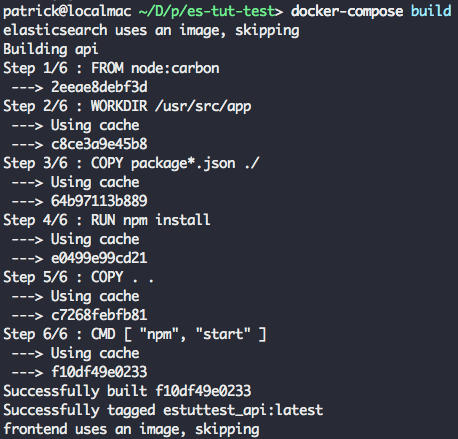
Everything is in place now to test out each component of the app. From the base directory, run docker-compose build, which will build our Node.js application container.
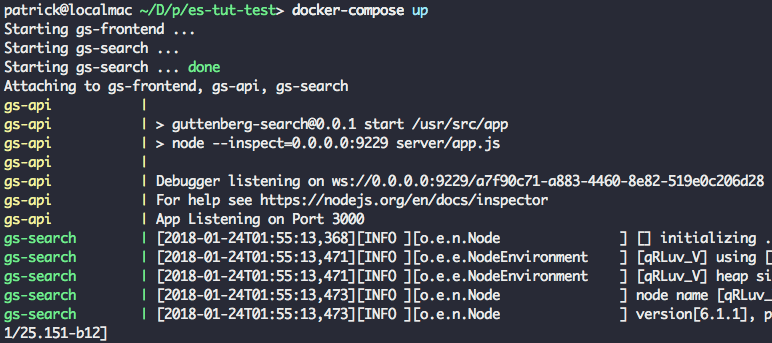
Next, run docker-compose up to launch our entire application stack.
This step might take a few minutes since Docker has to download the base images for each container. In subsequent runs, starting the app should be nearly instantaneous, since the required images will have already been downloaded.
Try visiting localhost:8080 in your browser - you should see a simple "Hello World" webpage.
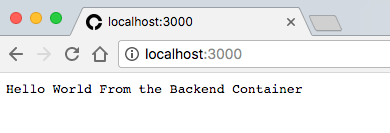
Visit localhost:3000 to verify that our Node server returns it's own "Hello World" message.
Finally, visit localhost:9200 to check that Elasticsearch is running. It should return information similar to this.
{
  "name" : "SLTcfpI",
  "cluster_name" : "docker-cluster",
  "cluster_uuid" : "iId8e0ZeS_mgh9ALlWQ7-w",
  "version" : {
    "number" : "6.1.1",
    "build_hash" : "bd92e7f",
    "build_date" : "2017-12-17T20:23:25.338Z",
    "build_snapshot" : false,
    "lucene_version" : "7.1.0",
    "minimum_wire_compatibility_version" : "5.6.0",
    "minimum_index_compatibility_version" : "5.0.0"
  },
  "tagline" : "You Know, for Search"
}
If all three URLs display data successfully, congrats! The entire containerized stack is running, so now we can move on to the fun part.
3 - CONNECT TO ELASTICSEARCH
The first thing that we'll need to do in our app is connect to our local Elasticsearch instance.
3.0 - Add ES Connection Module
Add the following Elasticsearch initialization code to a new file server/connection.js.
const elasticsearch = require('elasticsearch')

// Core ES variables for this project
const index = 'library'
const type = 'novel'
const port = 9200
const host = process.env.ES_HOST || 'localhost'
const client = new elasticsearch.Client({ host: { host, port } })

/** Check the ES connection status */
async function checkConnection () {
  let isConnected = false
  while (!isConnected) {
    console.log('Connecting to ES')
    try {
      const health = await client.cluster.health({})
      console.log(health)
      isConnected = true
    } catch (err) {
      console.log('Connection Failed, Retrying...', err)
    }
  }
}

checkConnection()
Let's rebuild our Node app now that we've made changes, using docker-compose build. Next, run docker-compose up -d to start the application stack as a background daemon process.
With the app started, run docker exec gs-api "node" "server/connection.js" on the command line in order to run our script within the container. You should see some system output similar to the following.
{ cluster_name: 'docker-cluster',
  status: 'yellow',
  timed_out: false,
  number_of_nodes: 1,
  number_of_data_nodes: 1,
  active_primary_shards: 1,
  active_shards: 1,
  relocating_shards: 0,
  initializing_shards: 0,
  unassigned_shards: 1,
  delayed_unassigned_shards: 0,
  number_of_pending_tasks: 0,
  number_of_in_flight_fetch: 0,
  task_max_waiting_in_queue_millis: 0,
  active_shards_percent_as_number: 50 }
Go ahead and remove the checkConnection() call at the bottom before moving on, since in our final app we'll be making that call from outside the connection module.
3.1 - Add Helper Function To Reset Index
In server/connection.js add the following function below checkConnection, in order to provide an easy way to reset our Elasticsearch index.
/** Clear the index, recreate it, and add mappings */
async function resetIndex (index) {
  if (await client.indices.exists({ index })) {
    await client.indices.delete({ index })
  }

  await client.indices.create({ index })
  await putBookMapping()
}
3.2 - Add Book Schema
Next, we'll want to add a "mapping" for the book data schema. Add the following function below resetIndex in server/connection.js.
/** Add book section schema mapping to ES */
async function putBookMapping () {
  const schema = {
    title: { type: 'keyword' },
    author: { type: 'keyword' },
    location: { type: 'integer' },
    text: { type: 'text' }
  }

  return client.indices.putMapping({ index, type, body: { properties: schema } })
}
Here we are defining a mapping for the book index. An Elasticsearch index is roughly analogous to a SQL table or a MongoDB collection. Adding a mapping allows us to specify each field and datatype for the stored documents. Elasticsearch is schema-less, so we don't technically need to add a mapping, but doing so will give us more control over how the data is handled.
For instance - we're assigning the keyword type to the "title" and "author" fields, and the text type to the "text" field. Doing so will cause the search engine to treat these string fields differently - During a search, the engine will search within the text field for potential matches, whereas keyword fields will be matched based on their full content. This might seem like a minor distinction, but it can have a huge impact on the behavior and speed of different searches.
Export the exposed properties and functions at the bottom of the file, so that they can be accessed by other modules in our app.
module.exports = {
  client, index, type, checkConnection, resetIndex
}
4 - LOAD THE RAW DATA
We'll be using data from Project Gutenberg - an online effort dedicated to providing free, digital copies of books within the public domain. For this project, we'll be populating our library with 100 classic books, including texts such as The Adventures of Sherlock Holmes , Treasure Island , The Count of Monte Cristo , Around the World in 80 Days , Romeo and Juliet , and The Odyssey .
4.1 - Download Book Files
I've zipped the 100 books into a file that you can download here - https://cdn.patricktriest.com/data/books.zip
Extract this file into a books/ directory in your project.
If you want, you can do this by using the following commands (requires wget and "The Unarchiver" CLI).
wget https://cdn.patricktriest.com/data/books.zip
unar books.zip
4.2 - Preview A Book
Try opening one of the book files, say 219-0.txt. You'll notice that it starts with an open access license, followed by some lines identifying the book title, author, release dates, language and character encoding.
Title: Heart of Darkness

Author: Joseph Conrad

Release Date: February 1995 [EBook #219]
Last Updated: September 7, 2016

Language: English

Character set encoding: UTF-8
After these lines comes *** START OF THIS PROJECT GUTENBERG EBOOK HEART OF DARKNESS ***, after which the book content actually starts.
If you scroll to the end of the book you'll see the matching message *** END OF THIS PROJECT GUTENBERG EBOOK HEART OF DARKNESS ***, which is followed by a much more detailed version of the book's license.
In the next steps, we'll programmatically parse the book metadata from this header and extract the book content from between the *** START OF and ***END OF place markers.
4.3 - Read Data Dir
Let's write a script to read the content of each book and to add that data to Elasticsearch. We'll define a new Javascript file server/load_data.js in order to perform these operations.
First, we'll obtain a list of every file within the books/ data directory.
Add the following content to server/load_data.js.
const fs = require('fs')
const path = require('path')
const esConnection = require('./connection')

/** Clear ES index, parse and index all files from the books directory */
async function readAndInsertBooks () {
  try {
    // Clear previous ES index
    await esConnection.resetIndex()

    // Read books directory
    let files = fs.readdirSync('./books').filter(file => file.slice(-4) === '.txt')
    console.log(`Found ${files.length} Files`)

    // Read each book file, and index each paragraph in elasticsearch
    for (let file of files) {
      console.log(`Reading File - ${file}`)
      const filePath = path.join('./books', file)
      const { title, author, paragraphs } = parseBookFile(filePath)
      await insertBookData(title, author, paragraphs)
    }
  } catch (err) {
    console.error(err)
  }
}

readAndInsertBooks()
We'll use a shortcut command to rebuild our Node.js app and update the running container.
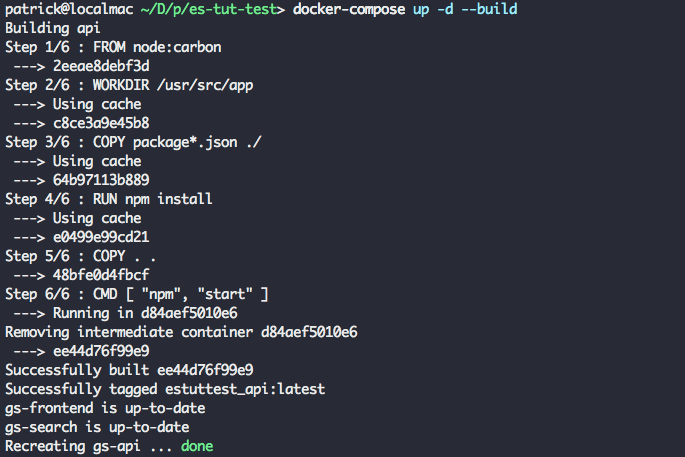
Run docker-compose up -d --build to update the application. This is a shortcut for running docker-compose build and docker-compose up -d.
Rundocker exec gs-api "node" "server/load_data.js" in order to run our load_data script within the container. You should see the Elasticsearch status output, followed by Found 100 Books.
After this, the script will exit due to an error because we're calling a helper function (parseBookFile) that we have not yet defined.
4.4 - Read Data File
Next, we'll read the metadata and content for each book.
Define a new function in server/load_data.js.
/** Read an individual book text file, and extract the title, author, and paragraphs */
function parseBookFile (filePath) {
  // Read text file
  const book = fs.readFileSync(filePath, 'utf8')

  // Find book title and author
  const title = book.match(/^Title:\s(.+)$/m)[1]
  const authorMatch = book.match(/^Author:\s(.+)$/m)
  const author = (!authorMatch || authorMatch[1].trim() === '') ? 'Unknown Author' : authorMatch[1]

  console.log(`Reading Book - ${title} By ${author}`)

  // Find Guttenberg metadata header and footer
  const startOfBookMatch = book.match(/^\*{3}\s*START OF (THIS|THE) PROJECT GUTENBERG EBOOK.+\*{3}$/m)
  const startOfBookIndex = startOfBookMatch.index + startOfBookMatch[0].length
  const endOfBookIndex = book.match(/^\*{3}\s*END OF (THIS|THE) PROJECT GUTENBERG EBOOK.+\*{3}$/m).index

  // Clean book text and split into array of paragraphs
  const paragraphs = book
    .slice(startOfBookIndex, endOfBookIndex) // Remove Guttenberg header and footer
    .split(/\n\s+\n/g) // Split each paragraph into it's own array entry
    .map(line => line.replace(/\r\n/g, ' ').trim()) // Remove paragraph line breaks and whitespace
    .map(line => line.replace(/_/g, '')) // Guttenberg uses "_" to signify italics.  We'll remove it, since it makes the raw text look messy.
    .filter((line) => (line && line.length !== '')) // Remove empty lines

  console.log(`Parsed ${paragraphs.length} Paragraphs\n`)
  return { title, author, paragraphs }
}
This function performs a few important tasks.
-
Read book text from the file system.
-
Use regular expressions (check out this post for a primer on using regex) to parse the book title and author.
-
Identify the start and end of the book content, by matching on the all-caps "Project Guttenberg" header and footer.
-
Extract the book text content.
-
Split each paragraph into its own array.
-
Clean up the text and remove blank lines.
As a return value, we'll form an object containing the book's title, author, and an array of paragraphs within the book.
Run docker-compose up -d --build and docker exec gs-api "node" "server/load_data.js" again, and you should see the same output as before, this time with three extra lines at the end of the output.
Success! Our script successfully parsed the title and author from the text file. The script will again end with an error since we still have to define one more helper function.
4.5 - Index Datafile in ES
As a final step, we'll bulk-upload each array of paragraphs into the Elasticsearch index.
Add a new insertBookData function to load_data.js.
/** Bulk index the book data in Elasticsearch */
async function insertBookData (title, author, paragraphs) {
  let bulkOps = [] // Array to store bulk operations

  // Add an index operation for each section in the book
  for (let i = 0; i < paragraphs.length; i++) {
    // Describe action
    bulkOps.push({ index: { _index: esConnection.index, _type: esConnection.type } })

    // Add document
    bulkOps.push({
      author,
      title,
      location: i,
      text: paragraphs[i]
    })

    if (i > 0 && i % 500 === 0) { // Do bulk insert in 500 paragraph batches
      await esConnection.client.bulk({ body: bulkOps })
      bulkOps = []
      console.log(`Indexed Paragraphs ${i - 499} - ${i}`)
    }
  }

  // Insert remainder of bulk ops array
  await esConnection.client.bulk({ body: bulkOps })
  console.log(`Indexed Paragraphs ${paragraphs.length - (bulkOps.length / 2)} - ${paragraphs.length}\n\n\n`)
}
This function will index each paragraph of the book, with author, title, and paragraph location metadata attached. We are inserting the paragraphs using a bulk operation, which is much faster than indexing each paragraph individually.
We're bulk indexing the paragraphs in batches, instead of inserting all of them at once. This was a last minute optimization which I added in order for the app to run on the low-ish memory (1.7 GB) host machine that serves
search.patricktriest.com. If you have a reasonable amount of RAM (4+ GB), you probably don't need to worry about batching each bulk upload,
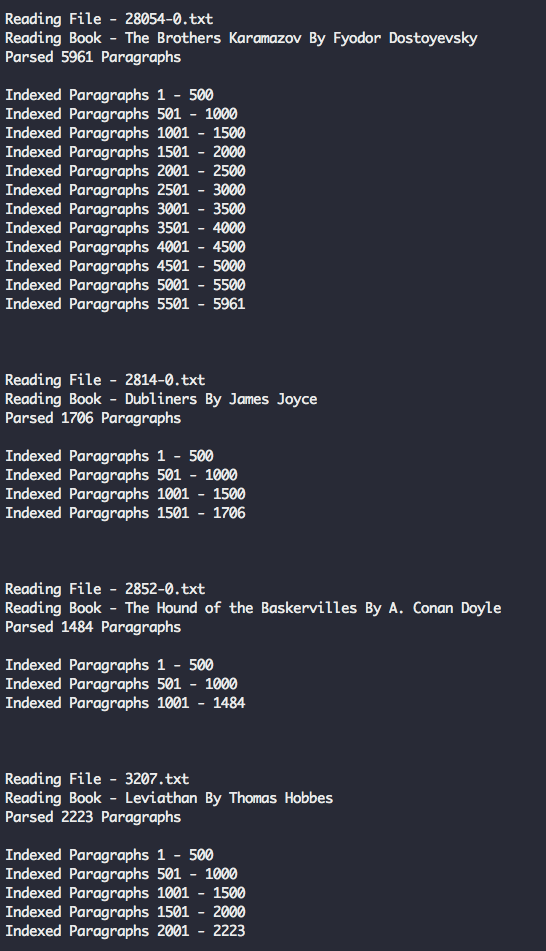
Run docker-compose up -d --build and docker exec gs-api "node" "server/load_data.js" one more time - you should now see a full output of 100 books being parsed and inserted in Elasticsearch. This might take a minute or so.
5 - SEARCH
Now that Elasticsearch has been populated with one hundred books (amounting to roughly 230,000 paragraphs), let's try out some search queries.
5.0 - Simple HTTP Query
First, let's just query Elasticsearch directly using it's HTTP API.
Visit this URL in your browser - http://localhost:9200/library/_search?q=text:Java&pretty
Here, we are performing a bare-bones full-text search to find the word "Java" within our library of books.
You should see a JSON response similar to the following.
{
  "took" : 11,
  "timed_out" : false,
  "_shards" : {
    "total" : 5,
    "successful" : 5,
    "skipped" : 0,
    "failed" : 0
  },
  "hits" : {
    "total" : 13,
    "max_score" : 14.259304,
    "hits" : [
      {
        "_index" : "library",
        "_type" : "novel",
        "_id" : "p_GwFWEBaZvLlaAUdQgV",
        "_score" : 14.259304,
        "_source" : {
          "author" : "Charles Darwin",
          "title" : "On the Origin of Species",
          "location" : 1080,
          "text" : "Java, plants of, 375."
        }
      },
      {
        "_index" : "library",
        "_type" : "novel",
        "_id" : "wfKwFWEBaZvLlaAUkjfk",
        "_score" : 10.186235,
        "_source" : {
          "author" : "Edgar Allan Poe",
          "title" : "The Works of Edgar Allan Poe",
          "location" : 827,
          "text" : "After many years spent in foreign travel, I sailed in the year 18-- , from the port of Batavia, in the rich and populous island of Java, on a voyage to the Archipelago of the Sunda islands. I went as passenger--having no other inducement than a kind of nervous restlessness which haunted me as a fiend."
        }
      },
      ...
    ]
  }
}
The Elasticseach HTTP interface is useful for testing that our data is inserted successfully, but exposing this API directly to the web app would be a huge security risk. The API exposes administrative functionality (such as directly adding and deleting documents), and should ideally not ever be exposed publicly. Instead, we'll write a simple Node.js API to receive requests from the client, and make the appropriate query (within our private local network) to Elasticsearch.
5.1 - Query Script
Let's now try querying Elasticsearch from our Node.js application.
Create a new file, server/search.js.
const { client, index, type } = require('./connection')

module.exports = {
  /** Query ES index for the provided term */
  queryTerm (term, offset = 0) {
    const body = {
      from: offset,
      query: { match: {
        text: {
          query: term,
          operator: 'and',
          fuzziness: 'auto'
        } } },
      highlight: { fields: { text: {} } }
    }

    return client.search({ index, type, body })
  }
}
Our search module defines a simple search function, which will perform a matchquery using the input term.
Here are query fields broken down -
-
from- Allows us to paginate the results. Each query returns 10 results by default, so specifyingfrom: 10would allow us to retrieve results 10-20. -
query- Where we specify the actual term that we are searching for. -
operator- We can modify the search behavior; in this case, we're using the "and" operator to prioritize results that contain all of the tokens (words) in the query. -
fuzziness- Adjusts tolerance for spelling mistakes,autodefaults tofuzziness: 2. A higher fuzziness will allow for more corrections in result hits. For instance,fuzziness: 1would allowPatriccto returnPatrickas a match. -
highlights- Returns an extra field with the result, containing HTML to display the exact text subset and terms that were matched with the query.
Feel free to play around with these parameters, and to customize the search query further by exploring the Elastic Full-Text Query DSL.
6 - API
Let's write a quick HTTP API in order to access our search functionality from a frontend app.
6.0 - API Server
Replace our existing server/app.js file with the following contents.
const Koa = require('koa')
const Router = require('koa-router')
const joi = require('joi')
const validate = require('koa-joi-validate')
const search = require('./search')

const app = new Koa()
const router = new Router()

// Log each request to the console
app.use(async (ctx, next) => {
  const start = Date.now()
  await next()
  const ms = Date.now() - start
  console.log(`${ctx.method} ${ctx.url} - ${ms}`)
})

// Log percolated errors to the console
app.on('error', err => {
  console.error('Server Error', err)
})

// Set permissive CORS header
app.use(async (ctx, next) => {
  ctx.set('Access-Control-Allow-Origin', '*')
  return next()
})

// ADD ENDPOINTS HERE

const port = process.env.PORT || 3000

app
  .use(router.routes())
  .use(router.allowedMethods())
  .listen(port, err => {
    if (err) throw err
    console.log(`App Listening on Port ${port}`)
  })
This code will import our server dependencies and set up simple logging and error handling for a Koa.js Node API server.
6.1 - Link endpoint with queries
Next, we'll add an endpoint to our server in order to expose our Elasticsearch query function.
Insert the following code below the // ADD ENDPOINTS HERE comment in server/app.js.
/**
 * GET /search
 * Search for a term in the library
 */
router.get('/search', async (ctx, next) => {
    const { term, offset } = ctx.request.query
    ctx.body = await search.queryTerm(term, offset)
  }
)
Restart the app using docker-compose up -d --build. In your browser, try calling the search endpoint. For example, this request would search the entire library for passages mentioning "Java" - http://localhost:3000/search?term=java
The result will look quite similar to the response from earlier when we called the Elasticsearch HTTP interface directly.
{
    "took": 242,
    "timed_out": false,
    "_shards": {
        "total": 5,
        "successful": 5,
        "skipped": 0,
        "failed": 0
    },
    "hits": {
        "total": 93,
        "max_score": 13.356944,
        "hits": [{
            "_index": "library",
            "_type": "novel",
            "_id": "eHYHJmEBpQg9B4622421",
            "_score": 13.356944,
            "_source": {
                "author": "Charles Darwin",
                "title": "On the Origin of Species",
                "location": 1080,
                "text": "Java, plants of, 375."
            },
            "highlight": {
                "text": ["<em>Java</em>, plants of, 375."]
            }
        }, {
            "_index": "library",
            "_type": "novel",
            "_id": "2HUHJmEBpQg9B462xdNg",
            "_score": 9.030668,
            "_source": {
                "author": "Unknown Author",
                "title": "The King James Bible",
                "location": 186,
                "text": "10:4 And the sons of Javan; Elishah, and Tarshish, Kittim, and Dodanim."
            },
            "highlight": {
                "text": ["10:4 And the sons of <em>Javan</em>; Elishah, and Tarshish, Kittim, and Dodanim."]
            }
        }
        ...
      ]
   }
}
6.2 - Input validation
This endpoint is still brittle - we are not doing any checks on the request parameters, so invalid or missing values would result in a server error.
We'll add some middleware to the endpoint in order to validate input parameters using Joi and the Koa-Joi-Validate library.
/**
 * GET /search
 * Search for a term in the library
 * Query Params -
 * term: string under 60 characters
 * offset: positive integer
 */
router.get('/search',
  validate({
    query: {
      term: joi.string().max(60).required(),
      offset: joi.number().integer().min(0).default(0)
    }
  }),
  async (ctx, next) => {
    const { term, offset } = ctx.request.query
    ctx.body = await search.queryTerm(term, offset)
  }
)
Now, if you restart the server and make a request with a missing term(http://localhost:3000/search), you will get back an HTTP 400 error with a relevant message, such as Invalid URL Query - child "term" fails because ["term" is required].
To view live logs from the Node app, you can run docker-compose logs -f api.
7 - FRONT-END APPLICATION
Now that our /search endpoint is in place, let's wire up a simple web app to test out the API.
7.0 - Vue.js App
We'll be using Vue.js to coordinate our frontend.
Add a new file, /public/app.js, to hold our Vue.js application code.
const vm = new Vue ({
  el: '#vue-instance',
  data () {
    return {
      baseUrl: 'http://localhost:3000', // API url
      searchTerm: 'Hello World', // Default search term
      searchDebounce: null, // Timeout for search bar debounce
      searchResults: [], // Displayed search results
      numHits: null, // Total search results found
      searchOffset: 0, // Search result pagination offset

      selectedParagraph: null, // Selected paragraph object
      bookOffset: 0, // Offset for book paragraphs being displayed
      paragraphs: [] // Paragraphs being displayed in book preview window
    }
  },
  async created () {
    this.searchResults = await this.search() // Search for default term
  },
  methods: {
    /** Debounce search input by 100 ms */
    onSearchInput () {
      clearTimeout(this.searchDebounce)
      this.searchDebounce = setTimeout(async () => {
        this.searchOffset = 0
        this.searchResults = await this.search()
      }, 100)
    },
    /** Call API to search for inputted term */
    async search () {
      const response = await axios.get(`${this.baseUrl}/search`, { params: { term: this.searchTerm, offset: this.searchOffset } })
      this.numHits = response.data.hits.total
      return response.data.hits.hits
    },
    /** Get next page of search results */
    async nextResultsPage () {
      if (this.numHits > 10) {
        this.searchOffset += 10
        if (this.searchOffset + 10 > this.numHits) { this.searchOffset = this.numHits - 10}
        this.searchResults = await this.search()
        document.documentElement.scrollTop = 0
      }
    },
    /** Get previous page of search results */
    async prevResultsPage () {
      this.searchOffset -= 10
      if (this.searchOffset < 0) { this.searchOffset = 0 }
      this.searchResults = await this.search()
      document.documentElement.scrollTop = 0
    }
  }
})
The app is pretty simple - we're just defining some shared data properties, and adding methods to retrieve and paginate through search results. The search input is debounced by 100ms, to prevent the API from being called with every keystroke.
Explaining how Vue.js works is outside the scope of this tutorial, but this probably won't look too crazy if you've used Angular or React. If you're completely unfamiliar with Vue, and if you want something quick to get started with, I would recommend the official quick-start guide - https://vuejs.org/v2/guide/
7.1 - HTML
Replace our placeholder /public/index.html file with the following contents, in order to load our Vue.js app and to layout a basic search interface.
<!DOCTYPE html>
<html lang="en">
<head>
  <meta charset="utf-8">
  <title>Elastic Library</title>
  <meta name="description" content="Literary Classic Search Engine.">
  <meta name="viewport" content="width=device-width, initial-scale=1, maximum-scale=1, user-scalable=no">
  <link href="https://cdnjs.cloudflare.com/ajax/libs/normalize/7.0.0/normalize.min.css" rel="stylesheet" type="text/css" />
  <link href="https://cdn.muicss.com/mui-0.9.20/css/mui.min.css" rel="stylesheet" type="text/css" />
  <link href="https://fonts.googleapis.com/css?family=EB+Garamond:400,700|Open+Sans" rel="stylesheet">
  <link href="styles.css" rel="stylesheet" />
</head>
<body>
<div class="app-container" id="vue-instance">
    <!-- Search Bar Header -->
    <div class="mui-panel">
      <div class="mui-textfield">
        <input v-model="searchTerm" type="text" v-on:keyup="onSearchInput()">
        <label>Search</label>
      </div>
    </div>

    <!-- Search Metadata Card -->
    <div class="mui-panel">
      <div class="mui--text-headline">{{ numHits }} Hits</div>
      <div class="mui--text-subhead">Displaying Results {{ searchOffset }} - {{ searchOffset + 9 }}</div>
    </div>

    <!-- Top Pagination Card -->
    <div class="mui-panel pagination-panel">
        <button class="mui-btn mui-btn--flat" v-on:click="prevResultsPage()">Prev Page</button>
        <button class="mui-btn mui-btn--flat" v-on:click="nextResultsPage()">Next Page</button>
    </div>

    <!-- Search Results Card List -->
    <div class="search-results" ref="searchResults">
      <div class="mui-panel" v-for="hit in searchResults" v-on:click="showBookModal(hit)">
        <div class="mui--text-title" v-html="hit.highlight.text[0]"></div>
        <div class="mui-divider"></div>
        <div class="mui--text-subhead">{{ hit._source.title }} - {{ hit._source.author }}</div>
        <div class="mui--text-body2">Location {{ hit._source.location }}</div>
      </div>
    </div>

    <!-- Bottom Pagination Card -->
    <div class="mui-panel pagination-panel">
        <button class="mui-btn mui-btn--flat" v-on:click="prevResultsPage()">Prev Page</button>
        <button class="mui-btn mui-btn--flat" v-on:click="nextResultsPage()">Next Page</button>
    </div>

    <!-- INSERT BOOK MODAL HERE -->
</div>
<script src="https://cdn.muicss.com/mui-0.9.28/js/mui.min.js"></script>
<script src="https://cdnjs.cloudflare.com/ajax/libs/vue/2.5.3/vue.min.js"></script>
<script src="https://cdnjs.cloudflare.com/ajax/libs/axios/0.17.0/axios.min.js"></script>
<script src="app.js"></script>
</body>
</html>
7.2 - CSS
Add a new file, /public/styles.css, with some custom UI styling.
body { font-family: 'EB Garamond', serif; }

.mui-textfield > input, .mui-btn, .mui--text-subhead, .mui-panel > .mui--text-headline {
  font-family: 'Open Sans', sans-serif;
}

.all-caps { text-transform: uppercase; }
.app-container { padding: 16px; }
.search-results em { font-weight: bold; }
.book-modal > button { width: 100%; }
.search-results .mui-divider { margin: 14px 0; }

.search-results {
  display: flex;
  flex-direction: row;
  flex-wrap: wrap;
  justify-content: space-around;
}

.search-results > div {
  flex-basis: 45%;
  box-sizing: border-box;
  cursor: pointer;
}

@media (max-width: 600px) {
  .search-results > div { flex-basis: 100%; }
}

.paragraphs-container {
  max-width: 800px;
  margin: 0 auto;
  margin-bottom: 48px;
}

.paragraphs-container .mui--text-body1, .paragraphs-container .mui--text-body2 {
  font-size: 1.8rem;
  line-height: 35px;
}

.book-modal {
  width: 100%;
  height: 100%;
  padding: 40px 10%;
  box-sizing: border-box;
  margin: 0 auto;
  background-color: white;
  overflow-y: scroll;
  position: fixed;
  top: 0;
  left: 0;
}

.pagination-panel {
  display: flex;
  justify-content: space-between;
}

.title-row {
  display: flex;
  justify-content: space-between;
  align-items: flex-end;
}

@media (max-width: 600px) {
  .title-row{
    flex-direction: column;
    text-align: center;
    align-items: center
  }
}

.locations-label {
  text-align: center;
  margin: 8px;
}

.modal-footer {
  position: fixed;
  bottom: 0;
  left: 0;
  width: 100%;
  display: flex;
  justify-content: space-around;
  background: white;
}
7.3 - Try it out
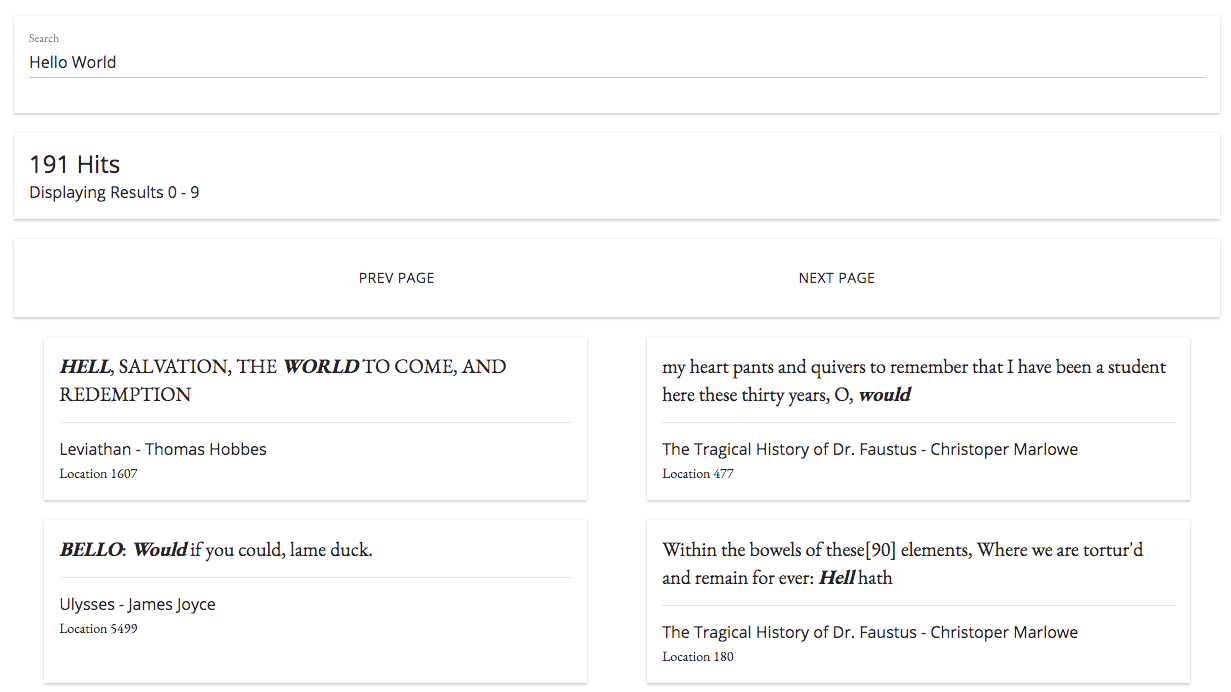
Open localhost:8080 in your web browser, you should see a simple search interface with paginated results. Try typing in the top search bar to find matches from different terms.
You do not have to re-run the
docker-compose upcommand for the changes to take effect. The localpublicdirectory is mounted to our Nginx fileserver container, so frontend changes on the local system will be automatically reflected in the containerized app.
If you try clicking on any result, nothing happens - we still have one more feature to add to the app.
8 - PAGE PREVIEWS
It would be nice to be able to click on each search result and view it in the context of the book that it's from.
8.0 - Add Elasticsearch Query
First, we'll need to define a simple query to get a range of paragraphs from a given book.
Add the following function to the module.exports block in server/search.js.
/** Get the specified range of paragraphs from a book */
getParagraphs (bookTitle, startLocation, endLocation) {
  const filter = [
    { term: { title: bookTitle } },
    { range: { location: { gte: startLocation, lte: endLocation } } }
  ]

  const body = {
    size: endLocation - startLocation,
    sort: { location: 'asc' },
    query: { bool: { filter } }
  }

  return client.search({ index, type, body })
}
This new function will return an ordered array of paragraphs between the start and end locations of a given book.
8.1 - Add API Endpoint
Now, let's link this function to an API endpoint.
Add the following to server/app.js, below the original /search endpoint.
/**
 * GET /paragraphs
 * Get a range of paragraphs from the specified book
 * Query Params -
 * bookTitle: string under 256 characters
 * start: positive integer
 * end: positive integer greater than start
 */
router.get('/paragraphs',
  validate({
    query: {
      bookTitle: joi.string().max(256).required(),
      start: joi.number().integer().min(0).default(0),
      end: joi.number().integer().greater(joi.ref('start')).default(10)
    }
  }),
  async (ctx, next) => {
    const { bookTitle, start, end } = ctx.request.query
    ctx.body = await search.getParagraphs(bookTitle, start, end)
  }
)
8.2 - Add UI functionality
Now that our new endpoint is in place, let's add some frontend functionality to query and display full pages from the book.
Add the following functions to the methods block of /public/app.js.
    /** Call the API to get current page of paragraphs */
    async getParagraphs (bookTitle, offset) {
      try {
        this.bookOffset = offset
        const start = this.bookOffset
        const end = this.bookOffset + 10
        const response = await axios.get(`${this.baseUrl}/paragraphs`, { params: { bookTitle, start, end } })
        return response.data.hits.hits
      } catch (err) {
        console.error(err)
      }
    },
    /** Get next page (next 10 paragraphs) of selected book */
    async nextBookPage () {
      this.$refs.bookModal.scrollTop = 0
      this.paragraphs = await this.getParagraphs(this.selectedParagraph._source.title, this.bookOffset + 10)
    },
    /** Get previous page (previous 10 paragraphs) of selected book */
    async prevBookPage () {
      this.$refs.bookModal.scrollTop = 0
      this.paragraphs = await this.getParagraphs(this.selectedParagraph._source.title, this.bookOffset - 10)
    },
    /** Display paragraphs from selected book in modal window */
    async showBookModal (searchHit) {
      try {
        document.body.style.overflow = 'hidden'
        this.selectedParagraph = searchHit
        this.paragraphs = await this.getParagraphs(searchHit._source.title, searchHit._source.location - 5)
      } catch (err) {
        console.error(err)
      }
    },
    /** Close the book detail modal */
    closeBookModal () {
      document.body.style.overflow = 'auto'
      this.selectedParagraph = null
    }
These five functions provide the logic for downloading and paginating through pages (ten paragraphs each) in a book.
Now we just need to add a UI to display the book pages. Add this markup below the <!-- INSERT BOOK MODAL HERE --> comment in /public/index.html.
    <!-- Book Paragraphs Modal Window -->
    <div v-if="selectedParagraph" ref="bookModal" class="book-modal">
      <div class="paragraphs-container">
        <!-- Book Section Metadata -->
        <div class="title-row">
          <div class="mui--text-display2 all-caps">{{ selectedParagraph._source.title }}</div>
          <div class="mui--text-display1">{{ selectedParagraph._source.author }}</div>
        </div>
        <br>
        <div class="mui-divider"></div>
        <div class="mui--text-subhead locations-label">Locations {{ bookOffset - 5 }} to {{ bookOffset + 5 }}</div>
        <div class="mui-divider"></div>
        <br>

        <!-- Book Paragraphs -->
        <div v-for="paragraph in paragraphs">
          <div v-if="paragraph._source.location === selectedParagraph._source.location" class="mui--text-body2">
            <strong>{{ paragraph._source.text }}</strong>
          </div>
          <div v-else class="mui--text-body1">
            {{ paragraph._source.text }}
          </div>
          <br>
        </div>
      </div>

      <!-- Book Pagination Footer -->
      <div class="modal-footer">
        <button class="mui-btn mui-btn--flat" v-on:click="prevBookPage()">Prev Page</button>
        <button class="mui-btn mui-btn--flat" v-on:click="closeBookModal()">Close</button>
        <button class="mui-btn mui-btn--flat" v-on:click="nextBookPage()">Next Page</button>
      </div>
    </div>
Restart the app server (docker-compose up -d --build) again and open up localhost:8080. When you click on a search result, you are now able to view the surrounding paragraphs. You can now even read the rest of the book to completion if you're entertained by what you find.
Congrats, you've completed the tutorial application!
Feel free to compare your local result against the completed sample hosted here - https://search.patricktriest.com/
9 - DISADVANTAGES OF ELASTICSEARCH
9.0 - Resource Hog
Elasticsearch is computationally demanding. The official recommendation is to run ES on a machine with 64 GB of RAM, and they strongly discourage running it on anything with under 8 GB of RAM. Elasticsearch is an in-memory datastore, which allows it to return results extremely quickly, but also results in a very significant system memory footprint. In production, it is strongly recommended to run multiple Elasticsearch nodes in a cluster to allow for high server availability, automatic sharding, and data redundancy in case of a node failure.
I've got our tutorial application running on a $15/month GCP compute instance (at search.patricktriest.com) with 1.7 GB of RAM, and it just barely is able to run the Elasticsearch node; sometimes the entire machine freezes up during the initial data-loading step. Elasticsearch is, in my experience, much more of a resource hog than more traditional databases such as PostgreSQL and MongoDB, and can be significantly more expensive to host as a result.
9.1 - Syncing with Databases
In most applications, storing all of the data in Elasticsearch is not an ideal option. It is possible to use ES as the primary transactional database for an app, but this is generally not recommended due to the lack of ACID compliance in Elasticsearch, which can lead to lost write operations when ingesting data at scale. In many cases, ES serves a more specialized role, such as powering the text searching features of the app. This specialized use requires that some of the data from the primary database is replicated to the Elasticsearch instance.
For instance, let's imagine that we're storing our users in a PostgreSQL table, but using Elasticsearch to power our user-search functionality. If a user, "Albert", decides to change his name to "Al", we'll need this change to be reflected in both our primary PostgreSQL database and in our auxiliary Elasticsearch cluster.
This can be a tricky integration to get right, and the best answer will depend on your existing stack. There are a multitude of open-source options available, from a process to watch a MongoDB operation log and automatically sync detected changes to ES, to a PostgresSQL plugin to create a custom PSQL-based index that communicates automatically with Elasticsearch.
If none of the available pre-built options work, you could always just add some hooks into your server code to update the Elasticsearch index manually based on database changes. I would consider this final option to be a last resort, since keeping ES in sync using custom business logic can be complex, and is likely to introduce numerous bugs to the application.
The need to sync Elasticsearch with a primary database is more of an architectural complexity than it is a specific weakness of ES, but it's certainly worth keeping in mind when considering the tradeoffs of adding a dedicated search engine to your app.
CONCLUSION
Full-text search is one of the most important features in many modern applications - and is one of the most difficult to implement well. Elasticsearch is a fantastic option for adding fast and customizable text search to your application, but there are alternatives. Apache Solr is a similar open source search platform that is built on Apache Lucene - the same library at the core of Elasticsearch. Algolia is a search-as-a-service web platform which is growing quickly in popularity and is likely to be easier to get started with for beginners (but as a tradeoff is less customizable and can get quite expensive).
"Search-bar" style features are far from the only use-case for Elasticsearch. ES is also a very common tool for log storage and analysis, commonly used in an ELK (Elasticsearch, Logstash, Kibana) stack configuration. The flexible full-text search allowed by Elasticsearch can also be very useful for a wide variety of data science tasks - such as correcting/standardizing the spellings of entities within a dataset or searching a large text dataset for similar phrases.
Here are some ideas for your own projects.
-
Add more of your favorite books to our tutorial app and create your own private library search engine.
-
Create an academic plagiarism detection engine by indexing papers from Google Scholar.
-
Build a spell checking application by indexing every word in the dictionary to Elasticsearch.
-
Build your own Google-competitor internet search engine by loading the Common Crawl Corpus into Elasticsearch (caution - with over 5 billion pages, this can be a very expensive dataset play with).
-
Use Elasticsearch for journalism: search for specific names and terms in recent large-scale document leaks such as the Panama Papers and Paradise Papers.
The source code for this tutorial application is 100% open-source and can be found at the GitHub repository here - https://github.com/triestpa/guttenberg-search
I hope you enjoyed the tutorial! Please feel free to post any thoughts, questions, or criticisms in the comments below.
作者简介:
Full-stack engineer, data enthusiast, insatiable learner, obsessive builder. You can find me wandering on a mountain trail, pretending not to be lost.
via: https://blog.patricktriest.com/text-search-docker-elasticsearch/
作者:Patrick Triest 译者:译者ID 校对:校对者ID
