6.2 KiB
LAMP Stack Installation Guide on Ubuntu Server 16.04 LTS
LAMP stack is a collection of free and open source softwares like Linux, Web Server (Apache), Database server (MySQL / MariaDB) and PHP (Scripting Language). LAMP is the platform which is required to install and build dynamic web sites and application like WordPress, Joomla, OpenCart and Drupal.
In this article i will describe how to install LAMP on Ubuntu Server 16.04 LTS, As We know that Ubuntu is a Linux based Operating system, so it provides the first component of LAMP and i am assuming Ubuntu Server 16.04 is already installed on your system.
Installation of Web Server (Apache2) :
In Ubuntu Linux Web server comes with the name Apache2, Use the beneath apt command to install it.
linuxtechi@ubuntu:~$ sudo apt update
linuxtechi@ubuntu:~$ sudo apt install apache2 -y
When Apache2 package is installed then its service is automatically started and enabled across the reboot, In case it is not started and enabled, use the following command :
linuxtechi@ubuntu:~$ sudo systemctl start apache2.service
linuxtechi@ubuntu:~$ sudo systemctl enable apache2.service
linuxtechi@ubuntu:~$ sudo systemctl status apache2.service
If Ubuntu firewall (ufw) is active, then allow the Web Server ports (80 and 443) in firewall using below commands.
linuxtechi@ubuntu:~$ sudo ufw status
Status: active
linuxtechi@ubuntu:~$ sudo ufw allow in 'Apache Full'
Rule added
Rule added (v6)
linuxtechi@ubuntu:~$
Access Web Server now :
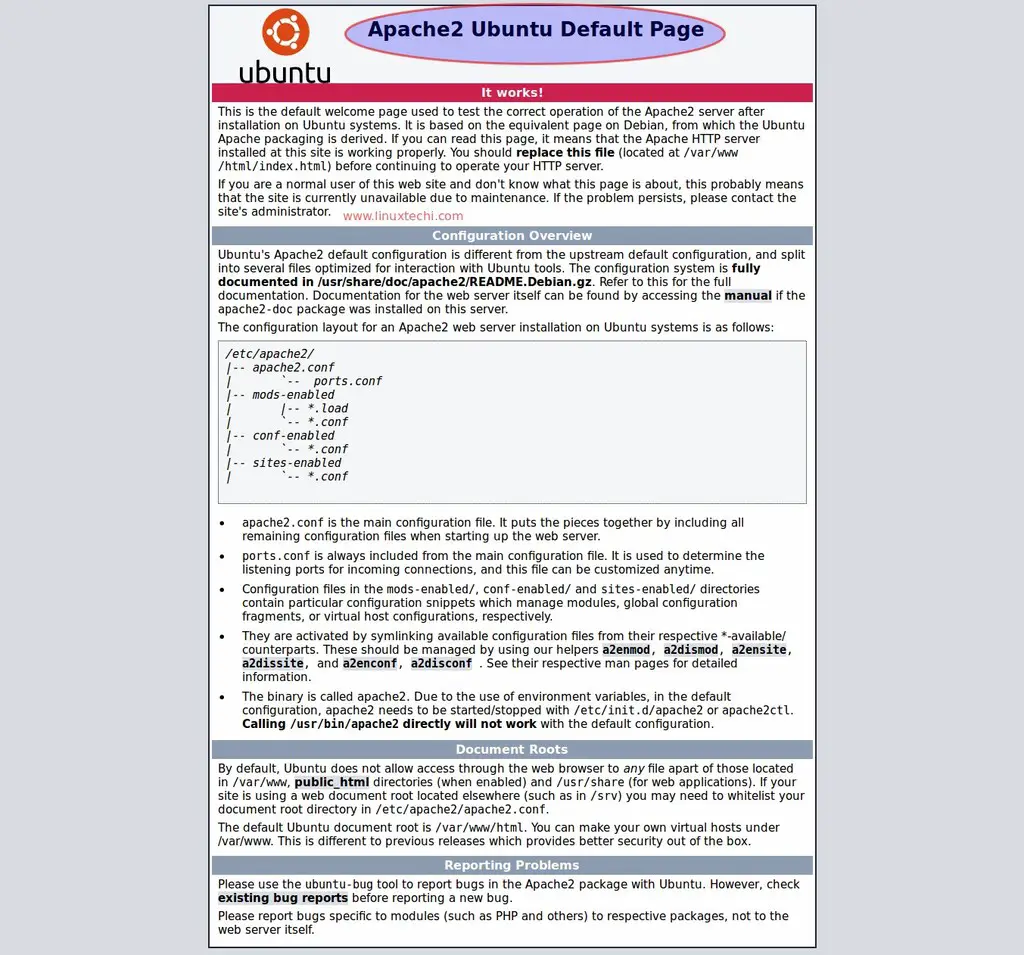
Open the Web browser and type the IP Address or Host name of your server (http://IP_Address_OR_Host_Name), In my Case my server IP is ‘192.168.1.13’
Installation of Data Base Server (MySQL Server 5.7) :
MySQL and MariaDB are the database servers in Ubuntu 16.04. MySQL Server and MariaDB Server’s packages are available in the default repositories and we can install either of the database. Run the following apt command to install MySQL Server from terminal.
linuxtechi@ubuntu:~$ sudo apt install mysql-server mysql-client
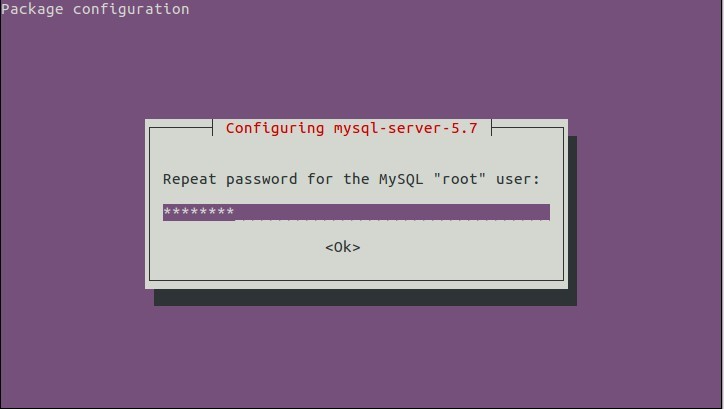
During the installation, it will prompt us to set the root password of mysql server.
Confirm root password and click on ‘OK’
Installation of MySQL Server is completed Now. MySQL Service will be started and enabled automatically.We can verify the MySQL Server’s service using below systemcl command :
linuxtechi@ubuntu:~$ sudo systemctl status mysql.service
Installation of MariaDB Server :
Use the beneath command to install MariaDB Server 10.0 from the terminal.
linuxtechi@ubuntu:~$ sudo apt install mariadb-server
Run the following command to set root password of mariadb and disable other options like disable remote login.
linuxtechi@ubuntu:~$ sudo mysql_secure_installation
Installation of PHP ( Scripting Language ) :
PHP 7.0 is available in the Ubuntu repositories. Execute the beneath command from the terminal to install PHP 7 :
linuxtechi@ubuntu:~$ sudo apt install php7.0-mysql php7.0-curl php7.0-json php7.0-cgi php7.0 libapache2-mod-php7.0
Create a sample php page and place it in apache document root (/var/ww/html)
linuxtechi@ubuntu:~$ vi samplepage.php
<?php
phpinfo();
?>
Save and exit the file.
linuxtechi@ubuntu:~$ sudo mv samplepage.php /var/www/html/
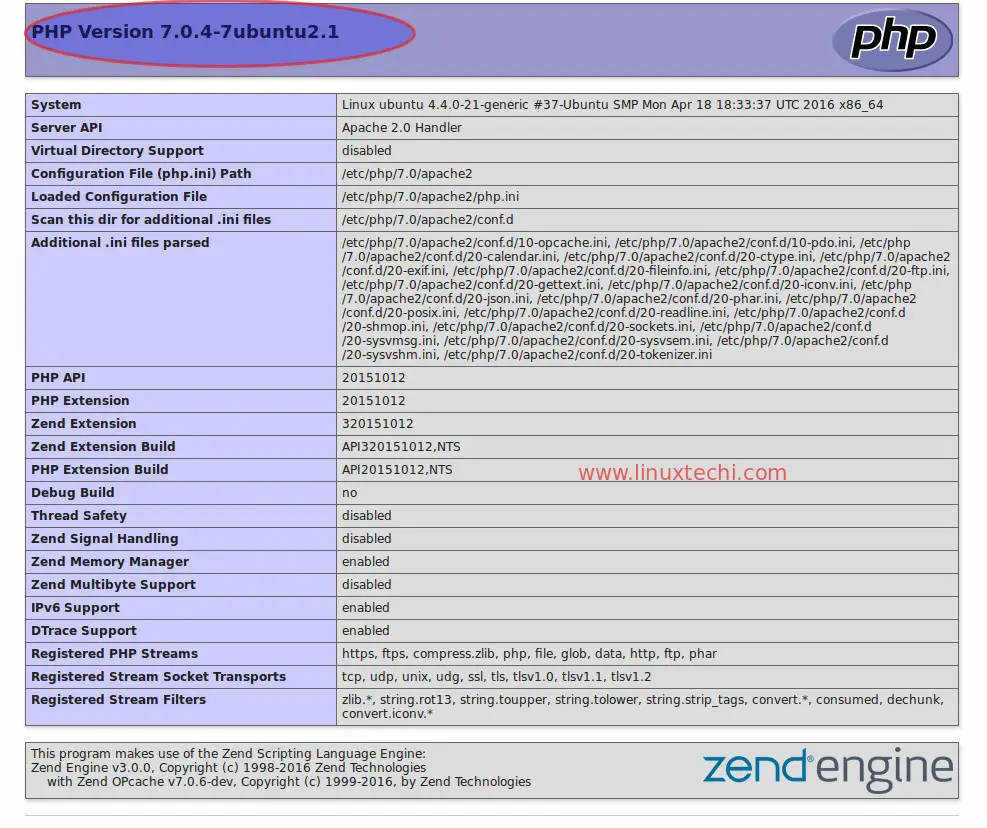
Now Access the sample PHP page from the Web Browser, type : “http://<Server_IP>/samplepage.php” , You should get the page like below.
Above Page shows that our PHP installation is completed successfully.
Installation of phpMyAdmin :
phpMyAdmin allows us to perform all the database related administrative and other DB operation task from its web interface. Its package is already listed in the Ubuntu server repositories.
Use the below commands to Install phpMyAdmin on Ubuntu server 16.04 LTS.
linuxtechi@ubuntu:~$ sudo apt install php-mbstring php7.0-mbstring php-gettext
linuxtechi@ubuntu:~$ sudo systemctl restart apache2.service
linuxtechi@ubuntu:~$ sudo apt install phpmyadmin
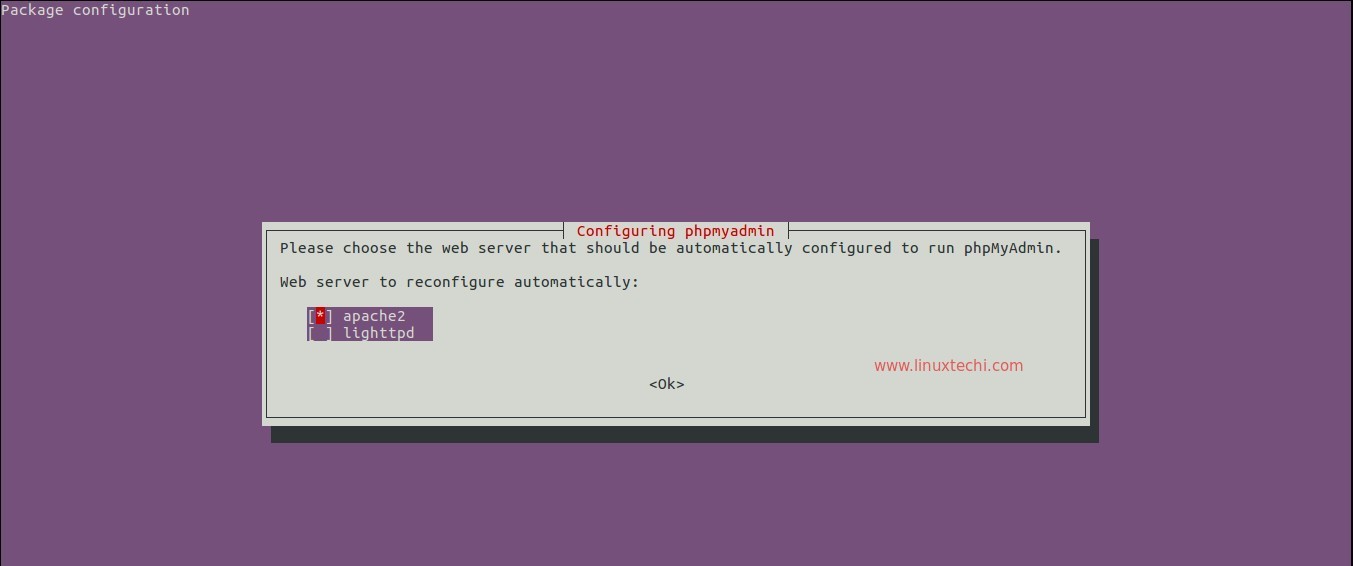
During its installation it will prompt us to choose the Web server to be configured for phpMyAdmin.
Select Apache2 and Click on OK.
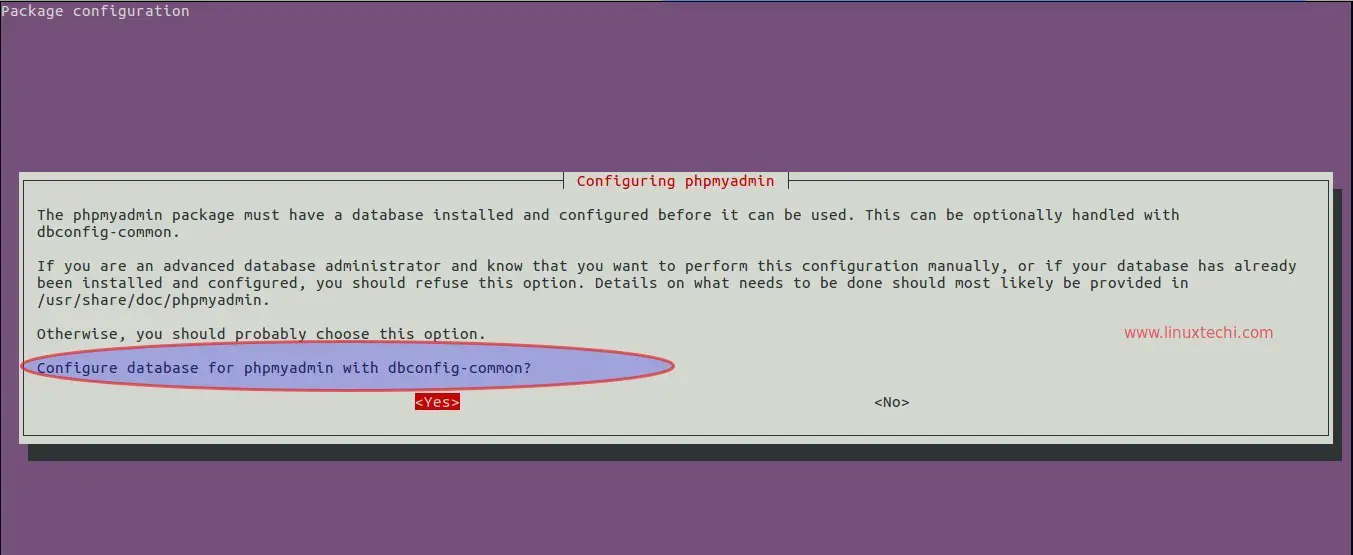
Click on ‘Yes’ to Configure database for phpMyAdmin.
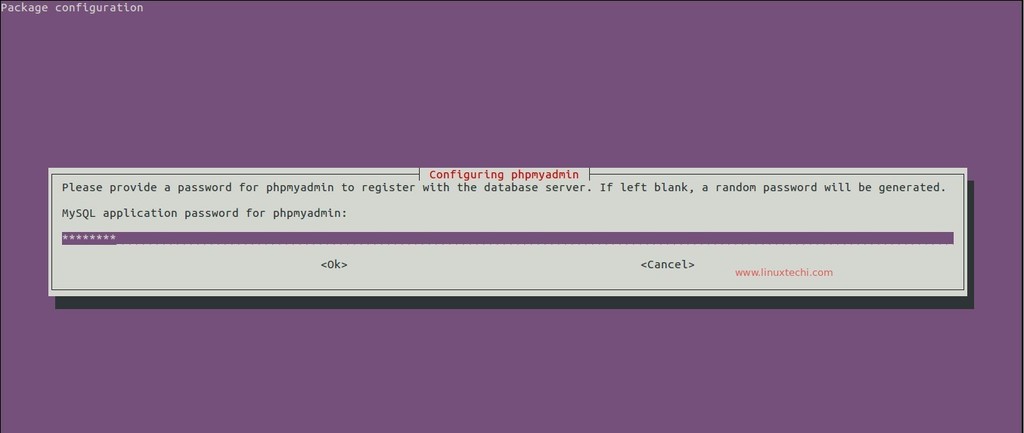
Specify the password for phpMyAdmin to register with Database Server.
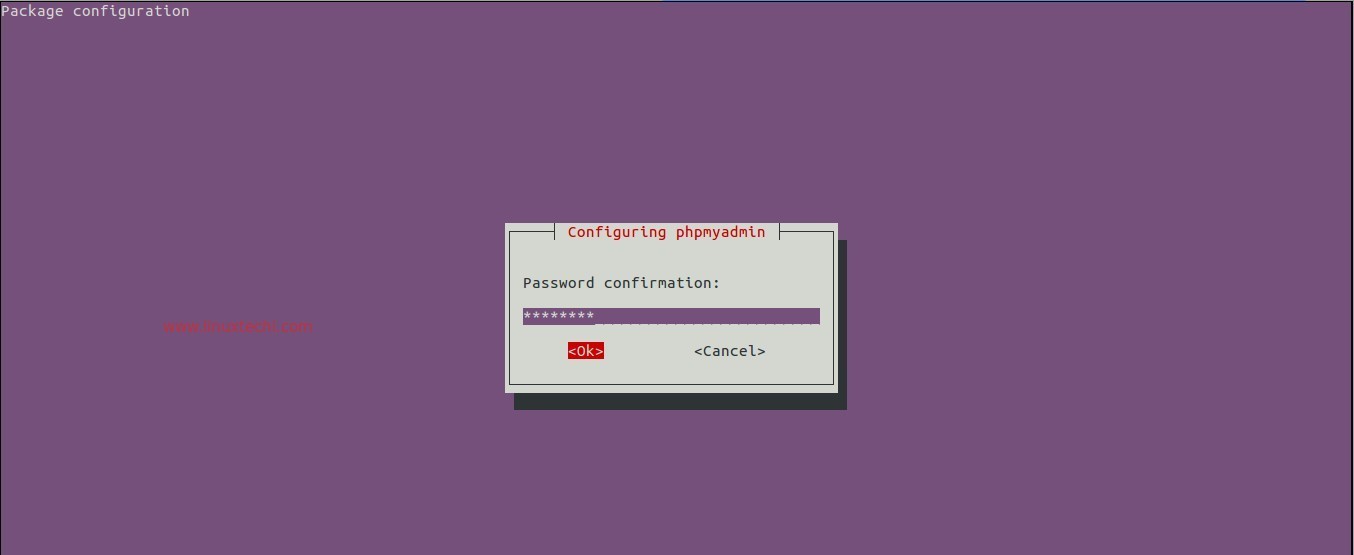
Confirm the password for phpMyAdmin and then click on ‘OK’
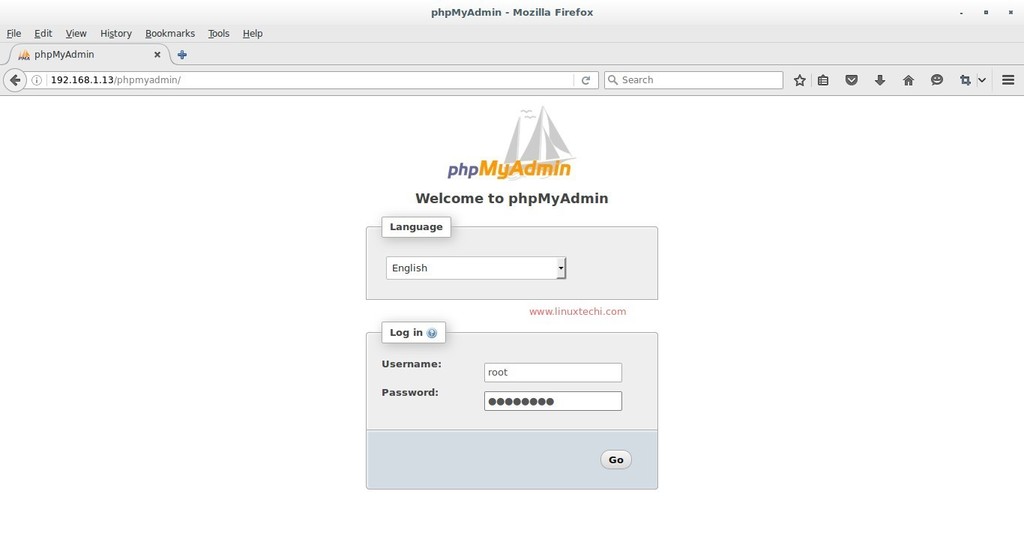
Now try to access the phpMyAdmin, open the browser type : “http://Server_IP_OR_Host_Name/phpmyadmin”
Use the user name as ‘root’ and password that we set during the installation.
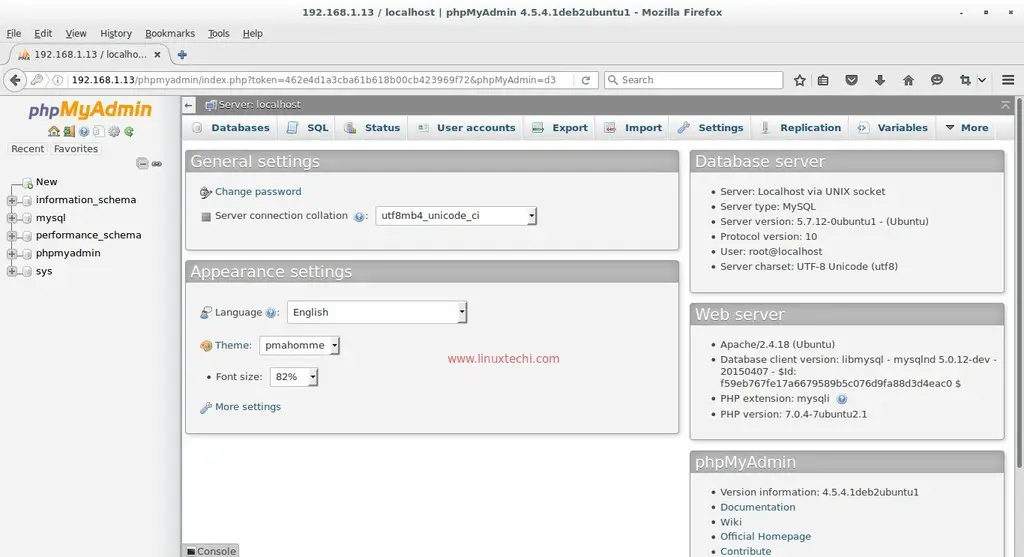
When we click on ‘Go’, it will redirect the page to ‘phpMyAdmin’ Web interface as shown below.
That’s it, LAMP stack is successfully installed and is ready for use 🙂 . Please share your feedback and comments.
via: http://www.linuxtechi.com/lamp-stack-installation-on-ubuntu-server-16-04/
作者:Pradeep Kumar 译者:译者ID 校对:校对者ID
