12 KiB
Teach a virtual class with Moodle on Linux
Teach school remotely with the Moodle learning management system on
Linux.

The pandemic has created a greater need for remote education than ever before. This makes a learning management system (LMS) like Moodle more important than ever for ensuring that education stays on track as more and more schooling is delivered virtually.
Moodle is a free LMS written in PHP and distributed under the open source GNU Public License (GPL). It was developed by Martin Dougiamas and has been under continuous development since its release in 2002. Moodle can be used for blended learning, distance learning, flipped classrooms, and other forms of e-learning. There are currently over 190 million users and 145,000 registered Moodle sites worldwide.
I have used Moodle as an administrator, teacher, and student, and in this article, I'll show you how to set it up and get started using it.
Install Moodle on Linux
Moodle's system requirements are modest, and there is plenty of documentation to help you. My favorite installation method is by downloading it as an ISO from Turnkey Linux and installing a Moodle site in VirtualBox.
First, download the Moodle ISO and save it to your computer.
Next, install VirtualBox from the Linux command line with
$ sudo apt install virtualbox
or
$ sudo dnf install virtualbox
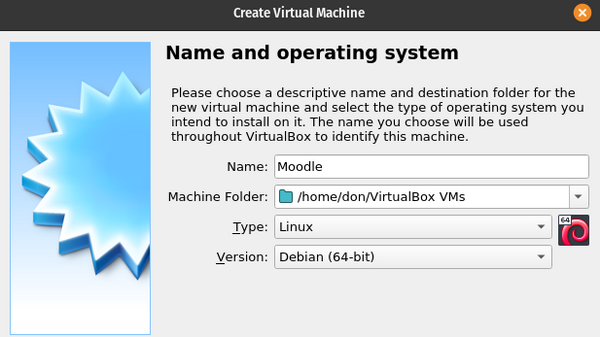
Once the download completes, start VirtualBox and select the New button on the console.
(Don Watkins, CC BY-SA 4.0)
Choose a name for your virtual machine, your operating system (Linux), and the type of Linux you're using (e.g., Debian 64-bit).
(Don Watkins, CC BY-SA 4.0)
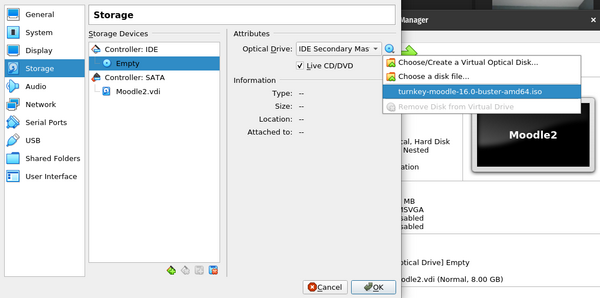
Next, set your virtual machine (VM) memory size—use the default 1024MB. Then, choose a dynamically allocated virtual disk and attach the Moodle.iso to your virtual machine.
(Don Watkins, CC BY-SA 4.0)
Change your network settings from NAT to Bridged adapter. Then start the machine and install the ISO to create the Moodle virtual machine. During installation, you will be prompted to create passwords for the root account, MySQL, and Moodle. The Moodle password must include at least eight characters, one upper case letter, and one special character.
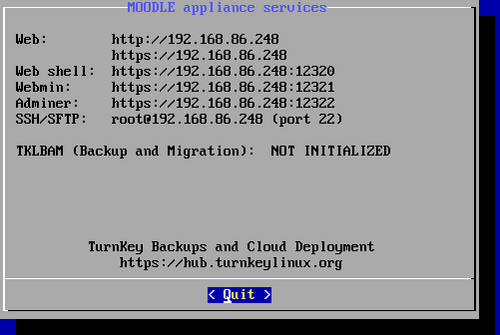
Reboot the virtual machine. When the installation finishes, be sure to record your Moodle appliance settings somewhere safe. (After the installation, you can delete the ISO file if you want.)
(Don Watkins, CC BY-SA 4.0)
It's important to note that your Moodle instance isn't visible by anyone on the Internet yet. It only exists in your local network: only people in your building who are connected to the same router or wifi access point as you can access your site right now. The worldwide Internet can't get to it because you're behind a firewall (embedded in your router, and possibly also in your computer). For more information on configuring your network, read Seth Kenlon's article on opening ports and routing traffic through your firewall.
Start using Moodle
Now you are ready to log into your Moodle machine and get familiar with the software. Log into Moodle using the default login username, admin, and the password you set when you created the Moodle VM.
(Don Watkins, CC BY-SA 4.0)
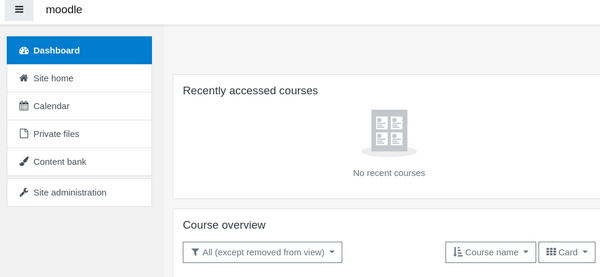
After logging in for the first time, you'll see your new Moodle site's main Dashboard.
(Don Watkins, CC BY-SA 4.0)
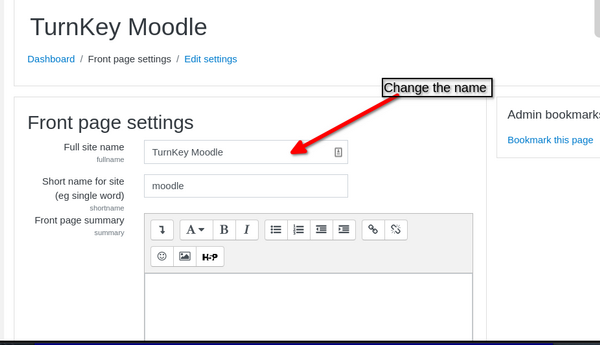
The default appliance name is Turnkey Moodle, but it's easy to change it to suit your school, classroom, or other needs and preferences. To personalize your Moodle site, in the menu on the left-hand side of the user interface, select Site home. Then click on the Settings icon on the right side of the display, and choose Edit settings.
(Don Watkins, CC BY-SA 4.0)
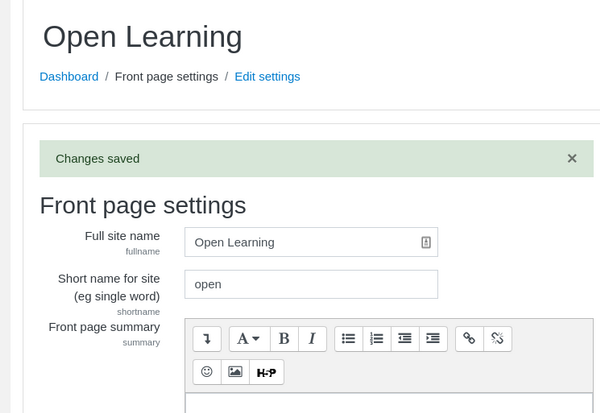
You can change your site's name and add a short name and site description if you'd like.
(Don Watkins, CC BY-SA 4.0)
Be sure to scroll to the bottom and save your changes. Now your site is personalized.
(Don Watkins, CC BY-SA 4.0)
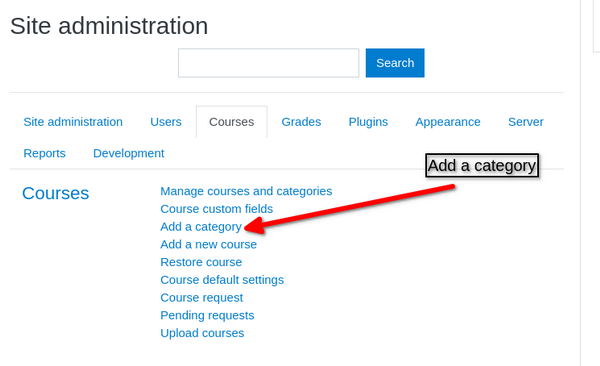
The default category is Miscellaneous, which won't help people identify your site's purpose. To add a category, return to the main Dashboard and select Site administration from the left-hand menu. Under Courses, select **Add a category **and enter details about your site.
(Don Watkins, CC BY-SA 4.0)
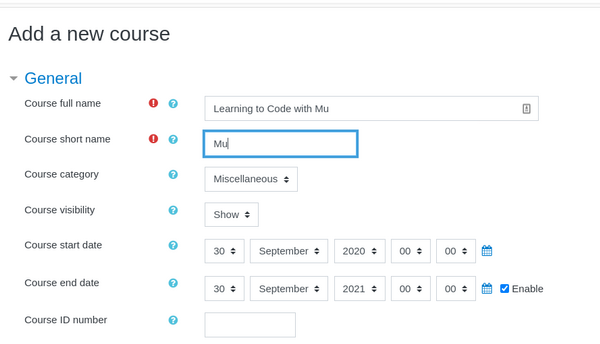
To add a course, return to Site administration, and click Add a new course. You will see a series of options, such as naming your course, providing a short name, assigning a category, and setting the course start and end dates. You can also set options for the course's format, such as social, weekly, and topic, as well as its appearance, file upload size, completion tracking, and more.
(Don Watkins, CC BY-SA 4.0)
Add and manage users
Now that you have set up a course, you can add users. There are a variety of ways to do this. Manual entry is a good place to start if you are a homeschooler. Moodle supports email-based registration, LDAP, Shibboleth, and many others. School districts and other larger installations can upload users with a comma-delimited file. Passwords can be added in bulk, too, with a forced password change at first login. For more information, be sure to consult Moodle's documentation.
Moodle is a very granular, permission-oriented environment. It is easy to assign policies and roles to users and enforce those assignments using Moodle's menus.
There are many roles within Moodle, and each has specific privileges and permissions. The default roles are manager, course creator, teacher, non-editing teacher, student, guest, and authenticated user, but you can add other ones.
Add content to your course
Once you have your Moodle site and a course set up, you can add content to the course. Moodle has all the tools you need to create great content, and it's built on solid pedagogy that emphasizes a social constructionist view.
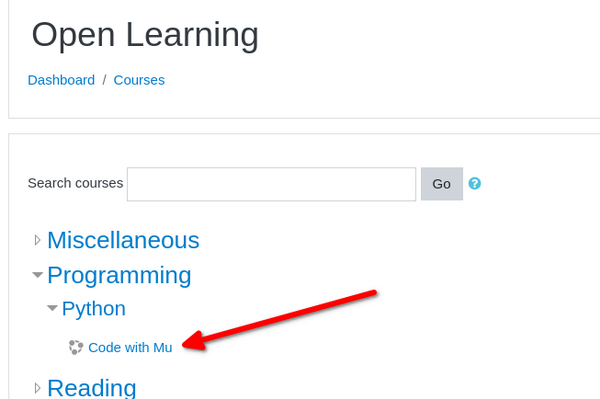
I created a sample course called Code with Mu. It is in the Programming category and Python subcategory.
(Don Watkins, CC BY-SA 4.0)
I chose a weekly format for my course with the default of four weeks. Using the editing tools, I hid all but the first week of the course. This ensures my students stay focused on the material.
As the teacher or Moodle administrator, I can add activities to each week's instruction by clicking Add an activity or resource.
(Don Watkins, CC BY-SA 4.0)
I get a pop-up window with a variety of activities I can assign to my students.
(Don Watkins, CC BY-SA 4.0)
Moodle's tools and activities make it easy for me to create learning materials and cap off the week with a short quiz.
(Don Watkins, CC BY-SA 4.0)
There are more than 1,600 plugins you can use to extend Moodle with new activities, question types, integrations with other systems, and more. For example, the BigBlueButton plugin supports slide sharing, a whiteboard, audio and video chat, and breakout rooms. Others to consider include the Jitsi plugin for videoconferencing, a plagiarism checker, and an Open Badge Factory for awarding badges.
Keep exploring Moodle
Moodle is a powerful LMS, and I hope this introduction whets your appetite to learn more. There are excellent tutorials to help you improve your skills, and you can see Moodle in action on its demonstration site or access Moodle's source code if you want to see what's under the hood or contribute to development. Moodle also has a great mobile app for iOS and Android, if you like to work on the go. Follow Moodle on Twitter, Facebook, and LinkedIn to stay up to date on what's new.
via: https://opensource.com/article/20/10/moodle
作者:Don Watkins 选题:lujun9972 译者:译者ID 校对:校对者ID

