mirror of
https://github.com/LCTT/TranslateProject.git
synced 2025-02-19 00:30:12 +08:00
279 lines
11 KiB
Markdown
279 lines
11 KiB
Markdown
Samba 系列(十):如何在 CentOS 7 上安装 iRedMail 集成到 Samba4 AD
|
||
============================================================
|
||
|
||
本系列教程将引导你了解如何在 CentOS 7 安装 iRedMail 以及 [Samba4 AD 域控制器][3],以便域帐户可以通过 Thunderbird 桌面客户端或通过 Roundcube Web 界面发送或接收邮件。
|
||
|
||
将安装 iRedMail 的 CentOS 7 服务器需允许通过 25 和 587 端口进行 SMTP 或邮件路由服务,并且还将通过 Dovecot 作为邮件传递代理,提供 POP3 和 IMAP 服务,两者都使用安装过程中签发的自签名证书进行安全保护。
|
||
|
||
收件人邮箱将与 Roundcube 提供的 webmail 用户代理一起存储在同一台 CentOS 服务器上。iRedMail 将使用 Samba4 AD 来查询和验证收件人帐户,在 AD 组的帮助下创建邮件列表,并通过 Samba4 AD DC 控制邮件帐户。
|
||
|
||
#### 需要:
|
||
|
||
- [在 Ubuntu 上使用 Samba4 创建 AD 基础架构][1]
|
||
|
||
### 步骤 1:在 CentOS 7 上安装 iRedMail
|
||
|
||
1、 在安装 iRedMail 之前,请先确保你使用下面的指南在你的机器上安装了一个全新的 CentOS 7 操作系统:
|
||
|
||
- [全新安装 CentOS 7 Minimal][2]
|
||
|
||
2、 同样使用下面的命令确保系统更新了最新的安全补丁和软件包。
|
||
|
||
```
|
||
# yum update
|
||
```
|
||
|
||
3、 系统同样需要一个 FQDN 主机名,使用下面的命令设置。使用你自定义的 FQDN 代替 `mail.tecmint.lan` 变量。
|
||
|
||
```
|
||
# hostnamectl set-hostname mail.tecmint.lan
|
||
```
|
||
|
||
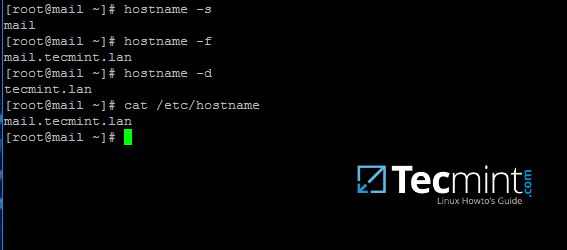
使用下面的命令验证系统主机名。
|
||
|
||
```
|
||
# hostname -s # Short name
|
||
# hostname -f # FQDN
|
||
# hostname -d # Domain
|
||
# cat /etc/hostname # Verify it with cat command
|
||
```
|
||
|
||
[
|
||
|
||
][4]
|
||
|
||
*验证 CentOS 7 主机名*
|
||
|
||
4、 通过手动编辑 `/etc/hosts`,将机器的 FQDN 和短名称映射到机器的回环 IP 地址。添加如下所示的值,并相应替换 `mail.tecmint.lan` 和 mail 的值。
|
||
|
||
```
|
||
127.0.0.1 mail.tecmint.lan mail localhost localhost.localdomain
|
||
```
|
||
|
||
5、 iRedMail 专家建议应该完全禁用 SELinux。通过编辑 `/etc/selinux/config` 并将 SELINUX 参数的值从 `permissive` 设置成 `disabled` 来禁用 SELinux。
|
||
|
||
```
|
||
SELINUX=disabled
|
||
```
|
||
|
||
重启机器并应用新的 SELinux 策略,或者运行 `setenforce` 带上参数 `0` 来强制 SELinux 立即禁用。
|
||
|
||
```
|
||
# reboot
|
||
或者
|
||
# setenforce 0
|
||
```
|
||
|
||
6、 接下来,安装下面这些接下来会用来系统管理的软件包:
|
||
|
||
```
|
||
# yum install bzip2 net-tools bash-completion wget
|
||
```
|
||
|
||
7、 要安装 iRedMail,首先打开下载页 [http://www.iredmail.org/download.html][5] 中并用下面的命令下载最新的版本。
|
||
|
||
```
|
||
# wget https://bitbucket.org/zhb/iredmail/downloads/iRedMail-0.9.6.tar.bz2
|
||
```
|
||
|
||
8、 下载完成后,使用下面命令解压压缩包并进入解压后的 iRedMail 目录。
|
||
|
||
```
|
||
# tar xjf iRedMail-0.9.6.tar.bz2
|
||
# cd iRedMail-0.9.6/
|
||
# ls
|
||
```
|
||
|
||
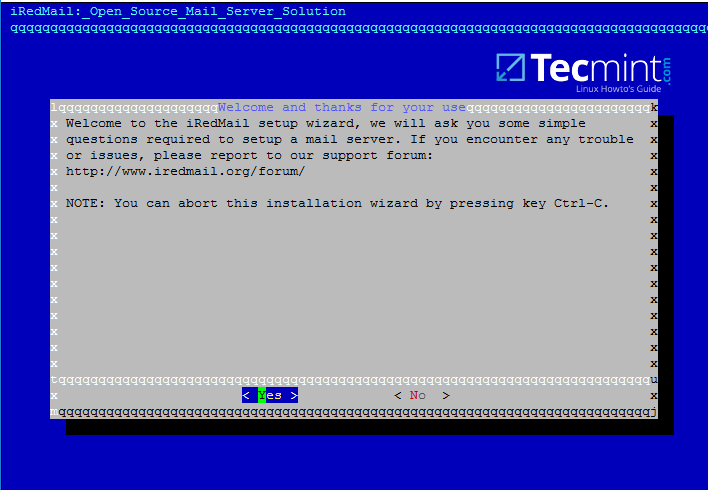
9、 使用下面的命令执行 iRedMail 的 shell 脚本来开始安装。接下来安装器会询问一系列的问题。
|
||
|
||
```
|
||
# bash iRedMail.sh
|
||
```
|
||
|
||
10、 在首个欢迎提示中,点击 `Yes` 来继续安装。
|
||
|
||
[
|
||
|
||
][6]
|
||
|
||
*iRedMail 安装向导*
|
||
|
||
11、 接下来,选择邮件存储的位置。iRedMail 默认邮箱的存储位置在 `/var/vmail/` 中。
|
||
|
||
如果这个目录所在的分区有足够的空间来保存你所有域帐户的邮件,接着点击 Next 来继续。
|
||
|
||
否则,如果你已经配置一个更大的分区来用于邮件存储,那么就用不同的目录来更改默认位置。
|
||
|
||
[
|
||

|
||
][7]
|
||
|
||
*iRedMail 邮件存储路径*
|
||
|
||
12、 在下一步中,选择要与 iRedMail 进行交互的前端 Web 服务器。今后将完全禁用 iRedMail 管理面板,因此我们将使用前端 Web 服务器仅通过 Roundcube Web 面板访问帐户邮件。
|
||
|
||
如果你每小时没有数以千计的邮件帐户访问 webmail 界面,那么你应该使用 Apache Web 服务器来实现其灵活性和易于管理。
|
||
|
||
[
|
||

|
||
][8]
|
||
|
||
*iRedMail 首选的 Web 服务器*
|
||
|
||
13、 在此步骤中,由于 Samba4 域控制器的兼容性原因,请选择 OpenLDAP 后端数据库,并点击 Next 继续,但是一旦将 iRedMail 集成到 Samba 域控制器中,我们将不再使用该 OpenLDAP 数据库。
|
||
|
||
[
|
||

|
||
][9]
|
||
|
||
*iRedMail LDAP 后端*
|
||
|
||
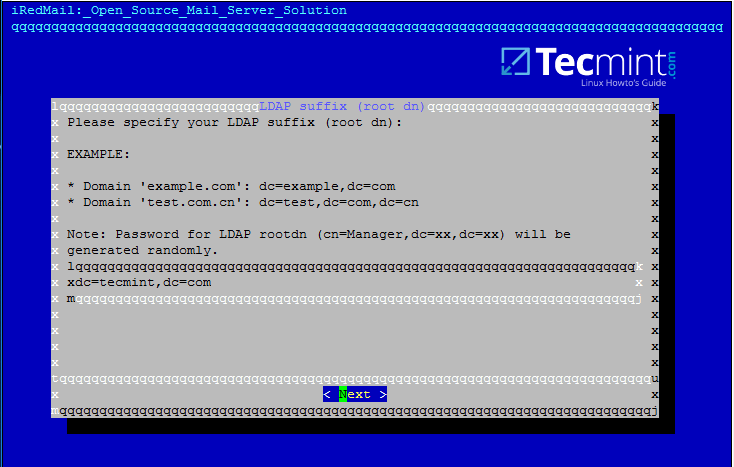
14、 接下来,如下图所示,为你的 Samba4 域名指定 LDAP 后缀,然后点击 Next 继续。
|
||
|
||
[
|
||
|
||
][10]
|
||
|
||
*iRedMail LDAP 后缀*
|
||
|
||
15、 在接下来的提示中,只要输入你的域名,并点击 Next 继续。相应地替换 `tecmint.lan` 值。
|
||
|
||
[
|
||

|
||
][11]
|
||
|
||
*iRedMail 邮件域*
|
||
|
||
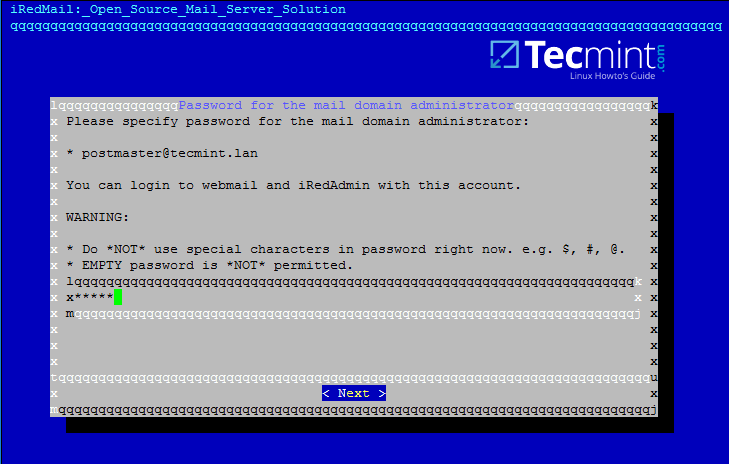
16、 现在,为 `postmaster@yourdomain.tld` 管理员设置一个密码,并点击 Next 继续。
|
||
|
||
[
|
||
|
||
][12]
|
||
|
||
*iRedMail 邮件域管理员*
|
||
|
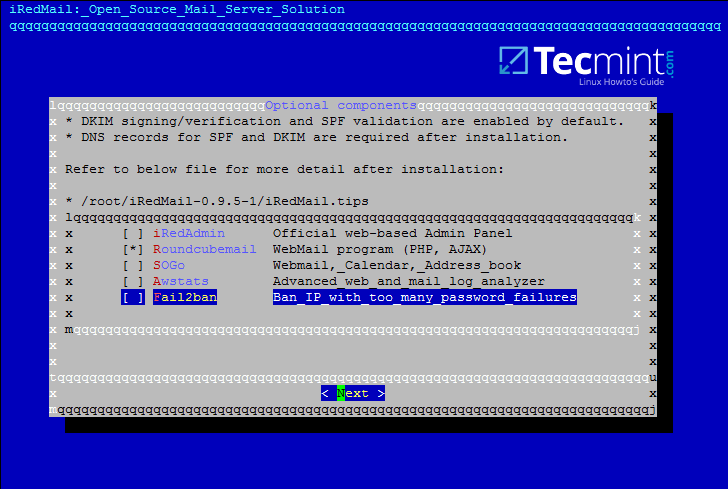
||
17、 接下来,从列表中选择要与邮件服务器集成的可选组件。我强烈建议你安装 Roundcube,以便为域帐户提供访问邮件的 Web 界面,尽管你也可以在不同的计算机上安装并配置 Roundcube,以便在高负载情况下释放邮件服务器资源。
|
||
|
||
对于受限访问互联网的本地域,特别是在我们使用域集成时,除了 Awstats 可以用于你进行邮件分析,其他组件不是非常有用。
|
||
|
||
[
|
||
|
||
][13]
|
||
|
||
*iRedMail 可选组件*
|
||
|
||
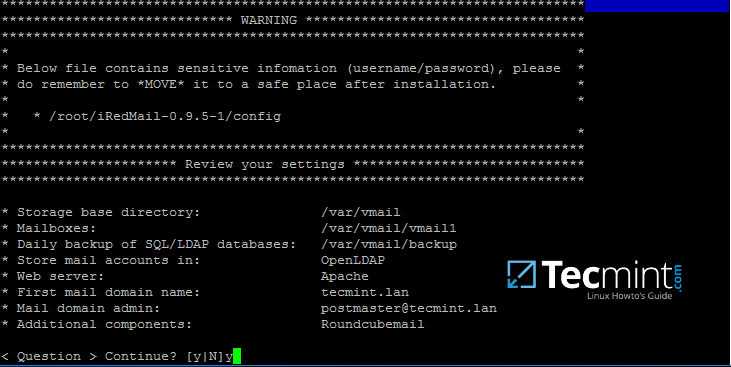
18、 在下一步中输入 `Y` 来应用配置并开始安装。
|
||
|
||
[
|
||
|
||
][14]
|
||
|
||
*iRedMail 配置更改*
|
||
|
||
19、 最后,所有的问题都输入 `Y`,接受 iRedMail 脚本自动配置你的防火墙以及 MySQL 配置文件。
|
||
|
||
[
|
||

|
||
][15]
|
||
|
||
*iRedMail 系统配置*
|
||
|
||
20、 安装完成后,安装器会提供一些敏感信息。比如 iRedAdmin 凭证、web 面板的 URL 地址以及安装过程中使用的所有参数的文件位置。
|
||
|
||
[
|
||

|
||
][16]
|
||
|
||
*iRedMail 安装总结*
|
||
|
||
仔细阅读上面的信息,使用下面的命令重启机器来使所有的邮件服务启用。
|
||
|
||
```
|
||
# init 6
|
||
```
|
||
|
||
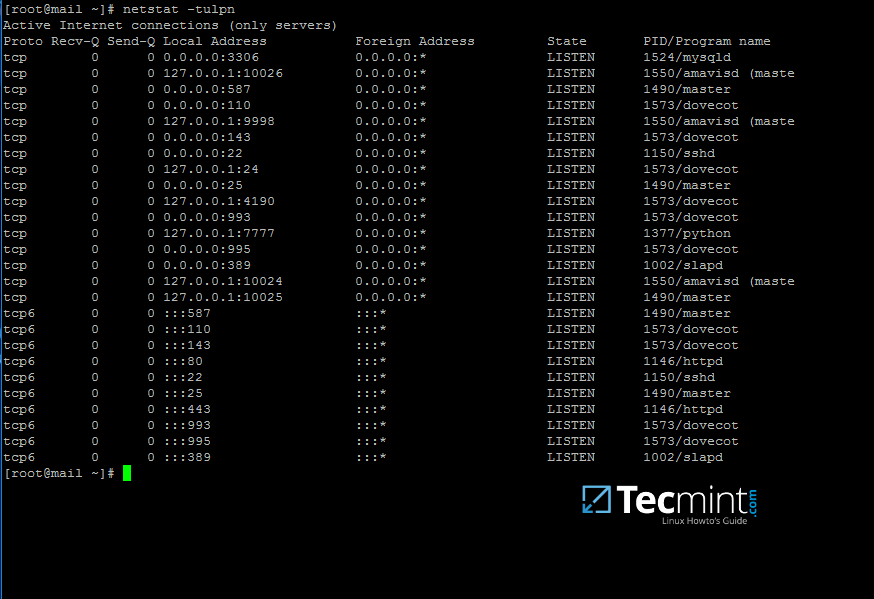
21、 系统重启后,使用 root 权限的帐户登录或以 root 身份登录,并使用下面的命令列出所有的网络套接字以及你邮件服务器监听的相关程序。
|
||
|
||
在套接字列表中,你会看到邮件服务器几乎覆盖邮件服务正常运行所需的所有服务:SMTP/S、POP3/S、IMAP/S 和防病毒以及垃圾邮件保护。
|
||
|
||
```
|
||
# netstat -tulpn
|
||
```
|
||
[
|
||
|
||
][17]
|
||
|
||
*iRedMail 网络套接字*
|
||
|
||
22、 为了查看 iRedMail 已修改的所有配置文件的位置、iRedMail 安装过程中用于数据库管理的凭据、邮件管理帐户以及其他帐户,那么就显示 `iRedMail.tips` 这个文件。
|
||
|
||
该文件位于你最初解压安装包的目录中。请注意,你应该移动并保护此文件,因为它包含有关邮件服务器的敏感信息。
|
||
|
||
```
|
||
# less iRedMail-0.9.6/iRedMail.tips
|
||
```
|
||
|
||
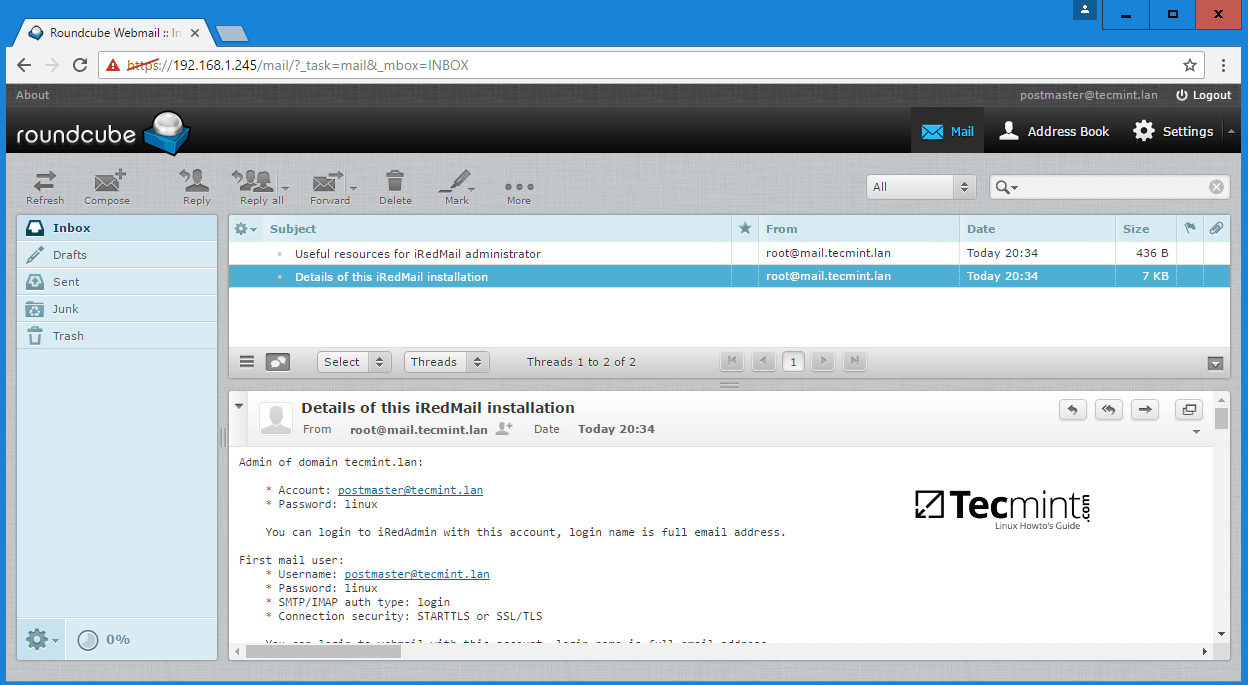
23、 上面提到的包含邮件服务器详细信息的文件也将自动发送到 postmaster 这个邮件服务器管理员帐户中。
|
||
|
||
通过在浏览器中输入机器的 IP 地址,你可以通过 HTTPS 协议安全地访问 webmail。接受 iRedMail 自签名证书在浏览器中生成的错误,并使用在安装中为 postmaster@your_domain.tld 帐户设置的密码登录。阅读并将此电子邮件存储到一个安全的邮箱。
|
||
|
||
```
|
||
https://192.168.1.254
|
||
```
|
||
[
|
||

|
||
][18]
|
||
|
||
*iRedMail 登录帐户*
|
||
|
||
[
|
||
|
||
][19]
|
||
|
||
*iRedMail Web 邮件*
|
||
|
||
就是这样了!到目前为止,你已经配置了一台完整的自己运行的邮件服务器了,但尚未与 Samba4 AD 域控制器服务集成。
|
||
|
||
在下一部分中,我们将看到如何修改 iRedMail 服务(postfix,dovecot 和 roundcube 配置文件),以便查询域帐户、发送、接收和读取邮件。
|
||
|
||
--------------------------------------------------------------------------------
|
||
|
||
作者简介:
|
||
|
||
我是一个电脑上瘾的家伙,开源和基于 linux 系统软件的粉丝,在 Linux 发行版桌面、服务器和 bash 脚本方面拥有大约 4 年的经验。
|
||
|
||
--------------------------------------------------------------------------------
|
||
|
||
via: http://www.tecmint.com/install-iredmail-on-centos-7-for-samba4-ad-integration/
|
||
|
||
作者:[Matei Cezar][a]
|
||
译者:[geekpi](https://github.com/geekpi)
|
||
校对:[wxy](https://github.com/wxy)
|
||
|
||
本文由 [LCTT](https://github.com/LCTT/TranslateProject) 原创编译,[Linux中国](https://linux.cn/) 荣誉推出
|
||
|
||
[a]:http://www.tecmint.com/author/cezarmatei/
|
||
|
||
[1]:https://linux.cn/article-8065-1.html
|
||
[2]:https://linux.cn/article-8048-1.html
|
||
[3]:https://linux.cn/article-8065-1.html
|
||
[4]:http://www.tecmint.com/wp-content/uploads/2017/03/Verify-CentOS-7-Hostname.png
|
||
[5]:http://www.iredmail.org/download.html
|
||
[6]:http://www.tecmint.com/wp-content/uploads/2017/03/iRedMail-Setup-Wizard.png
|
||
[7]:http://www.tecmint.com/wp-content/uploads/2017/03/iRedMail-Mail-Storage-Path.png
|
||
[8]:http://www.tecmint.com/wp-content/uploads/2017/03/iRedMail-Preferred-Web-Server.png
|
||
[9]:http://www.tecmint.com/wp-content/uploads/2017/03/iRedMail-LDAP-Backend.png
|
||
[10]:http://www.tecmint.com/wp-content/uploads/2017/03/iRedMail-LDAP-Suffix.png
|
||
[11]:http://www.tecmint.com/wp-content/uploads/2017/03/iRedMail-Mail-Domain.png
|
||
[12]:http://www.tecmint.com/wp-content/uploads/2017/03/iRedMail-Mail-Domain-Administrator.png
|
||
[13]:http://www.tecmint.com/wp-content/uploads/2017/03/iRedMail-Optional-Components.png
|
||
[14]:http://www.tecmint.com/wp-content/uploads/2017/03/iRedMail-Configuration-Changes.png
|
||
[15]:http://www.tecmint.com/wp-content/uploads/2017/03/iRedMail-System-Configuration.png
|
||
[16]:http://www.tecmint.com/wp-content/uploads/2017/03/iRedMail-Installation-Summary.png
|
||
[17]:http://www.tecmint.com/wp-content/uploads/2017/03/iRedMail-Network-Sockets.png
|
||
[18]:http://www.tecmint.com/wp-content/uploads/2017/03/iRedMail-Account-Login.png
|
||
[19]:http://www.tecmint.com/wp-content/uploads/2017/03/iRedMail-Web-Mail.png
|
||
[20]:http://www.tecmint.com/author/cezarmatei/
|
||
[21]:http://www.tecmint.com/10-useful-free-linux-ebooks-for-newbies-and-administrators/
|
||
[22]:http://www.tecmint.com/free-linux-shell-scripting-books/
|