4.6 KiB
Translating KevinSJ -- 05142018 How To Display Images In The Terminal
 There are plenty of GUI picture viewers available for Linux. But I haven’t heard or used any applications which displays pictures in the Terminal itself. Luckily, I have just found a CLI image viewer named FIM that can be used to display images images in Terminal. The FIM utility draw my attention, because it is very lightweight compared to most GUI picture viewer applications. Without further ado, lets us go ahead and see what it is capable of.
Display Images In the Terminal Using FIM
FIM stands for F bi IM proved. For those who don’t know, Fbi is a linux f rame b uffer i mageviewer. It uses the system’s framebuffer to display images directly from the command line. By default, it displays bmp, gif, jpeg, PhotoCD, png, ppm, tiff, and xwd from the Terminal itself. For other formats, it will try to use ImageMagick’s convert.
FIM is based on Fbi and it is a highly customizable and scriptable image viewer targeted at the users who are comfortable with software like the Vim text editor or the Mutt mail user agent. It displays the images in full screen and the images can be controlled (such as resize, flip, zoom) using keyboard shortcuts. Unlike fbi, the FIM utility is universal: it can open many file formats and it can display pictures in the following video modes:
- Graphically, with the Linux framebuffer device.
- Graphically, under X/Xorg, using the SDL library.
- Graphically, under X/Xorg, using the Imlib2 library.
- Rendered as ASCII Art in any textual console, using the AAlib library.
FIM is completely free and open source.
Install FIM
The FIM image viewer is available in the default repositories of DEB-based systems such as Ubuntu, Linux Mint. So, you can install fbi using command:
$ sudo apt-get install fim
If it is not available in the default repositories of your Linux distribution, you can download, compile and install from source as shown below.
wget http://download.savannah.nongnu.org/releases/fbi-improved/fim-0.6-trunk.tar.gz
wget http://download.savannah.nongnu.org/releases/fbi-improved/fim-0.6-trunk.tar.gz.sig
gpg --search 'dezperado autistici org'
# import the key from a trusted keyserver by following on screen instructions
gpg --verify fim-0.6-trunk.tar.gz.sig

tar xzf fim-0.6-trunk.tar.gz
cd fim-0.6-trunk
./configure --help=short
# read the ./configure --help=short output: you can give options to ./configure
./configure
make
su -c "make install"
FIM Usage
Once installed, you can display an image with “auto zoom” option using command:
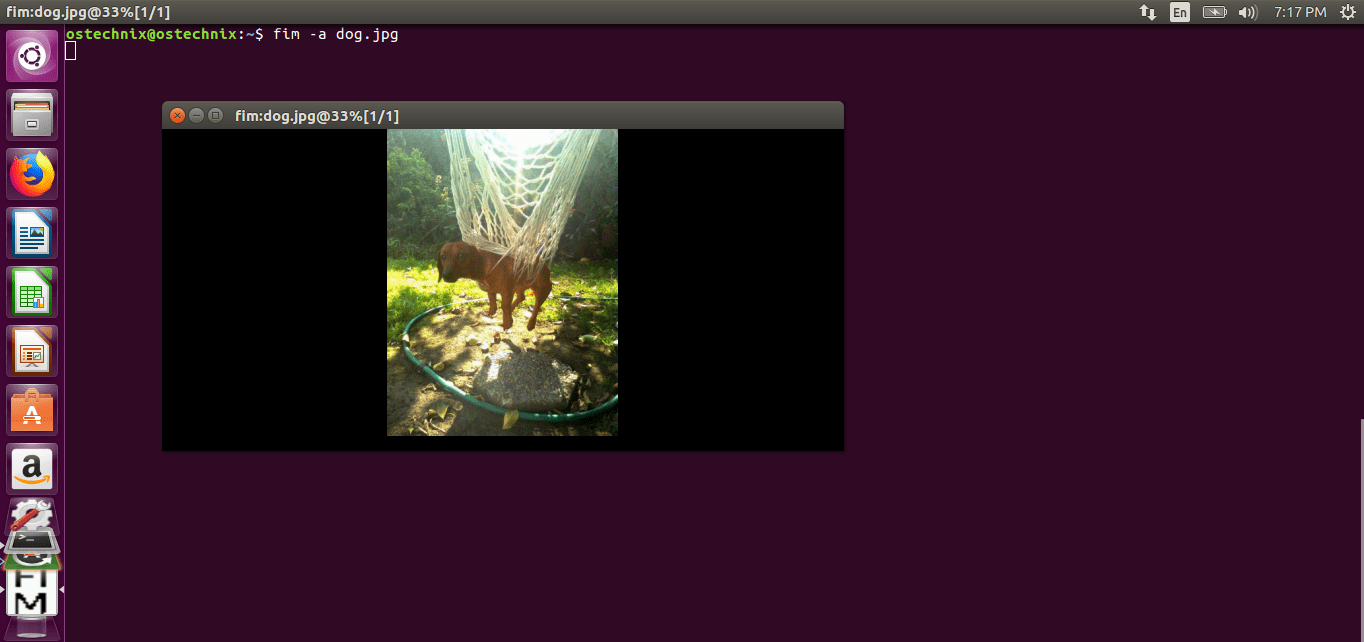
$ fim -a dog.jpg
Here is the sample output from my Ubuntu box.
As you can see in the above screenshot, FIM didn’t use any external GUI picture viewers. Instead, it uses our system’s framebuffer to display the image.
If you have multiple .jpg files in the current directory, you could use wildcard to open all of them as shown below.
$ fim -a *.jpg
To open all images in a directory, for example Pictures , run:
$ fim Pictures/
We can also open the images recursively in a folder and its sub-folder and then sorting the list like below.
$ fim -R Pictures/ --sort
To render the image in ASCII format, you can use -t flag.
$ fim -t dog.jpg
To quit Fim, press ESC or q.
Keyboard shortcuts
You can use various keyboard shortcuts to manage the images. For example, to load next image and previous images, press PgUp/PgDown keys. Ton Zoom in or out, use +/- keys. Here is the common keys used to control images in FIM.
- PageUp/Down : Prev/Next image
- +/- : Zoom in/out
- a : Autoscale
- w : Fit to width
- h : Fit to height
- j/k : Pan down/up
- f/m : flip/mirror
- r/R : Rotate (Clock wise and ant-clock wise)
- ESC/q : Quit
For complete details, refer man pages.
$ man fim
And, that’s all for now. Hope this helps. More good stuffs to come. Stay tuned!
Cheers!
via: https://www.ostechnix.com/how-to-display-images-in-the-terminal/
