7.0 KiB
Unboxing the Raspberry Pi 4
The Raspberry Pi 4 delivers impressive performance gains over its
predecessors, and the Starter Kit makes it easy to get it up and running
quickly.

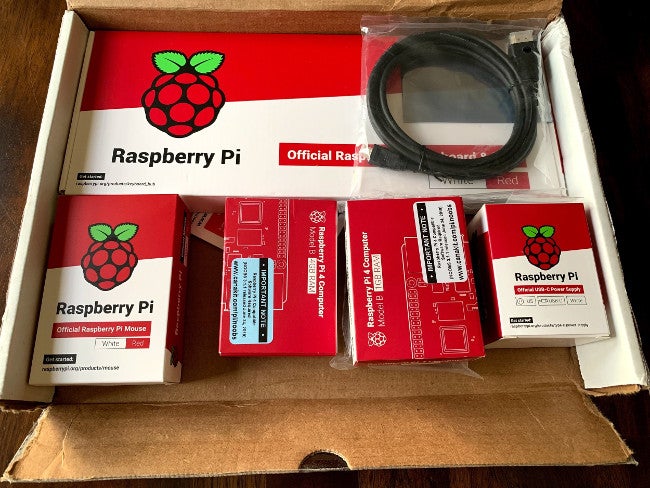
When the Raspberry Pi 4 was announced at the end of June, I wasted no time. I ordered two Raspberry Pi 4 Starter Kits the same day from CanaKit. The 1GB RAM version was available right away, but the 4GB version wouldn't ship until July 19th. Since I wanted to try both, I ordered them to be shipped together.
Here's what I found when I unboxed my Raspberry Pi 4.
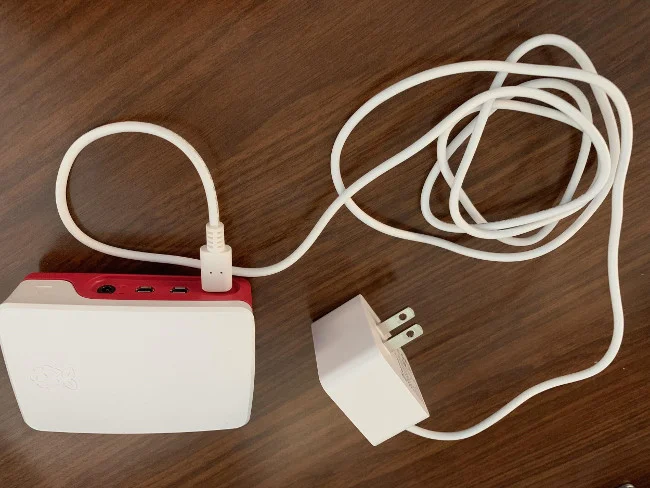
Power supply
The Raspberry Pi 4 uses a USB-C connector for its power supply. Even though USB-C cables are very common now, your Pi 4 may not like your USB-C cable (at least with these first editions of the Raspberry Pi 4). So, unless you know exactly what you are doing, I recommend ordering the Starter Kit, which comes with an official Raspberry Pi charger. In case you would rather try whatever you have on hand, the device's input reads 100-240V ~ 50/60Hz 0.5A, and the output says 5.1V --- 3.0A.
Keyboard and mouse
The official keyboard and mouse are sold separately from the Starter Kit, and at $25 total, they aren't really cheap, given you're paying only $35 to $55 for a proper computer. But the Raspberry Pi logo is printed on this keyboard (instead of the Windows logo), and there is something compelling about having an appropriate appearance. The keyboard is also a USB hub, so it allows you to plug in even more devices. I plugged in my YubiKey security key, and it works very nicely. I would classify the keyboard and mouse as a "nice to have" versus a "must-have." Your regular keyboard and mouse should work fine.
![Official Raspberry Pi keyboard with YubiKey plugged in and mouse.][9]
![Raspberry Pi logo on the keyboard][10]
Micro-HDMI cable
Something that may have caught some folks by surprise is that, unlike the Raspberry Pi Zero that comes with a Mini-HDMI port, the Raspberry Pi 4 comes with a Micro-HDMI. They are not the same thing! So, even though you may have a suitable USB-C cable/power adaptor, mouse, and keyboard on hand, there is a pretty good chance you will need a Micro-HDMI-to-HDMI cable (or an adapter) to plug your new Raspberry Pi into a display.
The case
Cases for the Raspberry Pi have been around for years and are probably one of the very first "official" peripherals the Raspberry Pi Foundation sold. Some people like them; others don't. I think putting a Pi in a case makes it easier to carry it around and avoid static electricity and bent pins.
On the other hand, keeping your Pi covered can overheat the board. This CanaKit Starter Kit also comes with heatsink for the processor, which might help, as the newer Pis are already [known for running pretty hot][11].
![Raspberry Pi 4 case][12]
Raspbian and NOOBS
The other item that comes with the Starter Kit is a microSD card with the correct version of the [NOOBS][13] operating system for the Raspberry Pi 4 pre-installed. (I got version 3.1.1, released June 24, 2019). If you're using a Raspberry Pi for the first time and are not sure where to start, this could save you a lot of time. The microSD card in the Starter Kit is 32GB.
After you insert the microSD card and connect all the cables, just start up the Pi, boot into NOOBS, pick the Raspbian distribution, and wait while it installs.
![Raspberry Pi 4 with 4GB of RAM][14]
I noticed a couple of improvements while installing the latest Raspbian. (Forgive me if they've been around for a while—I haven't done a fresh install on a Pi since the 3 came out.) One is that Raspbian will ask you to set up a password for your account at first boot after installation, and the other is that it will run a software update (assuming you have network connectivity). These are great improvements to help keep your Raspberry Pi a little more secure. I would love to see the option to encrypt the microSD card at installation … maybe someday?
![Running Raspbian updates at first boot][15]
![Raspberry Pi 4 setup][16]
It runs very smoothly!
Wrapping up
Although CanaKit isn't the only authorized Raspberry Pi retailer in the US, I found its Starter Kit to provide great value for the price.
So far, I am very impressed with the performance gains in the Raspberry Pi 4. I'm planning to try spending an entire workday using it as my only computer, and I'll write a follow-up article soon about how far I can go. Stay tuned!
via: https://opensource.com/article/19/8/unboxing-raspberry-pi-4
作者:Anderson Silva 选题:lujun9972 译者:译者ID 校对:校对者ID
[9]: https://opensource.com/sites/default/files/uploads/raspberrypi_keyboardmouse.jpg (Official Raspberry Pi keyboard (with YubiKey plugged in) and mouse.) [10]: https://opensource.com/sites/default/files/uploads/raspberrypi_keyboardlogo.jpg (Raspberry Pi logo on the keyboard) [11]: https://www.theregister.co.uk/2019/07/22/raspberry_pi_4_too_hot_to_handle/ [12]: https://opensource.com/sites/default/files/uploads/raspberrypi4_case.jpg (Raspberry Pi 4 case) [13]: https://www.raspberrypi.org/downloads/noobs/ [14]: https://opensource.com/sites/default/files/uploads/raspberrypi4_ram.jpg (Raspberry Pi 4 with 4GB of RAM) [15]: https://opensource.com/sites/default/files/uploads/raspberrypi4_rasbpianupdate.jpg (Running Raspbian updates at first boot) [16]: https://opensource.com/sites/default/files/uploads/raspberrypi_setup.jpg (Raspberry Pi 4 setup)

