6.6 KiB
4 Simple Steps to Clean Your Ubuntu System
You can try these four simple steps right now to clean up your Ubuntu installation.
This quick tutorial would help you to clean up old Ubuntu installations and free up some disk space.
If you have been running an Ubuntu system for more than a year, you might feel that your system is slow and lagging despite your being up-to-date.
Over time, there are many apps which you might have installed just to experiment or after reading a great review, but you did not remove them. These are some ways to help you find out some hidden disk spaces that you can free up.
Steps to Clean Your Ubuntu System
1. Clean Apt Cache
An “apt cache” is where Ubuntu keeps all the files you have downloaded just in case you need to refer them later. Most users don’t bother to clean this up, which may take up hundreds of MBs.
Open a terminal and run the below command to see how much your cache size is:
du -sh /var/cache/apt/archives
You would be surprised to see the size if yours is an old installation. Run below from the terminal to clean it up.
sudo apt-get clean
2. Remove unused Kernels
If you have been running an Ubuntu system/installation for more than a year, chances are high that you have multiple Kernels installed. If your hardware is the latest and compatible with Linux without much configuration, you may go ahead and remove old Kernels keeping the latest one.
Run below from the terminal to clean those up:
sudo apt-get autoremove --purge
3. Remove Old Apps, Packages
If you are a person who likes to experiment with Linux Apps, you surely have some unused apps in your system that you definitely do not need anymore.
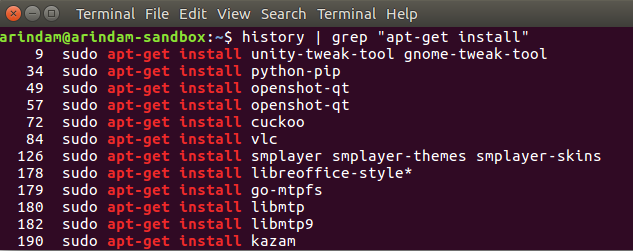
Now, you may have forgotten about the app names you installed. You can run below from the terminal to find out what you have recently installed:
This will give you a list of apps, and packages you have installed via the apt command:
history | grep "apt-get install"
This will give you a list of apps which you have installed in the recent past:
grep " install " /var/log/dpkg.log.1
zgrep " install " /var/log/dpkg.log.2.gz
You can run the below commands to remove the apps and packages:
sudo apt remove app1 package1
4. Use a system cleaner app
There is plenty of free and native system cleaner app available; however, I feel BleachBit is the best and oldest app for this purpose.
Install BleachBit using the below command or install using Software.
sudo apt install bleachbit
Once installed, open BleachBit and run a scan. It would show you all the cache files your browser is taking up, temp files, trash, etc., and you can clean it up with a click of a button.
Bonus Tips
Flatpak package cleanup
Flatpak applications and runtime take significant disk space. Because by design, the Flatpak executable combines the runtime. Although the runtime can be shared between related apps, many unused leftover runtimes may consume your disk space.
The most straightforward way to remove some unused Flatpak is the below command. Run it via the terminal.
flatpak uninstall --unused
For more information and wants to read details about it, refer to this article.
Clean Unused Snap items from Ubuntu
If you use Ubuntu, there is a high chance that you are using Snap packages. And over time, Snap accumulates irrelevant runtimes and files. You can use the following script to clean up some of the disabled snap runtimes.
Copy this entire script to a new file and name it clean_snap.sh:
Then give it executable permission using chmod +x clean_snap.sh command and run via ./clean_snap.sh
#!/bin/bash
#Removes old revisions of snaps
#CLOSE ALL SNAPS BEFORE RUNNING THIS
set -eu
LANG=en_US.UTF-8
snap list --all | awk '/disabled/{print $1, $3}' |
      while read snapname revision; do
          snap remove "$snapname" --revision="$revision"
      done
For more insights into cleaning up the snap packages, refer to this article.
Bonus Tip
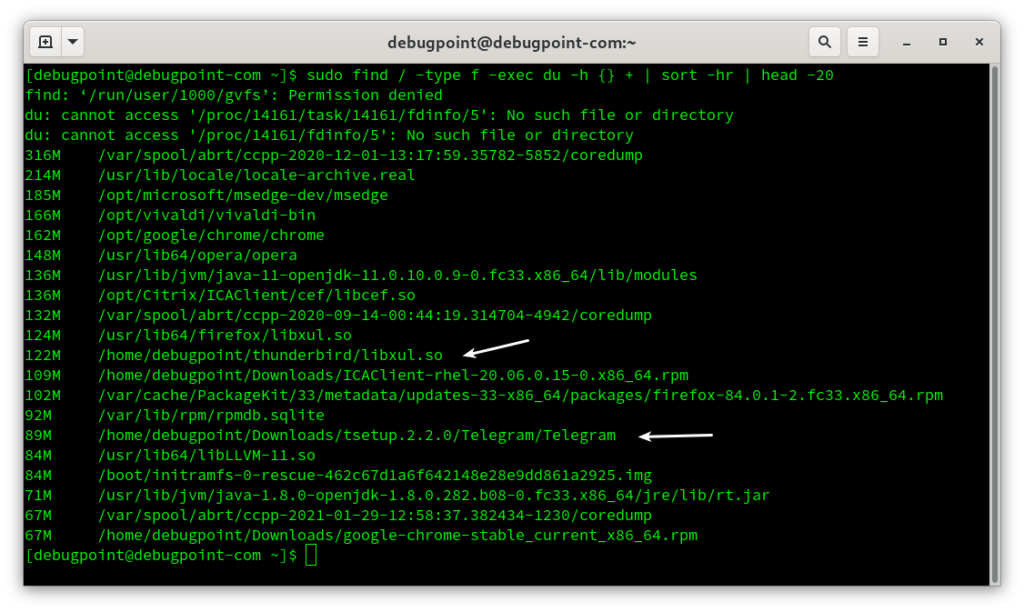
You can also manually search for large files using the following command.
find /home -type f -exec du -h {} + | sort -hr | head -20
For example, the following command searches and gives you the first 20 large files in the root directory “/”. Now you can review the large files and manually remove them using a file manager. Be careful while deleting any file. Try not to touch anything other than in your /home directory.
Wrapping Up
So, that’s it. If you followed the above steps, you definitely freed up some space in your Ubuntu system, and your system can breathe now. You can follow these measures to clean up the Ubuntu system. Do not forget to keep your system up-to-date with the latest packages.
🗨️ Comment below if you think you can free up some disk space and make your Ubuntu faster using these tips. What command do you normally use to Clean Your Ubuntu System?
Let me know.
Next: GNOME 43: Top New Features and Release Wiki
via: https://www.debugpoint.com/4-simple-steps-clean-ubuntu-system-linux/


