mirror of
https://github.com/LCTT/TranslateProject.git
synced 2024-12-26 21:30:55 +08:00
197 lines
7.3 KiB
Markdown
197 lines
7.3 KiB
Markdown
[#]: collector: (lujun9972)
|
||
[#]: translator: (robsean)
|
||
[#]: reviewer: (wxy)
|
||
[#]: publisher: (wxy)
|
||
[#]: url: (https://linux.cn/article-11631-1.html)
|
||
[#]: subject: (How to Install LEMP (Linux, Nginx, MariaDB, PHP) on Fedora 30 Server)
|
||
[#]: via: (https://www.linuxtechi.com/install-lemp-stack-fedora-30-server/)
|
||
[#]: author: (Pradeep Kumar https://www.linuxtechi.com/author/pradeep/)
|
||
|
||
如何在 Fedora 30 Server 上安装 LEMP(Linux、Nginx、MariaDB、PHP)
|
||
======
|
||
|
||
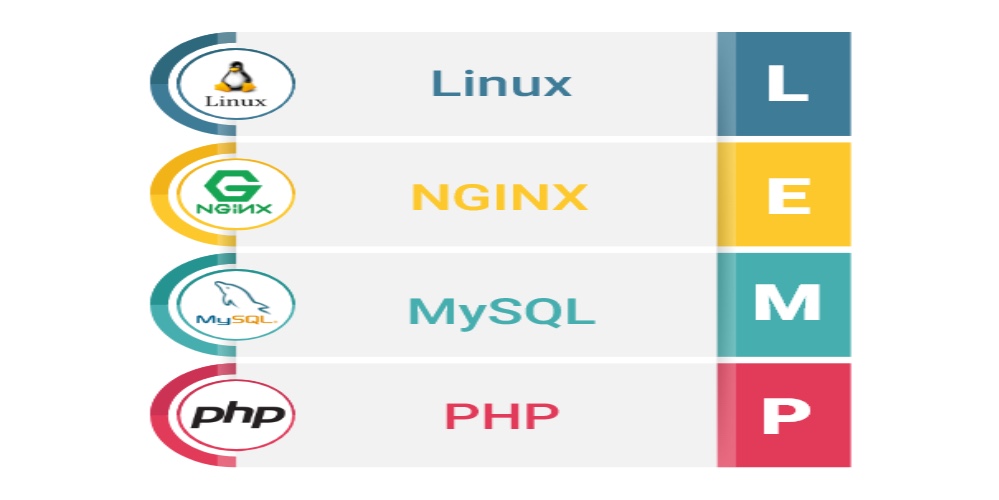
在这篇文章中,我们将看看如何在 Fedora 30 Server 上安装 **LEMP** 。LEMP 代表:
|
||
|
||
* L -> Linux
|
||
* E -> Nginx
|
||
* M -> Maria DB
|
||
* P -> PHP
|
||
|
||
我假设 [Fedora 30][1] 已经安装在你的电脑系统上。
|
||
|
||

|
||
|
||
LEMP 是一组强大的软件设置集合,它安装在一个 Linux 服务器上以帮助使用流行的开发平台来构建网站,LEMP 是 LAMP 的一个变种,在其中不是 Apache ,而是使用 EngineX(Nginx),此外,使用 MariaDB 代替 MySQL。这篇入门指南是一个安装 Nginx、Maria DB 和 PHP 的独立指南的作品集合。
|
||
|
||
### 在 Fedora 30 Server 上安装 Nginx、PHP 7.3 和 PHP-FPM
|
||
|
||
让我们看看如何在 Fedora 30 Server 上安装 Nginx 和 PHP 以及 PHP FPM。
|
||
|
||
#### 步骤 1) 切换到 root 用户
|
||
|
||
在系统上安装 Nginx 的第一步是切换到 root 用户。使用下面的命令:
|
||
|
||
```
|
||
root@linuxtechi ~]$ sudo -i
|
||
[sudo] password for pkumar:
|
||
[root@linuxtechi ~]#
|
||
```
|
||
|
||
#### 步骤 2) 使用 dnf 命令安装 Nginx、PHP 7.3 和 PHP FPM
|
||
|
||
使用下面的 `dnf` 命令安装 Nginx:
|
||
|
||
```
|
||
[root@linuxtechi ~]# dnf install nginx php php-fpm php-common -y
|
||
```
|
||
|
||
#### 步骤 3) 安装额外的 PHP 模块
|
||
|
||
PHP 的默认安装仅自带基本模块和最需要的模块,如果你需要额外的模块,像 PHP 支持的 GD、XML、命令行接口、Zend OPCache 功能等等,你总是能够选择你的软件包,并一次性安装所有的东西。查看下面的示例命令:
|
||
|
||
```
|
||
[root@linuxtechi ~]# sudo dnf install php-opcache php-pecl-apcu php-cli php-pear php-pdo php-pecl-mongodb php-pecl-redis php-pecl-memcache php-pecl-memcached php-gd php-mbstring php-mcrypt php-xml -y
|
||
```
|
||
|
||
#### 步骤 4) 开始 & 启用 Nginx 和 PHP-fpm 服务
|
||
|
||
使用下面的命令来开始并启用 Nginx 服务:
|
||
|
||
```
|
||
[root@linuxtechi ~]# systemctl start nginx && systemctl enable nginx
|
||
Created symlink /etc/systemd/system/multi-user.target.wants/nginx.service → /usr/lib/systemd/system/nginx.service.
|
||
[root@linuxtechi ~]#
|
||
```
|
||
|
||
使用下面的命令来开始并启用 PHP-FPM 服务:
|
||
|
||
```
|
||
[root@linuxtechi ~]# systemctl start php-fpm && systemctl enable php-fpm
|
||
Created symlink /etc/systemd/system/multi-user.target.wants/php-fpm.service → /usr/lib/systemd/system/php-fpm.service.
|
||
[root@linuxtechi ~]#
|
||
```
|
||
|
||
#### 步骤 5) 核实 Nginx (Web 服务) 和 PHP 安装
|
||
|
||
注意:假使操作系统防火墙是启用的,并运行在你的 Fedora 30 系统上,那么使用下面的命令来准许 80 和 443 端口:
|
||
|
||
```
|
||
[root@linuxtechi ~]# firewall-cmd --permanent --add-service=http
|
||
success
|
||
[root@linuxtechi ~]#
|
||
[root@linuxtechi ~]# firewall-cmd --permanent --add-service=https
|
||
success
|
||
[root@linuxtechi ~]# firewall-cmd --reload
|
||
success
|
||
[root@linuxtechi ~]#
|
||
```
|
||
|
||
打开网页浏览器,输入下面的 URL: http://<Your-Server-IP> 。
|
||
|
||
![Test-Page-HTTP-Server-Fedora-30][4]
|
||
|
||
上面的屏幕证实 Nginx 已经成功地安装。
|
||
|
||
现在,让我们核实 PHP 安装,使用下面的命令创建一个测试 php 页(`info.php`):
|
||
|
||
```
|
||
[root@linuxtechi ~]# echo "<?php phpinfo(); ?>" > /usr/share/nginx/html/info.php
|
||
[root@linuxtechi ~]#
|
||
```
|
||
|
||
在网页浏览器中输入下面的 URL, http://<Your-Server-IP>/info.php
|
||
|
||
![Php-info-page-fedora30][6]
|
||
|
||
上面的页面验证 PHP 7.3.5 已经被成功地安装。现在,让我们安装 MariaDB 数据库服务器。
|
||
|
||
### 在 Fedora 30 上安装 MariaDB
|
||
|
||
MariaDB 是 MySQL 数据库的一个极好的替代品,因为它的工作方式与 MySQL 非常类似,并且兼容性也与 MySQL 一致。让我们看看在 Fedora 30 Server 上安装 MariaDB 的步骤。
|
||
|
||
#### 步骤 1) 切换到 root 用户
|
||
|
||
在系统上安装 MariaDB 的第一步是切换到 root 用户,或者你可以使用有 root 权限的本地用户。使用下面的命令:
|
||
|
||
```
|
||
[root@linuxtechi ~]# sudo -i
|
||
[root@linuxtechi ~]#
|
||
```
|
||
|
||
#### 步骤 2) 使用 dnf 命令安装 MariaDB(10.3)的最新版本
|
||
|
||
在 Fedora 30 Server 上使用下面的命令来安装 MariaDB:
|
||
|
||
```
|
||
[root@linuxtechi ~]# dnf install mariadb-server -y
|
||
```
|
||
|
||
#### 步骤 3) 开启并启用 MariaDB 服务
|
||
|
||
在步骤 2 中成功地安装 MariaDB 后,接下来的步骤是开启 MariaDB 服务。使用下面的命令:
|
||
|
||
```
|
||
[root@linuxtechi ~]# systemctl start mariadb.service ; systemctl enable mariadb.service
|
||
```
|
||
|
||
#### 步骤 4) 保护安装好的 MariaDB
|
||
|
||
当我们安装 MariaDB 服务器时,因为默认情况下没有 root 密码,在数据库中也会创建匿名用户。因此,要保护安装好的 MariaDB,运行下面的 `mysql_secure_installation` 命令:
|
||
|
||
```
|
||
[root@linuxtechi ~]# mysql_secure_installation
|
||
```
|
||
|
||
接下来你将被提示一些问题,仅回答下面展示的问题:
|
||
|
||
![Secure-MariaDB-Installation-Part1][7]
|
||
|
||
![Secure-MariaDB-Installation-Part2][8]
|
||
|
||
#### 步骤 5) 测试 MariaDB 安装
|
||
|
||
在你安装后,你总是能够测试是否 MariaDB 被成功地安装在 Fedora 30 Server 上。使用下面的命令:
|
||
|
||
```
|
||
[root@linuxtechi ~]# mysql -u root -p
|
||
Enter password:
|
||
```
|
||
|
||
接下来,你将被提示一个密码。输入在保护安装好的 MariaDB 期间你设置的密码,接下来你可以看到 MariaDB 欢迎屏幕。
|
||
|
||
```
|
||
Welcome to the MariaDB monitor. Commands end with ; or \g.
|
||
Your MariaDB connection id is 17
|
||
Server version: 10.3.12-MariaDB MariaDB Server
|
||
|
||
Copyright (c) 2000, 2018, Oracle, MariaDB Corporation Ab and others.
|
||
|
||
Type 'help;' or '\h' for help. Type '\c' to clear the current input statement.
|
||
|
||
MariaDB [(none)]>
|
||
```
|
||
|
||
最后,我们已经在你的 Fedora 30 Server 上成功地完成安装 LEMP(Linux、Nginx、MariaDB 和 PHP)的所有工作。请在下面的反馈部分发布你的评论和建议,我们将尽快在后面回应。
|
||
|
||
--------------------------------------------------------------------------------
|
||
|
||
via: https://www.linuxtechi.com/install-lemp-stack-fedora-30-server/
|
||
|
||
作者:[Pradeep Kumar][a]
|
||
选题:[lujun9972][b]
|
||
译者:[robsean](https://github.com/robsean)
|
||
校对:[wxy](https://github.com/wxy)
|
||
|
||
本文由 [LCTT](https://github.com/LCTT/TranslateProject) 原创编译,[Linux中国](https://linux.cn/) 荣誉推出
|
||
|
||
[a]: https://www.linuxtechi.com/author/pradeep/
|
||
[b]: https://github.com/lujun9972
|
||
[1]: https://www.linuxtechi.com/fedora-30-workstation-installation-guide/
|
||
[2]: https://www.linuxtechi.com/wp-content/uploads/2019/06/LEMP-Stack-Fedora30.jpg
|
||
[3]: https://www.linuxtechi.com/wp-content/uploads/2019/06/Test-Page-HTTP-Server-Fedora-30-1024x732.jpg
|
||
[4]: https://www.linuxtechi.com/wp-content/uploads/2019/06/Test-Page-HTTP-Server-Fedora-30.jpg
|
||
[5]: https://www.linuxtechi.com/wp-content/uploads/2019/06/Php-info-page-fedora30-1024x732.jpg
|
||
[6]: https://www.linuxtechi.com/wp-content/uploads/2019/06/Php-info-page-fedora30.jpg
|
||
[7]: https://www.linuxtechi.com/wp-content/uploads/2019/06/Secure-MariaDB-Installation-Part1.jpg
|
||
[8]: https://www.linuxtechi.com/wp-content/uploads/2019/06/Secure-MariaDB-Installation-Part2.jpg
|