7.0 KiB
Getting started with the i3 window manager on Linux
In my article 5 reasons the i3 window manager makes Linux better, I shared the top five reasons I use and recommend the i3 window manager as an alternative Linux desktop experience.
In this post, I will walk through the installation and basic configuration of i3 on Fedora 28 Linux.
1. Installation
Log into a Fedora workstation and open up a terminal. Use dnf to install the required package, like this:
[ricardo@f28i3 ~]$ sudo dnf install -y i3 i3-ipc i3status i3lock dmenu terminator --exclude=rxvt-unicode
Last metadata expiration check: 1:36:15 ago on Wed 08 Aug 2018 12:04:31 PM EDT.
Dependencies resolved.
================================================================================================
 Package                     Arch         Version                           Repository     Size
================================================================================================
Installing:
 dmenu                       x86_64       4.8-1.fc28                        fedora         33 k
 i3                          x86_64       4.15-1.fc28                       fedora        323 k
 i3-ipc                      noarch       0.1.4-12.fc28                     fedora         14 k
 i3lock                      x86_64       2.9.1-2.fc28                      fedora         33 k
 i3status                    x86_64       2.12-1.fc28                       updates        62 k
 terminator                  noarch       1.91-4.fc28                       fedora        570 k
Installing dependencies:
 dzen2                       x86_64       0.8.5-21.20100104svn.fc28         fedora         60 k

... Skipping dependencies/install messages

Complete!
[ricardo@f28i3 ~]$
Note: In this command, I'm explicitly excluding the package rxvt-unicode because I prefer terminator as my terminal emulator.
Depending on the status of your system, it may install many dependencies. Wait for the installation to complete successfully and then reboot your machine.
2. First login and initial setup
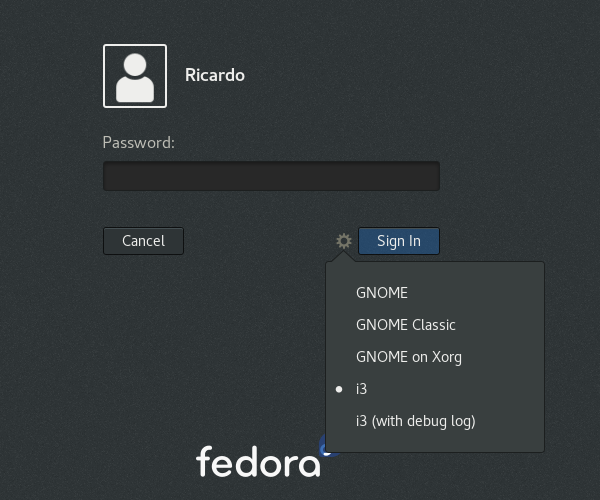
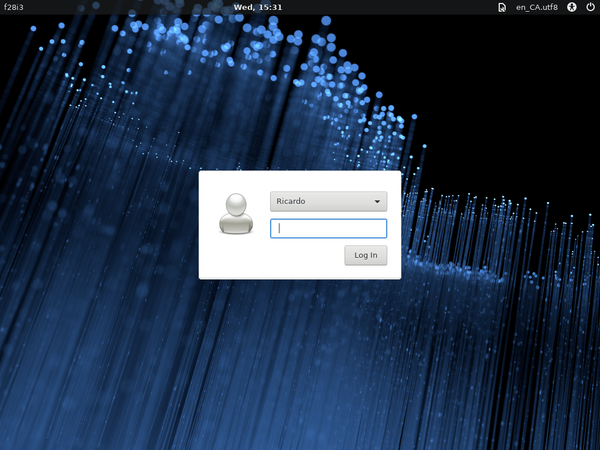
After your machine restarts, you're ready to log into i3 for the first time. In the GNOME Display Manager (GDM) screen, click on your username but—before typing the password to log in—click on the small gear icon and change the session to i3 instead of GNOME, like this:
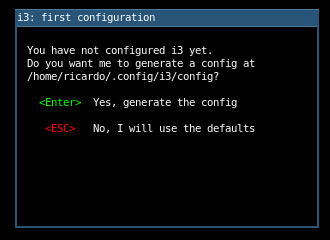
Type your password and click Sign In. On your first login, you are presented with the i3 configuration screen:
Press ENTER to generate a config file in your $HOME/.config/i3 directory. Later you can use this config file to further customize i3's behavior.
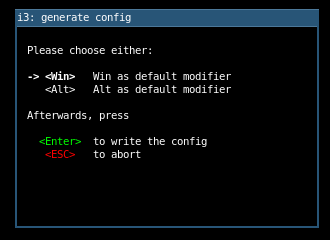
On the next screen, you need to select your Mod key. This is important, as the Mod key is used to trigger most of i3's keyboard shortcuts. Press ENTER to use the default Win key as the Mod key. If you don't have a Win key on your keyboard or prefer to use Alt instead, use the arrow key to select it and press ENTER to confirm.
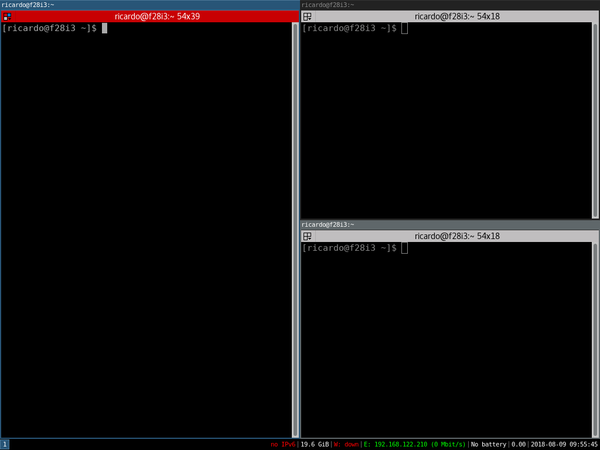
You're now logged into your i3 session. Because i3 is a minimalist window manager, you see a black screen with the status bar on the bottom:
Next, let's look at navigating in i3.
3. Basic shortcuts
Now that you're logged into an i3 session, you'll need a few basic keyboard shortcuts to get around.
The majority of i3 shortcuts use the Mod key you defined during the initial configuration. When I refer to Mod in the following examples, press the key you defined. This will usually be the Win key, but it can also be the Alt key.
First, to open up a terminal, use Mod+ENTER. Open more than one terminal and notice how i3 automatically tiles them to occupy all available space. By default, i3 splits the screen horizontally; use Mod+v to split vertically and press Mod+h to go back to the horizontal split.
To start other applications, press Mod+d to open dmenu, a simple text-based application menu. By default, dmenu presents a list of all applications available on your $PATH. Select the application you want to start by using the arrow keys or narrow down the search by typing parts of the application's name. Press ENTER to start the selected application.
If your application does not provide a way to close it, you can use i3 to kill a window by pressing Mod+Shift+q. Be careful, as you may lose unsaved work—this behavior depends on each application.
Finally, to end your session and exit i3, press Mod+Shift+e. You are presented with a confirmation message at the top of your screen. Click on Yes, exit i3 to exit or X to cancel.
This is just an initial list of shortcuts you can use to get around i3. For many more, consult i3's official documentation.
4. Replacing GDM
Using i3 window manager reduces the memory utilization on your system; however, Fedora still uses the default GDM as its login screen. GDM loads several GNOME-related libraries and applications that consume memory.
If you want to further reduce your system's memory utilization, you can replace GDM with a more lightweight display manager, such as lightdm, like this:
[ricardo@f28i3 ~]$ sudo dnf install -y lightdm
[ricardo@f28i3 ~]$ sudo systemctl disable gdm
Removed /etc/systemd/system/display-manager.service.
[ricardo@f28i3 ~]$ sudo systemctl enable lightdm
Created symlink /etc/systemd/system/display-manager.service -> /usr/lib/systemd/system/lightdm.service.
[ricardo@f28i3 ~]$
Restart your machine to see the Lightdm login screen.
Now you're ready to log in and use i3.
via: https://opensource.com/article/18/8/getting-started-i3-window-manager
作者:Ricardo Gerardi 选题:lujun9972 译者:译者ID 校对:校对者ID

