mirror of
https://github.com/LCTT/TranslateProject.git
synced 2025-02-19 00:30:12 +08:00
128 lines
5.7 KiB
Markdown
128 lines
5.7 KiB
Markdown
如何在 Ubuntu 和 Linux Mint 上启用桌面共享
|
||
============================================================
|
||
|
||
桌面共享是指通过图形终端仿真器在计算机桌面上实现远程访问和远程协作的技术。桌面共享允许两个或多个连接到网络的计算机用户在不同位置对同一个文件进行操作。
|
||
|
||
在这篇文章中,我将向你展示如何在 Ubuntu 和 Linux Mint 中启用桌面共享,并展示一些重要的安全特性。
|
||
|
||
### 在 Ubuntu 和 Linux Mint 上启用桌面共享
|
||
|
||
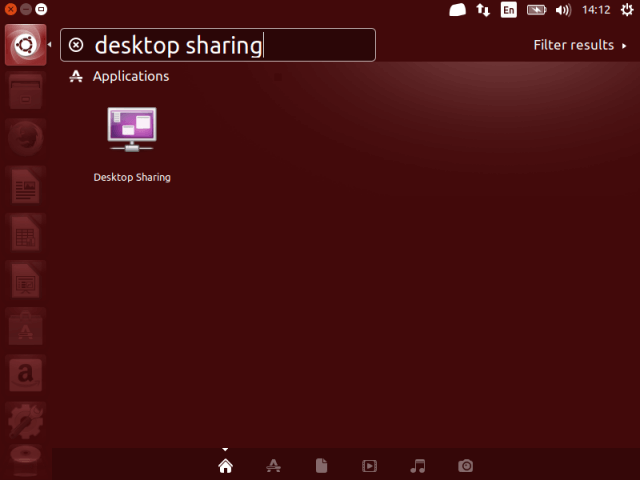
1、在 Ubuntu Dash 或 Linux Mint 菜单中,像下面的截图这样搜索 `desktop sharing`,搜索到以后,打开它。
|
||
|
||
[
|
||
|
||
][1]
|
||
|
||
*在 Ubuntu 中搜索 Desktop sharing*
|
||
|
||
2、打开 Desktop sharing 以后,有三个关于桌面共享设置的选项:共享、安全以及通知设置。
|
||
|
||
在共享选项下面,选中选项“允许其他用户查看桌面”来启用桌面共享。另外,你还可以选中选项“允许其他用户控制你的桌面”,从而允许其他用户远程控制你的桌面。
|
||
|
||
[
|
||

|
||
][2]
|
||
|
||
*桌面共享偏好*
|
||
|
||
3、接下来,在“安全”部分,你可以通过勾选选项“你必须确认任何对该计算机的访问”来手动确认每个远程连接。
|
||
|
||
另外,另一个有用的安全特性是通过选项“需要用户输入密码”创建一个确定的共享密码。这样当用户每次想要访问你的桌面时需要知道并输入密码。
|
||
|
||
4、对于通知,你可以勾选“仅当有人连接上时”来监视远程连接,这样每次当有人远程连接到你的桌面时,可以在通知区域查看。
|
||
|
||
[
|
||

|
||
][3]
|
||
|
||
*配置桌面共享设置*
|
||
|
||
当所有的桌面共享选项都设置好以后,点击“关闭”。现在,你已经在你的 Ubuntu 或 Linux Mint 上成功启用了桌面共享。
|
||
|
||
### 测试 Ubuntu 的远程桌面共享
|
||
|
||
你可以通过使用一个远程连接应用来进行测试,从而确保桌面共享可用。在这个例子中,我将展示上面设置的一些选项是如何工作的。
|
||
|
||
5、我将使用 VNC(虚拟网络计算)协议通过 [remmina 远程连接应用][4]连接到我的 Ubuntu PC。
|
||
|
||
[
|
||

|
||
][5]
|
||
|
||
*Remmina 桌面共享工具*
|
||
|
||
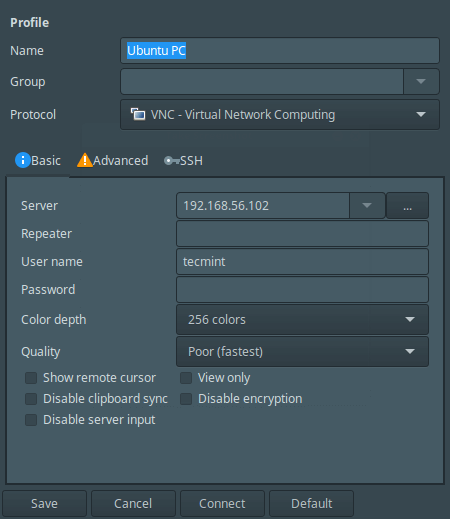
6、在点击 Ubuntu PC 以后,将会出现下面这个配置连接设置的界面,
|
||
|
||
[
|
||
|
||
][6]
|
||
|
||
*Remmina 桌面共享偏好*
|
||
|
||
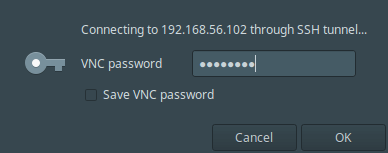
7、当执行好所有设置以后,点击连接。然后,给用户名提供 SSH 密码并点击 OK 。
|
||
|
||
[
|
||
|
||
][7]
|
||
|
||
*输入 SSH 用户密码*
|
||
|
||
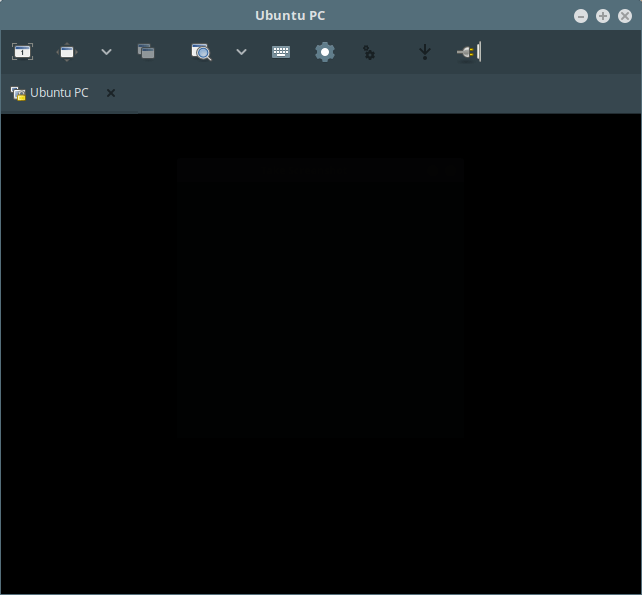
点击确定以后,出现下面这个黑屏,这是因为在远程机器上,连接还没有确认。
|
||
|
||
[
|
||
|
||
][8]
|
||
|
||
*连接确认前的黑屏*
|
||
|
||
8、现在,在远程机器上,我需要如下一个屏幕截图显示的那样点击 `Allow` 来接受远程访问请求。
|
||
|
||
[
|
||

|
||
][9]
|
||
|
||
*允许远程桌面共享*
|
||
|
||
9、在接受请求以后,我就成功地连接到了远程 Ubuntu 机器的桌面。
|
||
|
||
[
|
||

|
||
][10]
|
||
|
||
*远程 Ubuntu 桌面*
|
||
|
||
这就是全部内容了,在这篇文章中,我们讲解了如何在 Ubuntu 和 Linux Mint 中启用桌面共享。你使用评论部分给我们写反馈。
|
||
|
||
--------------------------------------------------------------------------------
|
||
|
||
|
||
作者简介:
|
||
|
||
Aaron Kili 是 Linux 和 F.O.S.S 爱好者,将来的 Linux 系统管理员和网络开发人员,目前是 TecMint 的内容创作者,他喜欢用电脑工作,并坚信分享知识。
|
||
|
||
--------------------------------------------------------------------------------
|
||
|
||
via: http://www.tecmint.com/enable-desktop-sharing-in-ubuntu-linux-mint/
|
||
|
||
作者:[Aaron Kili][a]
|
||
译者:[ucasFL](https://github.com/ucasFL)
|
||
校对:[wxy](https://github.com/wxy)
|
||
|
||
本文由 [LCTT](https://github.com/LCTT/TranslateProject) 原创编译,[Linux中国](https://linux.cn/) 荣誉推出
|
||
|
||
[a]:http://www.tecmint.com/author/aaronkili/
|
||
|
||
[1]:http://www.tecmint.com/wp-content/uploads/2017/03/search-for-desktop-sharing.png
|
||
[2]:http://www.tecmint.com/wp-content/uploads/2017/03/desktop-sharing-settings-inte.png
|
||
[3]:http://www.tecmint.com/wp-content/uploads/2017/03/Configure-Desktop-Sharing-Set.png
|
||
[4]:http://www.tecmint.com/remmina-remote-desktop-sharing-and-ssh-client
|
||
[5]:http://www.tecmint.com/wp-content/uploads/2017/03/Remmina-Desktop-Sharing-Tool.png
|
||
[6]:http://www.tecmint.com/wp-content/uploads/2017/03/Remmina-Configure-Remote-Desk.png
|
||
[7]:http://www.tecmint.com/wp-content/uploads/2017/03/shared-pass.png
|
||
[8]:http://www.tecmint.com/wp-content/uploads/2017/03/black-screen-before-confirmat.png
|
||
[9]:http://www.tecmint.com/wp-content/uploads/2017/03/accept-remote-access-request.png
|
||
[10]:http://www.tecmint.com/wp-content/uploads/2017/03/successfully-connected-to-rem.png
|
||
[11]:http://www.tecmint.com/author/aaronkili/
|
||
[12]:http://www.tecmint.com/10-useful-free-linux-ebooks-for-newbies-and-administrators/
|
||
[13]:http://www.tecmint.com/free-linux-shell-scripting-books/
|