12 KiB
Integrate devices and add-ons into your home automation setup
Learn how to set up initial integrations and install add-ons in Home
Assistant in the fifth article in this series.

In the four previous articles in this series about home automation, I have discussed what Home Assistant is, why you may want local control, some of the communication protocols for smart home components, and how to install Home Assistant in a virtual machine (VM) using libvirt. In this fifth article, I will talk about configuring some initial integrations and installing some add-ons.
Set up initial integrations
It's time to start getting into some of the fun stuff. The whole reason Home Assistant (HA) exists is to pull together various "smart" devices from different manufacturers. To do so, you have to make Home Assistant aware of which devices it should coordinate. I'll demonstrate by adding a Sonoff Zigbee Bridge.
I followed DigiBlur's Sonoff Guide to replace the stock firmware with the open source firmware Tasmota to decouple my sensors from the cloud. My second article in this series explains why you might wish to replace the stock firmware. (I won't go into the device's setup with either the stock or custom firmware, as that is outside of the scope of this tutorial.)
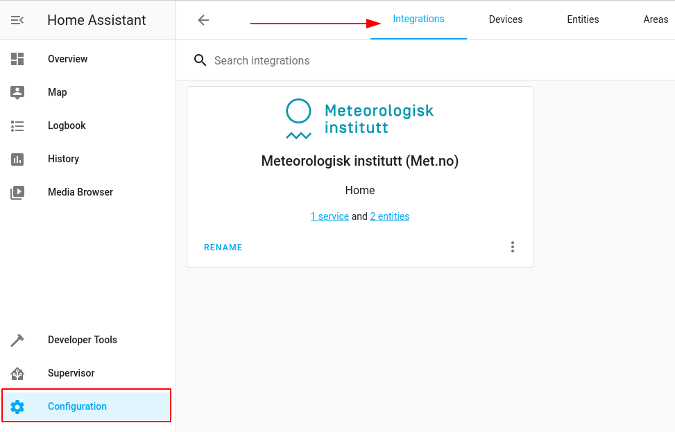
First, navigate to the Configuration menu on the left side of the HA interface, and make sure Integrations is selected:
(Steve Ovens, CC BY-SA 4.0)
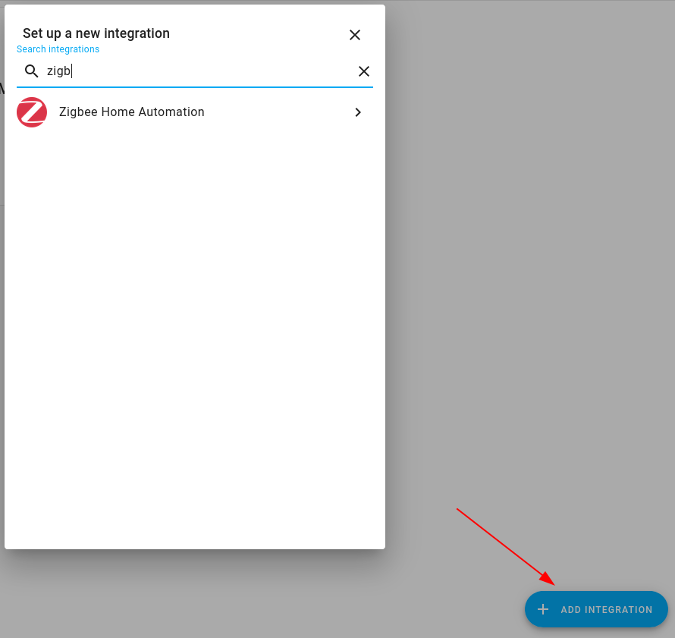
From there, click the Add Integration button in the bottom-right corner and search for Zigbee:
(Steve Ovens, CC BY-SA 4.0)
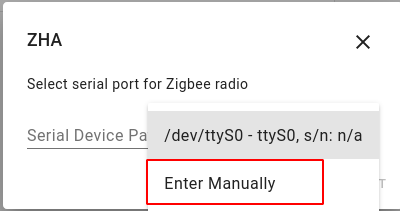
Enter the device manually. If the Zigbee Bridge was physically connected to the Home Assistant interface, you could select the device path. For instance, I have a ZigBee CC2531 USB stick that I use for some Zigbee devices that do not communicate correctly with the Sonoff Bridge. It attaches directly to the Home Assistant host and shows up as a Serial Device. See my third article for details on wireless standards. However, in this tutorial, we will continue to configure and use the Sonoff Bridge.
(Steve Ovens, CC BY-SA 4.0)
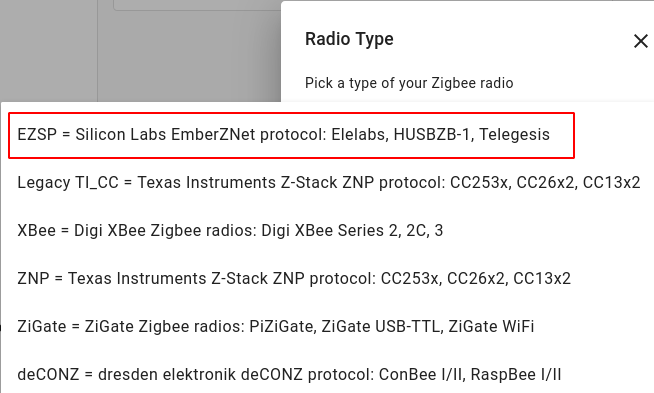
The next step is to choose the radio type, using the information in the DigiBlur tutorial. In this case, the radio is an EZSP radio:
(Steve Ovens, CC BY-SA 4.0)
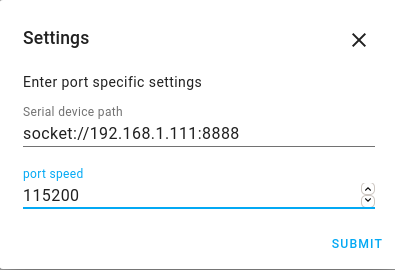
Finally, you need to know the IP address of the Sonoff Bridge, the port it is listening on, and the speed of the connection. Once I found the Sonoff Bridge's MAC address, I used my DHCP server to ensure that the device always uses the same IP on my network. DigiBlur's guide provides the port and speed numbers.
(Steve Ovens, CC BY-SA 4.0)
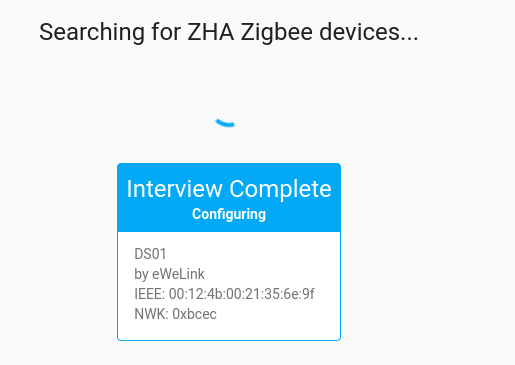
Once you've added the Bridge, you can begin pairing devices to it. Ensure that your devices are in pairing mode. The Bridge will eventually find your device(s).
(Steve Ovens, CC BY-SA 4.0)
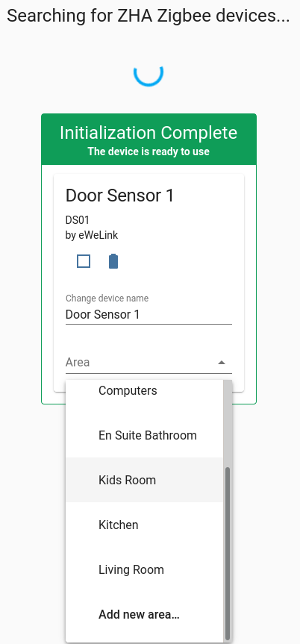
You can name the device(s) and assign an area (if you set them up).
(Steve Ovens, CC BY-SA 4.0)
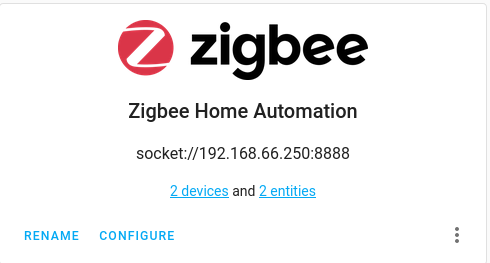
The areas displayed will vary based on whether or not you have any configured. Bedroom, Kitchen, and Living Room exist by default. As you add a device, HA will add a new Card to the Integrations tab. A Card is a user interface (UI) element that groups information related to a specific entity. The Zigbee card looks like this:
(Steve Ovens, CC BY-SA 4.0)
Later, I'll come back to using this integration. I'll also get into how to use this device in automation flows. But now, I will show you how to add functionality to Home Assistant to make your life easier.
Add functionality with add-ons
Out of the box, HA has some pretty great features for home automation. If you are buying commercial-off-the-shelf (CoTS) products, there is a good chance you can accomplish everything you need without the help of add-ons. However, you may want to investigate some of the add-ons, especially if (like me) you want to make your own sensors.
There are all kinds of HA add-ons, ranging from Android debugging (ADB) tools to MQTT brokers to the Visual Studio Code editor. With each release, the number of add-ons grows. Some people make HA the center of their local system, encompassing DHCP, Plex, databases, and other useful programs. In fact, HA now ships with a built-in media browser for playing any media that you expose to it.
I won't go too crazy in this article; I'll show you some of the basics and let you decide how you want to proceed.
Install official add-ons
Some of the many HA add-ons are available for installation right from the web UI, and others can be installed from alternative sources, such as Git.
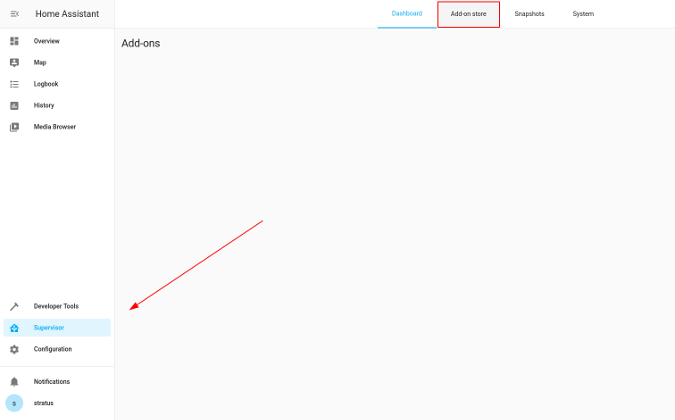
To see what's available, click on the Supervisor menu on the left panel. Near the top, you will see a tab called Add-on store.
(Steve Ovens, CC BY-SA 4.0)
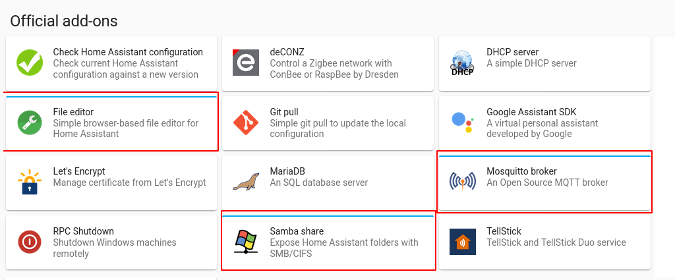
Below are three of the more useful add-ons that I think should be standard for any HA deployment:
(Steve Ovens, CC BY-SA 4.0)
The File Editor allows you to manage Home Assistant configuration files directly from your browser. I find this far more convenient for quick edits than obtaining a copy of the file, editing it, and pushing it back to HA. If you use add-ons like the Visual Studio Code editor, you can edit the same files.
The Samba share add-on is an excellent way to extract HA backups from the system or push configuration files or assets to the web directory. You should never leave your backups sitting on the machine being backed up.
Finally, Mosquitto broker is my preferred method for managing an MQTT client. While you can install a broker that's external to the HA machine, I find low value in doing this. Since I am using MQTT just to communicate with my IoT devices, and HA is the primary method of coordinating that communication, there is a low risk in having these components vertically integrated. If HA is offline, the MQTT broker is almost useless in my arrangement.
Install community add-ons
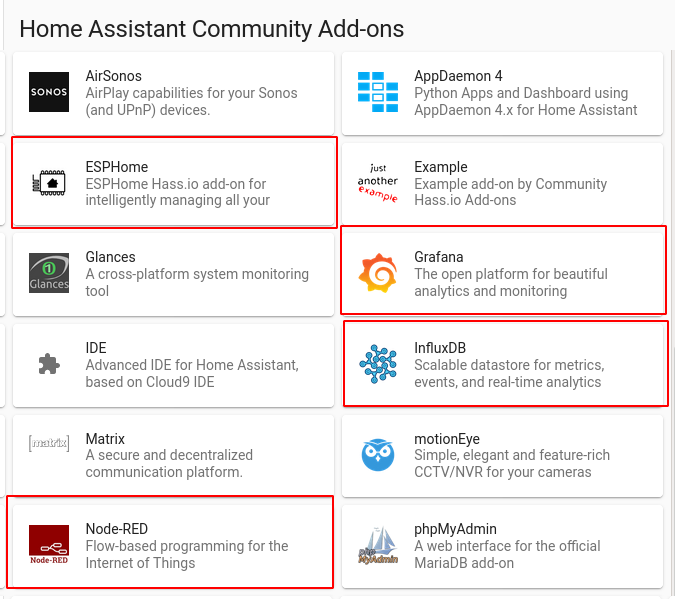
Home Assistant has a prolific community and passionate developers. In fact, many of the "community" add-ons are developed and maintained by the HA developers themselves. For my needs, I install:
(Steve Ovens, CC BY-SA 4.0)
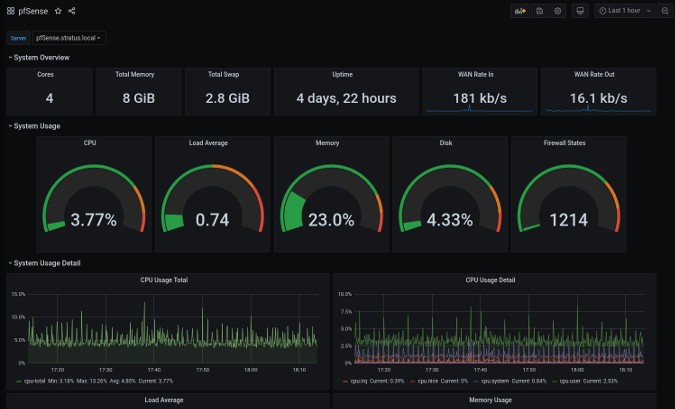
Grafana (graphing program) and InfluxDB (a time-series database) are largely optional and relate to the ability to customize how you visualize the data HA collects. I like to have historical data handy and enjoy looking at the graphs from time to time. While not exactly HA-related, I have my pfSense firewall/router forward metrics to InfluxDB so that I can make some nice graphs over time.
(Steve Ovens, CC BY-SA 4.0)
ESPHome is definitely an optional add-on that's warranted only if you plan on making your own sensors.
NodeRED is my preferred automation flow-handling solution. Although HA has some built-in automation, I find a visual flow editor is preferable for some of the logic I use in my system.
Configure add-ons
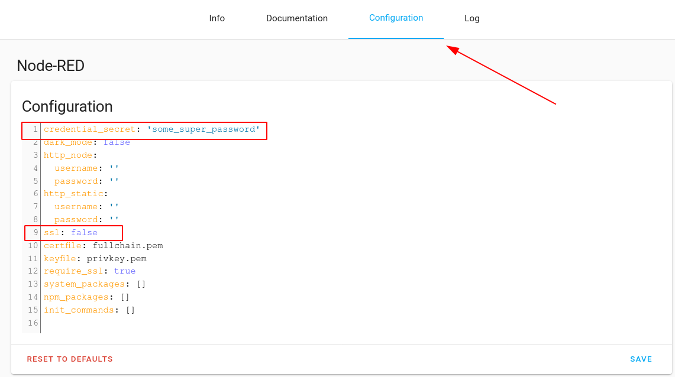
Some add-ons (such as File Editor) require no configuration to start them. However, most—such as Node-RED—require at least a small amount of configuration. Before you can start Node-RED, you will need to set a password:
(Steve Ovens, CC BY-SA 4.0)
IMPORTANT: Many people will abstract passwords through the secrets.yaml file. This does not provide any additional security other than not having passwords in the add-on configuration's YAML. See the official documentation for more information.
In addition to the password requirement, most of the add-ons that have a web UI default to having the ssl: true option set. A self-signed cert on my local LAN is not a requirement, so I usually set this to false. There is an add-on for Let's Encrypt, but dealing with certificates is outside the scope of this series.
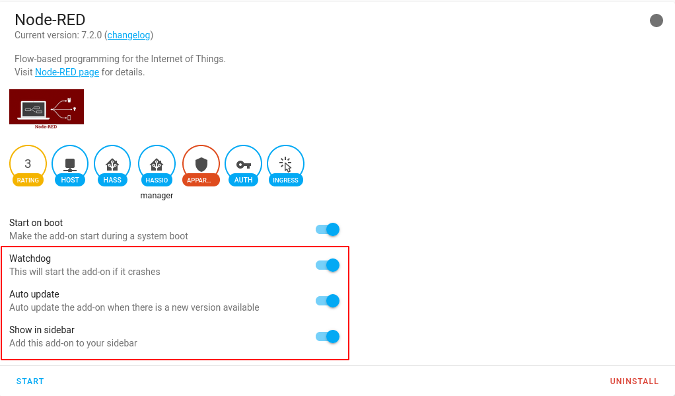
After you have looked through the Configuration tab, save your changes, and enable Node-RED on the add-on's main screen.
(Steve Ovens, CC BY-SA 4.0)
Don't forget to start the plugin.
Most add-ons follow a similar procedure, so you can use this approach to set up other add-ons.
Wrapping up
Whew, that was a lot of screenshots! Fortunately, when you are doing the configuration, the UI makes these steps relatively painless.
At this point, your HA instance should be installed with some basic configurations and a few essential add-ons.
In the next article, I will discuss integrating custom Internet of Things (IoT) devices into Home Assistant. Don't worry; the fun is just beginning!
via: https://opensource.com/article/21/2/home-automation-addons
作者:Steve Ovens 选题:lujun9972 译者:译者ID 校对:校对者ID
