7.5 KiB
Boot From a USB Drive in VirtualBox in Linux
Got a live Linux USB? The usual way to test it on your current system is to reboot and choose to boot from the live USB when the system restarts.
But that's annoying as you need to quit working on your computer and restart it.
A less disruptive way is to use a VM.
Yes, you can boot from a USB in a virtual machine with VirtualBox. This way, you don't have to install a distribution in VM just to try it. Use the live session instead.
In this tutorial, I'll show the steps to boot from a USB drive in VirtualBox on Linux systems. It takes some time and effort but saves you from rebooting your system.
Boot from USB drive in VirtualBox in Linux
Since this is a tutorial for advanced users, I am leaving out a few steps that you need beforehand**:**
- VirtualBox installed on your Linux system
- A live Linux USB, preferably Using Ventoy
This guide is divided into three parts:
- Create a virtual machine disk file
- Boot using USB in VM
- Removing virtual machine disk (optional)
So let's start with the first one.
Step 1: Create a virtual machine disk file (VMDK)
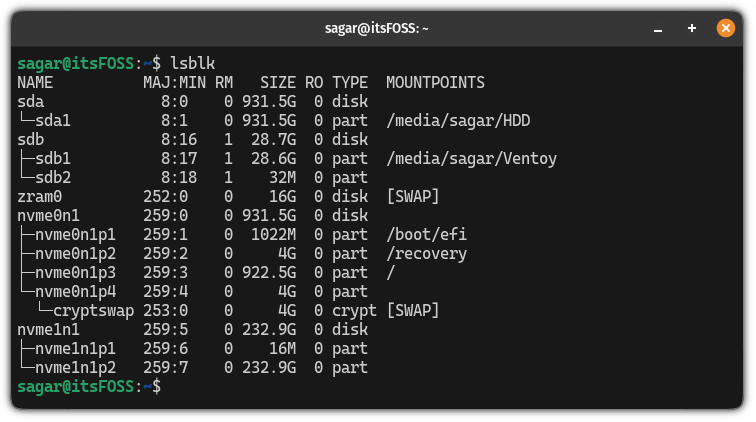
First, you need to identify the disk name of the USB drive, and to do so, you have to list the drives of your system.
For that purpose, I'm going to use the lsblk command:
lsblk
🚧
Make sure to use the disk name without any numbers. In my case, Ventoy is named with sdb1 but still, I have to use the sdb only.
From the above image, you can see, Ventoy is listed having the sdb1 but you have to use the name without any numbers. This means I have to use the sdb only, or else, it will throw an error.
Once you find your drive name, use the VBoxManage command in the following command to create
sudo VBoxManage createmedium disk --filename=/path/to/rawdisk.vmdk --variant=RawDisk --format=VMDK --property RawDrive=/dev/sda
In the above command, replace the path with /path/to/rawdisk.vmdk to where you want to save the file and /dev/sda with your target drive.
In my case, I want to create a file named IF.vmdk in my home directory and my target drive is /dev/sdb, then, I will be using the following:
📋
You have to give an absolute path to create the vmdk file!
sudo VBoxManage createmedium disk --filename=/home/sagar/IF.vmdk --variant=RawDisk --format=VMDK --property RawDrive=/dev/sdb
And finally, change the permissions using the chmod command:
sudo chmod 777 Filename.vmdk
Step 2: Boot from USB in VirtualBox in Linux
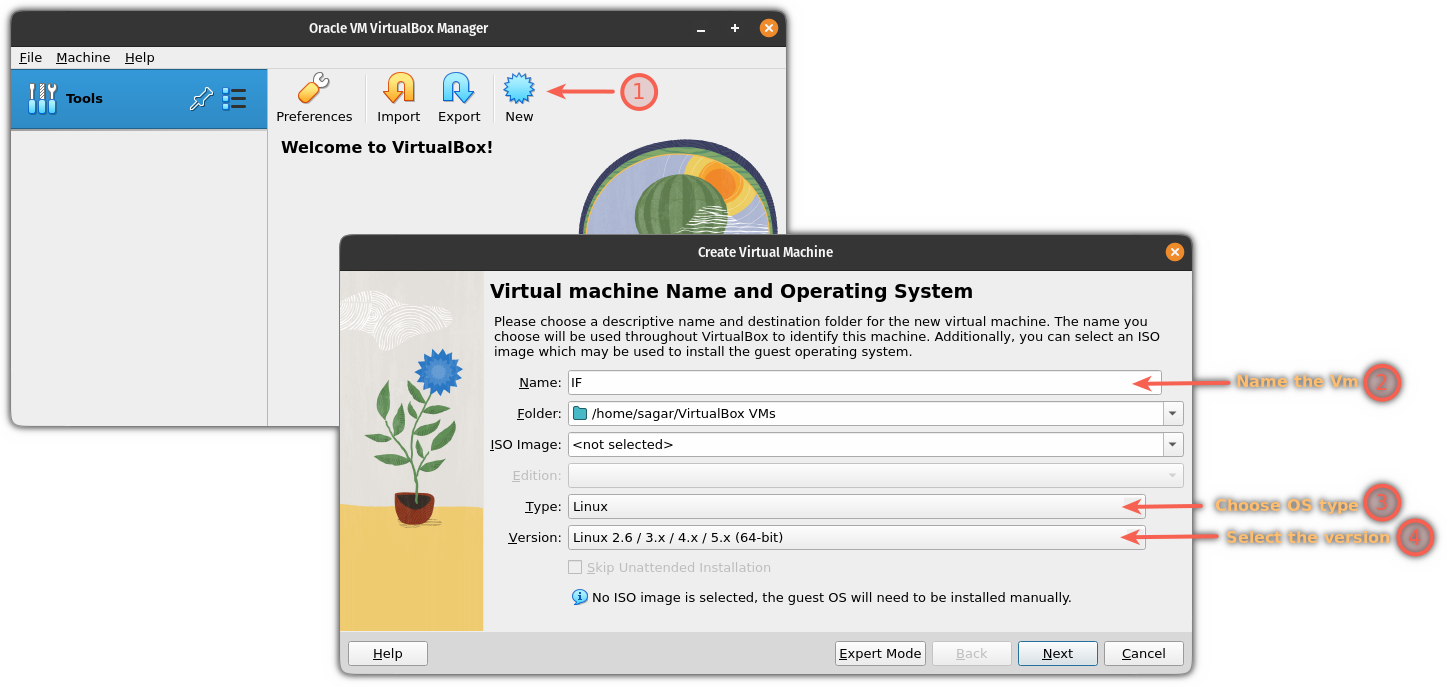
First, open the VirtualBox from your system menu and click on the New button.
There, name your VM and select the operating system type and its version:
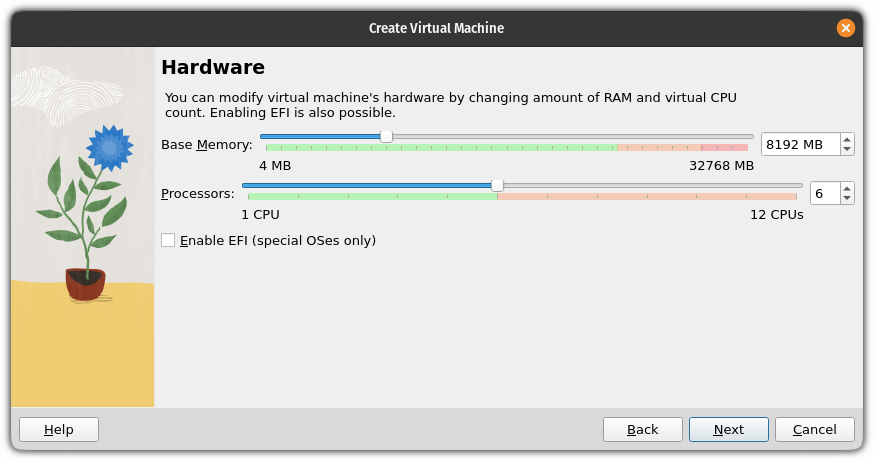
Now, click on the Next button and it will ask you to allocate hardware resources for your VM:
Once you are done allocating the hardware resources, click on the Next button.
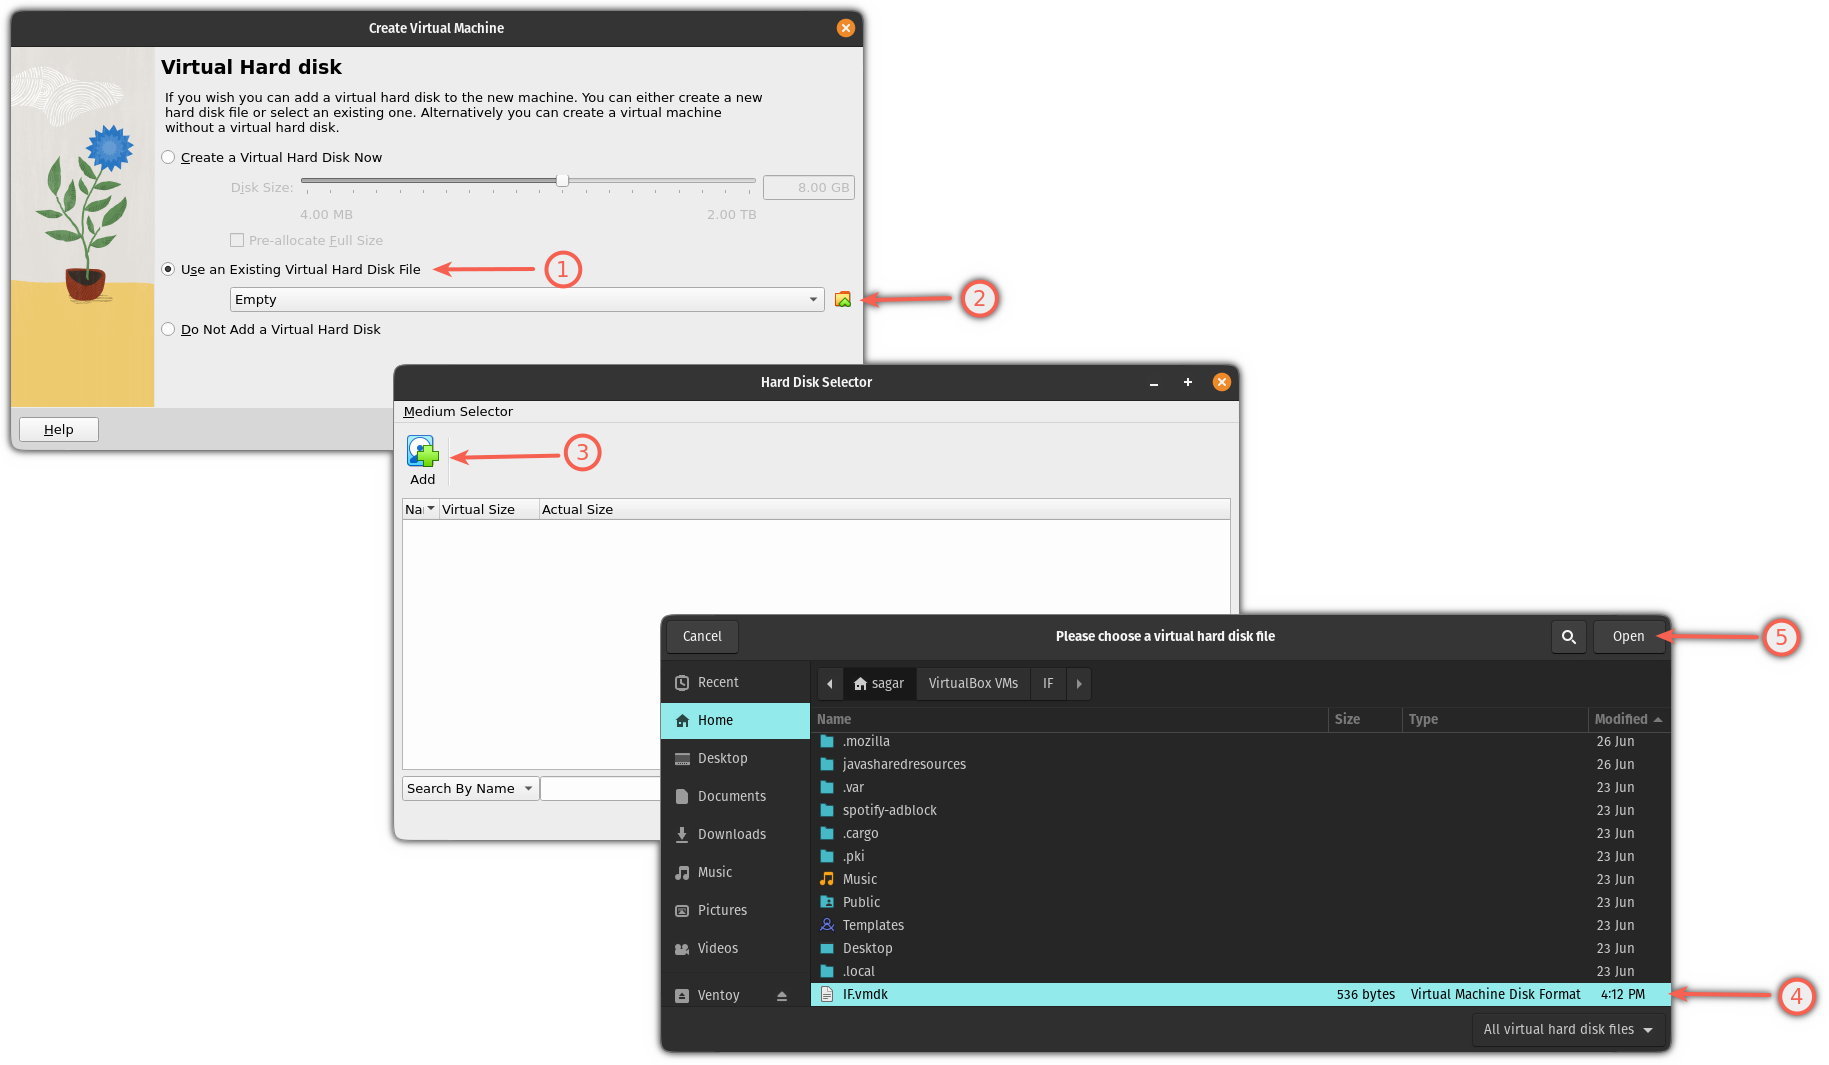
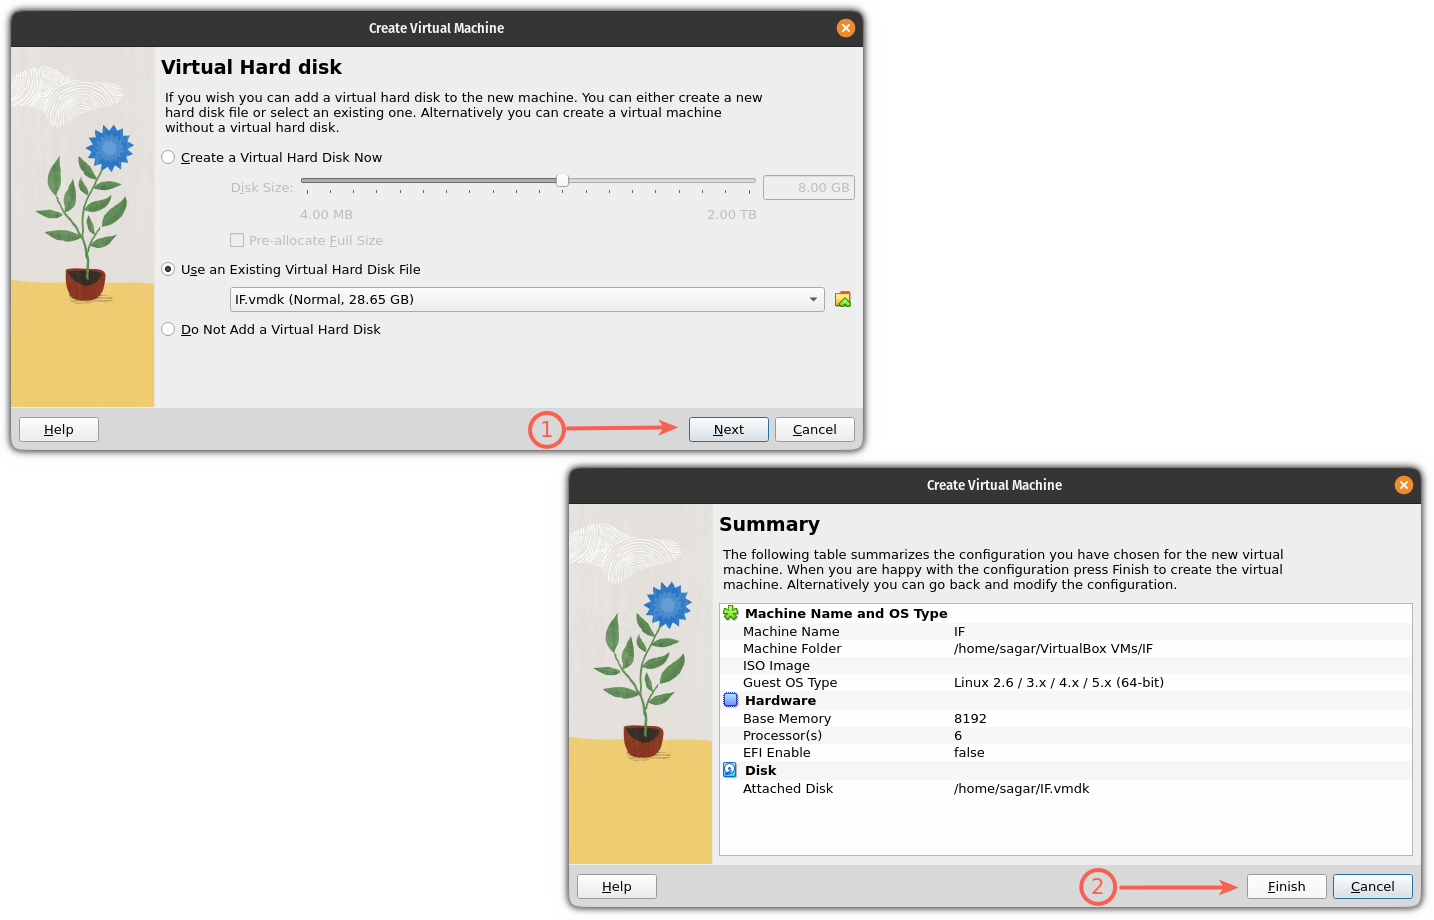
Here, you will find an option to create or add a virtual disk. Now, follow 3 simple steps:
- Select the 2nd option saying
Use an Existing Virtual Hard Disk File. - Click on the
Fileicon. - Hit the
Addbutton and select the file ending the.vmdkthat you created recently.
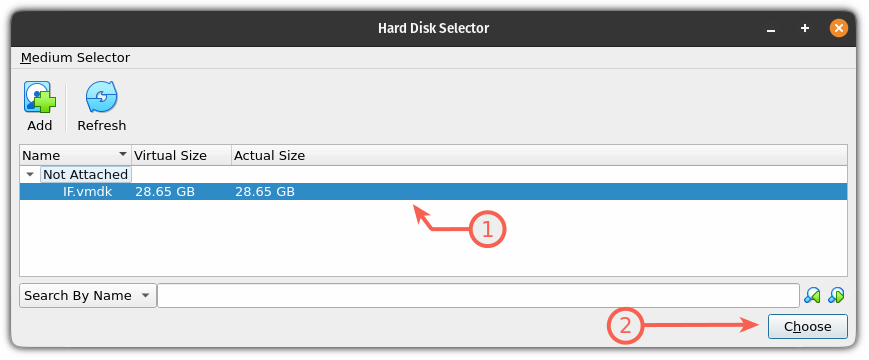
Once you select the file, it will show you the name of the file, select it and hit the Choose option:
It will show you the file that has been selected to boot from. Click on the next and it will show the summery of choices you've made.
Hit the Finish button:
That's it! The VM has been created.
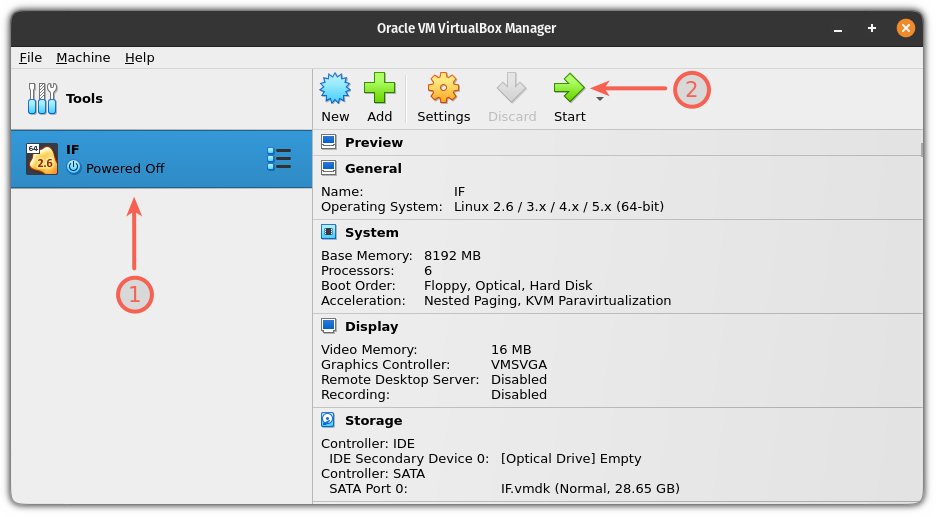
To start the VM, first, select the VM and hit the start button:
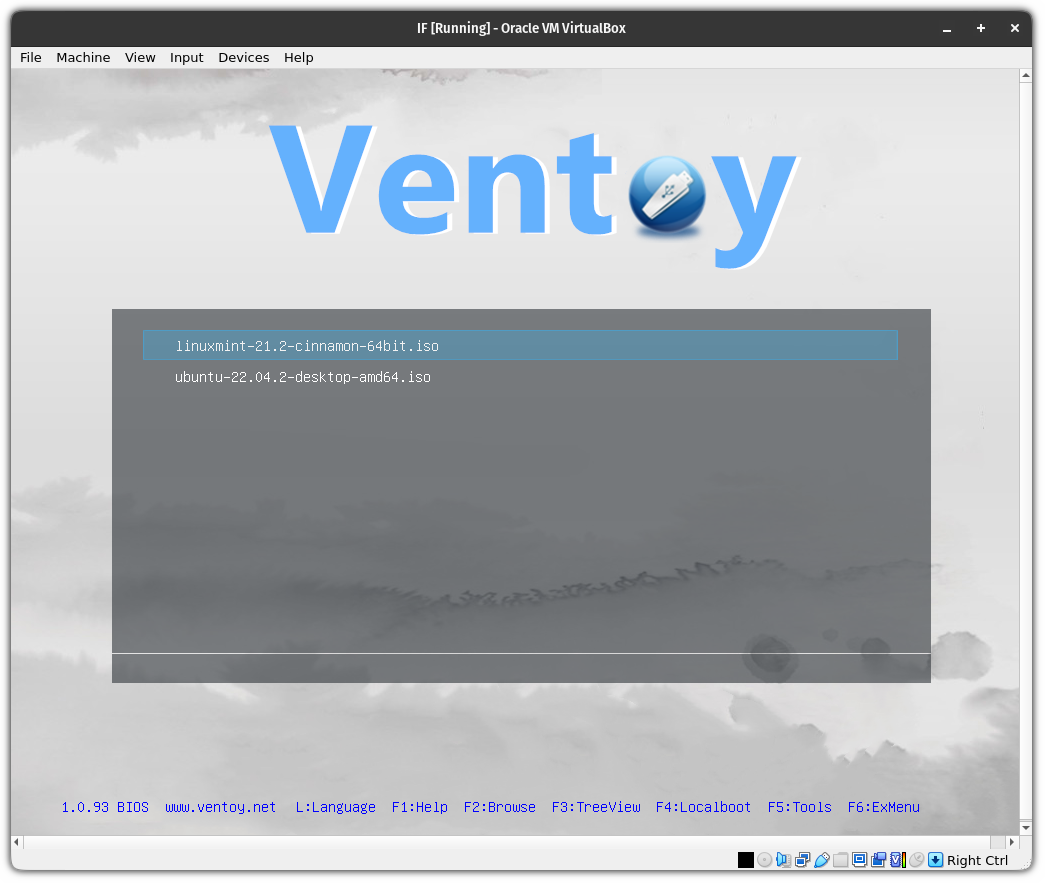
As my USB had Ventoy, you can see, multiple distros listed here:
Pretty cool. Right?
Step 3: Remove VM with vmdk file (optional)
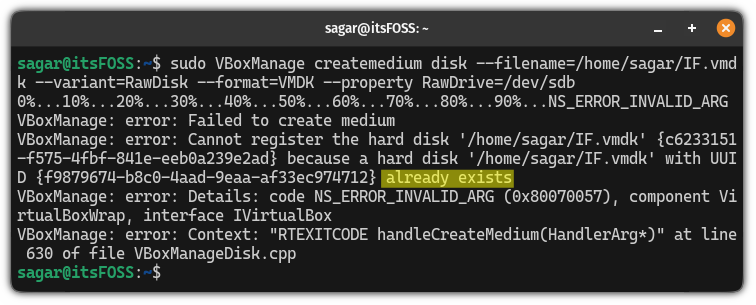
When I tried removing the vmdk file after deleting the VM, sure, it was getting deleted but whenever I tried creating a new file having the same name, it gave me an error saying the file already exists!
So here, I will walk you through how you can remove the VM with the vmdk file.
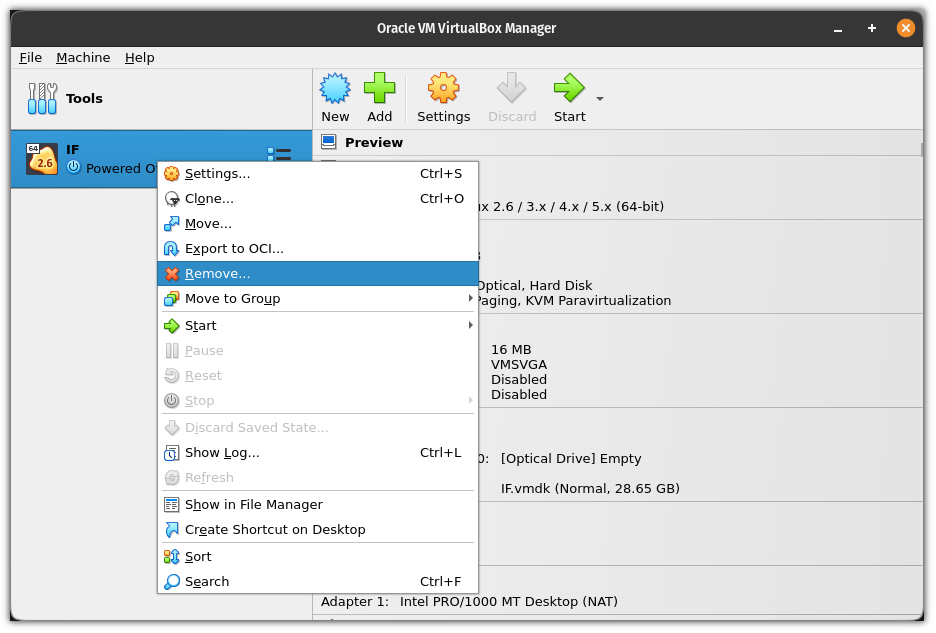
First, turn off the VM and remove it
Now, if you try to remove the vmdk file using the rm command and elevated privileges, you can remove it (but there's where the illusion starts).
For example, here, I removed the IF.vmdk file:
sudo rm IF.vmdk
And now, if I try to create a new vmdk file with the same name, it gives me an error saying the file already exists:
To remove the vmdk file, first, you have to unregister the file using the following:
sudo VBoxManage closemedium disk /path/to/MyDrive.vmdk
Once done, you can remove the file using the rm command and it will be removed easily:
sudo rm Filename.vmdk
And then, if you try to create a vmdk file with the same filename, you can do that:
There you have it!
More VM tips
If you are looking for the fastest VM, you can use the combination of Qemu + KVM. I know it sounds complex.
But to make things easy, we made a dedicated guide on how to install and use Qemu on Ubuntu including enabling shared folders, clipboard, and auto-resizing:
I hope you will find this guide helpful.
via: https://itsfoss.com/virtualbox-boot-from-usb/
作者:Sagar Sharma 选题:lujun9972 译者:译者ID 校对:校对者ID

