11 KiB
Open source interior design with Sweet Home 3D
Try out furniture layouts, color schemes, and more in virtual reality
before you go shopping in the real world.
There are three schools of thought on how to go about decorating a room:
- Buy a bunch of furniture and cram it into the room
- Take careful measurements of each item of furniture, calculate the theoretical capacity of the room, then cram it all in, ignoring the fact that you've placed a bookshelf on top of your bed
- Use a computer for pre-visualization
Historically, I practiced the little-known fourth principle: don't have furniture. However, since I became a remote worker, I've found that a home office needs conveniences like a desk and a chair, a bookshelf for reference books and tech manuals, and so on. Therefore, I have been formulating a plan to populate my living and working space with actual furniture, made of actual wood rather than milk crates (or glue and sawdust, for that matter), with an emphasis on plan. The last thing I want is to bring home a great find from a garage sale to discover that it doesn't fit through the door or that it's oversized compared to another item of furniture.
It was time to do what the professionals do. It was time to pre-viz.
Open source interior design
Sweet Home 3D is an open source (GPLv2) interior design application that helps you draw your home's floor plan and then define, resize, and arrange furniture. You can do all of this with precise measurements, down to fractions of a centimeter, without having to do any math and with the ease of basic drag-and-drop operations. And when you're done, you can view the results in 3D. If you can create a basic table (not the furniture kind) in a word processor, you can plan the interior design of your home in Sweet Home 3D.
Installing
Sweet Home 3D is a Java application, so it's universal. It runs on any operating system that can run Java, which includes Linux, Windows, MacOS, and BSD. Regardless of your OS, you can download the application from the website.
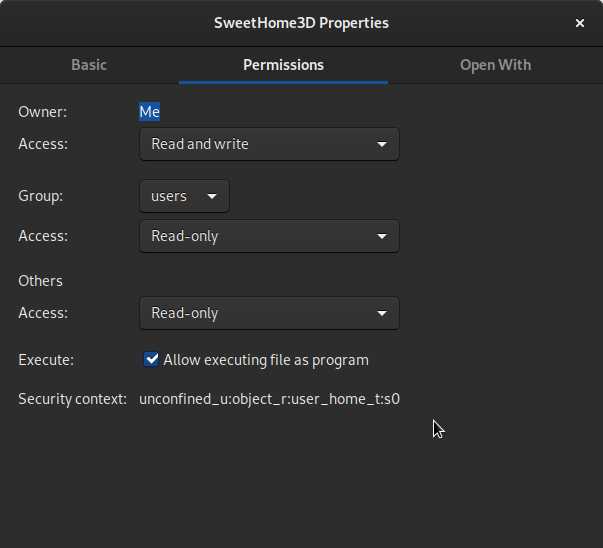
- On Linux, untar the archive. Right-click on the SweetHome3D file and select Properties. In the Permission tab, grant the file executable permission.
- On MacOS and Windows, expand the archive and launch the application. You must grant it permission to run on your system when prompted.
On Linux, you can also install Sweet Home 3D as a Snap package, provided you have snapd installed and enabled.
Measures of success
First thing first: Break out your measuring tape. To get the most out of Sweet Home 3D, you must know the actual dimensions of the living space you're planning for. You may or may not need to measure down to the millimeter or 16th of an inch; you know your own tolerance for variance. But you must get the basic dimensions, including measuring walls and windows and doors.
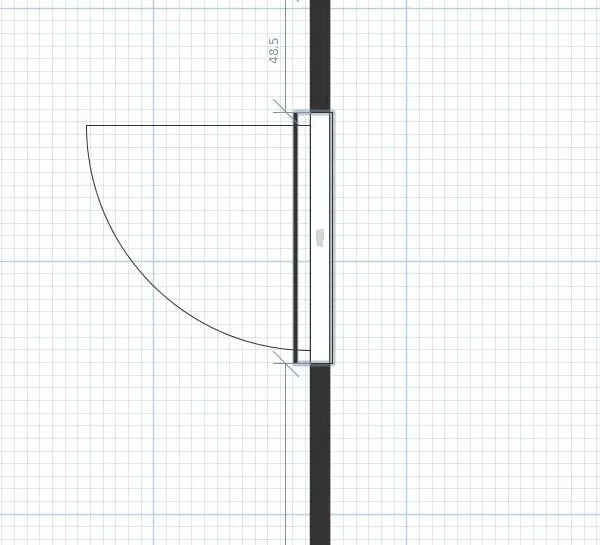
Use your best judgment for common sense. For instance, When measuring doors, include the door frame; while it's not technically part of the door itself, it is part of the wall space that you probably don't want to cover with furniture.
CC-SA-BY opensource.com
Creating a room
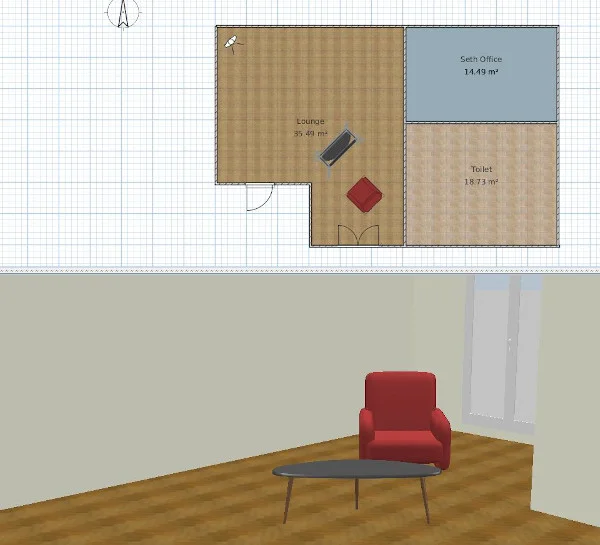
When you first launch Sweet Home 3D, it opens a blank canvas in its default viewing mode, a blueprint view in the top panel, and a 3D rendering in the bottom panel. On my Slackware desktop computer, this works famously, but my desktop is also my video editing and gaming computer, so it's got a great graphics card for 3D rendering. On my laptop, this view was a lot slower. For best performance (especially on a computer not dedicated to 3D rendering), go to the 3D View menu at the top of the window and select Virtual Visit. This view mode renders your work from a ground-level point of view based on the position of a virtual visitor. That means you get to control what is rendered and when.
It makes sense to switch to this view regardless of your computer's power because an aerial 3D rendering doesn't provide you with much more detail than what you have in your blueprint plan. Once you have changed the view mode, you can start designing.
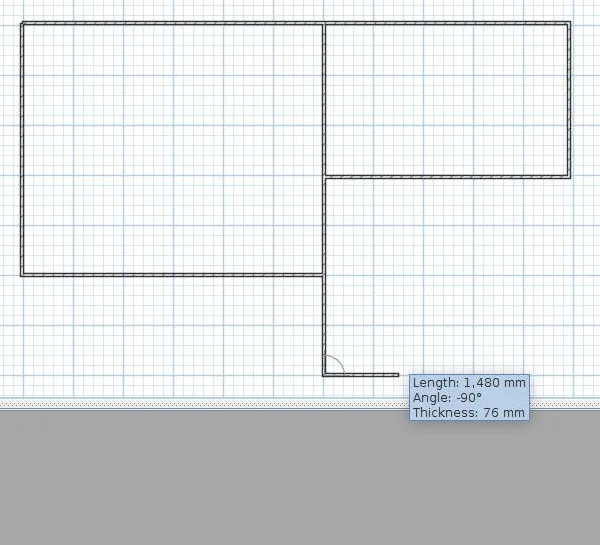
The first step is to define the walls of your home. This is done with the Create Walls tool, found to the right of the Hand icon in the top toolbar. Drawing walls is simple: Click where you want a wall to begin, click to anchor it, and continue until your room is complete.
Once you close the walls, press Esc to exit the tool.
Defining a room
Sweet Home 3D is flexible on how you create walls. You can draw the outer boundary of your house first, and then subdivide the interior, or you can draw each room as conjoined "containers" that ultimately form the footprint of your house. This flexibility is possible because, in real life and in Sweet Home 3D, walls don't always define a room. To define a room, use the Create Rooms button to the right of the Create Walls button in the top toolbar.
If the room's floor space is defined by four walls, then all you need to do to define that enclosure as a room is double-click within the four walls. Sweet Home 3D defines the space as a room and provides you with its area in feet or meters, depending on your preference.
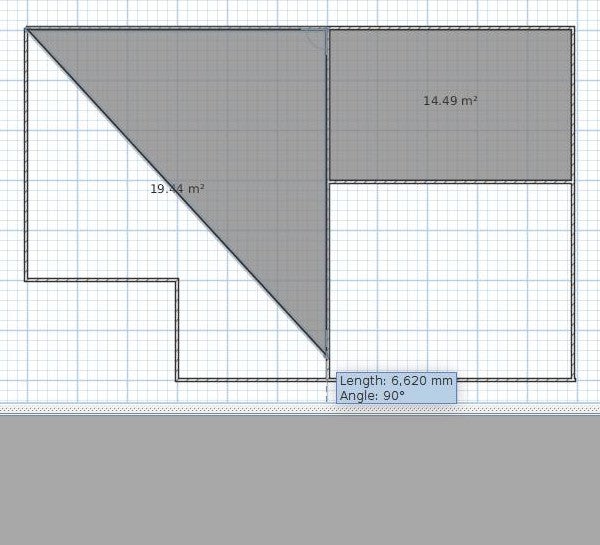
For irregular rooms, you must manually define each corner of the room with a click. Depending on the complexity of the room shape, you may have to experiment to find whether you need to work clockwise or counterclockwise from your origin point to avoid quirky Möbius-strip flooring. Generally, however, defining the floor space of a room is straightforward.
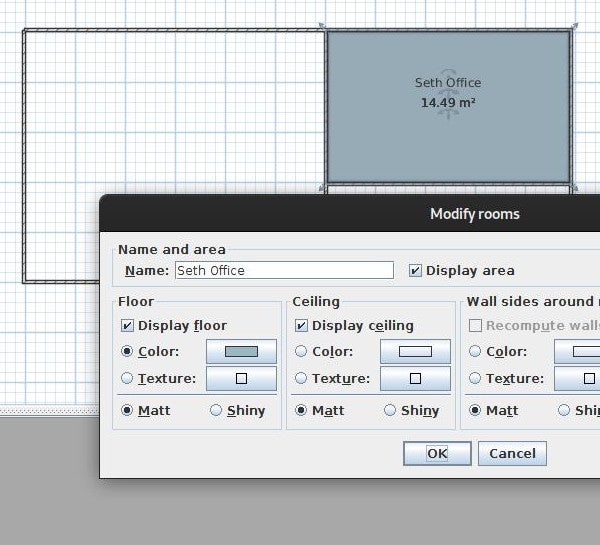
After you give the room a floor, you can change to the Arrow tool and double-click on the room to give it a name. You can also set the color and texture of the flooring, walls, ceiling, and baseboards.
None of this is rendered in your blueprint view by default. To enable room rendering in your blueprint panel, go to the File menu and select Preferences. In the Preferences panel, set Room rendering in plan to Floor color or texture.
Doors and windows
Once you've finished the basic floor plan, you can switch permanently to the Arrow tool.
You can find doors and windows in the left column of Sweet Home 3D, in the Doors and Windows category. You have many choices, so choose whatever is closest to what you have in your home.
To place a door or window into your plan, drag-and-drop it on the appropriate wall in your blueprint panel. To adjust its position and size, double-click the door or window.
Adding furniture
With the base plan complete, the part of the job that feels like work is over! From this point onward, you can play with furniture arrangements and other décor.
You can find furniture in the left column, organized by the room for which each is intended. You can drag-and-drop any item into your blueprint plan and control orientation and size with the tools visible when you hover your mouse over the item's corners. Double-click on any item to adjust its color and finish.
Visiting and exporting
To see what your future home will look like, drag the "person" icon in your blueprint view into a room.
You can strike your own balance between realism and just getting a feel for space, but your imagination is your only limit. You can get additional assets to add to your home from the Sweet Home 3D download page. You can even create your own furniture and textures with the Library Editor applications, which are optional downloads from the project site.
Sweet Home 3D can export your blueprint plan to SVG format for use in Inkscape, and it can export your 3D model to OBJ format for use in Blender. To export your blueprint, go to the Plan menu and select Export to SVG format. To export a 3D model, go to the 3D View menu and select Export to OBJ format.
You can also take "snapshots" of your home so that you can refer to your ideas without opening Sweet Home 3D. To create a snapshot, go to the 3D View menu and select Create Photo. The snapshot is rendered from the perspective of the person icon in the blueprint view, so adjust as required, then click the Create button in the Create Photo window. If you're happy with the photo, click Save.
Home sweet home
There are many more features in Sweet Home 3D. You can add a sky and a lawn, position lights for your photos, set ceiling height, add another level to your house, and much more. Whether you're planning for a flat you're renting or a house you're buying—or a house that doesn't even exist (yet), Sweet Home 3D is an engaging and easy application that can entertain and help you make better purchasing choices when scurrying around for furniture, so you can finally stop eating breakfast at the kitchen counter and working while crouched on the floor.
via: https://opensource.com/article/19/10/interior-design-sweet-home-3d
作者:Seth Kenlon 选题:lujun9972 译者:译者ID 校对:校对者ID
