6.2 KiB
Scan documents and old photos on Linux with Skanlite
Use this Linux KDE application to digitize your archives.

Although the world has mostly gone digital now, there are still times when you just have to print a form, sign it, and scan it back in. Sometimes, I find that a snapshot on my phone suffices, but some industries require a better copy than a hasty snapshot, and so a flatbed scanner is necessary. The KDE project provides an application called Skanlite that helps you import documents scanned on a flatbed, or even a tethered camera.
Install Skanlite on Linux
You can install Skanlite from your software repository. On Fedora, Mageia, and similar:
`$ sudo dnf install skanlite`
On Elementary, Linux Mint, and other Debian-based distributions:
`$ sudo apt install skanlite`
Scanner drivers
Most scanners on the market are compatible with the SANE scanner API. SANE isn't really a driver, but a protocol that can receive input from image capture devices and provide options to a programmer looking to build an application around it. Skanlite is one such application.
I've yet to come across a scanner that doesn't interface with SANE, but there are probably scanners out there that don't. In those cases, look on the manufacturer's website for SANE or TWAIN drivers, or else for their proprietary driver and scanner interface. The latter may not be usable with Skanlite, but Skanlite is always worth launching when you're unsure whether your scanner communicates over standard protocols. I've even had printer and scanner combination devices where the scanner is recognized immediately, even though the printer requires an additional driver.
Using Skanlite
When you launch Skanlite, it first searches your system for image capture devices. On laptops, Skanlite usually discovers the webcam as a valid input source (because it is), but it also locates flatbed scanners attached to your machine. Select the scanner you want to use, and then continue.
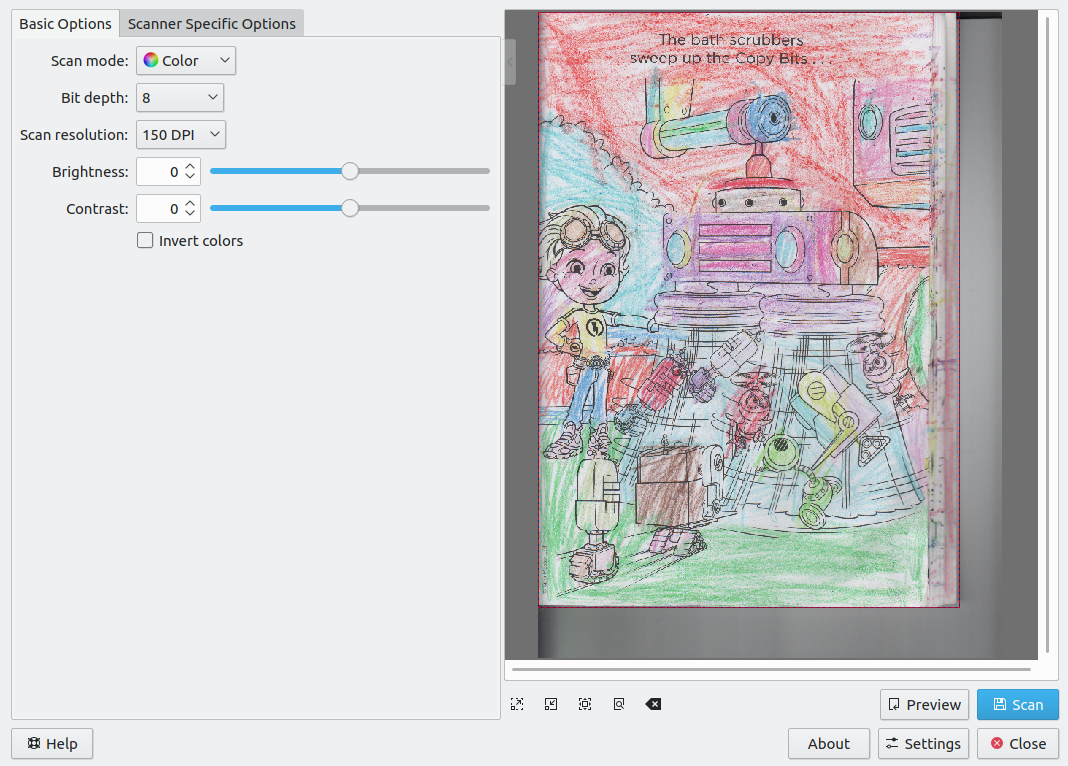
To see what's on the scanbed, click the Preview button in the bottom right corner of the application.
(Image courtesy KDE)
This displays a preview image in the right panel. Nothing has been saved to your drive, this only shows you what your scanner has on it at the moment.
Selecting a scan area
If you only need a portion of what's on the scanner, you can select an area you want to save. To select a single region, click and drag your mouse over the area you want to save. When there's an active selection, only the portion of the document you've selected will be saved when you click the Scan button.
You can have more than one selection, which is especially efficient when you need to scan several small images or only specific parts of one larger documents. To add a selection, click the + icon that appears in the center of your selection.
(Image courtesy KDE)
You can remove selections by clicking the - icon, which appears when you have multiple active selections.
Scan settings
Image capture settings are located in the left panel. These controls allow you to import images in color or grayscale, and make adjustments to the brightness and contrast of the image. These options are software-based and don't affect how your scanner behaves, but they're common adjustments to make, and doing those adjustments here can save you from having to post-process the image in GIMP or Gwenview.
In many cases, your scanner may have configurable settings, found in the Scanner Specific Options tab on the left of the Skanlite window. Some scanners allow you to adjust color temperature, brightness, saturation, and other attributes that happen in firmware. Available options vary depending on the device and vendor, so you're likely to see changes in this panel depending on which device you're interfacing with.
Scan and save
When you're ready to import the image (or the selected area of the image, if you've made selections), click the Scan button in the bottom right corner of the Skanlite window. Depending on your device, it may take a few moments to create the scan, but when it's done you're prompted to save or discard the image. If you like what you see, click Save.
Images are saved to whatever default location you have configured. To see the default location, click the Settings button in the bottom right corner of the window. In Skanlite Settings, you can set the default save location, the default name format, and the image resolution. You can also control whether you're prompted to save or discard an image after each scan, or whether you prefer to save everything and sort through it later.
Scanning is easy on Linux
Scanning documents on Linux is so easy, I rarely give it a second thought. There aren't usually special drivers or applications you need to hunt down and install, because applications like Skanlite use open protocols to make the process simple. The next time you have a hard copy that you need to digitize, import it with Skanlite.
via: https://opensource.com/article/22/2/scan-documents-skanlite-linux-kde
作者:Seth Kenlon 选题:lujun9972 译者:译者ID 校对:校对者ID

