mirror of
https://github.com/LCTT/TranslateProject.git
synced 2025-02-19 00:30:12 +08:00
183 lines
9.8 KiB
Markdown
183 lines
9.8 KiB
Markdown
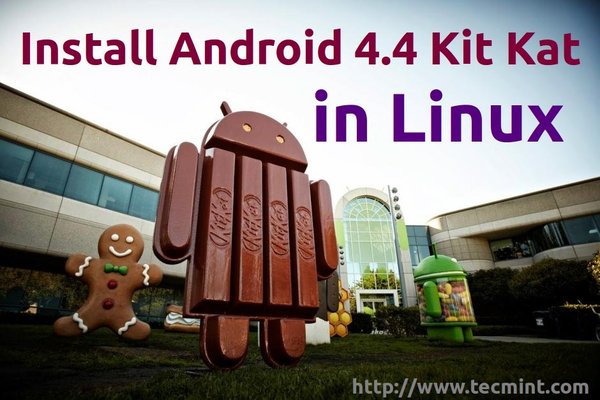
在Linux上安装Android 4.4 KitKat来玩玩喜爱的游戏和应用
|
||
================================================================================
|
||
**Android (x86)**项目致力于移植Android系统到X86处理器上,使用户可以更容易的在任何电脑上安装Android。他们通过使用android源码,增加补丁来使Android能够在X86处理器,笔记本电脑和平板电脑下工作。
|
||
|
||
|
||
在Linux安装Android 4.4 KitKat
|
||
|
||
前一段时间,项目组发布了最新的“Android KitKat 4.4 RC2”,下面,我将说明如何在VirtualBox上安装,不过有一个小问题,安装完成Android后鼠标指针不工作了,我猜,如果你根据本教程将它安装成主系统,这个鼠标应该可以工作,否则我们只能使用键盘了。
|
||
|
||
### 第一步: 在linux上安装VirtualBox ###
|
||
|
||
**1.** 大多数的Linux发行版中,官方源都有VirtualBox,例如在Ubuntu中安装
|
||
|
||
$ sudo apt-get install virtualbox
|
||
|
||
其他的Linux发行版,像**RHEL, CentOS and Fedora**,请参考下面文章来安装VirtualBox
|
||
|
||
- [Install VirtualBox in RHEL, CentOS and Fedora][1]
|
||
|
||
### 第二步: 下载并在VirtualBox中安装Android 4.4 kitkat ###
|
||
|
||
**2.** 这步挺简单的,只是需要去[androud Sourceforge.net][2]项目下载 **Android 4.4 x86 Kit Kat**文件
|
||
|
||
**3.** 要想安装**Android 4.4 kitkat**,首先,你需要启动刚刚下载.iso文件,打开 **VirtualBox**,创建一个新的虚拟机,然后按照下面图片设置:
|
||
|
||

|
||
创建新的虚拟机
|
||
|
||
**4.** 接下来,它会询问你新设备的内存大小,Android 4.4 kikat需要1G内存才能完美运行,但是由于我的电脑只有1G内存,我只能选择512MB。
|
||
|
||

|
||
设置内存
|
||
|
||
**5.** 选择“现在创建虚拟硬盘”(“Create a virtual hard drive now”)来创建一个新的硬盘。
|
||
|
||

|
||
创建虚拟硬盘
|
||
|
||
**6.** 它现在会询问你新虚拟硬盘的类型,选择**VDI**
|
||
|
||

|
||
选择硬盘驱动类型
|
||
|
||

|
||
选择存储方式
|
||
|
||
**7.** 现在设置虚拟硬盘大小,你可以按照你的所需来设置任何大小,但是除了将来安装Apps所用的空间,至少需要**4G**来保证系统正确安装。
|
||
|
||

|
||
设置虚拟硬盘大小
|
||
|
||
**8.** 现在你的新虚拟设备创建好了,可以启动下载的**.iso**文件了,从左边的列表选择创建的虚拟机,点击**设置** -> **存储** ,如下图,选择**android 4.4 kitkat RC2**的镜像文件。
|
||
|
||

|
||
选择Android KitKat ISO
|
||
|
||
**9.** 点击**OK**, 打开机器,启动.iso镜像, 选择 “**安装**” 开始在虚拟机上安装系统.
|
||
|
||

|
||
选择安装Android Kit Kat
|
||
|
||
**10.** 请选择一个分区来安装Android-x86
|
||
|
||

|
||
选择 Partition Drive
|
||
|
||
**11.** 如下图,你可以看见cfdisk界面,cfdisk是一个分区工具,我们将要使用它来创建一个新的硬盘分区,用来安装Android 4.4,现在,点击 “**New**”
|
||
|
||

|
||
创建新分区
|
||
|
||
**12.** 选择“**Primary**”作为分区类型
|
||
|
||

|
||
选择主分区
|
||
|
||
**13.** 接下来,设置分区大小
|
||
|
||

|
||
设置分区大小
|
||
|
||
**14.** 现在我们必须给硬盘创建新的引导使其能够写入新的分区表,点击“**Bootable**”给引导标记新的分区,你不会注意到有任何变化,但是引导标记将会自己给选中分区。
|
||
|
||

|
||
制作分区引导
|
||
|
||
**15.** 完成之后,点击“**Write**”对硬盘写入新的分区。
|
||
|
||

|
||
应用新分区
|
||
|
||
**16.** 它会询问你是否确认,输入“**yes**”并点击**Enter**
|
||
|
||

|
||
确认分区改变
|
||
|
||
**17.** 现在我们的新硬盘已经创建,点击 **Quit** 你就可以看来类似下图的显示,选中刚刚创建的用来安装Android 的分区,点击**Enter**
|
||
|
||

|
||
选择分区来安装Android
|
||
|
||
**18.** 选择“**ext3**”作为硬盘文件系统并格式化
|
||
|
||

|
||
选择Ext3分区类型
|
||
|
||

|
||
格式化分区
|
||
|
||
**19.** 它将会询问你是否需要安装GRUB启动器,当然选择**Yes**,如果不这样,你将不能启动新系统,所以选择**Yes**并点击**Enter**
|
||
|
||

|
||
安装启动加载器 GRUB
|
||
|
||
**20.** 最后,它会问你是否设置**/system**分区能写入,选择**yes**,它会在安装完系统后帮助你减少很多麻烦。
|
||
|
||

|
||
使分区能写入
|
||
|
||
**21.** 安装将会开始它的任务,安装器结束工作后,选择重启,在我做测试的时候,“Run-Android x86”不起作用,所以你不得不重启。
|
||
|
||

|
||
Android Kit kat 安装完成
|
||
|
||
**22.** 我们已经完成安装**Android 4.4 KitKat RC2**,问题是VirtualBox将会继续加载**.iso**镜像文件而不是从虚拟硬盘驱动启动,所以为了修正这个问题,选择**设置** -> **存储** ->移除iso文件
|
||
|
||

|
||
移除Android Kit Kat 镜像
|
||
|
||
**23.** 你可以启动你的虚拟设备,运行你的Android系统了
|
||
|
||

|
||
启动Android Kit Kat 系统
|
||
|
||

|
||
Android标志界面
|
||
|
||
**24.** 使用**Android**之前,你需要完成一个向导来进行配置。你会看见如下屏幕,现在的问题是,鼠标不能在**android 4.4 kitkat**工作,这意味着我们需要展示我们高超的键盘试用技巧了。首先,选择语言,你需要使用键盘**上**键和**下**键,进行到下一步,敲击**右**键移动光标,选择**Enter**
|
||
|
||

|
||
Android 欢迎界面
|
||
|
||

|
||
选择WiFi网络
|
||
|
||

|
||
创建Android Google账户
|
||
|
||

|
||
注册Google账户
|
||
|
||

|
||
设置日期和时间
|
||
|
||

|
||
输入你的信息
|
||
|
||

|
||
Android 4.4 Kit Kat 主界面
|
||
|
||
|
||
如果你没有智能手机而又想轻松使用**Play Store**apps,那么安装 **Android x86**是个不错的选择。你曾经尝试过安装android x86吗?结果怎样呢?你有没有想过android可以成为一个目标指向桌面功能的**真正操作系统**?
|
||
|
||
----------
|
||
|
||

|
||
|
||
[Hanny Helal][3]
|
||
|
||
自2010年起,成为Linux和自由软件用户,致力于多个自由软件项目。
|
||
|
||
--------------------------------------------------------------------------------
|
||
|
||
via: http://www.tecmint.com/install-android-kitkat-in-linux/
|
||
|
||
译者:[Vic___](http://www.vicyu.net) 校对:[Caroline](https://github.com/carolinewuyan)
|
||
|
||
本文由 [LCTT](https://github.com/LCTT/TranslateProject) 原创翻译,[Linux中国](http://linux.cn/) 荣誉推出
|
||
|
||
[1]:http://www.tecmint.com/install-virtualbox-on-redhat-centos-fedora/
|
||
[2]:http://sourceforge.net/projects/android-x86/
|
||
[3]:http://www.tecmint.com/
|