mirror of
https://github.com/LCTT/TranslateProject.git
synced 2024-12-29 21:41:00 +08:00
183 lines
9.6 KiB
Markdown
183 lines
9.6 KiB
Markdown
客户机通过DNSMASQ网络启动服务器网络安装“Debian 7(Wheezy)”
|
||
================================================================================
|
||
本教程将指引你直接通过使用**DNSMASQ**作为**PXE服务器(预启动执行环境)**的网络位置安装**Debian 7(Wheezy)**,此种情况是假定你的服务器不提供任何CD/DVD/USB介质驱动器,或者它只能通过相连的监视器、键盘和鼠标操作。
|
||
|
||

|
||
|
||
客户机上的Debian 7网络安装
|
||
|
||
**DNSMASQ**是一个轻量级网络基础架构服务器,它可以通过内建的DNS、DHCP和TFTP服务器提供如DNS、DHCP和网络启动等关键服务。
|
||
|
||
一旦PXE服务器启动并运行,你可以指示你所有的客户机直接从网络启动,前提是你的客户机必须拥有一张支持网络启动的网卡,网络启动可以从BIOS的网络启动或启动服务选项中启用。
|
||
|
||
### 需求 ###
|
||
|
||
- [Debian 7 (Wheezy)安装指南][1]
|
||
|
||
### 步骤1: 安装及配置DNSMASQ服务器 ###
|
||
|
||
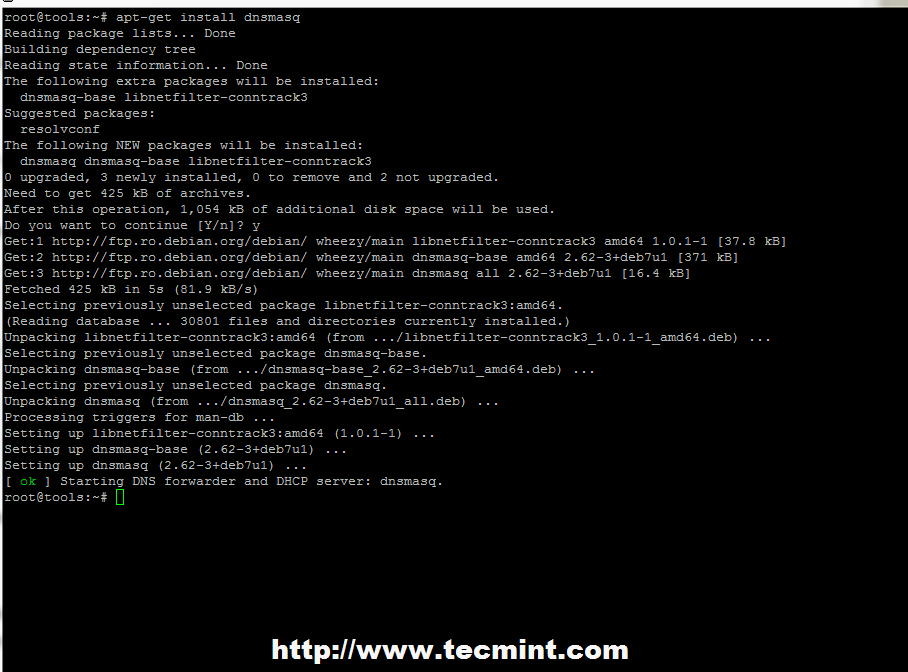
**1.** 首先,在安装Debian服务器后,要确保你的系统使用的是**静态IP地址**。因为除了网络启动之外,也要为你的整个网段提供DHCP服务。设置好静态IP地址后,以root帐号或具有root权力的用户来运行以下命令,进行DNSMASQ服务器的安装。
|
||
|
||
# apt-get install dnsmasq
|
||
|
||

|
||
|
||
安装Dnsmasq包
|
||
|
||
**2.** 安装好DNSMASQ包后,你可以开始编辑配置文件。首先创建一个主配置文件的备份,然后使用下面的命令对**dnsmasq.conf**文件进行编辑。
|
||
|
||
# mv /etc/dnsmasq.conf /etc/dnsmasq.conf.backup
|
||
# nano /etc/dnsmasq.conf
|
||
|
||

|
||
|
||
备份Dnsmasq配置
|
||
|
||
**3.** 上面的备份过程适合重命名配置文件,所以新的文件应该是空,你可以使用以下下面描述的**DNSMASQ**配置文件节录。
|
||
|
||
interface=eth0
|
||
domain=debian.lan
|
||
dhcp-range=192.168.1.3,192.168.1.253,255.255.255.0,1h
|
||
dhcp-boot=pxelinux.0,pxeserver,192.168.1.100
|
||
pxe-prompt="Press F8 for menu.", 60
|
||
#pxe-service types: x86PC, PC98, IA64_EFI, Alpha, Arc_x86, Intel_Lean_Client, IA32_EFI, BC_EFI, Xscale_EFI and X86-64_EFI
|
||
pxe-service=x86PC, "Install Debian 7 Linux from network server 192.168.1.100", pxelinux
|
||
enable-tftp
|
||
tftp-root=/srv/tftp
|
||
|
||

|
||
|
||
Dnsmasq配置
|
||
|
||
- **interface** – 服务器监听的网络接口。
|
||
- **domain** – 用你自己的域名替换。
|
||
- **dhcp-range** – 用你自己的网络掩码定义的网络IP地址范围。
|
||
- **dhcp-boot** – 保持默认,但使用你自己的服务器IP地址替换IP声明。
|
||
- **pxe-prompt** – 保持默认 – 要求在**敲击F8键** 进入菜单时等待60秒。
|
||
- **pxe=service** – 使用**x86PC**作为32位/64位架构,并进入引号字符串的菜单描述提示。其它值类型可能是:PC98,IA64_EFI,Alpha,Arc_x86,Intel_Lean_Client,IA32_EFI, BC_EFI,Xscale_EFI和 X86-64_EFI。
|
||
- **enable-tftp** – 启用内建TFTP服务器。
|
||
- **tftp-root** – 使用/srv/tftp作为Debian网络启动文件的存放位置。
|
||
|
||
### 步骤2: 下载Debian网络启动文件并打开防火墙连接 ###
|
||
|
||
**4.** 现在,该下载Debian网络启动文件了。首先,修改你当前工作目录路径到**TFTP根目录**位置,此位置由最后的配置语句定义(**/srv/tftp**系统路径)。
|
||
|
||
转到[Debian网络安装][2] – [网络启动部分][3]的官方页面镜像,抓取以下文件,要抓取的文件取决于你想要安装到客户端的系统架构。
|
||
|
||
下载好**netboot.tar.gz**文件后,同时提取归档(该过程描述只适用于64位,但对于其它系统架构也基本相同)。
|
||
|
||
# cd /srv/tftp/
|
||
# wget http://ftp.nl.debian.org/debian/dists/wheezy/main/installer-amd64/current/images/netboot/netboot.tar.gz
|
||
# tar xfz netboot.tar.gz
|
||
# wget http://ftp.nl.debian.org/debian/dists/wheezy/main/installer-amd64/current/images/SHA256SUMS
|
||
# wget http://ftp.nl.debian.org/debian/dists/wheezy/Release
|
||
# wget http://ftp.nl.debian.org/debian/dists/wheezy/Release.gpg
|
||
|
||
同时,必须确保**TFTP**目录中的所有文件都可让TFTP服务器读取。
|
||
|
||
# chmod -R 755 /srv/tftp/
|
||
|
||

|
||
|
||
下载Debian网络启动文件
|
||
|
||
使用以下变量用于**Debian网络安装**镜像和架构。
|
||
|
||
# wget http://"$YOURMIRROR"/debian/dists/wheezy/main/installer-"$ARCH"/current/images/netboot/netboot.tar.gz
|
||
# wget http://"$YOURMIRROR"/debian/dists/wheezy/main/installer-"$ARCH"/current/images/SHA256SUMS
|
||
# wget http://"$YOURMIRROR"/debian/dists/wheezy/Release
|
||
# wget http://"$YOURMIRROR"/debian/dists/wheezy/Release.gpg
|
||
|
||
**5.** 下一步,启动或重启DNSMASQ守护进程,并运行netstat命令来获取服务器监听的端口列表。
|
||
|
||
# service dnsmasq restart
|
||
# netstat -tulpn | grep dnsmasq
|
||
|
||

|
||
|
||
启动Dnsmasq服务
|
||
|
||
**6.** 基于Debian的发行版通常附带了**UFW防火墙**包。使用以下命令来打开需要的**DNSMASQ**端口号:**67**(Bootps),**69**(TFTP),**53**(DNS)**4011**(代理DHCP)udp和**53** tcp(DNS)。
|
||
# ufw allow 69/udp
|
||
# ufw allow 4011/udp ## Only if you have a ProxyDHCP on the network
|
||
# ufw allow 67/udp
|
||
# ufw allow 53/tcp
|
||
# ufw allow 53/udp
|
||
|
||

|
||
|
||
开启Dnsmasq端口
|
||
|
||
Now, the PXE loader located on your client network interface will load **pxelinux** configuration files from **/srv/tftp/pxelinux.cfg** directory using this order.
|
||
现在,位于你的客户机网络接口上的PXE加载器将使用按以下顺序从**/srv/tftp/pxelinux.cfg**目录加载**pxelinux**配置文件。
|
||
|
||
- GUID文件
|
||
- MAC文件
|
||
- 默认文件
|
||
|
||
### 步骤3: 配置客户端从网络启动 ###
|
||
|
||
**7.** 要为你的客户端计算机启用网络启动,请进入系统**BIOS配置**(如何进入BIOS设置,请查阅硬件主板提供商的文档)。
|
||
|
||
转到**启动菜单**,然后选择**网络启动**作为**首要启动设备**(在某些系统上,你可以不用进入BIOS配置就能选择启动设备,只要在**BIOS自检**时按一个键就可以进行选择了)。
|
||
|
||

|
||
|
||
选择BIOS设置
|
||
|
||
**8。** 在编辑启动顺序后,通常按**F10**来保存BIOS设置。重启后,你的客户端计算机应该可以直接从网络启动了,应该会出第一个**PXE**提示,要求你按**F8**键进入菜单。
|
||
|
||
接下来,敲击**F8**键来进入,会出现一个新的提示。敲击**回车**键,屏幕上会出现**Debian安装器**主界面提示,如下图所示。
|
||
|
||

|
||
|
||
启动菜单选择
|
||
|
||

|
||
|
||
选择Debian安装器启动
|
||
|
||

|
||
|
||
选择Debian安装
|
||
|
||
从这里开始,你可以使用Debian 7 Wheezy安装进程将Debian安装到你的机器上了(安装链接见上面)。然而,为了能够完成安装进程,你也需要确保你的机器上互联网连接已经激活。
|
||
|
||
### 步骤4: DNSMASQ服务器排障并在系统范围内启用 ###
|
||
|
||
**9.** 要诊断服务器以查询最终是否发生问题或要查询其它提供给客户端的信息,运行以下命令来打开日志文件。
|
||
|
||
# tailf /var/log/daemon.log
|
||
|
||

|
||
|
||
DNSMASQ服务器排障
|
||
|
||
**10.** 如果服务器测试中已一切就绪,你现在可以在**sysv-rc-conf**包的帮助下,启用**DNSMASQ**守护进程自启动,以使该进程在系统重启后自动启动。
|
||
|
||
# apt-get install sysv-rc-conf
|
||
# sysv-rc-conf dnsmaq on
|
||
|
||

|
||
|
||
启用DNSMASQ守护进程
|
||
|
||
到此为止吧!现在你的**PXE**服务器已经整装待发,随时准备好分配IP地址了(**DHCP**),并为你所有网段中的客户端提供需要的启动信息,这些信息配置用来从网络启动并安装Debian Wheezy。
|
||
|
||
使用PXE网络启动安装在服务器主机数量增长时很有优势,因为你可以在短时间内火同时设置整个网络基础架构,为版本升级提供了方便,也可以通过kickstart文件使整个安装的全自动化。
|
||
|
||
--------------------------------------------------------------------------------
|
||
|
||
via: http://www.tecmint.com/network-installation-of-debian-7-on-client-machines/
|
||
|
||
作者:[Matei Cezar][a]
|
||
译者:[GOLinux](https://github.com/GOLinux)
|
||
校对:[校对者ID](https://github.com/校对者ID)
|
||
|
||
本文由 [LCTT](https://github.com/LCTT/TranslateProject) 原创翻译,[Linux中国](http://linux.cn/) 荣誉推出
|
||
|
||
[a]:http://www.tecmint.com/author/cezarmatei/
|
||
[1]:http://www.tecmint.com/debian-gnulinux-7-0-code-name-wheezy-server-installation-guide/
|
||
[2]:http://www.debian.org/distrib/netinst#netboot
|
||
[3]:http://ftp.nl.debian.org/debian/dists/wheezy/main/
|