mirror of
https://github.com/LCTT/TranslateProject.git
synced 2025-01-13 22:30:37 +08:00
121 lines
6.0 KiB
Markdown
121 lines
6.0 KiB
Markdown
Linux FAQs with Answers--How to install and access CentOS remote desktop on VPS
|
|
================================================================================
|
|
> **Question**: I want to install CentOS desktop on VPS, and be able to access the desktop GUI remotely from home. What is a recommended way to set up and access CentOS-based remote desktop on VPS?
|
|
|
|
Nowadays teleworking or remote working with flexible hours is increasingly popular in tech industry. One of the enabling technologies behind this trend is remote desktop. Your desktop environment is in the cloud, and you can access the remote desktop anywhere you go, either from home or at your workplace.
|
|
|
|
This tutorial describes how you can set up CentOS based remote desktop on VPS. Here we are going to demonstrate CentOS 7 based environment.
|
|
|
|
We assume that you already created a CentOS 7 VPS instance somewhere (e.g., using [DigitalOcean][1] or Amazon EC2). Make sure that the VPS instance has at least 1GB memory. Otherwise, CentOS desktop will crash when you try to access remote desktop.
|
|
|
|
### Step One: Install CentOS Desktop ###
|
|
|
|
If an available CentOS image is a minimal version of CentOS without desktop, you will need to install desktop (e.g., GNOME) on your CentOS VPS before proceeding. For example, DigitalOcean's CentOS image is such a minimal version, which requires [desktop GUI installation][2] as follows.
|
|
|
|
# yum groupinstall "GNOME Desktop"
|
|
|
|
Reboot a VPS after finishing installation.
|
|
|
|
### Step Two: Install and Configure VNC Server ###
|
|
|
|
The next step is to install and configure VNC server. We are going to use TigerVNC, an open-source VNC server implementation.
|
|
|
|
# yum install tigervnc-server
|
|
|
|
Now create a user account (e.g., xmodulo) which will be used to access remote desktop.
|
|
|
|
# useradd xmodulo
|
|
# passwd xmodulo
|
|
|
|
When a user tries to access remote desktop using VNC, a dedicated VNC server daemon will be launched to handle its requests. This means that you will need to create a separate VNC server configuration for each user.
|
|
|
|
CentOS 7 relies on systemd to manage and configure system services. So we are going to configure VNC server for xmodulo user using systemd.
|
|
|
|
Let's first check the status of VNC server by running either command below:
|
|
|
|
# systemctl status vncserver@:.service
|
|
# systemctl is-enabled vncserver@.service
|
|
|
|
By default, freshly installed VNC service is not active (disabled).
|
|
|
|

|
|
|
|
Now create a VNC service configuration for xmodulo user by copying a generic VNC service unit file as follows.
|
|
|
|
# cp /lib/systemd/system/vncserver@.service /etc/systemd/system/vncserver@:1.service
|
|
|
|
Open the configuration file with a text editor, and replace <USER> with an actual user name (e.g., xmodulo) under [Service] section. Also, append "-geometry <resolution>" parameter in ExecStart. In the end, the following two lines with bold font will be modified.
|
|
|
|
# vi /etc/systemd/system/vncserver@:1.service
|
|
|
|
----------
|
|
|
|
[Service]
|
|
Type=forking
|
|
# Clean any existing files in /tmp/.X11-unix environment
|
|
ExecStartPre=/bin/sh -c '/usr/bin/vncserver -kill %i > /dev/null 2>&1 || :'
|
|
ExecStart=/sbin/runuser -l xmodulo -c "/usr/bin/vncserver %i -geometry 1024x768"
|
|
PIDFile=/home/xmodulo/.vnc/%H%i.pid
|
|
ExecStop=/bin/sh -c '/usr/bin/vncserver -kill %i > /dev/null 2>&1 || :'
|
|
|
|
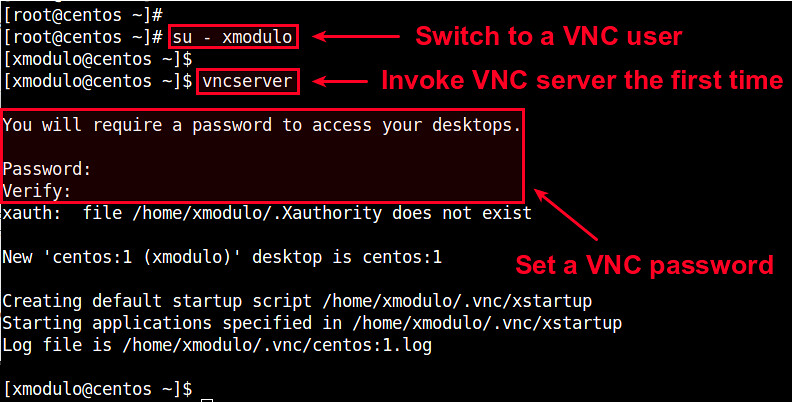
Now set up (optional) VNC password for xmodulo user for security. For this, switch to the user, and run vncserver command.
|
|
|
|
# su - xmodulo
|
|
# vncserver
|
|
|
|
You will be prompted to enter a VNC password for the user. Once the password is set, you will need to use this password to gain access to remote desktop.
|
|
|
|

|
|
|
|
Finally, reload services to activate the new VNC configuration:
|
|
|
|
# systemctl daemon-reload
|
|
|
|
and enable VNC service to make it start automatically upon boot:
|
|
|
|
# systemctl enable vncserver@:1.service
|
|
|
|
Check the port number that a VNC server is listening on by running:
|
|
|
|
# netstat -tulpn | grep vnc
|
|
|
|

|
|
|
|
Port 5901 is the default port number for VNC client to connect to a VNC server.
|
|
|
|
### Step Three: Connect to Remote Desktop over SSH ###
|
|
|
|
By design, Remote Frame Buffer (RFB) protocol used by VNC is not a secure protocol. Thus it is not a good idea to directly connect to a remote VNC server running on VPS using a VNC client. Any sensitive information such as password could easily be leaked from VNC traffic. So instead, I strongly recommend that you [tunnel VNC traffic][3] over a secure SSH tunnel, as described here.
|
|
|
|
On a local host where you want to run VNC client, create an SSH tunnel to a remote VPS using the following command. When prompted for SSH password, type the password of the user.
|
|
|
|
$ ssh xmodulo@<VPS-IP-address> -L 5901:127.0.0.1:5901
|
|
|
|
Replace "xmodulo" with your own VNC user, and fill in the IP address of your VPS instance.
|
|
|
|
Once an SSH tunnel is established, remote VNC traffic will be routed over the SSH tunnel, and be sent to 127.0.0.1:5901.
|
|
|
|
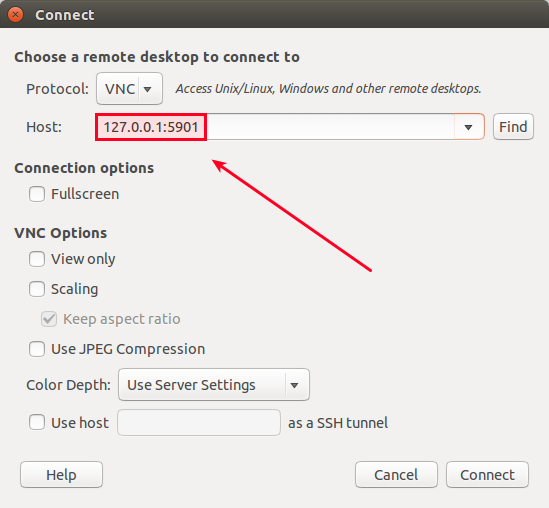
Now go ahead and launch your favorite VNC client (e.g., vinagre), and connect to 127.0.0.1:5901.
|
|
|
|

|
|
|
|
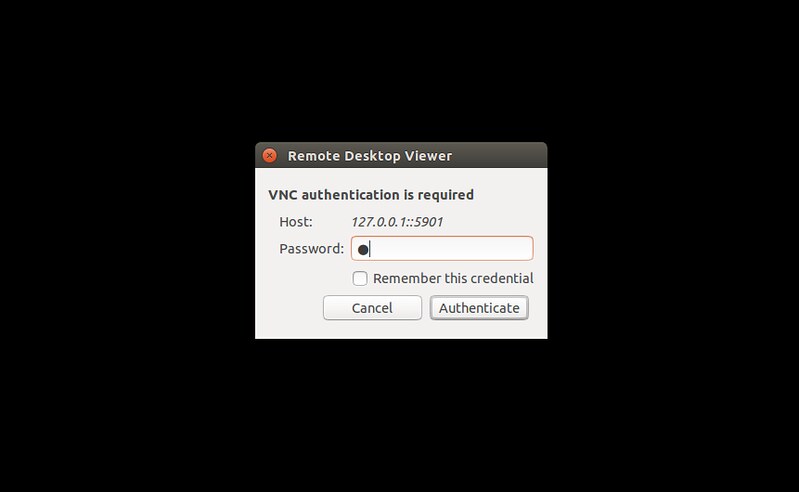
You will be asked to enter a VNC password. When you type a correct VNC password, you will finally be able to CentOS remote desktop on VPS securely.
|
|
|
|

|
|
|
|

|
|
|
|
--------------------------------------------------------------------------------
|
|
|
|
via: http://ask.xmodulo.com/centos-remote-desktop-vps.html
|
|
|
|
作者:[Dan Nanni][a]
|
|
译者:[译者ID](https://github.com/译者ID)
|
|
校对:[校对者ID](https://github.com/校对者ID)
|
|
|
|
本文由 [LCTT](https://github.com/LCTT/TranslateProject) 原创翻译,[Linux中国](http://linux.cn/) 荣誉推出
|
|
|
|
[a]:http://ask.xmodulo.com/author/nanni
|
|
[1]:http://xmodulo.com/go/digitalocean
|
|
[2]:http://xmodulo.com/how-to-install-gnome-desktop-on-centos.html
|
|
[3]:http://xmodulo.com/how-to-set-up-vnc-over-ssh.html |