6.5 KiB
Image processing at NASA with open source tools
keyword: NASA , Image Process , Node.js , OpenCV
This past summer, I was an intern at the GVIS Lab at NASA Glenn, where I brought my passion for open source into the lab. My task was to improve our lab's contributions to an open source fluid flow dynamics simulation developed by Dan Schroeder. The original simulation presents obstacles that users can draw in with their mouse to model computational fluid dynamics. My team contributed by adding image processing code that analyzes each frame of a live video feed to show how a physical object interacts with a fluid. But, there was more for us to do.
We wanted to make the image processing more robust, so I worked on improving the image processing library.
With the new library, the simulation would be able to detect contours, perform coordinate transformations in place, and find the center of mass of an object. The image processing doesn't directly relate to the physics of the fluid flow dynamics simulation. It detects the object with a camera and creates a barrier for the fluid flow simulation by getting the outline of the object. Then, the fluid flow simulation runs, and the output is projected down onto the actual object.
My goal was to improve the simulation in three ways:
- to find accurate contours of an object
- to find the center of mass of an object
- to be able to perform accurate transformations about the center of an object
My mentor recommended that I install Node.js, OpenCV, and the Node.js bindings for OpenCV. While I was waiting for those to install, I looked at the example code on the OpenCV bindings on their GitHub page. I discovered that the example code was in JavaScript, so because I didn’t know JavaScript, I started a short course from Codecademy. Two days later, I was sick of JavaScript but ready to start my project... which involved yet more JavaScript.
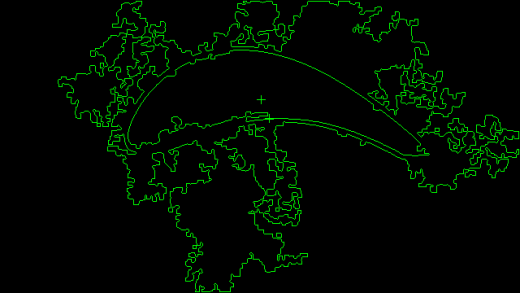
The example contour-finding code worked well. In fact, it allowed me to accomplish my first goal in a matter of hours! To get the contours of an image, here's what it looked like:
The original image with all of the contours.
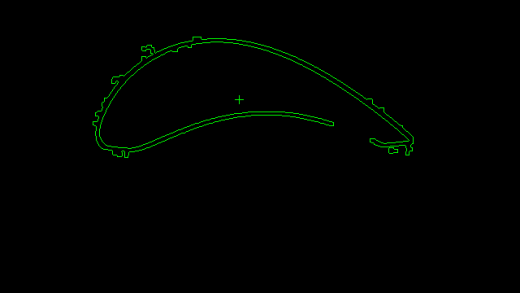
The example contour-finding code worked a bit too well. Instead of the contour of the object being detected, all of the contours in the image were detected. This would have resulted in the simulation interacting with all of the unwanted contours. This is a problem because it would return incorrect data. To keep the simulation from interacting with the unwanted contours, I added an area constraint. If the contour was in a certain area range, then it would be drawn. The area constraint resulted in a much cleaner contour.
The filtered contour with the shadow contour.
Though the extraneous contours weren't detected, there was still a problem with the image. There was only one contour in the image, but it doubled back on itself and wasn't complete. Area couldn't be a deciding factor here, so it was time to try something else.
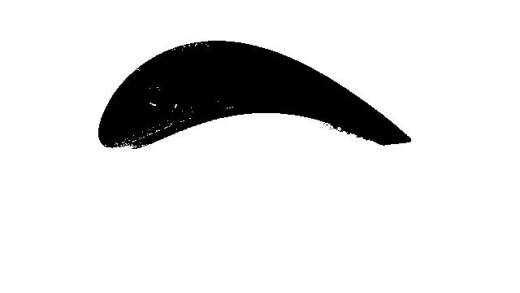
This time around, instead of immediately finding the contours, I first converted the image into a binary image. A binary image is an image where each pixel is either black or white. To get a binary image I first converted the color image to grayscale. Once the image was in grayscale, I called the threshold method on the image. The threshold method went through the image pixel by pixel and if the color value of the pixel was less than 30, the pixel color would be changed to black. Otherwise, the pixel value would be turned to white. After the original image was converted to a binary image, the resulting image looked like this:
The binary image.
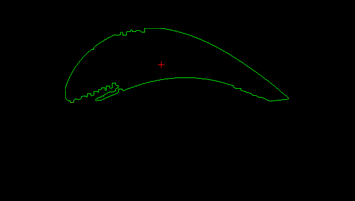
Then I got the contours from the binary image, which resulted in a much cleaner contour, without the shadow contour.
The final clean contour.
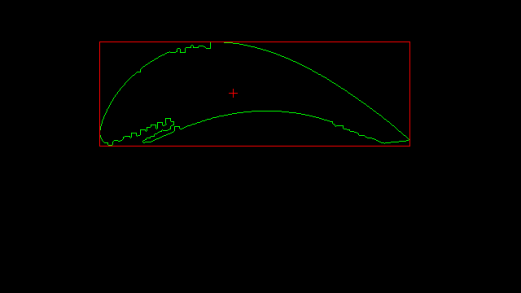
At this point, I was able to get clean contours and detect the center of mass. Unfortunately, I didn't have enough time to be able to complete transformations about the center of mass. Since I only had a few days left in my internship, I started to think about other things I could do within a limited time span. One of those things was the bounding rectangle. The bounding rectangle is a quadrilateral with the smallest area that contains the entire contour of an image. The bounding rectangle is important because it is key in scaling the contour on the page. Unfortunately I didn't have time to do much with the bounding rectangle, but I still wanted to learn about it because it's a useful tool.
Finally, after all of that, I was able to finish processing the image!
The final image with bounding rectangle and center of mass in red.
Once the image processing code was complete, I replaced the old image processing code in the simulation with my code. To my surprise, it worked!
Well, mostly.
The program had a memory leak in it, which leaked 100MB every 1/10 of a second. I was glad that it wasn’t because of my code. The bad thing was that fixing it was out of my control. The good thing was that there was a workaround that I could use. It was less than ideal, but it checked the amount of memory the simulation was using and when it used more than 1 GiB, the simulation restarted.
At the NASA lab, we use a lot of open source software, and my work there isn't possible without it.
via: https://opensource.com/life/16/3/image-processing-nasa
作者:Lauren Egts 译者:译者ID 校对:校对者ID

