3.4 KiB
Let's get physical: How to use GPIO pins on the Raspberry Pi
The 10th article in our series on getting started with Raspberry Pi explains how the GPIO pins work.

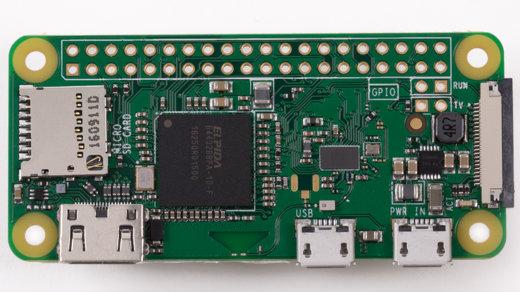
Until now, this series has focused on the Raspberry Pi's software side, but today we'll get into the hardware. The availability of general-purpose input/output (GPIO) pins was one of the main features that interested me in the Pi when it first came out. GPIO allows you to programmatically interact with the physical world by attaching sensors, relays, and other types of circuitry to the Raspberry Pi.
Each pin on the board either has a predefined function or is designated as general purpose. Also, different Raspberry Pi models have either 26 or 40 pins for you to use at your discretion. Wikipedia has a good overview of each pin and its functionality.
You can do many things with the Pi's GPIO pins. I've written some other articles about using the GPIOs, including a trio of articles (Part I, Part II, and Part III) about controlling holiday lights with the Raspberry Pi while using open source software to pair the lights with music.
The Raspberry Pi community has done a great job in creating libraries in different programming languages, so you should be able to interact with the pins using C, Python, Scratch, and other languages.
Also, if you want the ultimate experience to interact with the physical world, pick up a Raspberry Pi Sense Hat. It is an affordable expansion board for the Pi that plugs into the GPIO pins so you can programmatically interact with LEDs, joysticks, and barometric pressure, temperature, humidity, gyroscope, accelerometer, and magnetometer sensors.
via: https://opensource.com/article/19/3/gpio-pins-raspberry-pi
作者:Anderson Silva 选题:lujun9972 译者:译者ID 校对:校对者ID
