mirror of
https://github.com/LCTT/TranslateProject.git
synced 2024-12-26 21:30:55 +08:00
295 lines
12 KiB
Markdown
295 lines
12 KiB
Markdown
如何部署一个你的公共系统状态页面
|
||
================================================================================
|
||
如果你是一个系统管理员,负责关键的IT基础设置或你公司的服务,你将明白有效的沟通在日常任务中的重要性。假设你的线上存储服务器故障了。你希望团队所有人达成共识你好尽快的解决问题。当你忙来忙去时,你不想一半的人问你为什么他们不能访问他们的文档。当一个维护计划快到时间了你想在计划前提醒相关人员,这样避免了不必要的开销。
|
||
|
||
这一切的要求或多或少改进了你和你的团队,用户和你的服务的沟通渠道。一个实现它方法是维护一个集中的系统状态页面,故障停机详情,进度更新和维护计划会被报告和记录。这样,在故障期间你避免了不必要的打扰,也有一些相关方提供的资料和任何选状态更新择性加入。
|
||
|
||
一个不错的**开源, 自承载系统状态页面**是is [Cachet][1]。在这个教程,我将要描述如何用Cachet部署一个自承载系统状态页面。
|
||
|
||
### Cachet 特性 ###
|
||
|
||
在详细的配置Cachet之前,让我简单的介绍一下它的主要特性。
|
||
|
||
- **全JSON API**:Cachet API允许你使用任意外部程序或脚本(例如,uptime脚本)链接到Cachet来报告突发事件或自动更新状态。
|
||
- **认证**:Cachet支持基础认证和JSON API的API令牌,所以只有认证用户可以更新状态页面。
|
||
- **衡量系统**:这通常用来展现随着时间推移的自定义数据(例如,服务器负载或者相应时间)。
|
||
- **通知**:你可以随意的发送通知邮件,报告事件给任一注册了状态页面的人。
|
||
- **多语言**:状态也可以被转换为11种不同的语言。
|
||
- **双因子认证**:这允许你使用Google的双因子认证管理账户锁定你的Cachet(什么事Google?呵呵!)。
|
||
- **支持交叉数据库**:你可以选择MySQL,SQLite,Redis,APC和PostgreSQL作为后端存储。
|
||
|
||
剩下的教程,我说明如何在Linux上安装配置Cachet。
|
||
|
||
### 第一步:下载和安装Cachet ###
|
||
|
||
Cachet需要一个web服务器和一个后端数据库来运转。在这个教程中,我将使用LAMP架构。这里有特定发行版安装Cachet和LAMP架构的指令。
|
||
|
||
#### Debian, Ubuntu 或者 Linux Mint ####
|
||
|
||
$ sudo apt-get install curl git apache2 mysql-server mysql-client php5 php5-mysql
|
||
$ sudo git clone https://github.com/cachethq/Cachet.git /var/www/cachet
|
||
$ cd /var/www/cachet
|
||
$ sudo git checkout v1.1.1
|
||
$ sudo chown -R www-data:www-data .
|
||
|
||
在基于Debian的系统上更多详细的设置LAMP架构,参考这个[教程][2]。
|
||
|
||
#### Fedora, CentOS 或 RHEL ####
|
||
|
||
在基于Red Hat系统上,你首先需要[设置REMI资源库][3](以满足PHP版本需求)。然后执行下面命令。
|
||
|
||
$ sudo yum install curl git httpd mariadb-server
|
||
$ sudo yum --enablerepo=remi-php56 install php php-mysql php-mbstring
|
||
$ sudo git clone https://github.com/cachethq/Cachet.git /var/www/cachet
|
||
$ cd /var/www/cachet
|
||
$ sudo git checkout v1.1.1
|
||
$ sudo chown -R apache:apache .
|
||
$ sudo firewall-cmd --permanent --zone=public --add-service=http
|
||
$ sudo firewall-cmd --reload
|
||
$ sudo systemctl enable httpd.service; sudo systemctl start httpd.service
|
||
$ sudo systemctl enable mariadb.service; sudo systemctl start mariadb.service
|
||
|
||
在基于Red Hat系统上更多详细设置LAMP,参考这个[教程][4]。
|
||
|
||
### 配置Cachet的后端数据库###
|
||
|
||
下一步是配置后端数据库。
|
||
|
||
登陆到MySQL/MariaDB服务,然后创建一个空的数据库称为‘cachet’。
|
||
|
||
$ sudo mysql -uroot -p
|
||
|
||
----------
|
||
|
||
mysql> create database cachet;
|
||
mysql> quit
|
||
|
||
现在用一个样本配置文件创建一个Cachet配置文件。
|
||
|
||
$ cd /var/www/cachet
|
||
$ sudo mv .env.example .env
|
||
|
||
在.env文件里,填写你自己设置的数据库信息(例如,DB\_\*)。其他的字段先不改变。
|
||
|
||
APP_ENV=production
|
||
APP_DEBUG=false
|
||
APP_URL=http://localhost
|
||
APP_KEY=SomeRandomString
|
||
|
||
DB_DRIVER=mysql
|
||
DB_HOST=localhost
|
||
DB_DATABASE=cachet
|
||
DB_USERNAME=root
|
||
DB_PASSWORD=<root-password>
|
||
|
||
CACHE_DRIVER=apc
|
||
SESSION_DRIVER=apc
|
||
QUEUE_DRIVER=database
|
||
|
||
MAIL_DRIVER=smtp
|
||
MAIL_HOST=mailtrap.io
|
||
MAIL_PORT=2525
|
||
MAIL_USERNAME=null
|
||
MAIL_PASSWORD=null
|
||
MAIL_ADDRESS=null
|
||
MAIL_NAME=null
|
||
|
||
REDIS_HOST=null
|
||
REDIS_DATABASE=null
|
||
REDIS_PORT=null
|
||
|
||
### 第三步:安装PHP依赖和执行数据库迁移 ###
|
||
|
||
下面,我们将要安装必要的PHP依赖包。所以我们将使用composer。如果你的系统还没有安装composer,先安装它:
|
||
|
||
$ curl -sS https://getcomposer.org/installer | sudo php -- --install-dir=/usr/local/bin --filename=composer
|
||
|
||
现在开始用composer安装PHP依赖包。
|
||
|
||
$ cd /var/www/cachet
|
||
$ sudo composer install --no-dev -o
|
||
|
||
下面执行一次数据库迁移。这一步将我们早期创建的必要表填充到数据库。
|
||
|
||
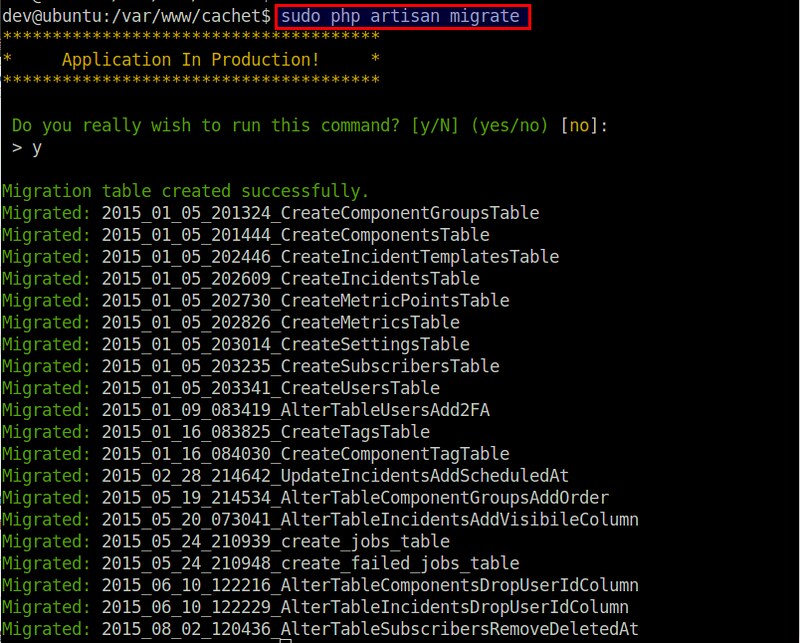
$ sudo php artisan migrate
|
||
|
||
假设数据库配置在/var/www/cachet/.env是正确的,数据库迁移应该像下面显示一样完成成功。
|
||
|
||
|
||
|
||
下面,创建一个密钥,它将用来加密进入Cachet的数据。
|
||
|
||
$ sudo php artisan key:generate
|
||
$ sudo php artisan config:cache
|
||
|
||

|
||
|
||
生成的应用密钥将自动添加到你的.env文件APP\_KEY变量中。你不需要单独编辑.env。
|
||
|
||
### 第四步:配置Apache HTTP服务 ###
|
||
|
||
现在到了配置web服务的时候,Cachet将运行在上面。我们使用Apache HTTP服务器,为Cachet创建一个新的[虚拟主机][5]如下所述。
|
||
|
||
#### Debian, Ubuntu 或 Linux Mint ####
|
||
|
||
$ sudo vi /etc/apache2/sites-available/cachet.conf
|
||
|
||
----------
|
||
|
||
<VirtualHost *:80>
|
||
ServerName cachethost
|
||
ServerAlias cachethost
|
||
DocumentRoot "/var/www/cachet/public"
|
||
<Directory "/var/www/cachet/public">
|
||
Require all granted
|
||
Options Indexes FollowSymLinks
|
||
AllowOverride All
|
||
Order allow,deny
|
||
Allow from all
|
||
</Directory>
|
||
</VirtualHost>
|
||
|
||
启用新虚拟主机和mod_rewrite:
|
||
|
||
$ sudo a2ensite cachet.conf
|
||
$ sudo a2enmod rewrite
|
||
$ sudo service apache2 restart
|
||
|
||
#### Fedora, CentOS 或 RHEL ####
|
||
|
||
在基于Red Hat系统上,创建一个虚拟主机文件如下所述。
|
||
|
||
$ sudo vi /etc/httpd/conf.d/cachet.conf
|
||
|
||
----------
|
||
|
||
<VirtualHost *:80>
|
||
ServerName cachethost
|
||
ServerAlias cachethost
|
||
DocumentRoot "/var/www/cachet/public"
|
||
<Directory "/var/www/cachet/public">
|
||
Require all granted
|
||
Options Indexes FollowSymLinks
|
||
AllowOverride All
|
||
Order allow,deny
|
||
Allow from all
|
||
</Directory>
|
||
</VirtualHost>
|
||
|
||
现在重载Apache配置:
|
||
|
||
$ sudo systemctl reload httpd.service
|
||
|
||
### 第五步:配置/etc/hosts来测试Cachet ###
|
||
|
||
这时候,初始的Cachet状态页面应该启动运行了,现在测试一下。
|
||
|
||
由于Cachet被配置为Apache HTTP服务的虚拟主机,我们需要调整你的客户机的/etc/hosts来访问他。你将从这个客户端电脑访问Cachet页面。
|
||
|
||
Open /etc/hosts, and add the following entry.
|
||
|
||
$ sudo vi /etc/hosts
|
||
|
||
----------
|
||
|
||
<cachet-server-ip-address> cachethost
|
||
|
||
上面名为“cachethost”必须匹配Cachet的Apache虚拟主机文件的ServerName。
|
||
|
||
### 测试Cachet状态页面 ###
|
||
|
||
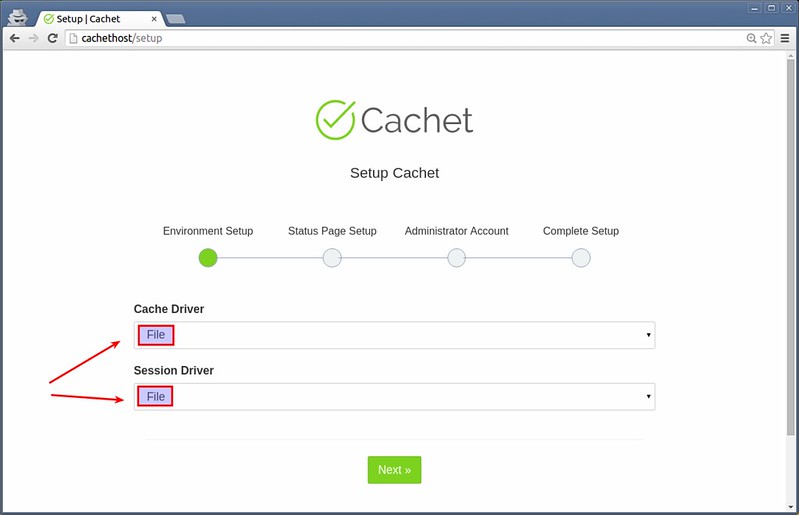
现在你准备好访问Cachet状态页面。在你浏览器地址栏输入http://cachethost。你将被转到初始Cachet状态页如下。
|
||
|
||
|
||
|
||
选择cache/session驱动。这里cache和session驱动两个都选“File”。
|
||
|
||
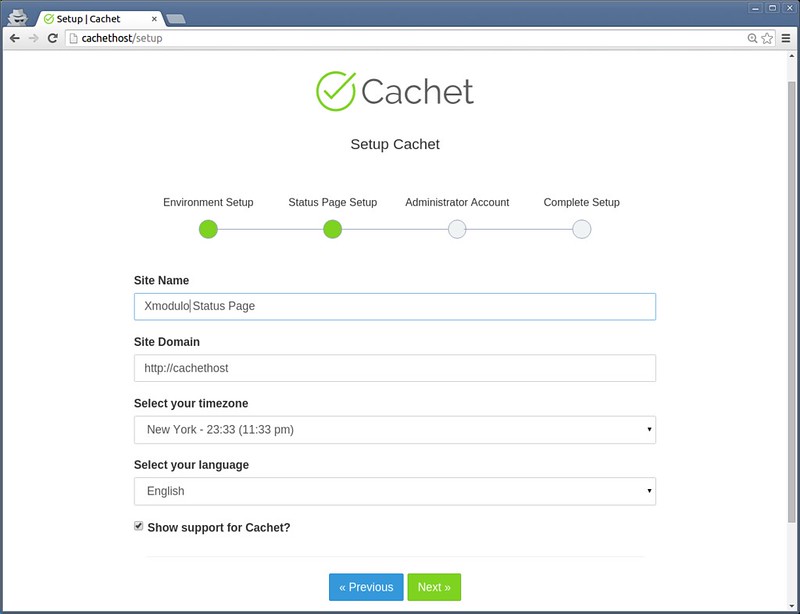
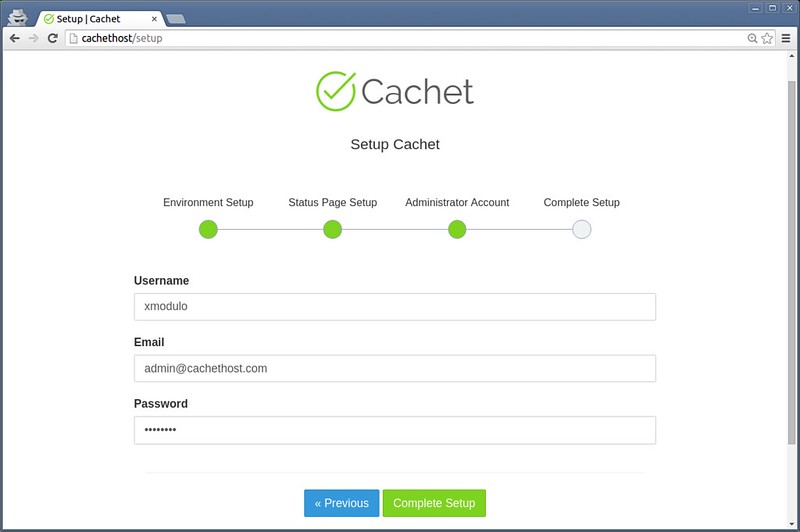
下一步,输入关于状态页面的基本信息(例如,站点名称,域名,时区和语言),以及管理员认证账户。
|
||
|
||
|
||
|
||
|
||
|
||
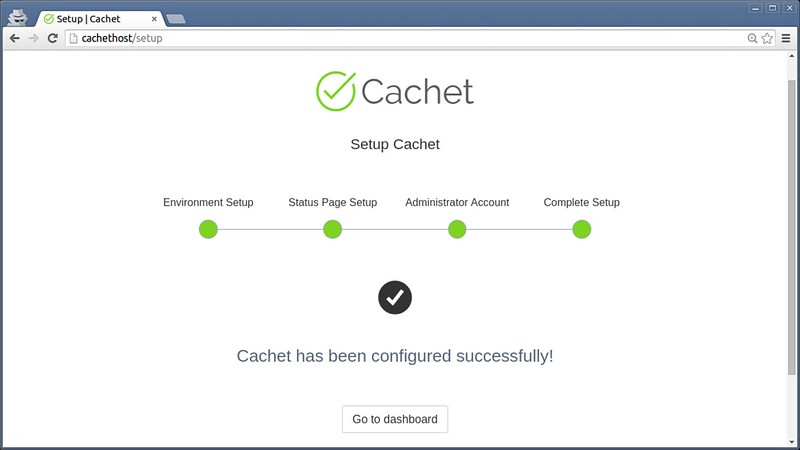
|
||
|
||
你的初始状态页将要最终完成。
|
||
|
||
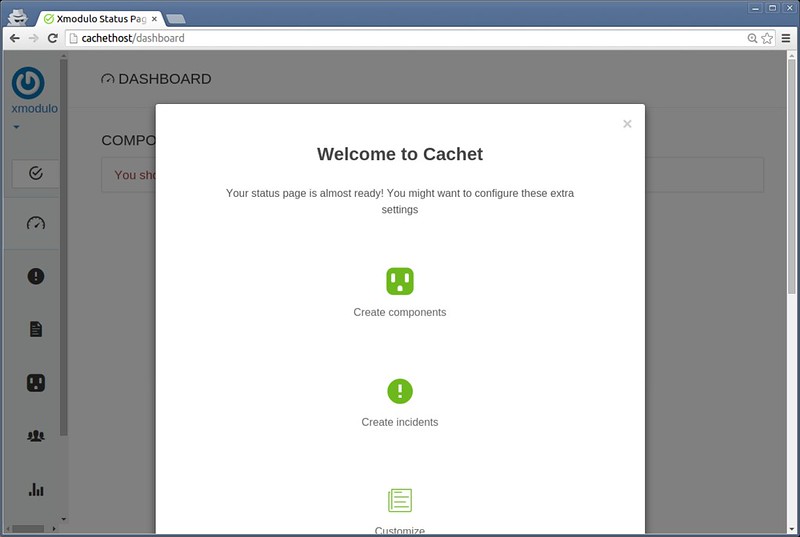
|
||
|
||
继续创建组件(你的系统单位),事件或者任意你想要的维护计划。
|
||
|
||
例如,增加一个组件:
|
||
|
||
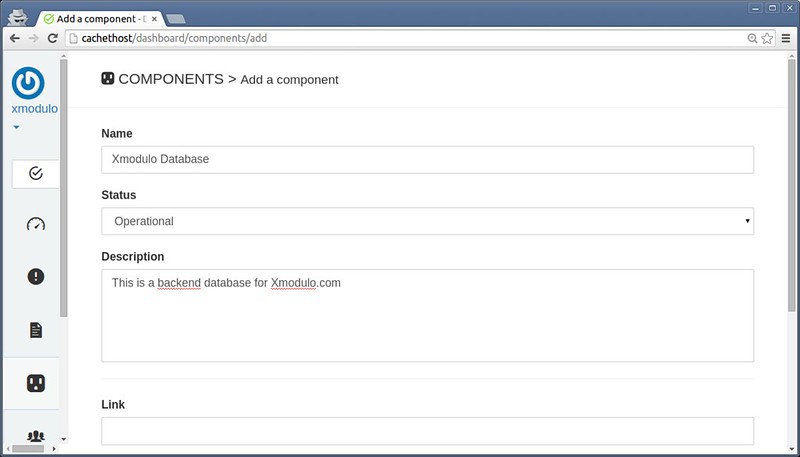
|
||
|
||
增加一个维护计划:
|
||
|
||
公共Cachet状态页就像这样:
|
||
|
||
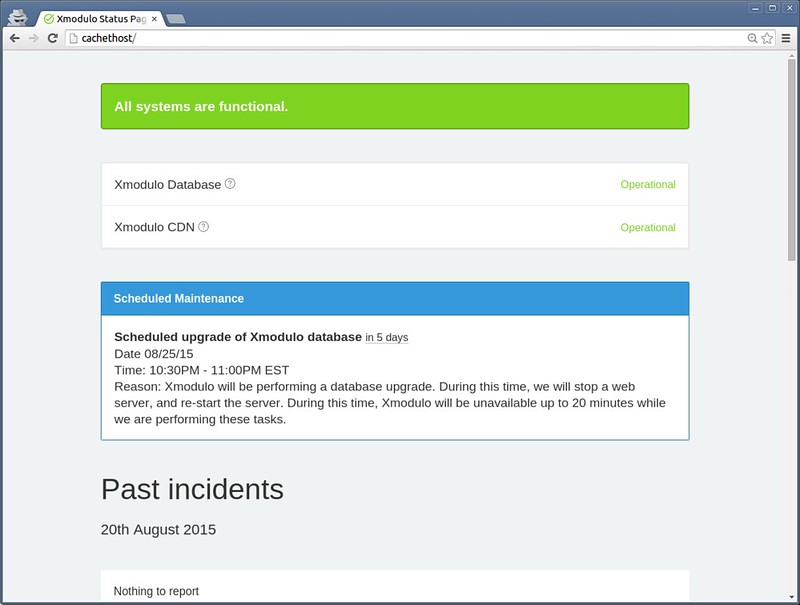
|
||
|
||
集成SMTP,你可以在状态更新时发送邮件给订阅者。并且你可以完全自定义布局和状态页面使用的CSS和markdown格式。
|
||
|
||
### 结论 ###
|
||
|
||
Cachet是一个相当易于使用,自托管的状态页面软件。Cachet一个高级特性是支持全JSON API。使用它的RESTful API,Cachet可以轻松连接单独的监控后端(例如,[Nagios][6]),然后回馈给Cachet事件报告并自动更新状态。比起手段管理一个状态页它更快和有效率。
|
||
|
||
最后一句,我喜欢提及一个事。用Cachet简单的设置一个花哨的状态页面同时,使用最佳的软件不像安装它那么容易。你需要完全保障所有IT团队习惯准确及时的更新状态页,从而建立公共信息的准确性。同时,你需要教用户去查看状态页面。在今天最后,如果不很好的填充,部署状态页面将没有意义,并且/或者没有一个人查看它。记住这个,当你考虑部署Cachet在你的工作环境中时。
|
||
|
||
### 故障排查 ###
|
||
|
||
作为奖励,万一你安装Cachet时遇到问题,这有一些有用的故障排查的技巧。
|
||
|
||
1. Cachet页面没有加载任何东西,并且你看到如下报错。
|
||
|
||
production.ERROR: exception 'RuntimeException' with message 'No supported encrypter found. The cipher and / or key length are invalid.' in /var/www/cachet/bootstrap/cache/compiled.php:6695
|
||
|
||
**解决方案**:确保你创建了一个应用密钥,以及明确配置缓存如下所述。
|
||
|
||
$ cd /path/to/cachet
|
||
$ sudo php artisan key:generate
|
||
$ sudo php artisan config:cache
|
||
|
||
2. 调用composer命令时有如下报错。
|
||
|
||
- danielstjules/stringy 1.10.0 requires ext-mbstring * -the requested PHP extension mbstring is missing from your system.
|
||
- laravel/framework v5.1.8 requires ext-mbstring * -the requested PHP extension mbstring is missing from your system.
|
||
- league/commonmark 0.10.0 requires ext-mbstring * -the requested PHP extension mbstring is missing from your system.
|
||
|
||
**解决方案**:确保安装了必要的PHP扩展mbstring到你的系统上,并且兼容你的PHP。在基于Red Hat的系统上,由于我们从REMI-56库安装PHP,要从同一个库安装扩展。
|
||
|
||
$ sudo yum --enablerepo=remi-php56 install php-mbstring
|
||
|
||
3. 你访问Cachet状态页面时得到一个白屏。HTTP日志显示如下错误。
|
||
|
||
PHP Fatal error: Uncaught exception 'UnexpectedValueException' with message 'The stream or file "/var/www/cachet/storage/logs/laravel-2015-08-21.log" could not be opened: failed to open stream: Permission denied' in /var/www/cachet/bootstrap/cache/compiled.php:12851
|
||
|
||
**解决方案**:尝试如下命令。
|
||
|
||
$ cd /var/www/cachet
|
||
$ sudo php artisan cache:clear
|
||
$ sudo chmod -R 777 storage
|
||
$ sudo composer dump-autoload
|
||
|
||
如果上面的方法不起作用,试试禁止SELinux:
|
||
|
||
$ sudo setenforce 0
|
||
|
||
--------------------------------------------------------------------------------
|
||
|
||
via: http://xmodulo.com/setup-system-status-page.html
|
||
|
||
作者:[Dan Nanni][a]
|
||
译者:[wyangsun](https://github.com/wyangsun)
|
||
校对:[校对者ID](https://github.com/校对者ID)
|
||
|
||
本文由 [LCTT](https://github.com/LCTT/TranslateProject) 原创翻译,[Linux中国](https://linux.cn/) 荣誉推出
|
||
|
||
[a]:http://xmodulo.com/author/nanni
|
||
[1]:https://cachethq.io/
|
||
[2]:http://xmodulo.com/install-lamp-stack-ubuntu-server.html
|
||
[3]:http://ask.xmodulo.com/install-remi-repository-centos-rhel.html
|
||
[4]:http://xmodulo.com/install-lamp-stack-centos.html
|
||
[5]:http://xmodulo.com/configure-virtual-hosts-apache-http-server.html
|
||
[6]:http://xmodulo.com/monitor-common-services-nagios.html
|