14 KiB
Stream event data with this open source tool
Route real-time events from web, mobile, and server-side app sources to
help build your customer data lake on your data warehouse.

In my previous article, I introduced RudderStack, an open source, warehouse-first customer data pipeline. In this article, I demonstrate how easy Rudderstack makes it to set up and use event streams.
An event stream is a pipeline between a source you define and a destination of your choice. Rudderstack provides you with SDKs and plugins to help you ingest event data from your website, mobile apps, and server-side sources — including JavaScript, Gatsby, Android, iOS, Unity, ReactNative, Node.js, and many more. Similarly, Rudderstack's Event Stream module features over 80 destination and warehouse integrations, including Firebase, Google Analytics, Salesforce, Zendesk, Snowflake, BigQuery, RedShift, and more, making it easy to send event data to downstream tools that can use it as well as build a customer data lake on a data warehouse for analytical use cases.
This tutorial shows how to track and route events using RudderStack.
How to set up an event stream
Before you get started, make sure you understand these terms used in this tutorial:
- Source: A source refers to a tool or a platform from which RudderStack ingests your event data. Your website, mobile app, or your back-end server are common examples of sources.
- Destination: A destination refers to a tool that receives your event data from RudderStack. These destination tools can then use this data for your activation use cases. Tools like Google Analytics, Salesforce, and HubSpot are common examples of destinations.
The steps for setting up an event stream in RudderStack open source are:
- Instrumenting an event stream source
- Configuring a warehouse destination
- Configuring a tool destination
- Sending events to verify the event stream
Step 1: Instrument an event stream source
To set up an event stream source in RudderStack:
- Log into your RudderStack dashboard. If you don't have a RudderStack account, please sign up. You can use the RudderStack open source control plane to set up your event streams.
RudderStack's hosted control plane is an option to manage your event stream configurations. It is completely free, requires no setup, and has some more advanced features than the open source control plane.
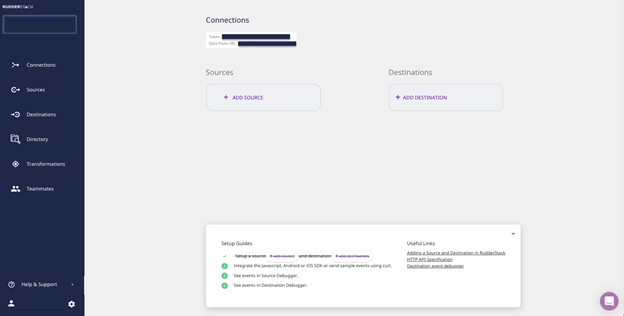
- Once you've logged into RudderStack, you should see the following dashboard:
(Gavin Johnson, CC BY-SA 4.0)
Note: Make sure to save the Data Plane URL. It is required in your RudderStack JavaScript SDK snippet to track events from your website.
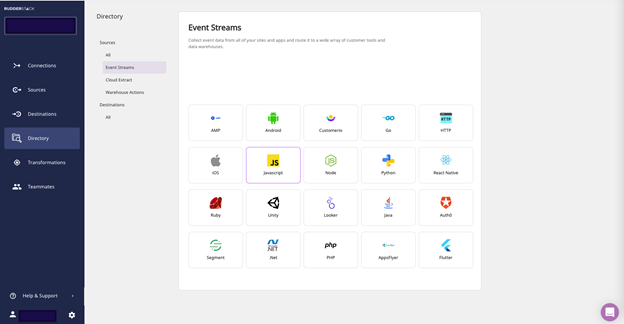
- To instrument the source, click Add Source. Optionally, you can also select the Directory option on the left navigation bar, and select Event Streams under Sources. This tutorial will set up a simple JavaScript source that allows you to track events from your website.
(Gavin Johnson, CC BY-SA 4.0)
- Assign a name to your source, and click Next.
(Gavin Johnson, CC BY-SA 4.0)
- That's it! Your event source is now configured.
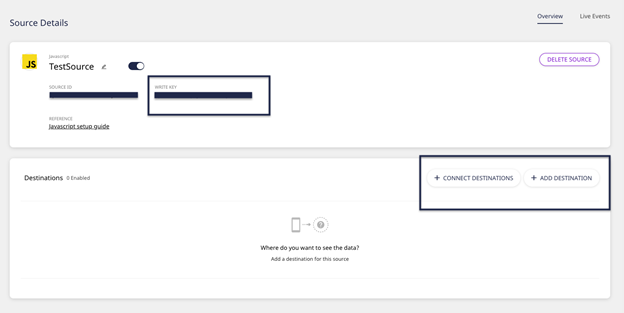
(Gavin Johnson, CC BY-SA 4.0)
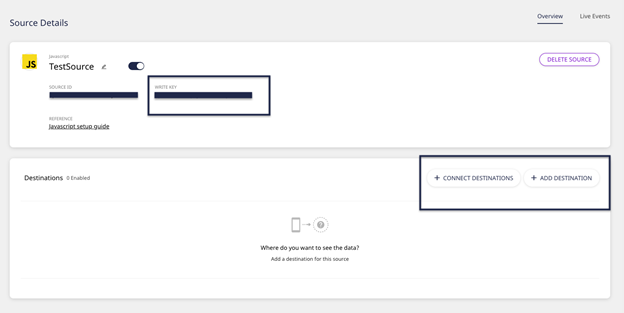
Note: Save the source Write Key. Your RudderStack JavaScript SDK snippet requires it to track events from your website.
Now you need to install the RudderStack JavaScript SDK on your website. To do this, you need to place either the minified or non-minified version of the snippet with your Data Plane URL and source Write Key in your website's <head> section. Consult the docs for information on how to install and use the RudderStack JavaScript SDK.
Step 2: Configure a warehouse destination
Important: Before you configure your data warehouse as a destination in RudderStack, you need to set up a new project in your warehouse and create a RudderStack user role with the relevant permissions. The docs provide detailed, step-by-step instructions on how to do this for the warehouse of your choice.
This tutorial sets up a Google BigQuery warehouse destination. You don't have to configure a warehouse destination, but I recommend it. The docs provide instructions on setting up a Google BigQuery project and a service account with the required permissions.
Then configure BigQuery as a warehouse destination in RudderStack by following these steps:
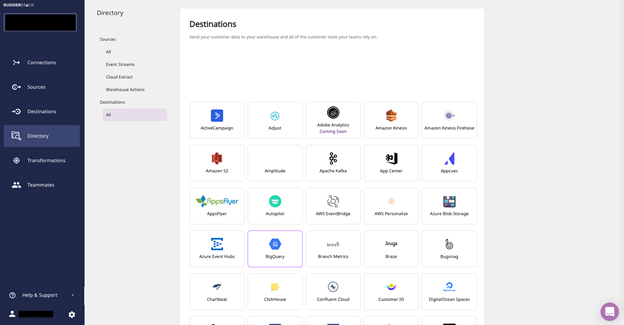
- On the left navigation bar, click on Directory, and then click on Google BigQuery from the list of destinations:
(Gavin Johnson, CC BY-SA 4.0)
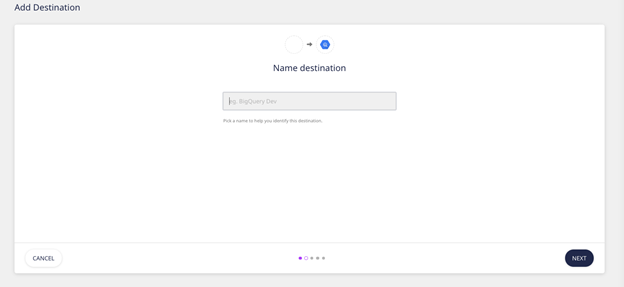
- Assign a name to your destination, and click on Next.
(Gavin Johnson, CC BY-SA 4.0)
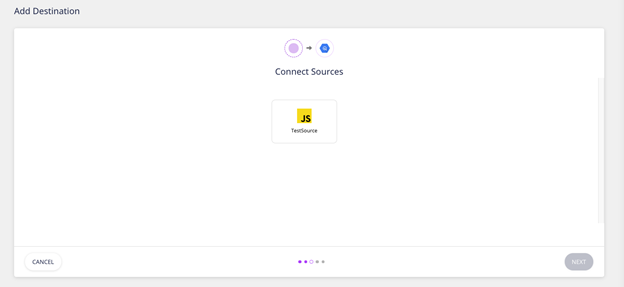
- Choose which source you want to use to send the events to your destination. Select the source that you created in the previous section. Then, click on Next.
(Gavin Johnson, CC BY-SA 4.0)
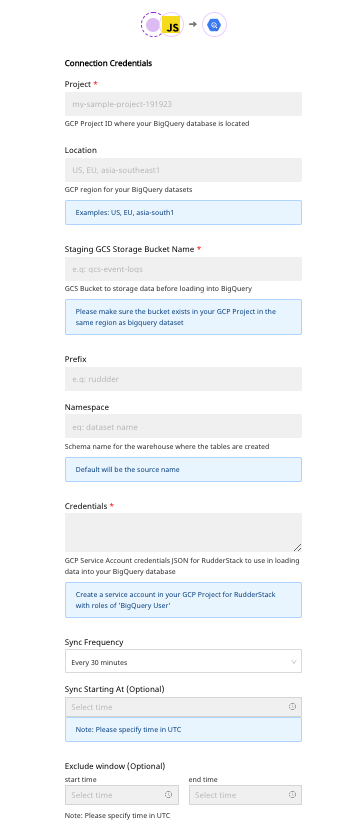
- Specify the required connection credentials. For this destination, enter the BigQuery Project ID and the staging bucket name; information on how to get this information is in the docs.
(Gavin Johnson, CC BY-SA 4.0)
- Copy the contents of the private JSON file you created, as the docs explain.
That's it! You have configured your BigQuery warehouse as a destination in RudderStack. Once you start sending events from your source (a website in this case), RudderStack will automatically route them into your BigQuery and build your identity graph there as well.
Step 3: Configure a tool destination
Once you've added a source, follow these steps to configure a destination in the RudderStack dashboard:
- To add a new destination, click on the Add Destination button as shown:
(Gavin Johnson, CC BY-SA 4.0)
Note: If you have configured a destination before, use the Connect Destinations option to connect it to any source.
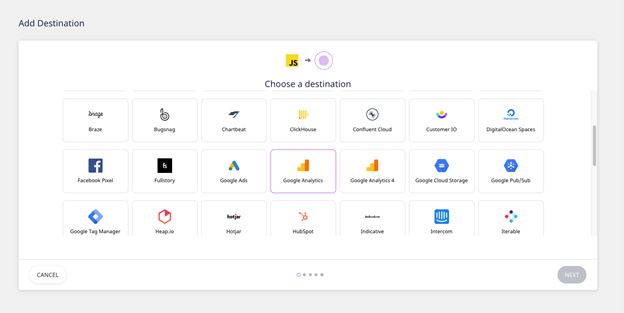
- RudderStack supports over 80 destinations to which you can send your event data. Choose your preferred destination platform from the list. This example configures Google Analytics as a destination.
(Gavin Johnson, CC BY-SA 4.0)
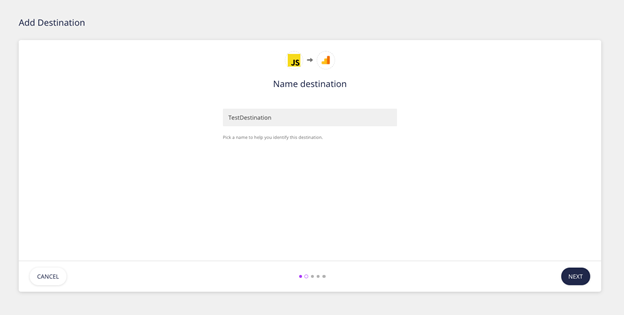
- Add a name to your destination, and click Next.
(Gavin Johnson, CC BY-SA 4.0)
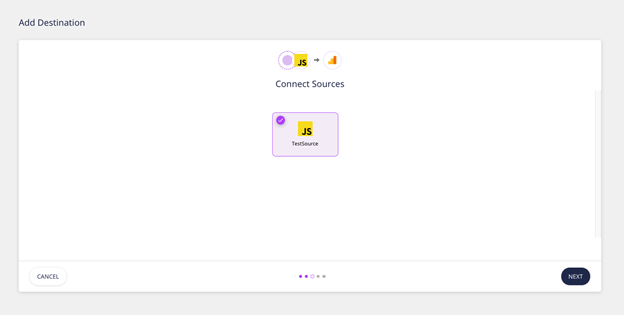
- Next, choose the preferred source. If you're following along with this tutorial, choose the source you configured above.
(Gavin Johnson, CC BY-SA 4.0)
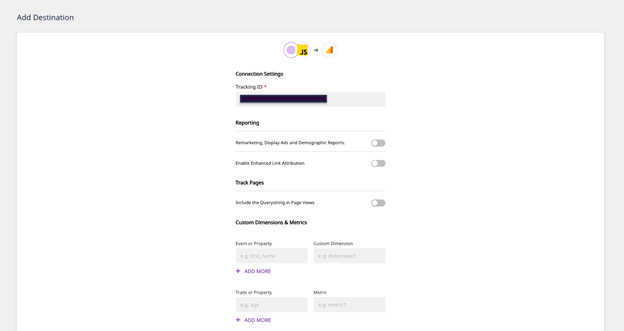
- In this step, you must add the relevant Connection Settings. Enter the Tracking ID for this destination (Google Analytics). You can also configure other optional settings per your requirements. Once you've added the required settings, click Next.
(Gavin Johnson, CC BY-SA 4.0)
Note: RudderStack also gives you the option of transforming the events before sending them to your destination. Read more about user transformations in RudderStack in the docs.
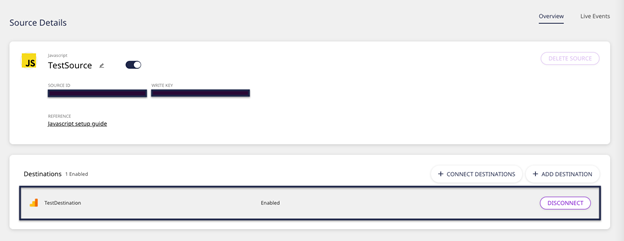
- That's it! The destination is now configured. You should now see it connected to your source.
(Gavin Johnson, CC BY-SA 4.0)
Step 4: Send test events to verify the event stream
This tutorial set up a JavaScript source to track events from your website. Once you have placed the JavaScript code snippet in your website's <head> section, RudderStack will automatically track and collect user events from the website in real time.
However, to quickly test if your event stream is set up correctly, you can send some test events. To do so, follow these steps:
Note: Before you get started, you will need to clone the rudder-server repo and have a RudderStack server installed in your environment. Follow this tutorial to set up a RudderStack server.
-
Make sure you have set up a source and destination by following the steps in the previous sections and have your Data Plane URL and source Write Key available.
-
Start the RudderStack server.
-
The rudder-server repo includes a shell script that generates test events. Get the source Write Key from step 2, and run the following command:
`./scripts/generate-event <YOUR_WRITE_KEY> <YOUR_DATA_PLANE_URL>/v1/batch`
(Gavin Johnson, CC BY-SA 4.0)
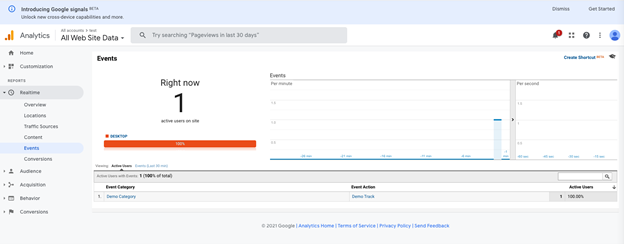
- To check if the test events are delivered, go to your Google Analytics dashboard, navigate to Realtime under Reports, and click Events.
Note: Make sure you check the events associated with the same Tracking ID you provided while instrumenting the destination.
You should now be able to see the test event received in Google Analytics and BigQuery.
(Gavin Johnson, CC BY-SA 4.0)
If you come across any issues while setting up or configuring RudderStack open source, join our Slack and start a conversation in our #open-source channel. We will be happy to help.
If you want to try RudderStack but don't want to host your own, sign up for our free, hosted offering, RudderStack Cloud Free. Explore our open source repos on GitHub, subscribe to our blog, and follow us on our socials: Twitter, LinkedIn, dev.to, Medium, and YouTube.
via: https://opensource.com/article/21/4/event-streaming-rudderstack
作者:Amey Varangaonkar 选题:lujun9972 译者:译者ID 校对:校对者ID
