13 KiB
Playing with modular synthesizers and VCV Rack
You know about using Fedora Linux to write code, books, play games, and listen to music. You can also do system simulation, work on electronic circuits, work with embedded systems too via Fedora Labs. But you can also make music with the VCV Rack software. For that, you can use to Fedora Jam or work from a standard Fedora Workstation installation with the LinuxMAO Copr repository enabled. This article describes how to use modular synthesizers controlled by Fedora Linux.
Some history
The origin of the modular synthesizer dates back to the 1950’s and was soon followed in the 60’s by the Moog modular synthesizer. Wikipedia has a lot more on the history.
But, by the way, what is a modular synthesizer ?
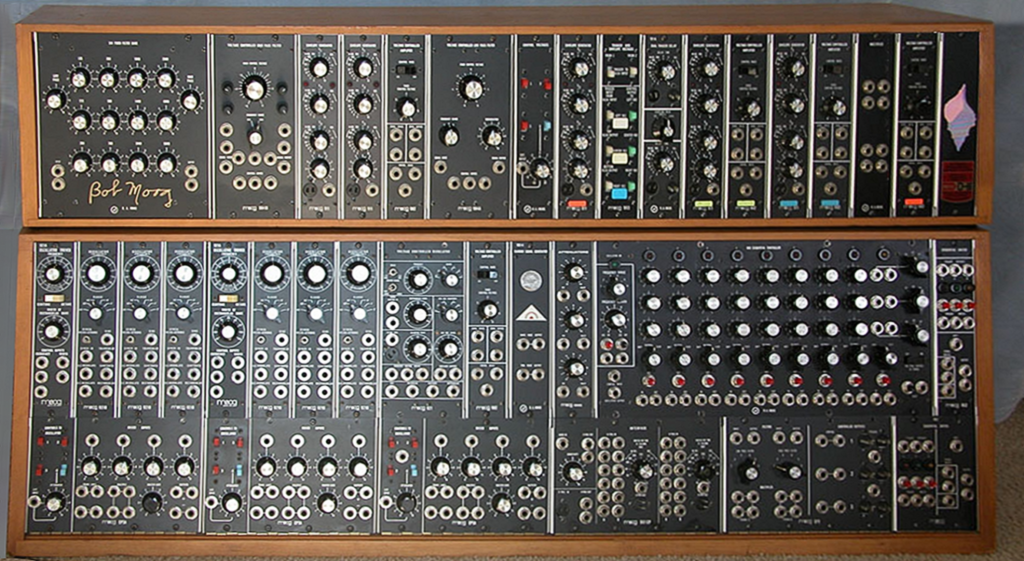
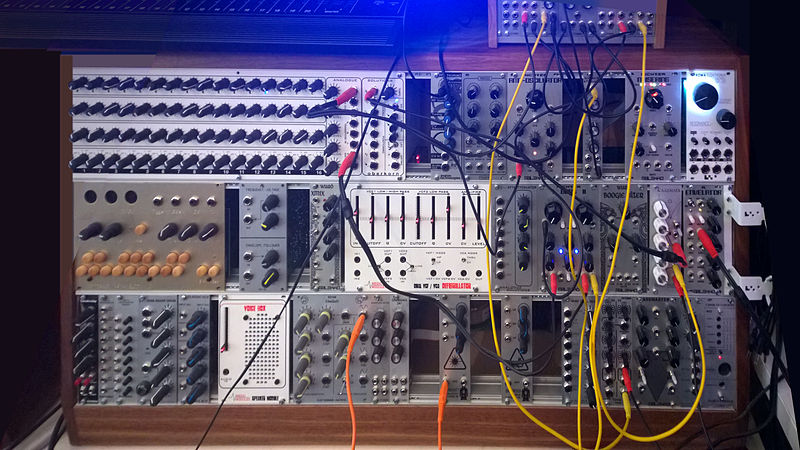
These synthesizers are made of hardware “blocks” or modules with specific functions like oscillators, amplifier, sequencer, and other various functions. The blocks are connected together by wires. You make music with these connected blocks by manipulating knobs. Most of these modular synthesizers came without keyboard.
Modular synthesizers were very common in the early days of progressive rock (with Emerson Lake and Palmer) and electronic music (Klaus Schulze, for example).
After a while people forgot about modular synthesizers because they were cumbersome, hard to tune, hard to fix, and setting a patch (all the wires connecting the modules) was a time consuming task not very easy to perform live. Price was also a problem because systems were mostly sold as a small series of modules, and you needed at least 10 of them to have a decent set-up.
In the last few years, there has been a rebirth of these synthesizers. Doepfer produces some affordable models and a lot of modules are also available and have open sources schematics and codes (check Mutable instruments for example).
But, a few years ago came … VCV Rack. VCV Rack stands for Voltage Controlled Virtual Rack: software-based modular synthesizer lead by Andrew Belt. His first commit on GitHub was Monday Nov 14 18:34:40 2016.
Getting started with VCV Rack
Installation
To be able to use VCV Rack, you can either go to the VCV Rack web site and install a binary for Linux or, you can activate a Copr repository dedicated to music: the LinuxMAO Copr repository (disclaimer: I am the man behind this Copr repository). As a reminder, Copr is not officially supported by Fedora infrastructure. Use packages at your own risk.
Enable the repository with:
sudo dnf copr enable ycollet/linuxmao
Then install VCV Rack:
sudo dnf install Rack-v1
You can now start VCV Rack from the console of via the Multimedia entry in the start menu:
$ Rack &
Add some modules
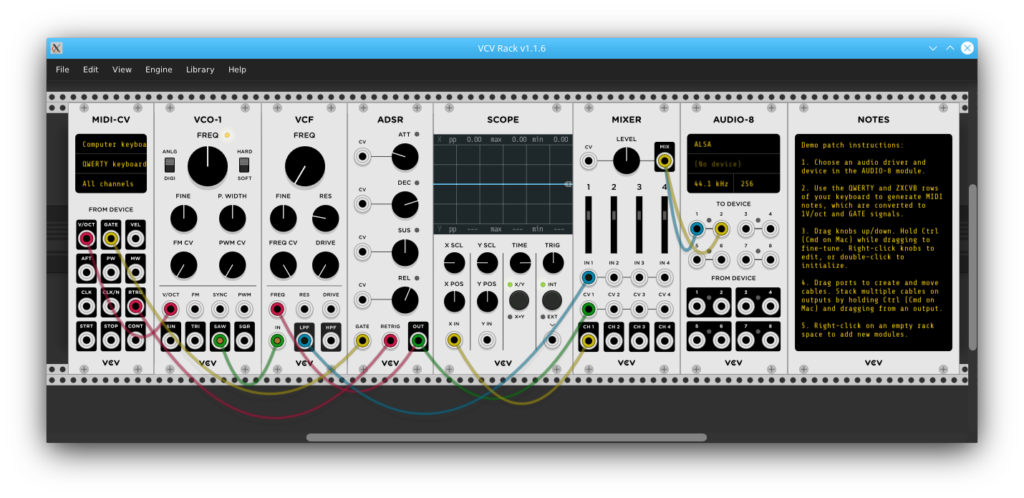
The first step is now to clean up everything and leave just the AUDIO-8 module. You can remove modules in various ways:
- Click on a module and hit the backspace key
- Right click on a module and click “delete”
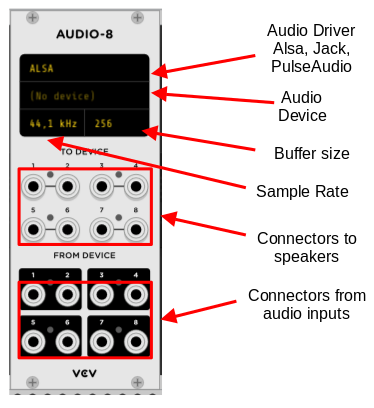
The AUDIO-8 module allows you to connect from and to audio devices. Here are the features for this module.
Now it’s time to produce some noise (for the music, we’ll see that later).
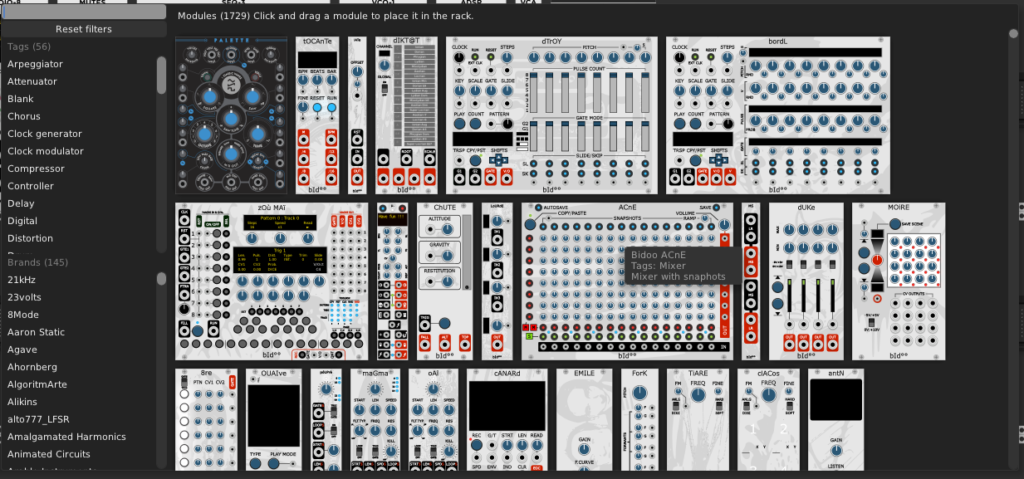
Right click inside VCV Rack (but outside of a module) and a module search window will appear.
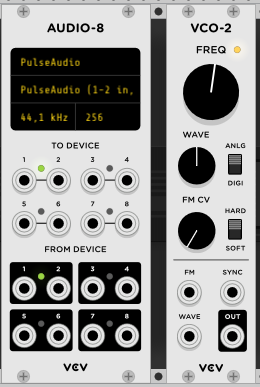
Enter “VCO-2” in the search bar and click on the image of the module. This module is now on VCV Rack.
To move a module: click and drag the module.
To move a group of modules, hit shit + click + drag a module and all the modules on the right of the dragged modules will move with the selected module.
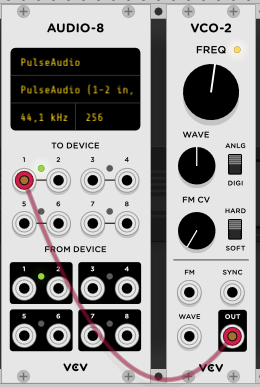
Now you need to connect the modules by drawing a wire between the “OUT” connector of VCO-2 module and the “1” “TO DEVICE” of AUDIO-8 module.
Left-click on the “OUT” connector of the VCO-2 module and while keeping the left-click, drag your mouse to the “1” “TO DEVICE” of the AUDIO-8 module. Once on this connector, release your left-click.
To remove a wire, do a right-click on the connector where the wire is connected.
To draw a wire from an already connected connector, hold “ctrl+left+click” and draw the wire. For example, you can draw a wire from “OUT” connector of module VCO-2 to the “2” “TO DEVICE” connector of AUDIO-8 module.
What are these wires ?
Wires allow you to control various part of the module. The information handled by these wires are Control Voltages, Gate signals, and Trigger signals.
CV (Control Voltages): These typically control pitch and range between a minimum value around -1 to -5 volt and a maximum value between 1 and 5 volt.
What is the GATE signal you find on some modules? Imagine a keyboard sending out on/off data to an amplifier module: its voltage is at zero when no key is pressed and jumps up to max level (5v for example) when a key is pressed; release the key, and the voltage goes back to zero again. A GATE signal can be emitted by things other than a keyboard. A clock module, for example, can emit gate signals.
Finally, what is a TRIGGER signal you find on some modules? It’s a square pulse which starts when you press a key and stops after a while.
In the modular world, gate and trigger signals are used to trigger drum machines, restart clocks, reset sequencers and so on.
Connecting everybody
Let’s control an oscillator with a CV signal. But before that, remove your VCO-2 module (click on the module and hit backspace).
Do a right-click on VCV Rack a search for these modules:
- VCO-1 (a controllable oscillator)
- LFO-1 (a low frequency oscillator which will control the frequency of the VCO-1)
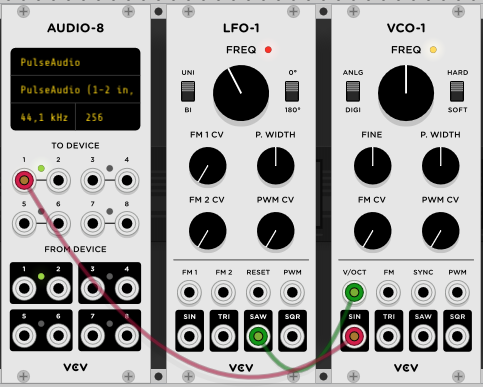
Now draw wires:
- between the “SAW” connector of the LFO-1 module and the “V/OCT” (Voltage per Octave) connector of the VCO-1 module
- between the “SIN” connector of the VCO-1 module and the “1” “TO DEVICE” of the AUDIO-8 module
You can adjust the range of the frequency by turning the FREQ knob of the LFO-1 module.
You can also adjust the low frequency of the sequence by turning the FREQ knob of the VCO-1 module.
The Fundamental modules for VCV Rack
When you install the Rack-v1, the Rack-v1-Fundamental package is automatically installed. Rack-v1 only installs the rack system, with input / output modules, but without other basic modules.
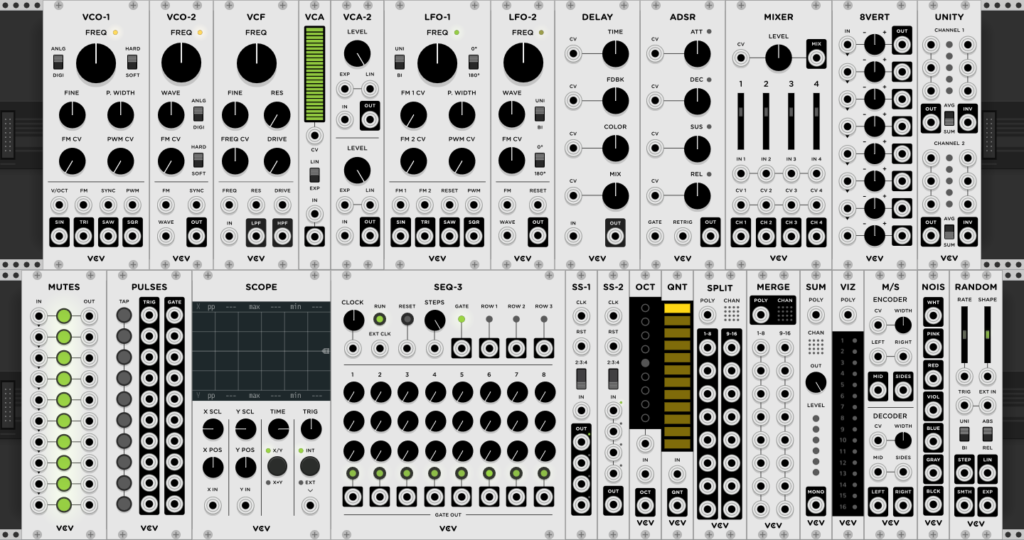
In the Fundamental VCV Rack packages, there are various modules available.
Some important modules to have in mind:
- VCO: Voltage Controlled Oscillator
- LFO: Low Frequency Oscillator
- VCA: Voltage Controlled Amplifier
- SEQ: Sequencers (to define a sequence of voltage / notes)
- SCOPE: an oscilloscope, very useful to debug your connexions
- ADSR: a module to generate an envelope for a note. ADSR stands for Attack / Decay / Sustain / Release
And there are a lot more functions available. I recommend you watch tutorials related to VCV Rack on YouTube to discover all these functionalities, in particular the Video Channel of Omri Cohen.
What to do next
Are you limited to the Fundamental modules? No, certainly not! VCV Rack provides some closed sources modules (for which you’ll need to pay) and a lot of other modules which are open source. All the open source modules are packages for Fedora 32 and 33. How many VCV Rack packages are available ?
sudo dnf search rack-v1 | grep src | wc -l
150
And counting. Each month new packages appear. If you want to install everything at once, run:
sudo dnf install `dnf search rack-v1 | grep src | sed -e "s/\(^.*\)\.src.*/\1/"`
Here are some recommended modules to start with.
- BogAudio (dnf install rack-v1-BogAudio)
- AudibleInstruments (dnf install rack-v1-AudibleInstruments)
- Valley (dnf install rack-v1-Valley)
- Befaco (dnf install rack-v1-Befaco)
- Bidoo (dnf install rack-v1-Bidoo)
- VCV-Recorder (dnf install rack-v1-VCV-Recorder)
A more complex case
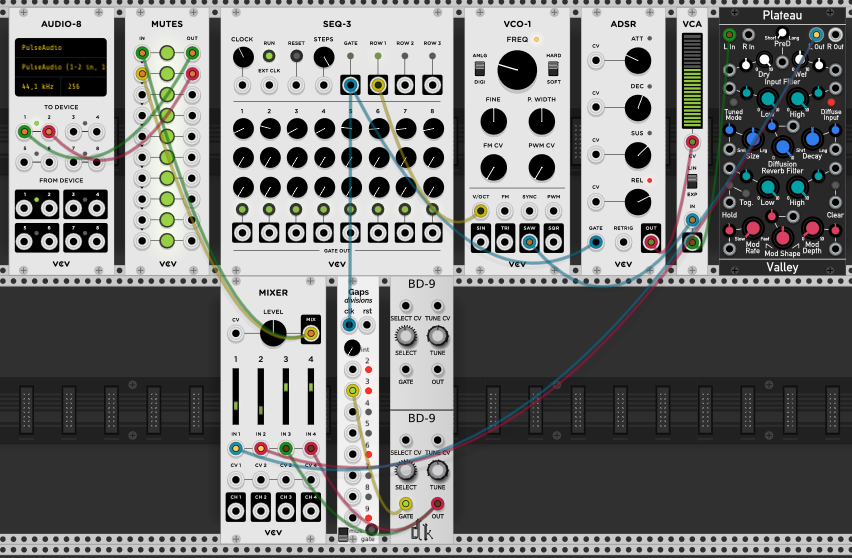
From Fundamental, use MIXER, AUDIO-8, MUTERS, SEQ-3, VCO-1, ADSR, VCA.
Use:
- Plateau module from Valley package (it’s an enhanced reverb).
- BassDrum9 from DrumKit package.
- HolonicSystems-Gaps from HolonicSystems-Free package.
How it sounds: checkout this video on my YouTube channel.
Managing MIDI
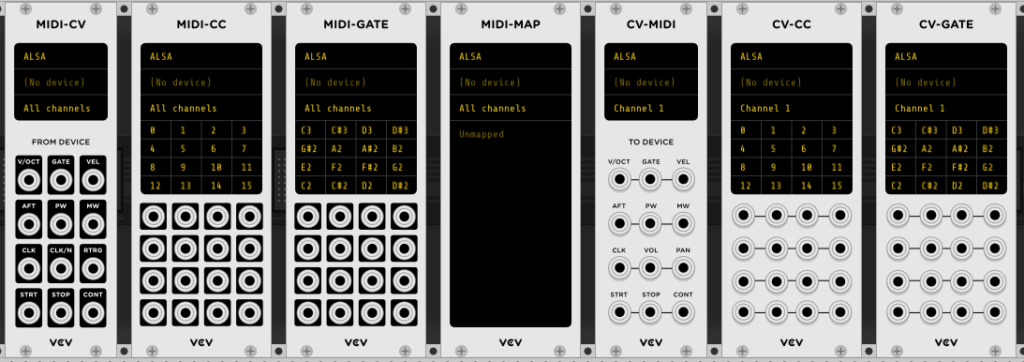
VCV Rack as a bunch of modules dedicated to MIDI management.
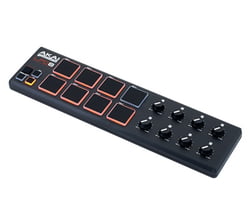
With these modules and with a tool like the Akai LPD-8:
You can easily control knob in VCV Rack modules from a real life device.
Before buying some devices, check it’s Linux compatibility. Normally every “USB Class Compliant” device works out of the box in every Linux distribution.
The MIDI → Knob mapping is done via the “MIDI-MAP” module. Once you have selected the MIDI driver (first line) and MIDI device (second line), click on “unmapped”. Then, touch a knob you want to control on a module (for example the “FREQ” knob of the VCO-1 Fundamental module). Now, turn the knob of the MIDI device and there you are; the mapping is done.
Artistic scopes
Last topic of this introduction paper: the scopes.
VCV Rack has several standard (and useful) scopes. The SCOPE module from Fundamental for example.
But it also has some interesting scopes.
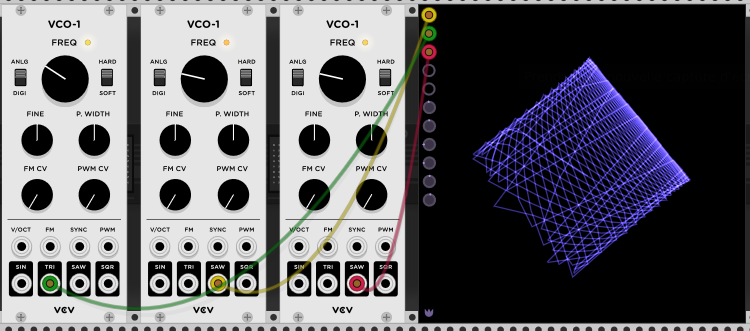
This used 3 VCO-1 modules from Fundamental and a fullscope from wiqid-anomalies.
The first connector at the top of the scope corresponds to the X input. The one below is the Y input and the other one below controls the color of the graph.
For the complete documentation of this module, check:
- the documentation of wigid-anomalies
- the documentation of the fullscope module
- the github repository of the wigid-anomalies module
For more information
If you’re looking for help or want to talk to the VCV Rack Community, visit their Discourse forum. You can get patches (a patch is the file saved by VCV Rack) for VCV Rack on Patch Storage.
Check out how vintage synthesizers looks like on Vintage Synthesizer Museum or Google’s online exhibition. The documentary “I Dream of Wires” provides a look at the history of modular synthesizers. Finally, the book Developing Virtual Syntehsizers with VCV Rack provides more depth.
via: https://fedoramagazine.org/vcv-rack-modular-synthesizers/
作者:Yann Collette 选题:lujun9972 译者:译者ID 校对:校对者ID
