7.7 KiB
Program your microcontroller with MicroBlocks
MicroBlocks brings a Scratch-like interface to programming the
Micro:bit, Circuit Playground Express, and other microcontroller boards.
If you like to tinker with technology, you may be familiar with programmable microcontroller boards, such as AdaFruit's Circuit Playground Express and the BBC Micro:bit. Now there's a new programming option for you to try: MicroBlocks. It's a simple Scratch-like programming interface that works well with several microcontrollers, including those two.
I own both the Circuit Playground Express and the BBC Micro:bit and was eager to try MicroBlocks after discovering it on Twitter.
Install MicroBlocks
To set up MicroBlocks on a Debian-based Linux distribution, download and install the .deb file. If you use an RPM-based Linux distribution, you can download the Linux 64-bit or 32-bit standalone executable. MicroBlocks also offers installers for Windows, macOS, and Raspberry Pi.
MicroBlocks can also run in a Chrome, Chromium, or Edge browser using its experimental web platform, which enables special web serial connections. The Chrome web store also has a browser extension for MicroBlocks.
Connect your microcontroller
Before you can access your microcontroller on Linux, you must add yourself to your computer's dialout group. Linux uses this group to communicate with serial devices, and if your user account isn't in that group, you won't be able to control your device.
Run the following in a terminal to add yourself to the dialout group:
`$ sudo usermod -G dialout -a `whoami``
Log out of your desktop and then log back in (or just reboot). Then connect your BBC Micro:bit, Circuit Playground Express, or other microcontroller board to an available USB port on your computer. My Intel NUC recognized my microcontroller without issue.
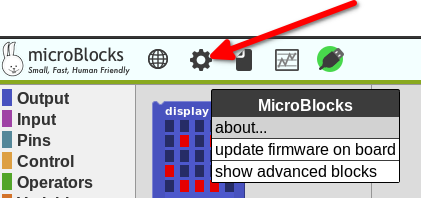
After connecting your microcontroller, you may be asked to update the device's firmware. It's safe to do so.
(Don Watkins, CC BY-SA 4.0)
Once that's done, you're all ready to go.
Start programming
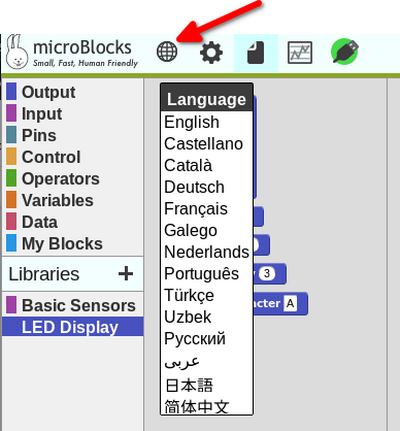
Use the programming interface to set what language you want to use when interacting with MicroBlocks.
(Don Watkins, CC BY-SA 4.0)
You can verify that your microcontroller is connected by checking the Connect icon on the menu.
(Don Watkins, CC BY-SA 4.0)
Now you're ready to start exploring. One of my favorite ways to learn is to tinker with a user interface's different options. What makes MicroBlocks special is that it's a live coding environment, so you get to see changes you make right away.
Try this: Go to the Display category (in the left-hand column) and drag the display array into the scripting area. Use the menu to change A to B in one of them.
Click on a programming block, and your code, simple though it may be, runs immediately on the board.
Use programming blocks
If you are familiar with Scratch, you are likely to find MicroBlocks extremely easy to use. Students love it because of the instant feedback from the board and the program.
My first program was very simple. I wanted to make a simple "smiley face" on my Micro:bit.
First, I clicked on the Control block and selected: "When button 'a' is pressed."
Then I selected a smiley face from the LED Display library and connected that to the Control block.
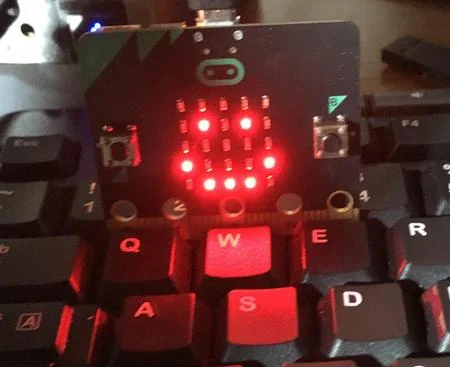
Finally, I pressed Button A on my Micro:bit. Feedback is instantaneous.
(Don Watkins, CC BY-SA 4.0)
Save your code
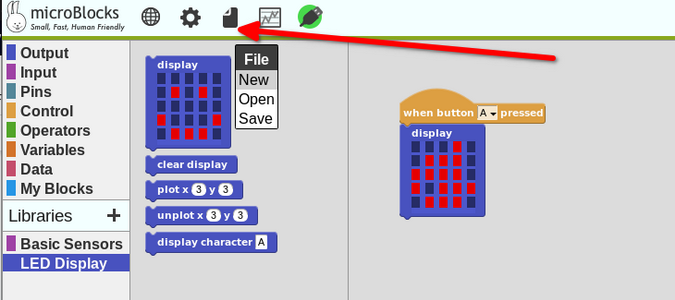
Saving your program is easy. On the top menu bar, click on the third icon from the left (the document icon). Choose the Save option from the drop-down menu.
(Don Watkins, CC BY-SA 4.0)
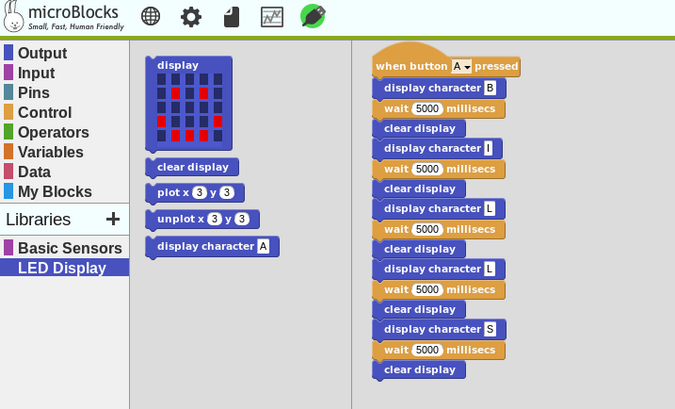
Try experimenting with the interface to program your board however you want. For my second program, I used the Control and LED Display blocks to spell out "Bills," which is my favorite NFL team. But there are lots of other functions available, so try designing something that interests you.
(Don Watkins, CC BY-SA 4.0)
Do more with MicroBlocks
Be sure to check out the quickstart guide on the MicroBlocks website for more information. The site also contains activity guides with easy-to-follow code examples for students and teachers. These will help anyone get started programming the Micro:bit or the Circuit Playground Express with MicroBlocks.
MicroBlocks is fully open source and released under the Mozilla Public License 2.0.
MicroBlocks is still under active development by the core team, and they're not currently soliciting code contributions or pull requests. However, they are interested in any MicroBlocks tutorials, lesson plans, or examples from the community, so please contact them if you have something to share.
via: https://opensource.com/article/20/11/microblocks
作者:Don Watkins 选题:lujun9972 译者:译者ID 校对:校对者ID
