9.7 KiB
How To Install, Configure And Use Fish Shell In Linux?
Every Linux administrator might heard the word called shell.
Do you know what is shell? Do you know what is the role for shell in Linux? How many shell is available in Linux?
A shell is a program that provides an interface between a user and kernel.
kernel is a heart of the Linux operating system that manage everything between user and operating system (OS).
Shell is available for all the users when they launch the terminal.
Once the terminal launched then user can run any commands which is available for him.
When shell completes the command execution then you will be getting the output on the terminal window.
Bash stands for Bourne Again Shell is the default shell which is running on most of the Linux distribution on today’s.
It’s very popular and has a lot of features. Today we are going to discuss about the fish shell.
What Is Fish Shell?
Fish stands for friendly interactive shell, is a fully-equipped, smart and user-friendly command line shell for Linux which comes with some handy features that is not available in most of the shell.
The features are Autosuggestion, Sane Scripting, Man Page Completions, Web Based configuration and Glorious VGA Color. Are you curious to test it? if so, go ahead and install it by following the below installation steps.
How To Install Fish Shell In Linux?
It’s very simple to install but it doesn’t available in most of the distributions except few. However, it can be easily installed by using the following fish repository.
For Arch Linux based systems, use Pacman Command to install fish shell.
$ sudo pacman -S fish
For Ubuntu 16.04/18.04 systems, use APT-GET Command or APT Command to install fish shell.
$ sudo apt-add-repository ppa:fish-shell/release-3
$ sudo apt-get update
$ sudo apt-get install fish
For Fedora system, use DNF Command to install fish shell.
For Fedora 29 System:
$ sudo dnf config-manager --add-repo https://download.opensuse.org/repositories/shells:/fish:/release:/3/Fedora_29/shells:fish:release:3.repo
$ sudo dnf install fish
For Fedora 28 System:
$ sudo dnf config-manager --add-repo https://download.opensuse.org/repositories/shells:/fish:/release:/3/Fedora_28/shells:fish:release:3.repo
$ sudo dnf install fish
For Debian systems, use APT-GET Command or APT Command to install fish shell.
For Debian 9 System:
$ sudo wget -nv https://download.opensuse.org/repositories/shells:fish:release:3/Debian_9.0/Release.key -O Release.key
$ sudo apt-key add - < Release.key
$ sudo echo 'deb http://download.opensuse.org/repositories/shells:/fish:/release:/3/Debian_9.0/ /' > /etc/apt/sources.list.d/shells:fish:release:3.list
$ sudo apt-get update
$ sudo apt-get install fish
For Debian 8 System:
$ sudo wget -nv https://download.opensuse.org/repositories/shells:fish:release:3/Debian_8.0/Release.key -O Release.key
$ sudo apt-key add - < Release.key
$ sudo echo 'deb http://download.opensuse.org/repositories/shells:/fish:/release:/3/Debian_8.0/ /' > /etc/apt/sources.list.d/shells:fish:release:3.list
$ sudo apt-get update
$ sudo apt-get install fish
For RHEL/CentOS systems, use YUM Command to install fish shell.
For RHEL 7 System:
$ sudo yum-config-manager --add-repo https://download.opensuse.org/repositories/shells:/fish:/release:/3/RHEL_7/shells:fish:release:3.repo
$ sudo yum install fish
For RHEL 6 System:
$ sudo yum-config-manager --add-repo https://download.opensuse.org/repositories/shells:/fish:/release:/3/RedHat_RHEL-6/shells:fish:release:3.repo
$ sudo yum install fish
For CentOS 7 System:
$ sudo yum-config-manager --add-repo https://download.opensuse.org/repositories/shells:fish:release:2/CentOS_7/shells:fish:release:2.repo
$ sudo yum install fish
For CentOS 6 System:
$ sudo yum-config-manager --add-repo https://download.opensuse.org/repositories/shells:fish:release:2/CentOS_6/shells:fish:release:2.repo
$ sudo yum install fish
For openSUSE Leap system, use Zypper Command to install fish shell.
$ sudo zypper addrepo https://download.opensuse.org/repositories/shells:/fish:/release:/3/openSUSE_Leap_42.3/shells:fish:release:3.repo
$ suod zypper refresh
$ sudo zypper install fish
How To Use Fish Shell?
Once you have successfully installed the fish shell. Simply type fish on your terminal, which will automatically switch to the fish shell from your default bash shell.
$ fish
Auto Suggestions
When you type any commands in the fish shell, it will auto suggest a command in a light grey color after typing few letters.

Once you got a suggestion then simple hit the Left Arrow Mark to complete it instead of typing the full command.

Instantly you can access the previous history based on the command by pressing Up Arrow Mark after typing a few letters. It’s similar to bash shell CTRL+r option.
Tab Completions
If you would like to see if there are any other possibilities for the given command then simple press the Tab button once after typing a few letters.

Press the Tab button one more time to see the full lists.

Syntax highlighting
fish performs syntax highlighting, that you can see when you are typing any commands in the terminal. Invalid commands are colored by RED color.

The same way valid commands are shown in a different color. Also, fish will underline valid file paths when you type and it doesn’t show the underline if the path is not valid.

Web based configuration
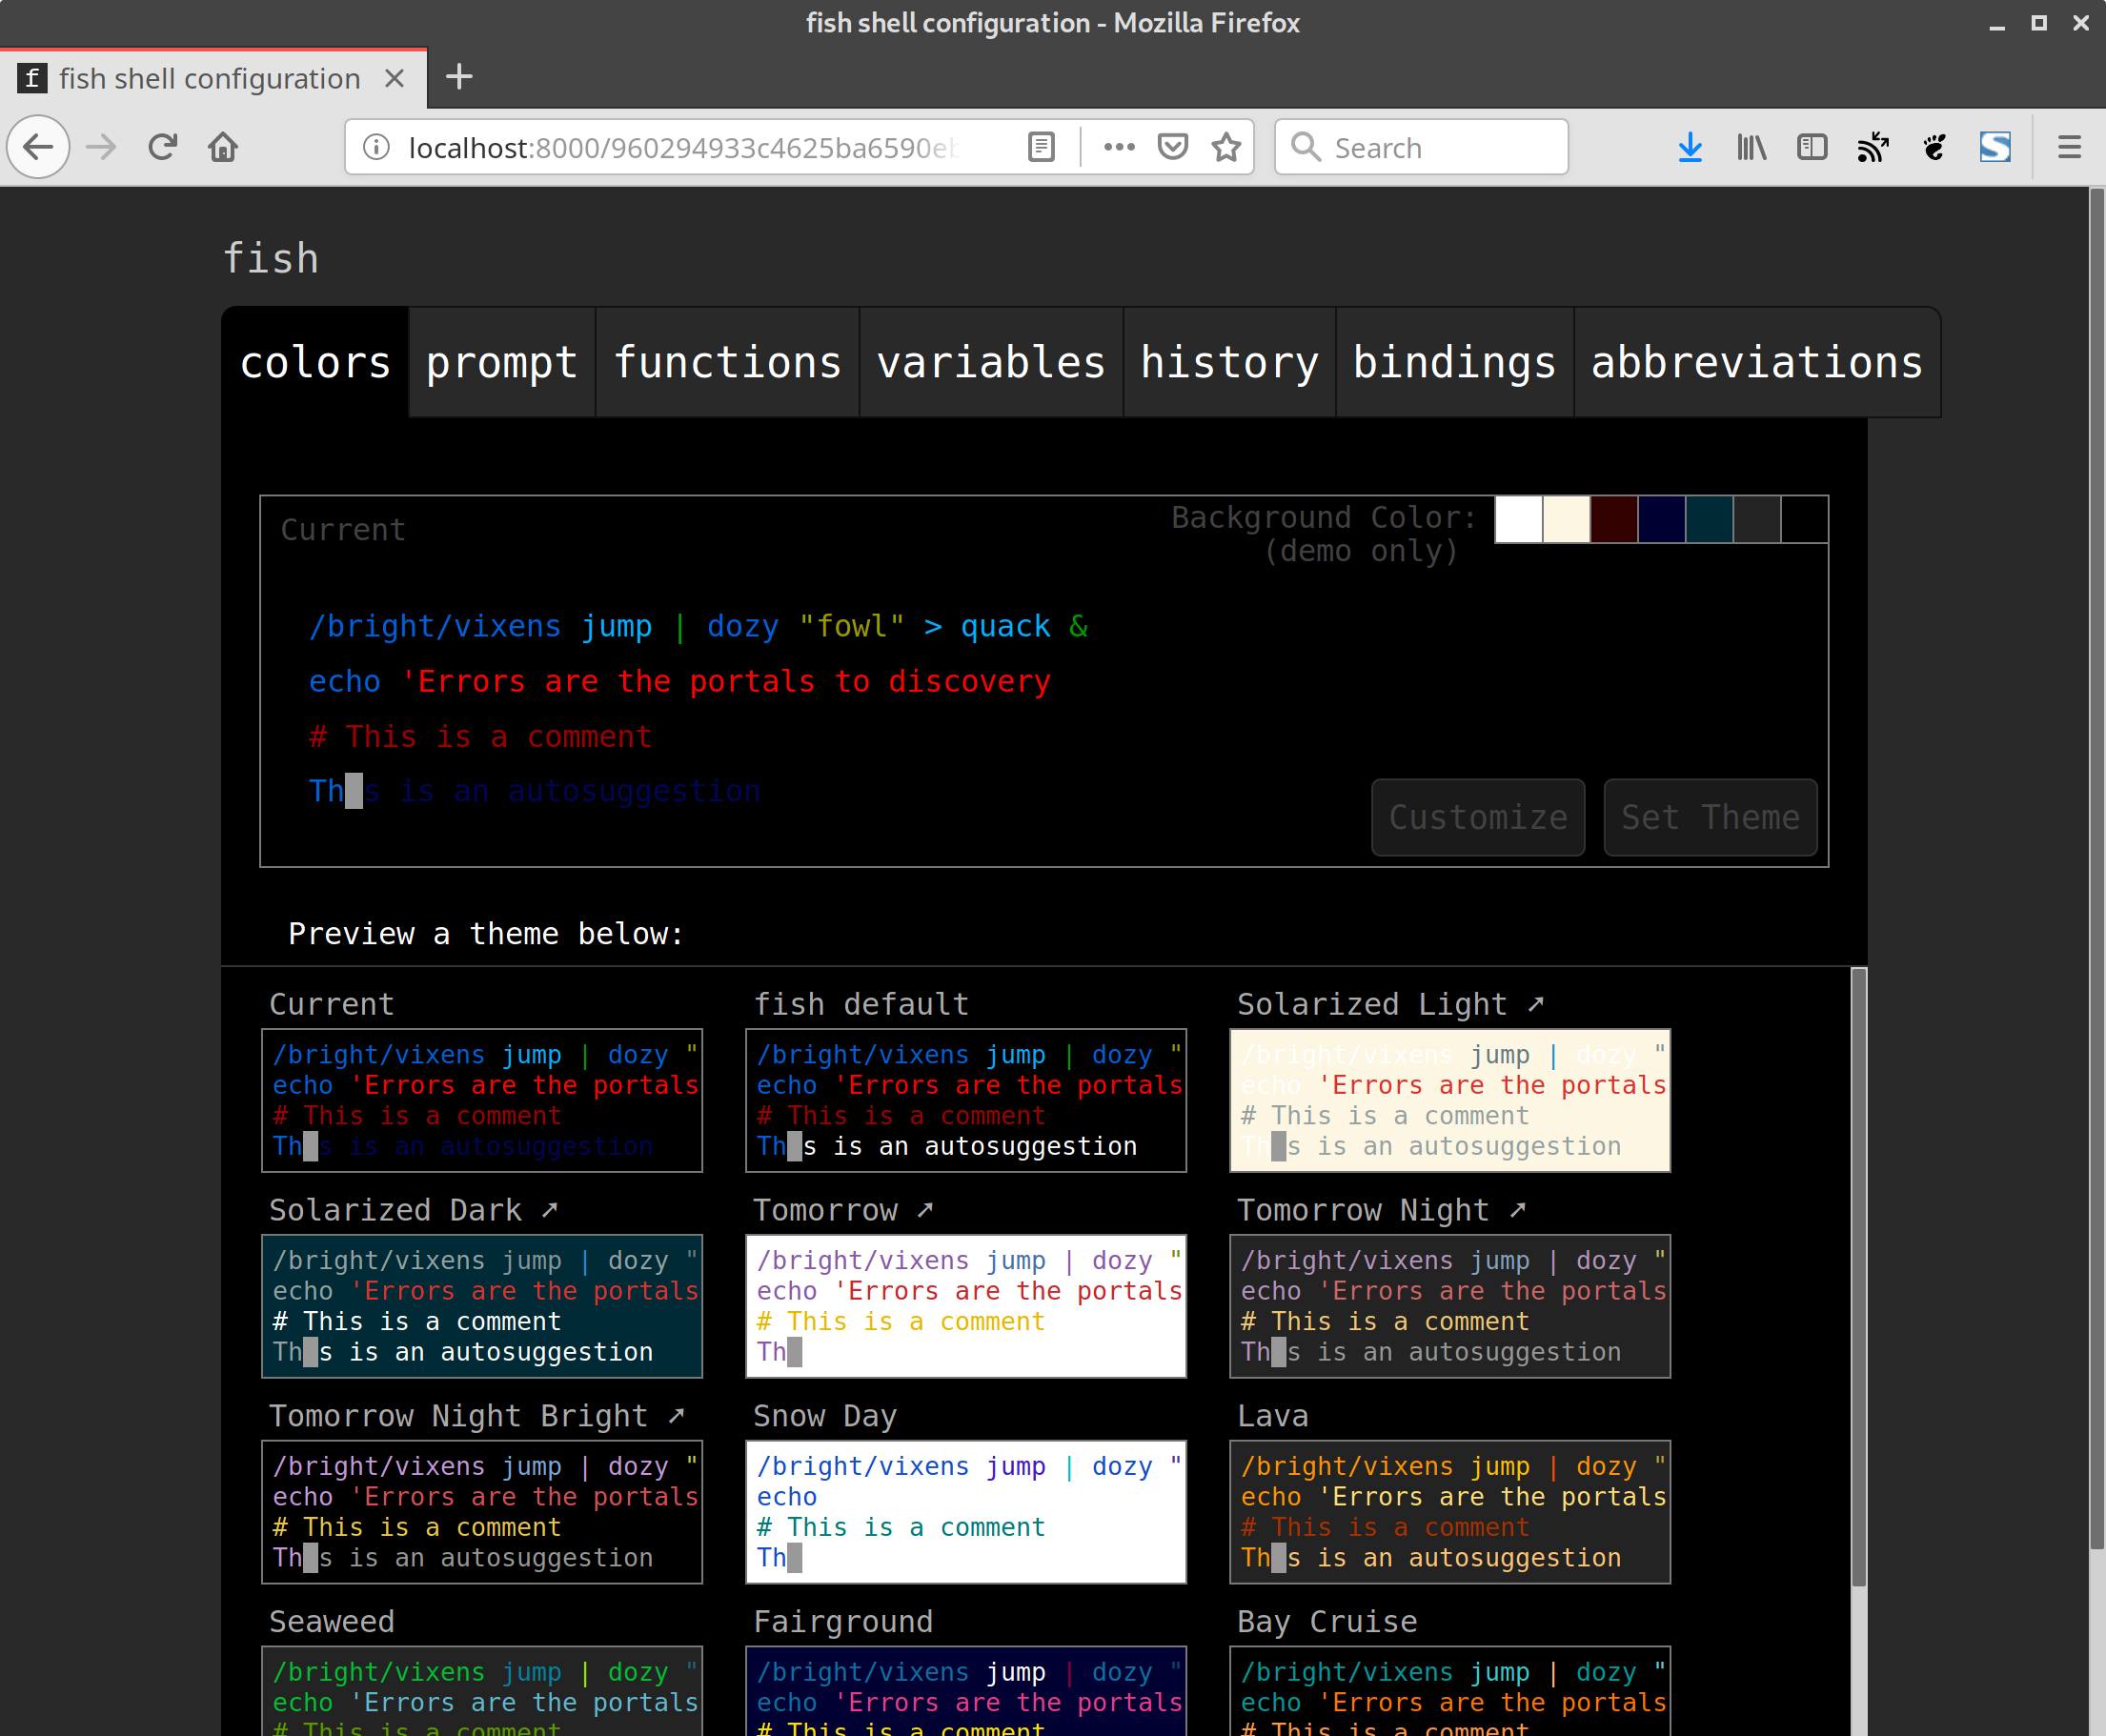
There is a cool feature is available in the fish shell, that allow us to set colors, prompt, functions, variables, history and bindings via web browser.
Run the following command on your terminal to start the web configuration interface. Simply press Ctrl+c to exit it.
$ fish_config
Web config started at 'file:///home/daygeek/.cache/fish/web_config-86ZF5P.html'. Hit enter to stop.
qt5ct: using qt5ct plugin
^C
Shutting down.
Man Page Completions
Other shells support programmable completions, but only fish generates them automatically by parsing your installed man pages.
To do so, run the below command.
$ fish_update_completions
Parsing man pages and writing completions to /home/daygeek/.local/share/fish/generated_completions/
 3466 / 3466 : zramctl.8.gz
How To Set Fish as default shell
If you would like to test the fish shell for some times then you can set the fish shell as your default shell instead of switching it every time.
If so, first get the fish shell location by using the below command.
$ whereis fish
fish: /usr/bin/fish /etc/fish /usr/share/fish /usr/share/man/man1/fish.1.gz
Change your default shell as a fish shell by running the following command.
$ chsh -s /usr/bin/fish
Make note: Just verify whether the fish shell is added into /etc/shells directory or not. If no, then run the following command to append it.
$ echo /usr/bin/fish | sudo tee -a /etc/shells
Once you have done the testing and if you would like to come back to the bash shell permanently then use the following command.
For temporary:
$ bash
For permanent:
$ chsh -s /bin/bash
via: https://www.2daygeek.com/linux-fish-shell-friendly-interactive-shell/
作者:Magesh Maruthamuthu 选题:lujun9972 译者:译者ID 校对:校对者ID


