mirror of
https://github.com/LCTT/TranslateProject.git
synced 2025-01-13 22:30:37 +08:00
71 lines
3.4 KiB
Markdown
71 lines
3.4 KiB
Markdown
Linux 有问必答:如何在桌面版 Ubuntu 中用命令行更改系统代理设置
|
||
================================================================================
|
||
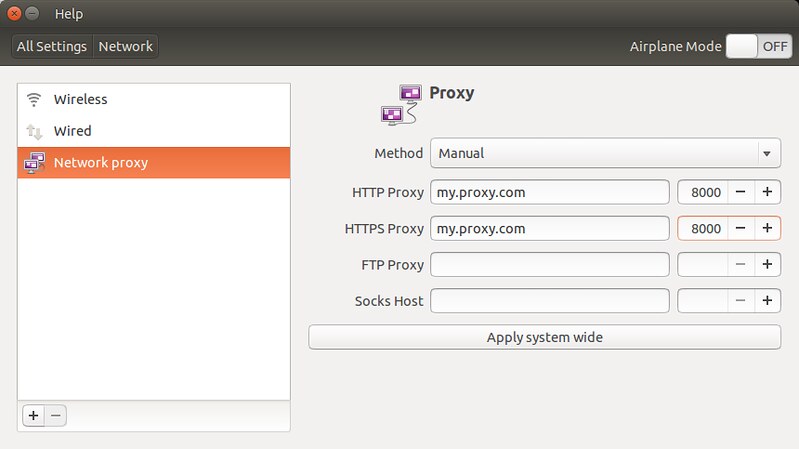
> **问题**: 我经常需要在桌面版 Ubuntu 中更改系统代理设置,但我不想通过繁琐的 GUI 菜单点击:"系统设置" -> "网络" -> "网络代理"。在命令行中有更方便的方法更改桌面版的代理设置吗?
|
||
|
||
在桌面版 Ubuntu 中,它的桌面环境设置,包括系统代理设置,都存储在 DConf 数据库,这是简单的键值对存储。如果你想通过系统设置菜单修改桌面属性,更改会持久保存在后端的 DConf 数据库。在 Ubuntu 中更改 DConf 数据库有基于图像用户界面和非图形用户界面的两种方式。系统设置或者 `dconf-editor` 是访问 DConf 数据库的图形方法,而 `gsettings` 或 `dconf` 就是能更改数据库的命令行工具。
|
||
|
||
下面介绍如何用 `gsettings` 从命令行更改系统代理设置。
|
||
|
||

|
||
|
||
`gsettings` 读写特定 Dconf 设置的基本用法如下:
|
||
|
||
更改 DConf 设置:
|
||
|
||
$ gsettings set <schema> <key> <value>
|
||
|
||
读取 DConf 设置:
|
||
|
||
$ gsettings get <schema> <key>
|
||
|
||
### 通过命令行更改系统代理设置为手动 ###
|
||
|
||
桌面版 Ubuntu 中下面的命令会更改 HTTP 代理设置为 "my.proxy.com:8000"。
|
||
|
||
$ gsettings set org.gnome.system.proxy.http host 'my.proxy.com'
|
||
$ gsettings set org.gnome.system.proxy.http port 8000
|
||
$ gsettings set org.gnome.system.proxy mode 'manual'
|
||
|
||
如果你还想更改 HTTPS/FTP 代理为手动,用这些命令:
|
||
|
||
$ gsettings set org.gnome.system.proxy.https host 'my.proxy.com'
|
||
$ gsettings set org.gnome.system.proxy.https port 8000
|
||
$ gsettings set org.gnome.system.proxy.ftp host 'my.proxy.com'
|
||
$ gsettings set org.gnome.system.proxy.ftp port 8000
|
||
|
||
更改套接字主机设置为手动:
|
||
|
||
$ gsettings set org.gnome.system.proxy.socks host 'my.proxy.com'
|
||
$ gsettings set org.gnome.system.proxy.socks port 8000
|
||
|
||
上面的更改都只适用于当前的桌面用户。如果你想在系统范围内使用代理设置更改,在 gsettings 命令面前添加 sudo。例如:
|
||
|
||
$ sudo gsettings set org.gnome.system.proxy.http host 'my.proxy.com'
|
||
$ sudo gsettings set org.gnome.system.proxy.http port 8000
|
||
$ sudo gsettings set org.gnome.system.proxy mode 'manual'
|
||
|
||
### 在命令行中更改系统代理设置为自动 ###
|
||
|
||
如果你正在使用 [自动配置代理][1] (proxy auto configuration,PAC),输入以下命令更改为 PAC。
|
||
|
||
$ gsettings set org.gnome.system.proxy mode 'auto'
|
||
$ gsettings set org.gnome.system.proxy autoconfig-url http://my.proxy.com/autoproxy.pac
|
||
|
||
### 在命令行中清除系统代理设置 ###
|
||
|
||
最后,清除所有“手动/自动”代理设置,还原为无代理设置:
|
||
|
||
$ gsettings set org.gnome.system.proxy mode 'none'
|
||
|
||
--------------------------------------------------------------------------------
|
||
|
||
via: http://ask.xmodulo.com/change-system-proxy-settings-command-line-ubuntu-desktop.html
|
||
|
||
作者:[Dan Nanni][a]
|
||
译者:[ictlyh](https://github.com/ictlyh)
|
||
校对:[wxy](https://github.com/wxy)
|
||
|
||
本文由 [LCTT](https://github.com/LCTT/TranslateProject) 原创翻译,[Linux中国](https://linux.cn/) 荣誉推出
|
||
|
||
[a]:http://ask.xmodulo.com/author/nanni
|
||
[1]:http://xmodulo.com/how-to-set-up-proxy-auto-config-on-ubuntu-desktop.html |