7.3 KiB
Cast your Android device with a Raspberry Pi
Use Scrcpy to turn your phone screen into an app running alongside your
applications on a Raspberry Pi or any other Linux-based device.

It's hard to stay away from the gadgets we use on a daily basis. In the hustle and bustle of modern life, I want to make sure I don't miss out on the important notifications from friends and family that pop up on my phone screen. I'm also busy and do not want to get lost in distractions, and picking up a phone and replying to messages tends to be distracting.
To further complicate matters, there are a lot of devices out there. Luckily, most of them, from powerful workstations to laptops and even the humble Raspberry Pi, can run Linux. Because they run Linux, almost every solution I find for one device is a perfect fit for the others.
One size fits all
I wanted a way to unify the different sources of data in my life on whatever screen I am staring at.
I decided to solve this problem by copying my phone's screen onto my computer. In essence, I made my phone into an app running alongside all of my other applications. This helps me keep my attention on my desktop, prevents me from mentally wandering away, and makes it easier for me to reply to urgent notifications.
Sound appealing? Here's how you can do it too.
Set up Scrcpy
Scrcpy, commonly known as Screen Copy, is an open source screen-mirroring tool that displays and controls Android devices from Linux, Windows, or macOS. Communication between the Android device and the computer is primarily done over a USB connection and Android Debug Bridge (ADB). It uses TCP/IP and does not require any root access.
Scrcpy's setup and configuration are very easy. If you're running Fedora, you can install it from a Copr repository:
$ sudo dnf copr enable zeno/scrcpy
$ sudo dnf install scrcpy -y
On Debian or Ubuntu:
`$ sudo apt install scrcpy`
You can also compile scrcpy yourself. It doesn't take long to build, even on a Raspberry Pi, using the instructions on scrcpy's GitHub page.
Set up the phone
Once scrcpy is installed, you must enable USB debugging and authorize each device (your Raspberry Pi, laptop, or workstation) as a trusted controller.
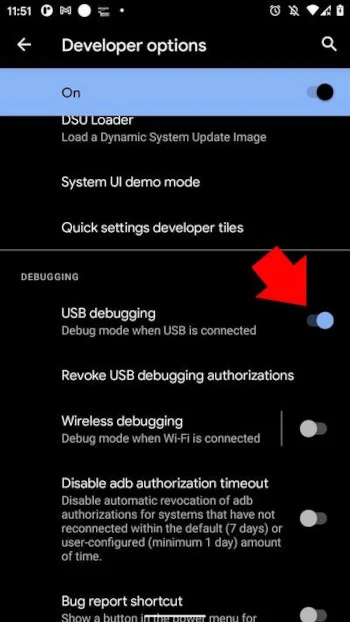
Open the Settings app on your Android and scroll down to Developer options. If Developer options is not activated, follow Android's instructions to unlock it.
Next, enable USB debugging.
(Sudeshna Sur, CC BY-SA 4.0)
Then connect the phone to your Raspberry Pi or laptop (or whatever device you're using) over USB and set the mode to PTP, if that's an option. If your phone doesn't use PTP, set the mode your phone uses for transferring files (rather than, for instance, serving as a tethering or MIDI device).
Your phone will probably prompt you to authorize your computer, identified by its RSA fingerprint. You only have to do this the first time you connect; after that, your phone will recognize and trust your computer.
Confirm the setting with the lsusb command:
$ lsusb
Bus 007 Device 001: ID 1d6b:0002 Linux Foundation 2.0 root hub
Bus 011 Device 004: ID 046d:c21d Logitech, Inc. F310 Gamepad
Bus 005 Device 005: ID 0951:1666 Kingston Technology DataTraveler G4
Bus 005 Device 004: ID 05e3:0608 Genesys Logic, Inc. Hub
Bus 004 Device 001: ID 18d1:4ee6 Google Inc. Nexus/Pixel Device (PTP + debug)
Bus 003 Device 001: ID 1d6b:0002 Linux Foundation 2.0 root hub
Bus 002 Device 001: ID 1d6b:0003 Linux Foundation 3.0 root hub
Bus 001 Device 001: ID 1d6b:0002 Linux Foundation 2.0 root hub
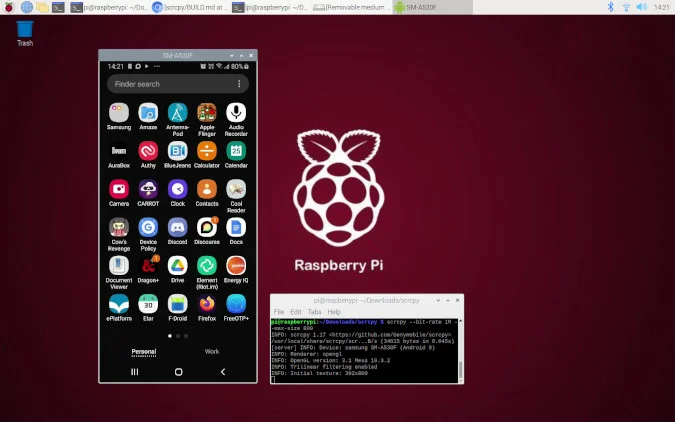
Then execute $ scrcpy to launch it with the default settings.
(Opensource.com, CC BY-SA 4.0)
Performance and responsiveness vary depending on what device you're using to control your mobile. On a Pi, some of the animations can be slow, and even the response sometimes lags. Scrcpy provides an easy fix for this: Reducing the bitrate and resolution of the image scrcpy displays makes it easier for your computer to keep up. Do this with:
`$ scrcpy --bit-rate 1M --max-size 800`
Try different values to find the one you prefer. To make it easier to type, once you've settled on a command, consider making your own Bash alias.
Cut the cord
Once scrcpy is running, you can even connect your mobile and your computer over WiFi. The scrcpy installation process also installs adb, a command to communicate with Android devices. Scrcpy also uses this command to communicate with your device and adb can connect over TCP/IP.
(Sudeshna Sur, CC BY-SA 4.0)
To try it, make sure your phone is connected over WiFi on the same wireless network your computer is using. Do NOT disconnect your phone from USB yet!
Next, get your phone's IP address by navigating to Settings and selecting About phone. Look at the Status option to get your address. It usually starts with 192.168 or 10.
Alternately, you can get your mobile's IP address using adb:
$ adb shell ip route | awk '{print $9}'

To connect to your device over WiFi, you must enable TCP/IP connections. This, you must do through the adb command:
$ adb tcpip 5555
Now you can disconnect your mobile from USB.
Whenever you want to connect over WiFi, first connect to the mobile with the command adb connect. For instance, assuming my mobile's IP address is 10.1.1.22, the command is:
$ adb connect 10.1.1.22:5555
Once it's connected, you can run scrcpy as usual.
Remote control
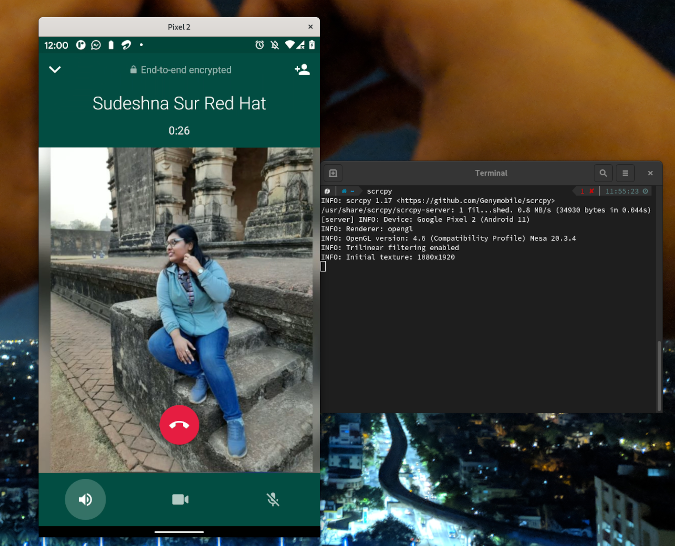
Scrcpy is easy to use. You can try it in a terminal or as a GUI application.
Do you use another screen-mirroring application? If so, let us know about it in the comments.
via: https://opensource.com/article/21/3/android-raspberry-pi
作者:Sudeshna Sur 选题:lujun9972 译者:译者ID 校对:校对者ID


