6.3 KiB
Terminalizer – A Tool To Record Your Terminal And Generate Animated Gif Images
This is know topic for most of us and i don’t want to give you the detailed information about this flow. Also, we had written many article under this topics.
Script command is the one of the standard command to record Linux terminal sessions. Today we are going to discuss about same kind of tool called Terminalizer.
This tool will help us to record the users terminal activity, also will help us to identify other useful information from the output.
What Is Terminalizer
Terminalizer allow users to record their terminal activity and allow them to generate animated gif images. It’s highly customizable CLI tool that user can share a link for an online player, web player for a recording file.
Suggested Read : (#) Script – A Simple Command To Record Your Terminal Session Activity (#) Automatically Record/Capture All Users Terminal Sessions Activity In Linux (#) Teleconsole – A Tool To Share Your Terminal Session Instantly To Anyone In Seconds (#) tmate – Instantly Share Your Terminal Session To Anyone In Seconds (#) Peek – Create a Animated GIF Recorder in Linux (#) Kgif – A Simple Shell Script to Create a Gif File from Active Window (#) Gifine – Quickly Create An Animated GIF Video In Ubuntu/Debian
There is no distribution official package to install this utility and we can easily install it by using Node.js.
How To Install Noje.js in Linux
Node.js can be installed in multiple ways. Here, we are going to teach you the standard method.
For Ubuntu/LinuxMint use APT-GET Command or APT Command to install Node.js
$ curl -sL https://deb.nodesource.com/setup_8.x | sudo -E bash -
$ sudo apt-get install -y nodejs
For Debian use APT-GET Command or APT Command to install Node.js
# curl -sL https://deb.nodesource.com/setup_8.x | bash -
# apt-get install -y nodejs
For RHEL/CentOS , use YUM Command to install tmux.
$ sudo curl --silent --location https://rpm.nodesource.com/setup_8.x | sudo bash -
$ sudo yum install epel-release
$ sudo yum -y install nodejs
For Fedora , use DNF Command to install tmux.
$ sudo dnf install nodejs
For Arch Linux , use Pacman Command to install tmux.
$ sudo pacman -S nodejs npm
For openSUSE , use Zypper Command to install tmux.
$ sudo zypper in nodejs6
How to Install Terminalizer
As you have already installed prerequisite package called Node.js, now it’s time to install Terminalizer on your system. Simple run the below npm command to install Terminalizer.
$ sudo npm install -g terminalizer
How to Use Terminalizer
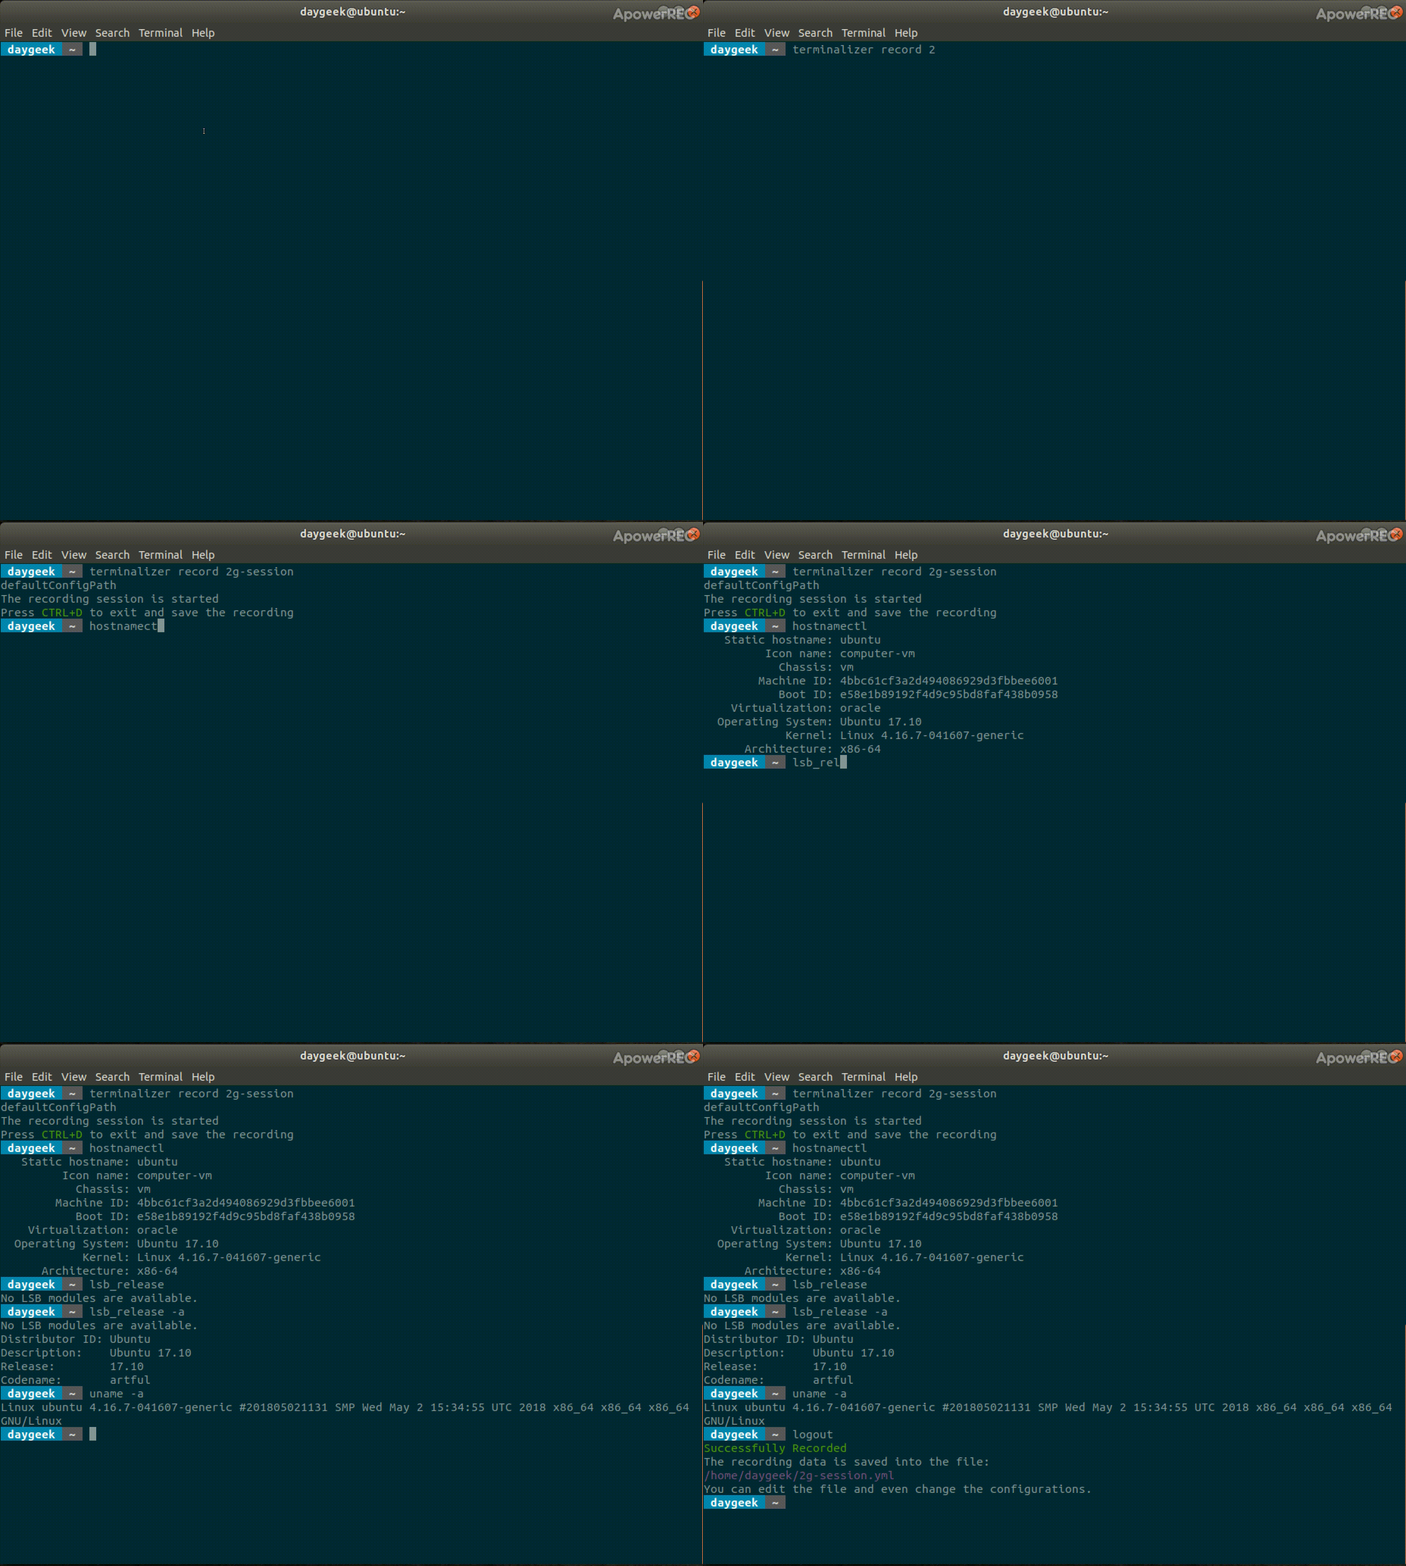
To record your session activity using Terminalizer, just run the following Terminalizer command. Once you started the recording then play around it and finally hit CTRL+D to exit and save the recording.
# terminalizer record 2g-session

defaultConfigPath
The recording session is started
Press CTRL+D to exit and save the recording
This will save your recording session as a YAML file, in this case my filename would be 2g-session-activity.yml.

Just type few commands to verify this and finally hit CTRL+D to exit the current capture. When you hit CTRL+D on the terminal and you will be getting the below output.
# logout
Successfully Recorded
The recording data is saved into the file:
/home/daygeek/2g-session.yml
You can edit the file and even change the configurations.
How to Play the Recorded File
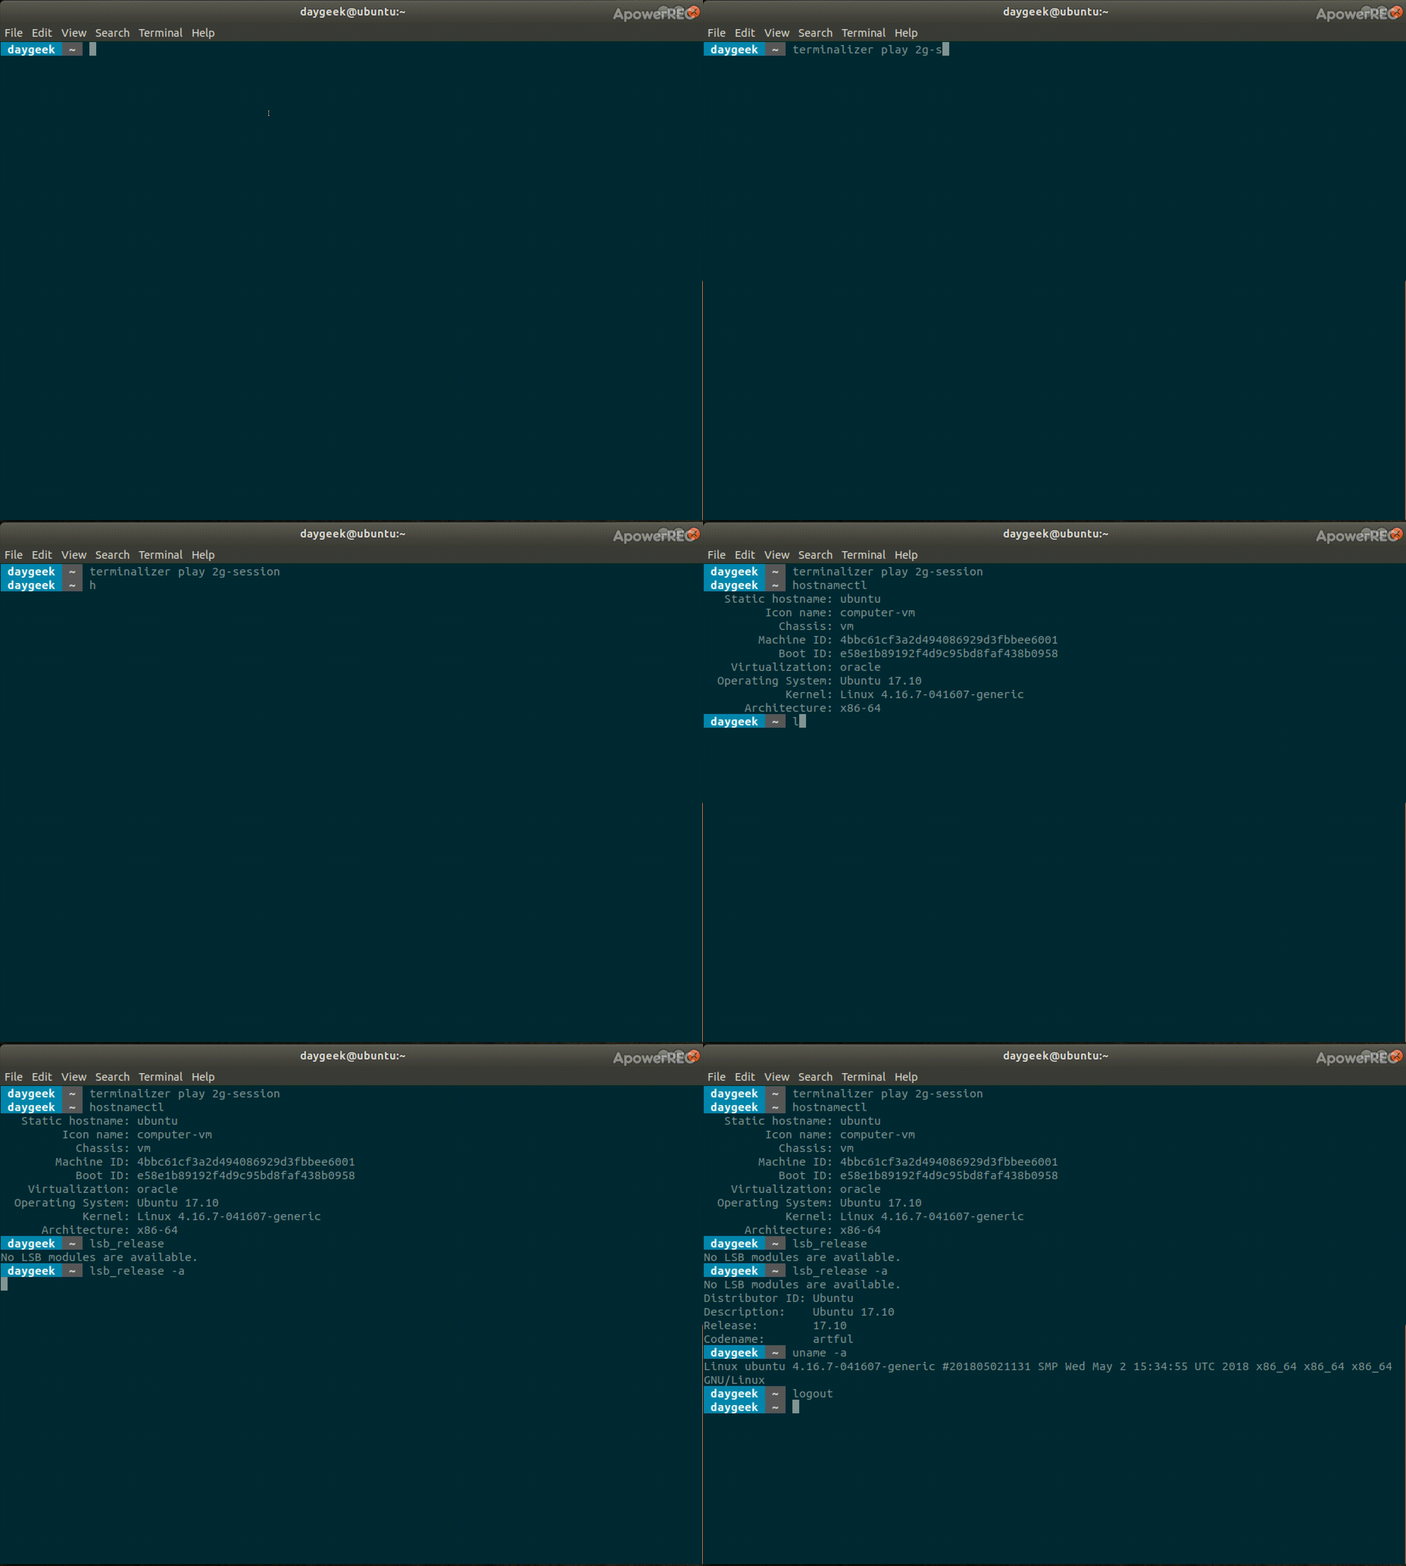
Use the below command format to paly your recorded YAML file. Make sure, you have to input your recorded file instead of us.
# terminalizer play 2g-session
Render a recording file as an animated gif image.
# terminalizer render 2g-session
Note: Below two commands are not implemented yet in the current version and will be available in the next version.
If you would like to share your recording to others then upload a recording file and get a link for an online player and share it.
terminalizer share 2g-session
Generate a web player for a recording file
# terminalizer generate 2g-session
作者:Prakash Subramanian 选题:lujun9972 译者:译者ID 校对:校对者ID
