7.4 KiB
translating by ypingcn
Control your data with Syncthing: An open source synchronization tool
Decide how to store and share your personal information.
These days, some of our most important possessions—from pictures and videos of family and friends to financial and medical documents—are data. And even as cloud storage services are booming, so there are concerns about privacy and lack of control over our personal data. From the PRISM surveillance program to Google letting app developers scan your personal emails, the news is full of reports that should give us all pause regarding the security of our personal information.
Syncthing can help put your mind at ease. An open source peer-to-peer file synchronization tool that runs on Linux, Windows, Mac, Android, and others (sorry, no iOS), Syncthing uses its own protocol, called Block Exchange Protocol. In brief, Syncthing lets you synchronize your data across many devices without owning a server.
Linux
In this post, I will explain how to install and synchronize files between a Linux computer and an Android phone.
Syncthing is readily available for most popular distributions. Fedora 28 includes the latest version.
To install Syncthing in Fedora, you can either search for it in Software Center or execute the following command:
sudo dnf install syncthing syncthing-gtk
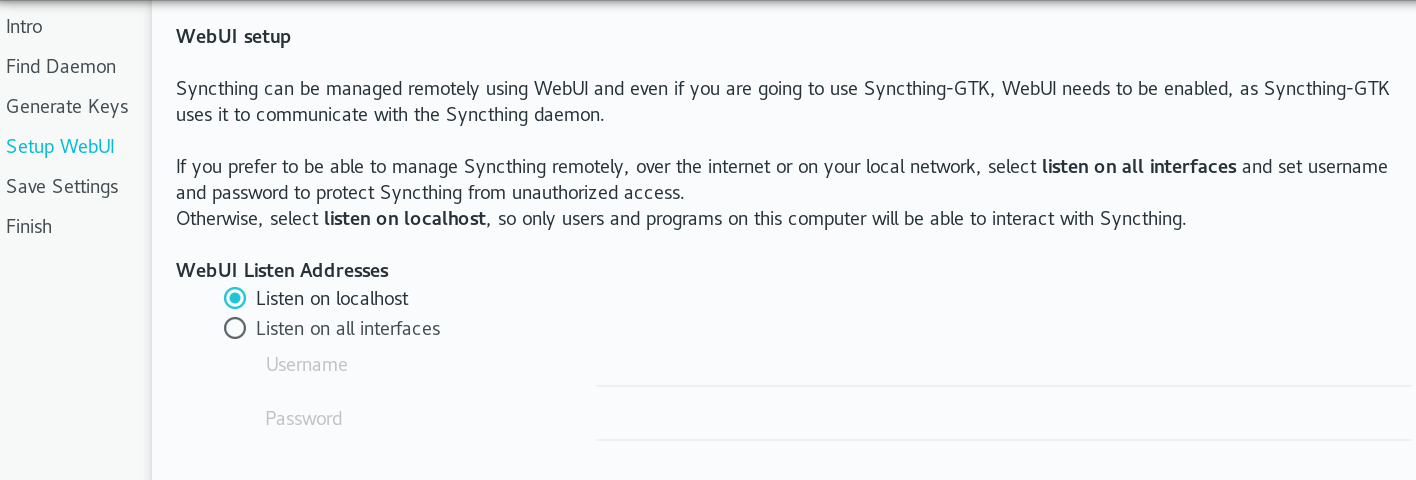
Once it’s installed, open it. You’ll be welcomed by an assistant to help configure Syncthing. Click Next until it asks to configure the WebUI. The safest option is to keep the option Listen on localhost. That will disable the web interface and keep unauthorized users away.
Syncthing in Setup WebUI dialog box
Close the dialog. Now that Syncthing is installed, it’s time to share a folder, connect a device, and start syncing. But first, let’s continue with your other client.
Android
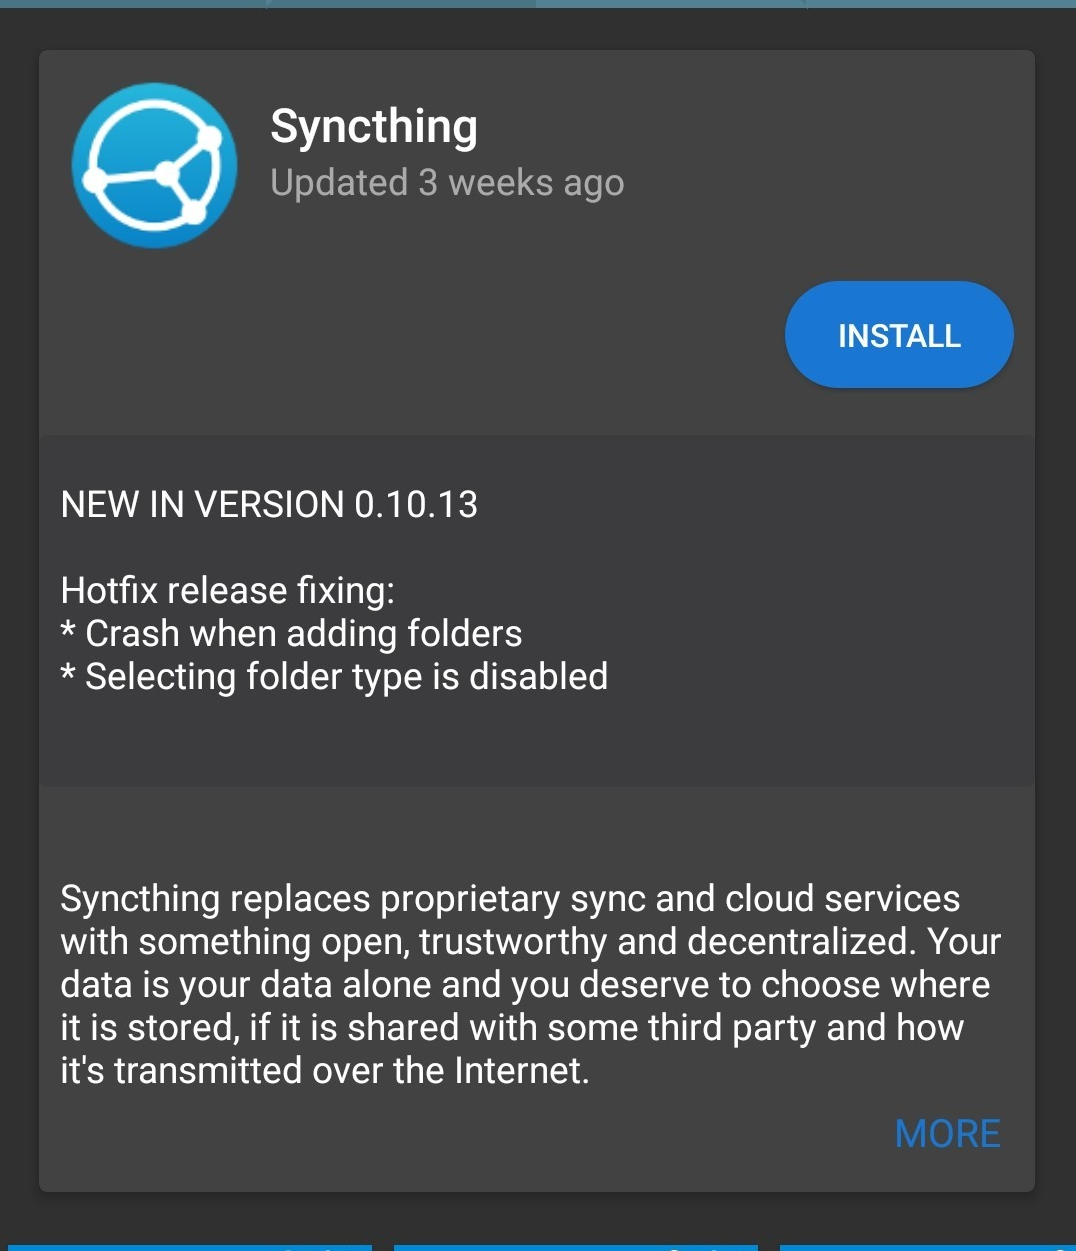
Syncthing is available in Google Play and in F-Droid app stores.
Once the application is installed, you’ll be welcomed by a wizard. Grant Syncthing permissions to your storage. You might be asked to disable battery optimization for this application. It is safe to do so as we will optimize the app to synchronize only when plugged in and connected to a wireless network.
Click on the main menu icon and go to Settings , then Run Conditions. Tick Always run in the background , Run only when charging , and Run only on wifi. Now your Android client is ready to exchange files with your devices.
There are two important concepts to remember in Syncthing: folders and devices. Folders are what you want to share, but you must have a device to share with. Syncthing allows you to share individual folders with different devices. Devices are added by exchanging device IDs. A device ID is a unique, cryptographically secure identifier that is created when Syncthing starts for the first time.
Connecting devices
Now let’s connect your Linux machine and your Android client.
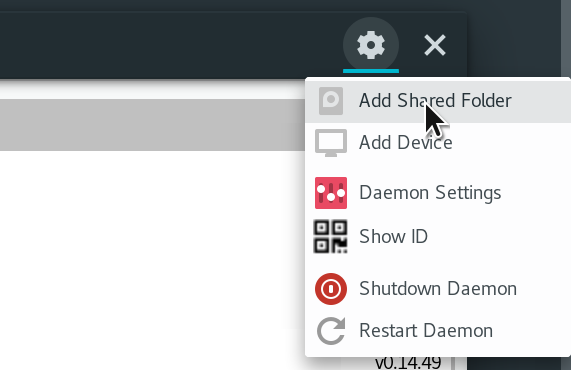
In your Linux computer, open Syncthing, click on the Settings icon and click Show ID. A QR code will show up.
In your Android mobile, open Syncthing. In the main screen, click the Devices tab and press the + symbol. In the first field, press the QR code symbol to open the QR scanner.
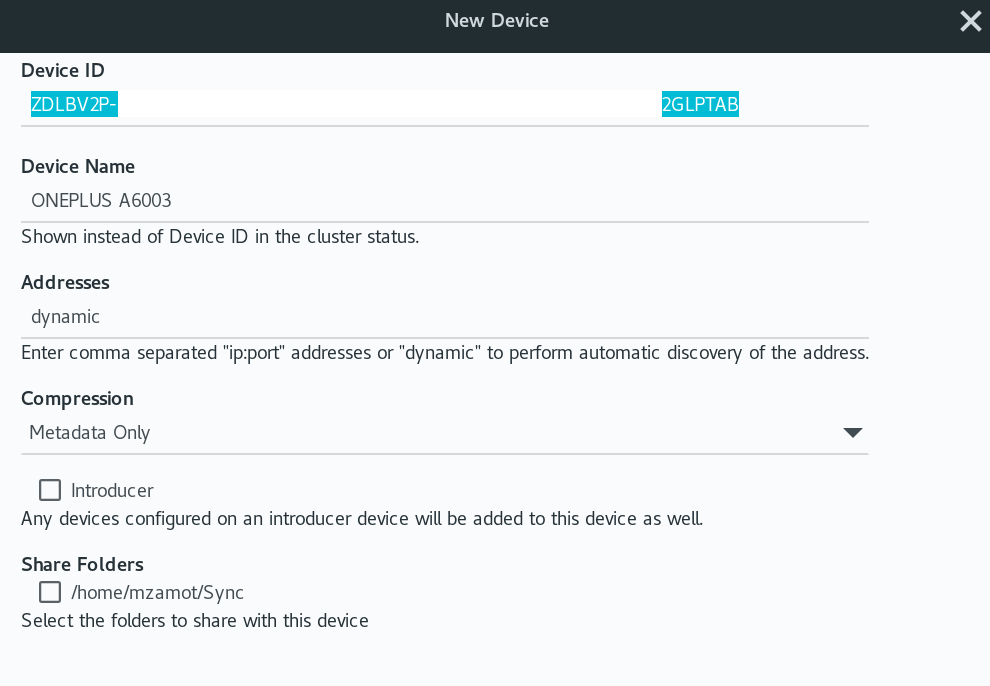
Point your mobile camera to the computer QR code. The Device ID** **field will be populated with your desktop client Device ID. Give it a friendly name and save. Because adding a device goes two ways, you now need to confirm on the computer client that you want to add the Android mobile. It might take a couple of minutes for your computer client to ask for confirmation. When it does, click Add.
In the New Device window, you can verify and configure some options about your new device, like the Device Name and Addresses. If you keep dynamic, it will try to auto-discover the device IP, but if you want to force one, you can add it in this field. If you already created a folder (more on this later), you can also share it with this new device.
Your computer and Android are now paired and ready to exchange files. (If you have more than one computer or mobile phone, simply repeat these steps.)
Sharing folders
Now that the devices you want to sync are already connected, it’s time to share a folder. You can share folders on your computer and the devices you add to that folder will get a copy.
To share a folder, go to Settings and click Add Shared Folder :
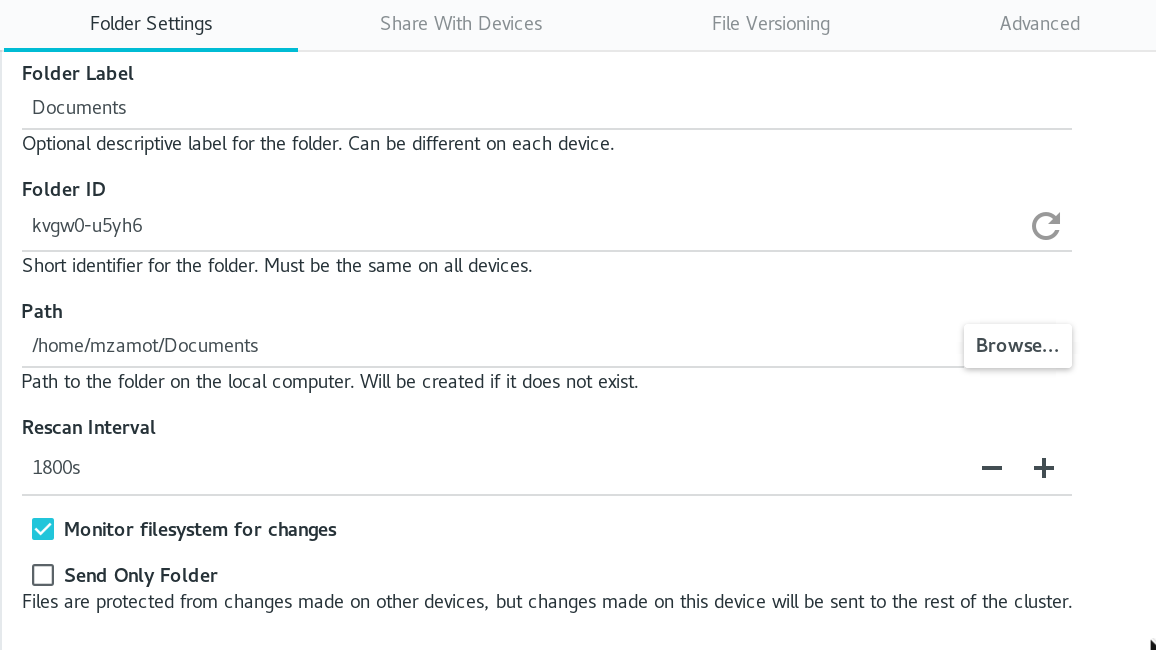
In the next window, enter the information of the folder you want to share:
You can use any label you want. Folder ID will be generated randomly and will be used to identify the folder between the clients. In Path , click Browse and locate the folder you want to share. If you want Syncthing to monitor the folder for changes (such as deletes, new files, etc.), click Monitor filesystem for changes.
Remember, when you share a folder, any change that happens on the other clients will be reflected on every single device. That means that if you share a folder containing pictures with other computers or mobile devices, changes in these other clients will be reflected everywhere. If this is not what you want, you can make your folder “Send Only” so it will send files to the clients, but the other clients’ changes won’t be synced.
When this is done, go to Share with Devices and select the hosts you want to sync with your folder:
All the devices you select will need to accept the share request; you will get a notification from the devices:
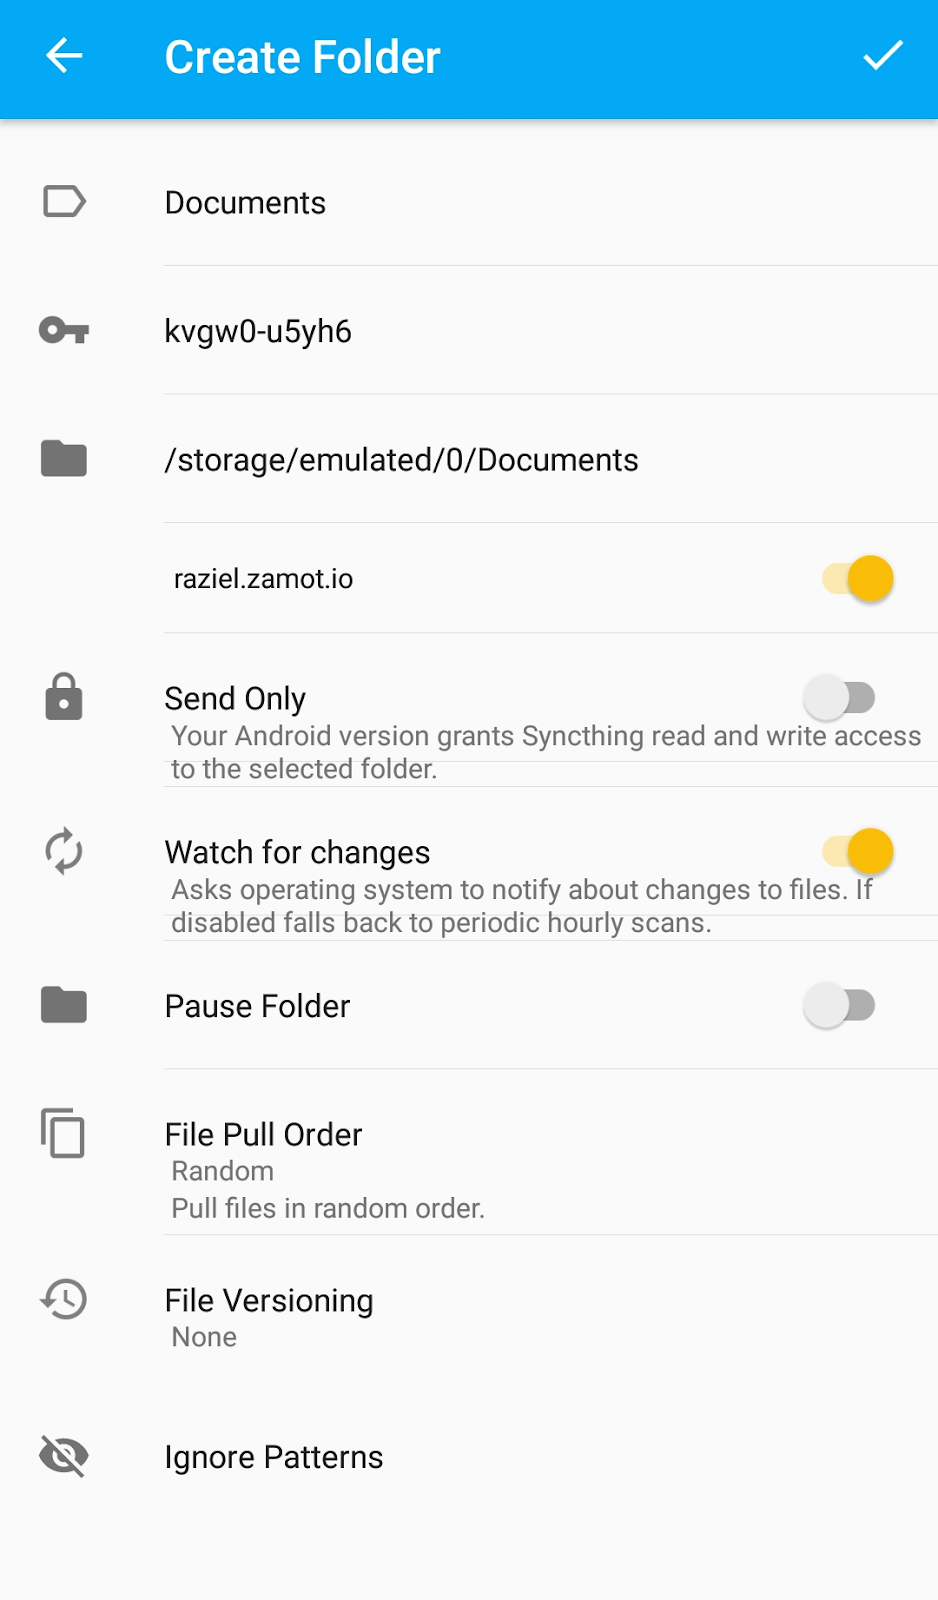
Just as when you shared the folder, you must configure the new shared folder:
Again, here you can define any label, but the ID must match each client. In the folder option, select the destination for the folder and its files. Remember that any change done in this folder will be reflected with every device allowed in the folder.
These are the steps to connect devices and share folders with Syncthing. It might take a few minutes to start copying, depending on your network settings or if you are not on the same network.
Syncthing offers many more great features and options. Try it—and take control of your data.
via: https://opensource.com/article/18/9/take-control-your-data-syncthing
作者:Michael Zamot 选题:lujun9972 译者:译者ID 校对:校对者ID

