7.8 KiB
Design a book cover with an open source alternative to InDesign
Use the open source publishing software, Scribus to create a cover for
your next self-published book.

I recently finished writing a book about C programming, which I self-published through Lulu.com. I've used Lulu for several book projects, and it's a great platform. Earlier this year, Lulu made changes that give authors greater control over creating their book covers. Previously, you just uploaded a pair of large-format images for the front and back book covers. Now, Lulu allows authors to upload a custom PDF exactly sized to your book's dimensions.
You can create the cover using Scribus, the open source page layout program. Here's how I do it.
Download a template
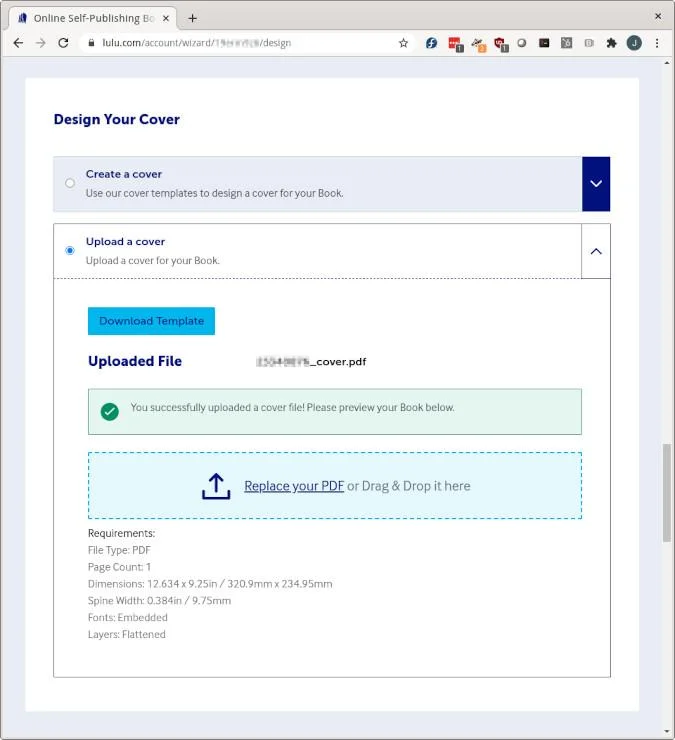
When you're entering your book project information on Lulu's website, eventually, you'll navigate to the Design tab. Under the Design Your Cover section on this page, you will find a handy Download Template button that provides a PDF template for your book cover.
(Jim Hall, CC BY-SA 4.0)
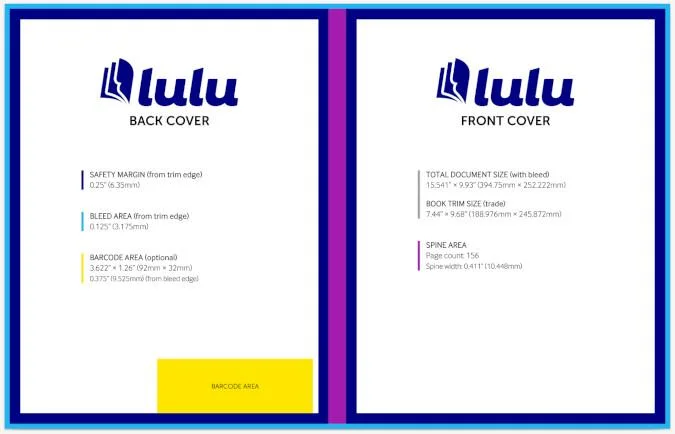
Download this template, which gives you the information you need to create your own book cover in Scribus.
(Jim Hall, CC BY-SA 4.0)
The most important details are:
- Total document size (with bleed)
- Bleed area (from trim edge)
- Spine area
Bleed is a printing term that is important when preparing a print-ready file for a printer. It is different from a margin in a regular document. When you print a document, you set a page margin for the top, bottom, and sides. In most documents, the margin is usually around an inch.
But in print-ready files, the document size needs to be a little bigger than the finished book because book covers usually include colors or pictures that go all the way to the cover's edge. To create this design, you make the colors or images go beyond your margin, and the print shop trims off the excess to get the cover down to the exact size. Therefore, the trim is where the print shop cuts the cover exactly to size. The bleed area is the extra part the printer cuts off.
If you didn't have a bleed, the print shop would have a hard time printing the cover exactly to size. If the printer was off by only a little bit, your cover would end up with a tiny, white, unprinted border on one edge. Using a bleed and trim means your cover looks right every time.
Set up your book cover document in Scribus
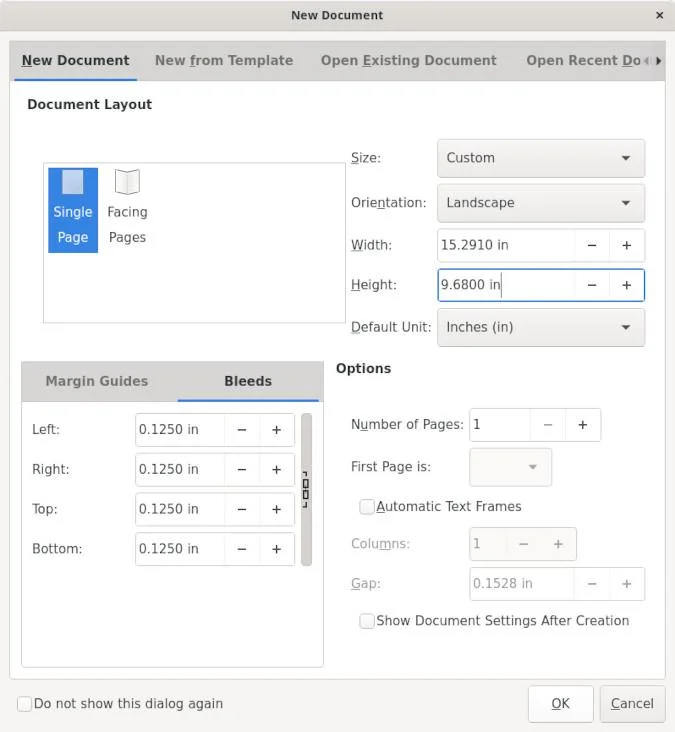
To create a new document in Scribus, start with the New Document dialog box where you define the document's dimensions. Click on the Bleeds tab and enter the bleed size the PDF template says to use. Lulu books usually use 0.125" bleeds on all edges.
For the total document dimension in Scribus, you can't just use the total document size on the PDF template. If you do, your Scribus document will have the wrong dimensions. Instead, you need to do a little math to get the right size.
Look at Total Document Size (with bleed) on the PDF template. This is the total size of the PDF that will be sent to the printer, and it includes the back cover, the book spine, and the front cover—including the bleeds. To enter the right dimensions in Scribus, you have to subtract the bleeds from all edges. For example, my latest book is Crown quarto size, which is 7.44" x 9.68" with a spine width of 0.411" after it's bound. With 0.125" bleeds, the Total Document Size (with bleed) is 15.541" x 9.93". So, my document size in Scribus is:
- Width: 15.541-(2 x 0.125)=15.291"
- Height: 9.93-(2 x 0.125)=9.68"
(Jim Hall, CC BY-SA 4.0)
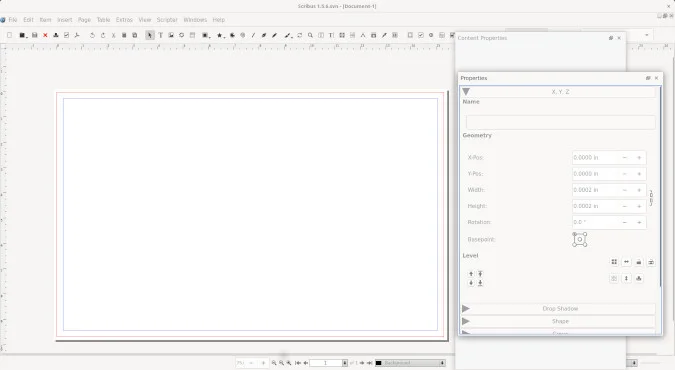
This sets up a new Scribus document that's the right size for my book cover. The new Scribus document dimensions should match exactly what is listed as the Total Document Size (with bleed) on the PDF template.
Start with the spine
When I create a new book cover in Scribus, I like to start with the spine area. This helps me verify that I defined the document correctly in Scribus.
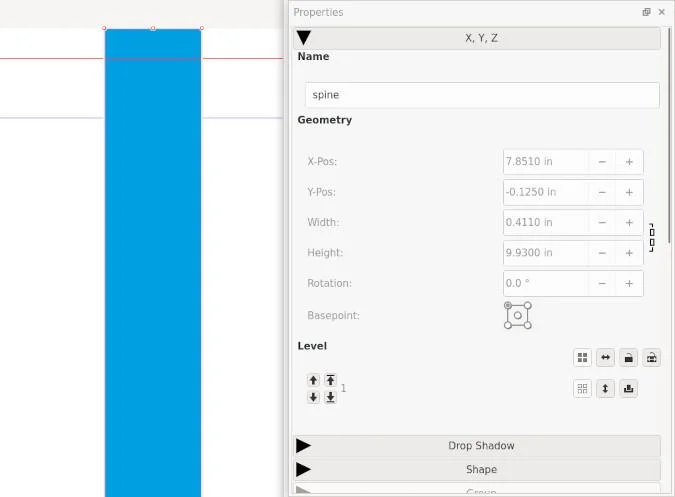
Use the Rectangle tool to draw a colored box on the document where the book's spine needs to go. You don't have to draw it exactly the right size and location; just get close and use the Properties to set the correct values. In the shape's Properties, select the upper-left base point, and enter the x,y position and dimensions where the spine needs to go. Again, you'll need to do a little math and use the dimensions on the PDF template as a reference.
(Jim Hall, CC BY-SA 4.0)
For example, my book's trim size is 7.44" x 9.68"; that's the size of the front and back covers after the printer trims it. My book's spine area is 0.411", and its bleed is 0.125". That means the correct upper-left x,y position for the book's spine is:
- X-Pos (bleed + trim width): 0.411+7.44=7.8510"
- Y-Pos (minus bleed): -0.125"
The rectangle's dimensions are the full height (including bleed) of my book cover and the spine width indicated in the PDF template:
- Width: 0.411"
- Height: 9.93"
Set the rectangle's Fill to your favorite color and the Stroke to None to hide the border. If you defined your Scribus document correctly, you should end up with a rectangle that stretches to the top and bottom edges of your book cover positioned in the center of the document.
(Jim Hall, CC BY-SA 4.0)
If the rectangle doesn't fit the document exactly, you probably set the wrong dimensions when you created the Scribus document. Since you haven't put a lot of effort into the book cover yet, it's probably easiest to start over rather than trying to fix your mistakes.
The rest is up to you
From there, you can create the rest of your book's cover. Always use the PDF template as a guide. The back cover is on the left, and the front cover is on the right.
I can manage a simple book cover, but I lack the artistic abilities to create a truly eye-catching design. After designing several of my own book covers, I've gained respect for those who can design a good cover. But if you just need to create a simple book cover, you can do it yourself with open source software.
via: https://opensource.com/article/20/9/open-source-publishing-scribus
