6.7 KiB
Photo Editing on Linux with Krita
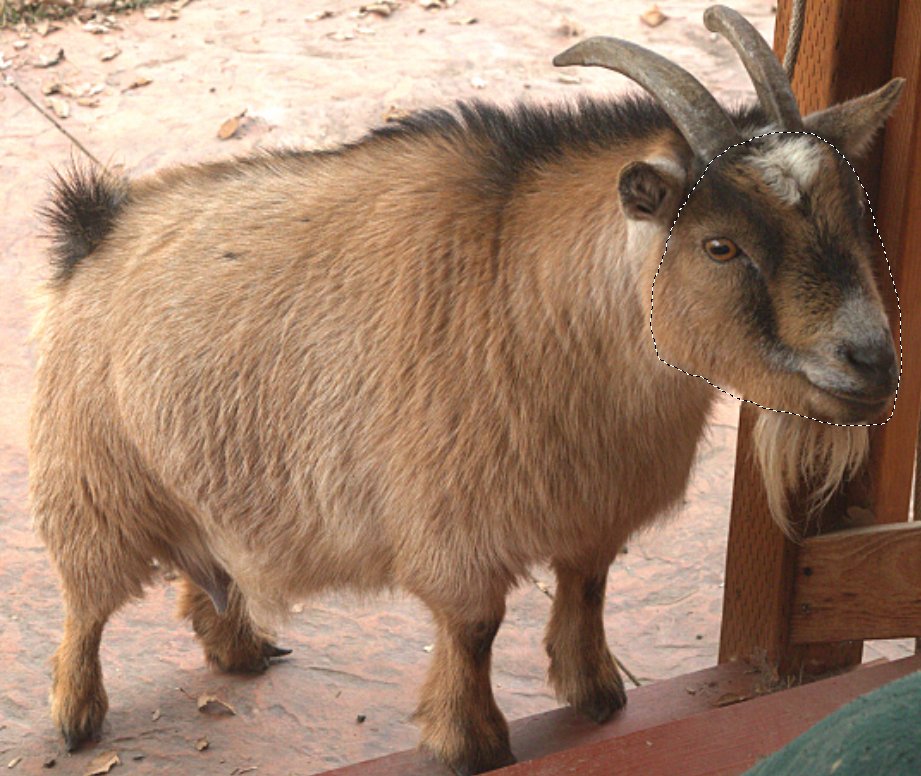
 Figure 1: Annabelle the pygmy goat.
Krita is a wonderful drawing and painting program, and it's also a nice photo editor. Today we will learn how to add text to an image, and how to selectively sharpen portions of a photo.
Navigating Krita
Like all image creation and editing programs, Krita contains hundreds of tools and options, and redundant controls for exposing and using them. It's worth taking some time to explore it and to see where everything is.
The default theme for Krita is a dark theme. I'm not a fan of dark themes, but fortunately Krita comes with a nice batch of themes that you can change anytime in the Settings > Theme menu.
Krita uses docking tool dialogues. Check Settings > Show Dockers to see your tool docks in the right and left panes, and Settings > Dockers to select the ones you want to see. The individual docks can drive you a little bit mad, as some of them open in a tiny squished aspect so you can't see anything. You can drag them to the top and sides of your Krita window, enlarge and shrink them, and you can drag them out of Krita to any location on your computer screen. If you drop a dock onto another dock they automatically create tabs.
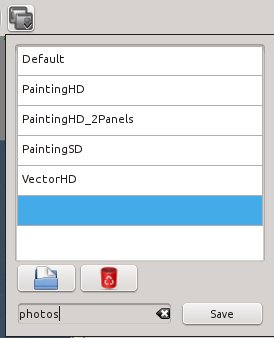
When you have arranged your perfect workspace, you can preserve it in the "Choose Workspace" picker. This is a button at the right end of the Brushes and Stuff toolbar (Settings > Toolbars Shown). This comes with a little batch of preset workspaces, and you can create your own (figure 2).
 Figure 2: Preserve custom workspaces in the Choose Workspace dialogue.
Krita has multiple zoom controls. Ctrl+= zooms in, Ctrl+- zooms out, and Ctrl+0 resets to 100%. You can also use the View > Zoom controls, and the zoom slider at the bottom right. There is also a dropdown zoom menu to the left of the slider.
The Tools menu sits in the left pane, and this contains your shape and selection tools. You have to hover your cursor over each tool to see its label. The Tool Options dock always displays options for the current tool you are using, and by default it sits in the right pane.
Crop Tool
Of course there is a crop tool in the Tools dock, and it is very easy to use. Draw a rectangle that contains the area you want to keep, use the drag handles to adjust it, and press the Return key. In the Tools Options dock you can choose to apply the crop to all layers or just the current layer, adjust the dimensions by typing in the size values, or size it as a percentage.
Adding Text
When you want to add some simple text to a photo, such as a label or a caption, Krita may leave you feeling overwhelmed because it contains so many artistic text effects. But it also supports adding simple text. Click the Text tool, and the Tool Options dock looks like figure 3.
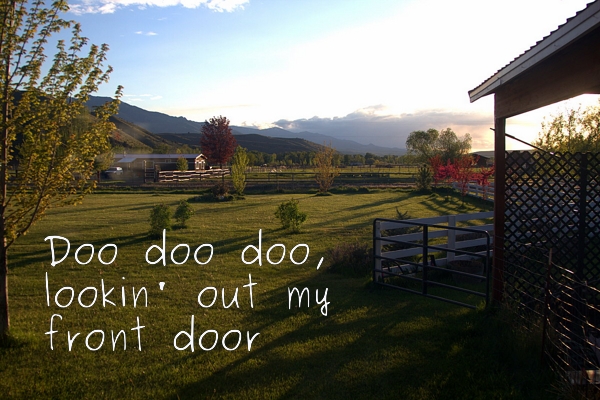
Click the Multiline button. This opens the simple text tool; first draw a rectangle to contain your text, then start typing your text. The Tool Options dock has all the usual text formatting options: font selector, font size, text and background colors, alignment, and a bunch of paragraph styles. When you're finished click the Shape Handling tool, which is the white arrow next to the Text tool button, to adjust the size, shape, and position of your text box. The Tool Options for the Shape Handling tool include borders of various thicknesses, colors, and alignments. Figure 4 shows the gleeful captioned photo I send to my city-trapped relatives.
 Figure 4: Green acres is the place to be.
How to edit your existing text isn't obvious. Click the Shape Handling tool, and double-click inside the text box. This opens editing mode, which is indicated by the text cursor. Now you can select text, add new text, change formatting, and so on.
Sharpening Selected Areas
Krita has a number of nice tools for making surgical edits. In figure 5 I want to sharpen Annabelle's face and eyes. (Annabelle lives next door, but she has a crush on my dog and spends a lot of time here. My dog is terrified of her and runs away, but she is not discouraged.) First select an area with the "Select an area by its outline" tool. Then open Filter > Enhance > Unsharp Mask. You have three settings to play with: Half-Size, Amount, and Threshold. Most image editing software has Radius, Amount, and Threshold settings. A radius is half of a diameter, so Half-Size is technically correct, but perhaps needlessly confusing.
 Figure 5: Selecting an arbitrary area to edit.
The Half-Size value controls the width of the sharpening lines. You want a large enough value to get a good affect, but not so large that it's obvious.
The Threshold value determines how different two pixels need to be for the sharpening effect to be applied. 0 = maximum sharpening, and 99 is no sharpening.
Amount controls the strength of the sharpening effect; higher values apply more sharpening.
Sharpening is nearly always the last edit you want to make to a photo, because it is affected by anything else you do to your image: crop, resize, color and contrast... if you apply sharpening first and then make other changes it will mess up your sharpening.
And what, you ask, does unsharp mask mean? The name comes from the sharpening technique: the unsharp mask filter creates a blurred mask of the original, and then layers the unsharp mask over the original. This creates an image that appears sharper and clearer without creating a lot of obvious sharpening artifacts.
That is all for today. The documentation for Krita is abundant, but disorganized. Start at Krita Tutorials, and poke around YouTube for a lot of good video how-tos.
via: http://www.linux.com/learn/tutorials/786040-photo-editing-on-linux-with-krita
作者:Carla Schroder 译者:译者ID 校对:校对者ID
