17 KiB
RHEL/CentOS 7中安装并配置 PowerDNS 和 PowerAdmin
PowerDNS是一个运行在许多Linux/Unix衍生版上的DNS服务器,它可以使用不同的后端进行配置,包括BIND类型的区域文件、关系型数据库,或者负载均衡/失效转移算法。它也可以被配置成一台DNS递归器,作为服务器上的一个独立进程运行。
PowerDNS授权服务器的最新版本是3.4.4,但是当前EPEL仓库中可以获得的版本是3.4.3。我推荐安装EPEL仓库中提供的那一个,因为该版本已经在CentOS和Fedora中测试过。那样,你也可以在今后很容易地更新PowerDNS。
本文用于向你演示如何安装并配置以MariaDB作为后端的PowerDNS,以及它的界面友好的 Web 管理工具 PowerAdmin。
出于本文的写作目的,我将使用以下服务器:
主机名: centos7.localhost
IP地址: 192.168.0.102
第一部分: 安装带有MariaDB后端的PowerDNS
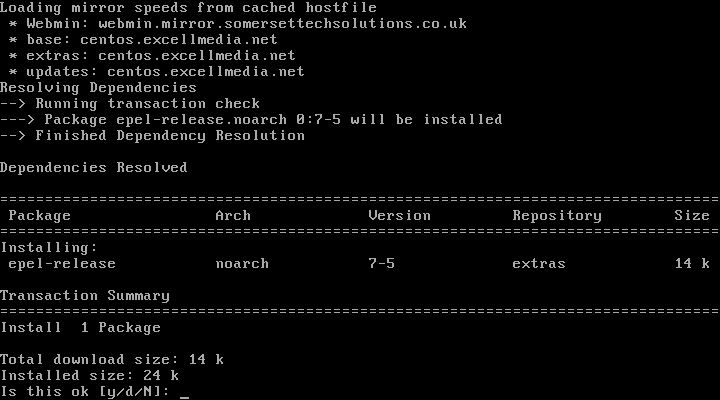
1、 首先,你需要为你的系统启用EPEL仓库,只需使用:
# yum install epel-release.noarch
启用Epel仓库
2、 下一步是安装MariaDB服务器。运行以下命令即可达成:
# yum -y install mariadb-server mariadb
安装MariaDB服务器
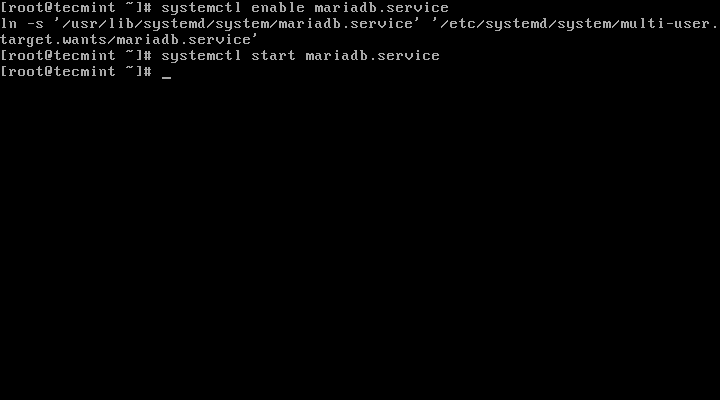
3、 接下来,我们将配置并启用MariaDB,并设置开机启动:
# systemctl enable mariadb.service
# systemctl start mariadb.service
启用MariaDB开机启动
4、 现在MariaDB服务运行起来了,我们将为MariaDB设置密码进行安全加固,运行以下命令:
# mysql_secure_installation
按照指示做
/bin/mysql_secure_installation: line 379: find_mysql_client: command not found

NOTE: RUNNING ALL PARTS OF THIS SCRIPT IS RECOMMENDED FOR ALL MariaDB
      SERVERS IN PRODUCTION USE!  PLEASE READ EACH STEP CAREFULLY!

In order to log into MariaDB to secure it, we'll need the current
password for the root user.  If you've just installed MariaDB, and
you haven't set the root password yet, the password will be blank,
so you should just press enter here.

Enter current password for root (enter for none):  Press ENTER
OK, successfully used password, moving on...

Setting the root password ensures that nobody can log into the MariaDB
root user without the proper authorisation.

Set root password? [Y/n] y
New password:  ← Set New Password
Re-enter new password:  ← Repeat Above Password
Password updated successfully!
Reloading privilege tables..
 ... Success!


By default, a MariaDB installation has an anonymous user, allowing anyone
to log into MariaDB without having to have a user account created for
them.  This is intended only for testing, and to make the installation
go a bit smoother.  You should remove them before moving into a
production environment.

Remove anonymous users? [Y/n] y ← Choose “y” to disable that user
 ... Success!

Normally, root should only be allowed to connect from 'localhost'.  This
ensures that someone cannot guess at the root password from the network.

Disallow root login remotely? [Y/n] n ← Choose “n” for no
 ... skipping.

By default, MariaDB comes with a database named 'test' that anyone can
access.  This is also intended only for testing, and should be removed
before moving into a production environment.

Remove test database and access to it? [Y/n] y ← Choose “y” for yes
 - Dropping test database...
 ... Success!
 - Removing privileges on test database...
 ... Success!

Reloading the privilege tables will ensure that all changes made so far
will take effect immediately.

Reload privilege tables now? [Y/n] y ← Choose “y” for yes
 ... Success!

Cleaning up...

All done!  If you've completed all of the above steps, your MariaDB
installation should now be secure.

Thanks for using MariaDB!
5、 MariaDB配置成功后,我们可以继续去安装PowerDNS。运行以下命令即可轻易完成:
# yum -y install pdns pdns-backend-mysql
安装带有MariaDB后端的PowerDNS
6、 PowerDNS的配置文件位于/etc/pdns/pdns,在编辑之前,我们将为PowerDNS服务配置一个MariaDB数据库。首先,我们将连接到MariaDB服务器并创建一个名为powerdns的数据库:
# mysql -u root -p
MariaDB [(none)]> CREATE DATABASE powerdns;
创建PowerDNS数据库
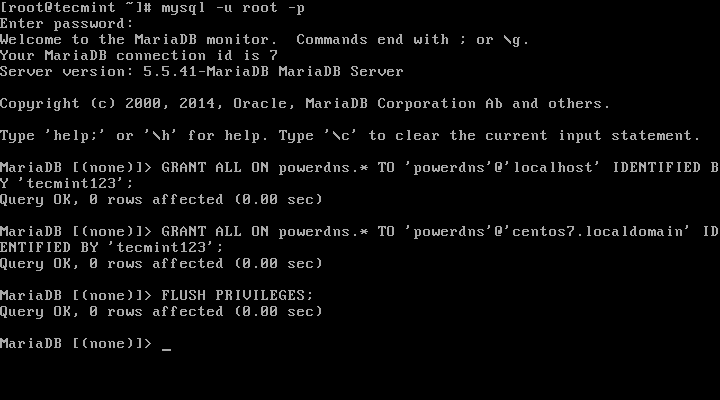
7、 接下来,我们将创建一个名为powerdns的数据库用户:
MariaDB [(none)]> GRANT ALL ON powerdns.* TO 'powerdns'@'localhost' IDENTIFIED BY ‘tecmint123’;
MariaDB [(none)]> GRANT ALL ON powerdns.* TO 'powerdns'@'centos7.localdomain' IDENTIFIED BY 'tecmint123';
MariaDB [(none)]> FLUSH PRIVILEGES;
创建PowerDNS用户
注意: 请将“tecmint123”替换为你想要设置的实际密码。
8、 我们继续创建PowerDNS要使用的数据库表。像堆积木一样执行以下这些:
MariaDB [(none)]> USE powerdns;
MariaDB [(none)]> CREATE TABLE domains (
id INT auto_increment,
name VARCHAR(255) NOT NULL,
master VARCHAR(128) DEFAULT NULL,
last_check INT DEFAULT NULL,
type VARCHAR(6) NOT NULL,
notified_serial INT DEFAULT NULL,
account VARCHAR(40) DEFAULT NULL,
primary key (id)
);
创建用于PowerDNS的表domains
MariaDB [(none)]> CREATE UNIQUE INDEX name_index ON domains(name);
MariaDB [(none)]> CREATE TABLE records (
id INT auto_increment,
domain_id INT DEFAULT NULL,
name VARCHAR(255) DEFAULT NULL,
type VARCHAR(6) DEFAULT NULL,
content VARCHAR(255) DEFAULT NULL,
ttl INT DEFAULT NULL,
prio INT DEFAULT NULL,
change_date INT DEFAULT NULL,
primary key(id)
);
创建用于PowerDNS的表 records
MariaDB [(none)]> CREATE INDEX rec_name_index ON records(name);
MariaDB [(none)]> CREATE INDEX nametype_index ON records(name,type);
MariaDB [(none)]> CREATE INDEX domain_id ON records(domain_id);
创建表索引
MariaDB [(none)]> CREATE TABLE supermasters (
ip VARCHAR(25) NOT NULL,
nameserver VARCHAR(255) NOT NULL,
account VARCHAR(40) DEFAULT NULL
);
创建表supermasters
你现在可以输入以下命令退出MariaDB控制台:
MariaDB [(none)]> quit;
9、 最后,我们可以继续配置PowerDNS了,以MariaDB作为后台。请打开PowerDNS的配置文件:
# vim /etc/pdns/pdns.conf
在该文件中查找像下面这样的行:
#################################
# launch        Which backends to launch and order to query them in
#
# launch=
在这后面放置以下代码:
launch=gmysql
gmysql-host=localhost
gmysql-user=powerdns
gmysql-password=user-pass
gmysql-dbname=powerdns
修改“user-pass”为你先前设置的实际密码,配置如下:
配置PowerDNS
保存修改并退出。
10、 现在,我们将启动并添加PowerDNS到系统开机启动列表:
# systemctl enable pdns.service
# systemctl start pdns.service
启用并启动PowerDNS
到这一步,你的PowerDNS服务器已经起来并运行了。要获取更多关于PowerDNS的信息,你可以参考手册http://downloads.powerdns.com/documentation/html/index.html
第二部分: 安装PowerAdmin来管理PowerDNS
11、 现在,我们将安装PowerAdmin——一个界面友好的PowerDNS服务器的 Web 管理器。由于它是用PHP写的,我们将需要安装PHP和一台网络服务器(Apache):
# yum install httpd php php-devel php-gd php-imap php-ldap php-mysql php-odbc php-pear php-xml php-xmlrpc php-mbstring php-mcrypt php-mhash gettext
安装Apache 和 PHP
PowerAdmin也需要两个PEAR包:
# yum -y install php-pear-DB php-pear-MDB2-Driver-mysql
安装Pear
你也可以参考一下文章了解CentOS 7中安装LAMP堆栈的完整指南:
安装完成后,我们将需要启动并设置Apache开机启动:
# systemctl enable httpd.service
# systemctl start httpd.service
启用Apache开机启动
12、 由于已经满足PowerAdmin的所有系统要求,我们可以继续下载软件包。因为Apache默认的网页目录位于/var/www/html/,我们将下载软件包到这里。
# cd /var/www/html/
# wget http://downloads.sourceforge.net/project/poweradmin/poweradmin-2.1.7.tgz
# tar xfv poweradmin-2.1.7.tgz
下载PowerAdmin
13、 现在,我们可以启动PowerAdmin的网页安装器了,只需打开:
http://192.168.0.102/poweradmin-2.1.7/install/
这会进入安装过程的第一步:
选择安装语言
上面的页面会要求你为PowerAdmin选择语言,请选择你想要使用的那一个,然后点击“进入步骤 2”按钮。
14、 安装器需要PowerDNS数据库:
PowerDNS数据库
15、 因为我们已经创建了一个数据库,所以我们可以继续进入下一步。你会被要求提供先前配置的数据库详情,你也需要为Poweradmin设置管理员密码:
输入PowerDNS数据库配置
16、 输入这些信息后,进入步骤 4。你将创建为Poweradmin创建一个受限用户。这里你需要输入的字段是:
- 用户名(Username) - PowerAdmin用户名。
- 密码(Password) – 上述用户的密码。
- 主机管理员(Hostmaster) - 当创建SOA记录而你没有指定主机管理员时,该值会被用作默认值。
- 主域名服务器 - 该值在创建新的DNS区域时会被用于作为主域名服务器。
- 辅域名服务器 – 该值在创建新的DNS区域时会被用于作为辅域名服务器。
PowerDNS配置设置
17、 在下一步中,Poweradmin会要求你在数据库表中创建一个新的受限数据库用户,它会提供你需要在MariaDB控制台输入的代码:
创建新的数据库用户
18、 现在打开终端并运行:
# mysql -u root -p
提供你的密码并执行由PowerAdmin提供的代码:
MariaDB [(none)]> GRANT SELECT, INSERT, UPDATE, DELETE
ON powerdns.*
TO 'powermarin'@'localhost'
IDENTIFIED BY '123qweasd';
为用户授予Mysql权限
19、 现在,回到浏览器中并继续下一步。安装器将尝试创建配置文件到/var/www/html/poweradmin-2.1.7/inc。
文件名是config.inc.php。为防止该脚本没有写权限,你可以手动复制这些内容到上述文件中:
配置PowerDNS设置
20、 现在,进入最后页面,该页面会告知你安装已经完成以及如何访问安装好的PowerAdmin:
PowerDNS安装完成
你可以通过运行以下命令来启用用于其他动态DNS提供商的URL:
# cp install/htaccess.dist .htaccess
出于该目的,你将需要在Apache的配置中启用mod_rewrite。
21、 现在,需要移除从PowerAdmin的根目录中移除“install”文件夹,这一点很重要。使用以下命令:
# rm -fr /var/www/html/poweradmin/install/
在此之后,你可以通过以下方式访问PowerAdmin:
http://192.168.0.102/poweradmin-2.1.7/
PowerDNS登录
在登录后,你应该会看到PowerAdmin的主页:
PowerDNS仪表盘
到这里,安装已经完成了,你也可以开始管理你的DNS区域了。
第三部分: PowerDNS中添加、编辑和删除DNS区域
22、 要添加新的主区域,只需点击“添加主区域”:
添加主区域
在下一页中,你需要填写一些东西:
- 域(Domain) – 你要添加区域的域。
- 所有者(Owner) – 设置DNS区域的所有者。
- 模板(Template)– DNS模板 – 留空。
- DNSSEC – 域名系统安全扩展(可选——看看你是否需要)。
点击“添加区域”按钮来添加DNS区域。
主DNS区域
现在,你可以点击“首页”链接回到PowerAdmin的首页。要查看所有现存的DNS区域,只需转到“列出区域(List Zones)”:
查看区域列表
你现在应该看到一个可用DNS区域列表:
检查DNS区域列表
23、 要编辑现存DNS区域或者添加新的记录,点击编辑图标:
编辑DNS区域
在接下来的页面,你会看到你选择的DNS区域的条目:
域名的DNS区域条目
24、 在此处添加新的DNS条目,你需要设置以下信息:
- 名称(Name) – 条目名称。只需添加域/子域的第一部分,PowerAdmin会添加剩下的。
- 类型(Type) – 选择记录类型。
- 优先级(Priority) – 记录优先级。
- TTL – 存活时间,以秒计算。
出于本文目的,我将为子域new.example.com添加一个A记录用于解析IP地址192.168.0.102,设置存活时间为14400秒:
添加新DNS记录
最后,点击“添加记录”按钮。
25、 如果你想要删除DNS区域,你可以回到“列出区域”页面,然后点击你想要删除的DNS区域旁边“垃圾桶”图标:
删除DNS区域
Poweradmin将问你是否确定想要删除DNS区域。只需点击“是”来完成删除。
如要获取更多关于怎样创建、编辑和删除区域的说明,你可以参与Poweradmin的文档:https://github.com/poweradmin/poweradmin/wiki/Documentation
我希望你已经发现本文很有趣,也很有用。一如既往,如果你有问题或要发表评论,请别犹豫,在下面评论区提交你的评论吧。
via: http://www.tecmint.com/install-powerdns-poweradmin-mariadb-in-centos-rhel/
作者:Marin Todorov 译者:GOLinux 校对:wxy


