sources/tech/20191001 How to create the data structure for a Corteza Low Code application.md
13 KiB
How to create the data structure for a Corteza Low Code application
Corteza is an open source alternative to Salesforce. Learn how to use it
in this series.

In the first article in this series, I showed how to create a custom application to track donations using Corteza Low-Code, a graphical user interface- (GUI) and web-based development environment that serves as an alternative to Salesforce. So far, the Donations application merely exists, but this article explains how to make it do something by populating it with a data structure using modules and fields.
Modules and fields exist inside your application. (In programming terminology, they are "locally defined.") Modules and fields define places where data is stored in your application. Without modules and fields, your application has no memory nor anything to work with, so defining them is the next step when creating a new app.
The Donations application is available on the Corteza community server. You need to be logged in or create a free Corteza community server account to check it out.
Enter the application's admin area
To enter the admin area of an application, you first need to open the application inside Corteza Low-Code. To enter the Donations application created in the first part of this series:
- Enter Corteza. (Read Intro to Corteza, an open source alternative to Salesforce if you need some background on this.)
- Click on the + button to create a new tab.
- Select Corteza Low-Code.
- Click on the Donations namespace to enter the Donations application.
Since the Donations application doesn't have any modules or pages yet, the only thing you see is an Admin panel link on the right. If the applications had pages, it would show the main menu and the Admin panel link on the far right.
Click on it to enter the application's admin area. There are four menu items:
- Modules: Create or edit modules and fields
- Pages: Define the visual part of your application
- Charts: Create charts to add to pages
- Automation: Add automation rules to automate business processes and workflows
The Public pages link takes you back to your application.
Create modules and fields
Modules and fields define what data you need to store in your application and how that data links to other data. If you've ever built a database with LibreOffice Base, Filemaker Pro, or a similar application, this might feel familiar—but you don't need any database experience to work with Corteza.
Modules
A module is like a table in a database. A simple application typically has a few modules, while bigger applications have many more. Corteza CRM, for example, has over 35. The number of modules an application can have is unlimited.
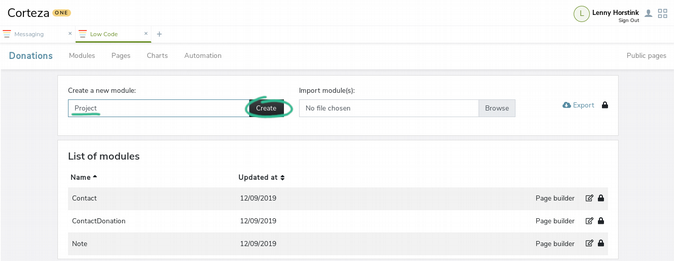
A new application does not have any modules. You can create one by using the form on top or by importing an existing module from a different application using an export file. You can import and export individual modules or all modules at the same time.
When you create a module, best practice is to give it a descriptive name without spaces and using capital letters on different words, e.g., Lead, Account, or CaseUpdate.
The Donations application includes the following modules:
- Contact: To store the donor's contact data
- ContactDonation: To track a contact's donation(s)
- Project: To store a project you can assign donations to
- Note: To store notes related to a project
Fields
Each module consists of a set of fields that define what data you want to store and in what format.
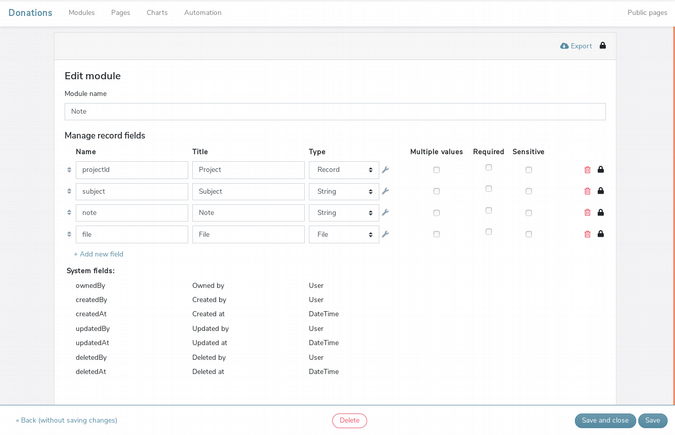
You can add new fields to a module by using the Add new field button. This adds a new row with the following fields:
- Name: It must be unique and cannot have spaces, e.g., "firstname." This is not shown to the end user.
- Title: This is the field's label—the field name the end users see when they view or edit a record. It can contain any character, including spaces. Although it's best practice to keep this title unique, it's not mandatory. An example is "First name."
- Type: This is where you set the field type. The wrench icon on the right allows you to set more detailed data for the field type.
- Multiple values: This checkbox is available when you want a field type to allow multiple value entries.
- Required: This makes the field mandatory for the end user when creating or editing a record.
- Sensitive: This allows you to mark data that is sensitive, such as name, email, or telephone number, so your application is compliant with privacy regulations such as the GDPR.
At the end of the row, you can find a Delete button (to remove a field) and a Permission button (to set read permissions and update field permissions per role).
Field types
You can select from the following field types. The wrench icon beside the field type provides further options for each case.
- Checkbox (Y/N): This field shows a checkbox to the end user when editing a record. When you click on the wrench icon, you can select what checked and unchecked represent. For example: Yes/No, Active/Inactive, etc.
- DateTime: This makes a date field. You can select:
- Date only
- Time only
- Past values only
- Future value only
- Output relative value (e.g., three days ago)
- Custom output format (see Moment.js for formatting options)
- Email: This field auto-validates whether the input is an email and turns it into a clickable email link in record-viewing mode. You can select the Don't turn email into a link option to remove the auto-link feature.
- Select: When you click on the wrench icon, you can use the Add button to add as many Select options as you need. You can also set whether the end user can select multiple values at once.
- Number: This field gives you the option to add a prefix (for example a $ for values in dollars), a suffix (for example % for a number that represents a percentage), and the decimal precision (e.g., zero for whole numbers or two for values like 1.13, 2.44, 3.98), and you can use the Format Input field to create more complex formats.
- Record: This field allows you to link the current module to another module. It will show as a Select to the end user. You can select the module in the Module name field and choose the field to use to load the Select options. In Query fields on search, you can define what fields you want the user to be able to search on. As with the Select field type, you can set whether the user can select multiple values at once.
- String: By default, a String field is a single-line text-input field, but you can choose to make it multi-line or even a rich text editor.
- URL: The URL field automatically validates whether the field is a link to a site. You can select the following options for this field:
- Trim # from the URL
- Trim ? from the URL
- Only allow SSL (HTTPS) URLs
- Don't turn URL into a link
- User: This creates a Select field that loads with all users in Corteza. You can preset the value to the current user.
- File: This creates a File Upload button for the end user.
Field types in the Donations application
The Donations application includes the following fields in its four modules.
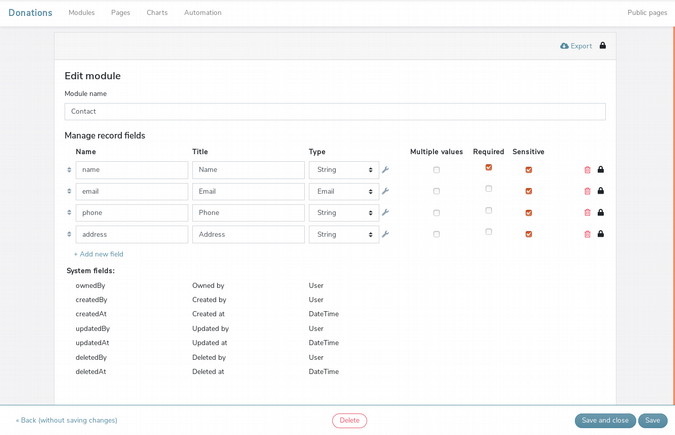
1. Contact
- Name (String)
- Email (Email)
- Phone (String)
- Address (String; Multi-line)
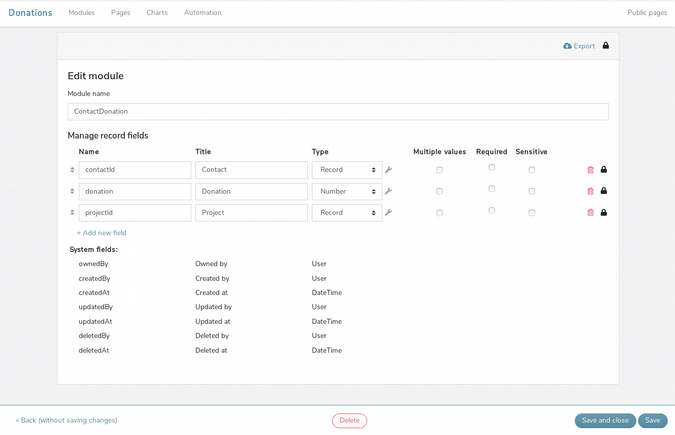
2. ContactDonation
- Contact (Record; link to Contact)
- Donation (Number; Prefix $ and Precision 2)
- Project (Record; link to Project)
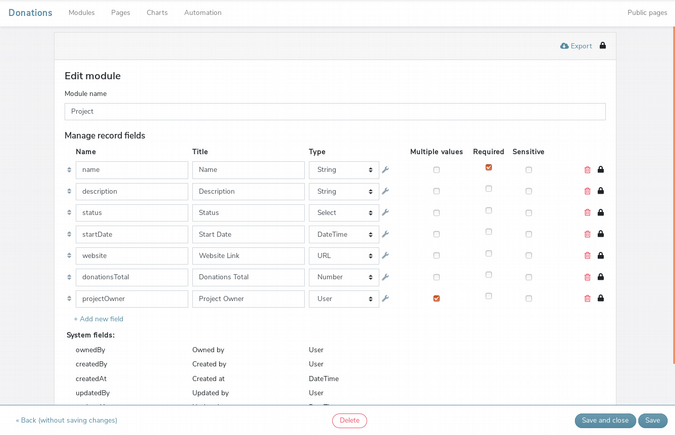
3. Project
- Name (String)
- Description (String; Multi-line and Use rich text editor)
- Status (Select; with options Planning, Active, and Finished)
- Start date (DateTime; Date only)
- Website link (URL)
- Donations total (Number; Prefix $ and Precision 2)
- Project owner (User; Multiple select and Preset with current user)
4. Notes
- Project (Record; link to Project)
- Subject (String)
- Note (String; Multi-line and Use rich text editor)
- File (File; Single image)
Create relationships between modules
Practically every Corteza Low Code application consists of multiple modules that are linked together. For example, projects can have notes or donations can be assigned to different projects. The Record field type creates relationships between modules.
The Record field type's basic function is to link from module B back to module A. Records in module B are children of records in module A (you could say it's a 1-N relationship).
For example, in the Donations application, the module Note has a Record field that links to the module Project. The end user will see a Select field in a Note record with the value of the Project that the note pertains to.
To create this relationship in the Donations application, select the wrench icon in the projectId row:
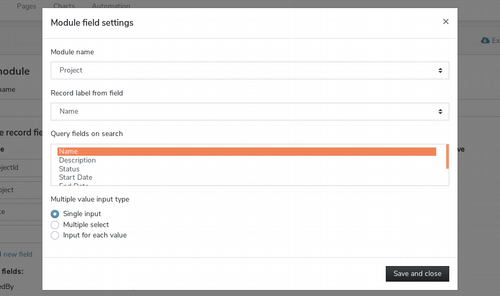
In the popup that opens, select the module the field will link to, the label end users will see, and which fields the end user can search on.
This creates a simple relationship that allows the Project to have Notes. A many-to-many relationship between modules is more complex. For example, the Donations application needs to support contacts who make multiple donations and donations that are assigned to different projects. The ContactDonation module sits in the middle to manage this.
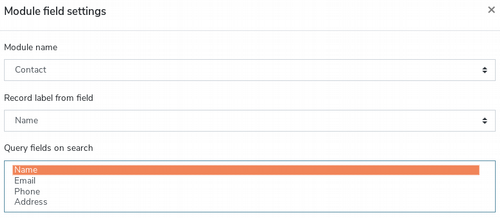
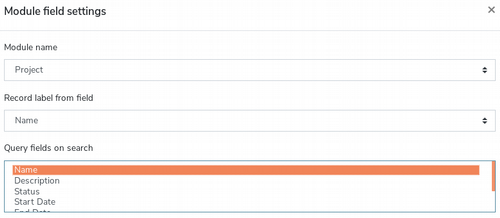
This module has two fields of the Record type. For each, we need to select the correct module and set the label and query fields the user can search on. The Donations application needs the following to be set for the Contact and Project modules:
This creates a many-to-many relationship between modules.
You've now set up a structure for the data in your application. The next step is to create the visual side of your app using Corteza's Pages feature. It's easier than you might expect, as you'll see in the third article in this series.
via: https://opensource.com/article/19/10/corteza-low-code-data-structure
作者:Lenny Horstink 选题:lujun9972 译者:译者ID 校对:校对者ID


