mirror of
https://github.com/LCTT/TranslateProject.git
synced 2025-01-19 22:51:41 +08:00
278 lines
12 KiB
Markdown
278 lines
12 KiB
Markdown
How to Install iRedMail on CentOS 7 for Samba4 AD Integration – Part 10
|
||
============================================================
|
||
|
||
This series of tutorials will guide you on how to integrate iRedMail installed on a CentOS 7 machine with a [Samba4 Active Directory Domain Controller][3] in order for domain accounts to send or receive mail via Thunderbird desktop client or via Roundcube web interface.
|
||
|
||
The CentOS 7 server where iRedMail will be installed will allow SMTP or mail routing services via ports 25 and 587 and will also serve as a mail delivery agent through Dovecot, providing POP3 and IMAP services, both secured with self-signed certificates issued on the installation process.
|
||
|
||
The recipient mailboxes will be stored on the same CentOS server along with the webmail user agent provided by Roundcube. Samba4 Active Directory will be used by iRedMail to query and authenticate recipient accounts against the realm, to create mail lists with the help of Active Directory groups and to control the mail accounts via Samba4 AD DC.
|
||
|
||
#### Requirements:
|
||
|
||
1. [Create an Active Directory Infrastructure with Samba4 on Ubuntu][1]
|
||
|
||
### Step 1: Install iRedMail in CentOS 7
|
||
|
||
1. Before starting with iRedMail installation first make sure you have a fresh CentOS 7 operating system installed on your machine using the instructions provided by this guide:
|
||
|
||
1. [Fresh Installation of CentOS 7 Minimal][2]
|
||
|
||
2. Also, assure that the system is up-to-date with the latest security and packages updates by issuing the below command.
|
||
|
||
```
|
||
# yum update
|
||
```
|
||
|
||
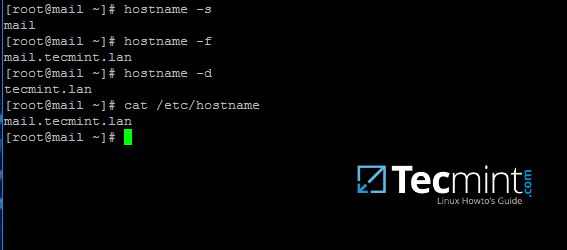
3. The system will also need a FQDN hostname set by issuing the below command. Replace `mail.tecmint.lan` variable with your own custom FQDN.
|
||
|
||
```
|
||
# hostnamectl set-hostname mail.tecmint.lan
|
||
```
|
||
|
||
Verify system hostname with the below commands.
|
||
|
||
```
|
||
# hostname -s # Short name
|
||
# hostname -f # FQDN
|
||
# hostname -d # Domain
|
||
# cat /etc/hostname # Verify it with cat command
|
||
```
|
||
[
|
||
|
||
][4]
|
||
|
||
Verify CentOS 7 Hostname
|
||
|
||
4. Map the machine FQDN and short name against the machine loopback IP address by manually editing `/etc/hosts` file. Add the values as illustrated below and replace `mail.tecmint.lan` and mail values accordingly.
|
||
|
||
```
|
||
127.0.0.1 mail.tecmint.lan mail localhost localhost.localdomain
|
||
```
|
||
|
||
5. iRedMail technicians recommends that SELinux should be completely disabled. Disable SELinux by editing /etc/selinux/config file and set SELINUX parameter from `permissive` to `disabled` as illustrated below.
|
||
|
||
```
|
||
SELINUX=disabled
|
||
```
|
||
|
||
Reboot the machine to apply new SELinux policies or run setenforce with 0 parameter to force SELinux to instantly disable.
|
||
|
||
```
|
||
# reboot
|
||
OR
|
||
# setenforce 0
|
||
```
|
||
|
||
6. Next, install the following packages that will come in-handy later for system administration:
|
||
|
||
```
|
||
# yum install bzip2 net-tools bash-completion wget
|
||
```
|
||
|
||
7. In order to install iRedMail, first go to the download page [http://www.iredmail.org/download.html][5] and grab the latest archive version of the software by issuing the below command.
|
||
|
||
```
|
||
# wget https://bitbucket.org/zhb/iredmail/downloads/iRedMail-0.9.6.tar.bz2
|
||
```
|
||
|
||
8. After the download finishes, extract the compressed archive and enter the extracted iRedMail directory by issuing the following commands.
|
||
|
||
```
|
||
# tar xjf iRedMail-0.9.6.tar.bz2
|
||
# cd iRedMail-0.9.6/
|
||
# ls
|
||
```
|
||
|
||
9. Start the installation process by executing iRedMail shell script with the following command. From now on a series of questions will be asked by the installer.
|
||
|
||
```
|
||
# bash iRedMail.sh
|
||
```
|
||
|
||
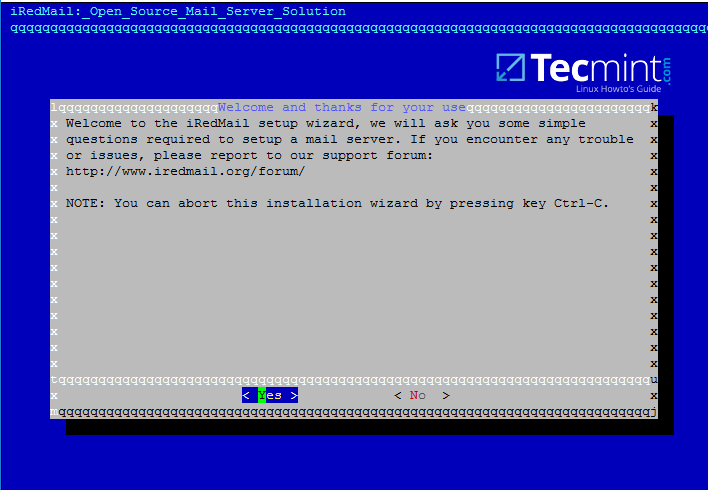
10. On the first welcome prompt hit on `Yes` to proceed further with the installation.
|
||
|
||
[
|
||
|
||
][6]
|
||
|
||
iRedMail Setup Wizard
|
||
|
||
11. Next, choose the location where all the mail will be stored. The default directory that iRedMail uses to store mailboxes is `/var/vmail/` system path.
|
||
|
||
If this directory is located under a partition with enough storage to host mail for all your domain accounts then hit on Next to continue.
|
||
|
||
Otherwise change the default location with a different directory in case if you’ve configured a larger partition dedicated to mail storage.
|
||
|
||
[
|
||

|
||
][7]
|
||
|
||
iRedMail Mail Storage Path
|
||
|
||
12. On the next step choose the frontend web server through which you will interact with iRedMail. iRedMail administration panel will be completely disabled later, so we will use the frontend web server only to access accounts mail via Roundcube web panel.
|
||
|
||
If you don’t have thousands of mail accounts per hour accessing the webmail interface you should go with Apache web server do to its flexibility and easy management.
|
||
|
||
[
|
||

|
||
][8]
|
||
|
||
iRedMail Preferred Web Server
|
||
|
||
13. On this step choose OpenLDAP backend database for compatibility reasons with Samba4 domain controller and hit Next to continue, although we won’t use this OpenLDAP database later once we’ll integrate iRedMail to Samba domain controller.
|
||
|
||
[
|
||

|
||
][9]
|
||
|
||
iRedMail LDAP Backend
|
||
|
||
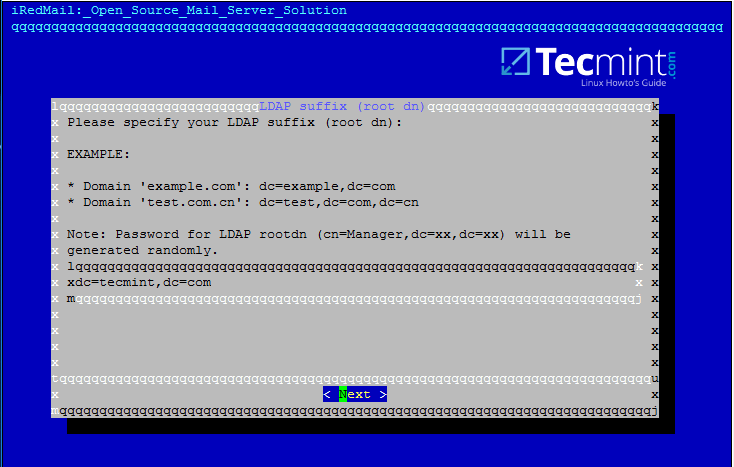
14. Next, specify your Samba4 domain name for LDAP suffix as illustrated on the image below and hit Next to continue.
|
||
|
||
[
|
||
|
||
][10]
|
||
|
||
iRedMail LDAP Suffix
|
||
|
||
15. On the next prompt enter your domain name only and hit Next to move on. Replace `tecmint.lan` value accordingly.
|
||
|
||
[
|
||

|
||
][11]
|
||
|
||
iRedMail Mail Domain
|
||
|
||
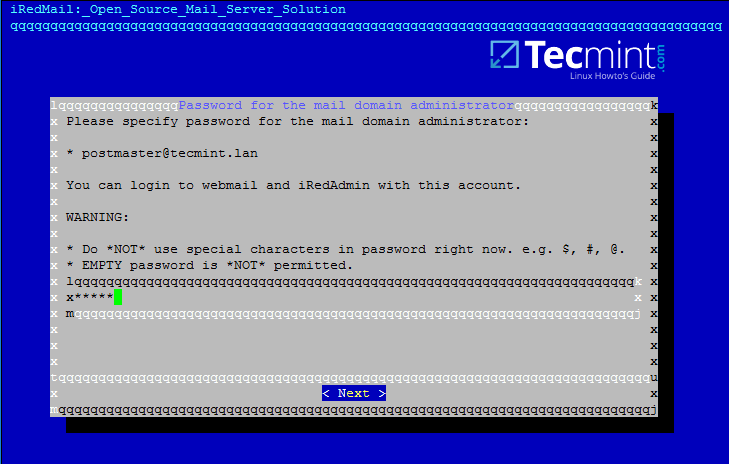
16. Now, setup a password for `postmaster@yourdomain.tld` administrator and hit Next to continue.
|
||
|
||
[
|
||
|
||
][12]
|
||
|
||
iRedMail Mail Domain Administrator
|
||
|
||
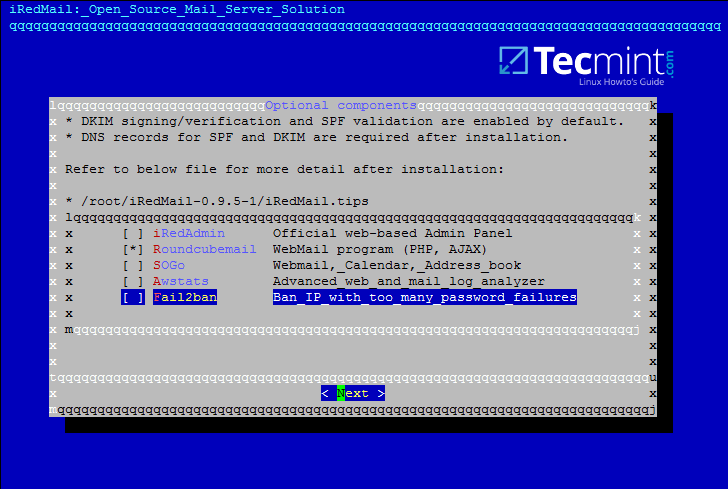
17. Next, choose from the list the optional components you want to integrate with your mail server. I strongly recommend to install Roundcube in order to provide a web interface for domain accounts to access mail, although Roundcube can be installed and configured on a different machine for this task in order to free mail server resources in case of high loads.
|
||
|
||
For local domains with restricted internet access and especially while we’re using domain integration the other components are not very useful, except Awstats in case you need mail analysis.
|
||
|
||
[
|
||
|
||
][13]
|
||
|
||
iRedMail Optional Components
|
||
|
||
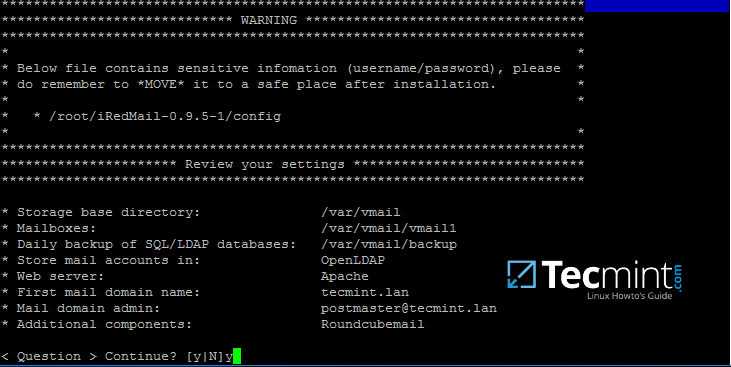
18. On the next review screen type `Y` in order to apply configuration and start the installation process.
|
||
|
||
[
|
||
|
||
][14]
|
||
|
||
iRedMail Configuration Changes
|
||
|
||
19. Finally, accept iRedMail scripts to automatically configure your machine firewall and MySQL configuration file by typing yes for all questions.
|
||
|
||
[
|
||

|
||
][15]
|
||
|
||
iRedMail System Configuration
|
||
|
||
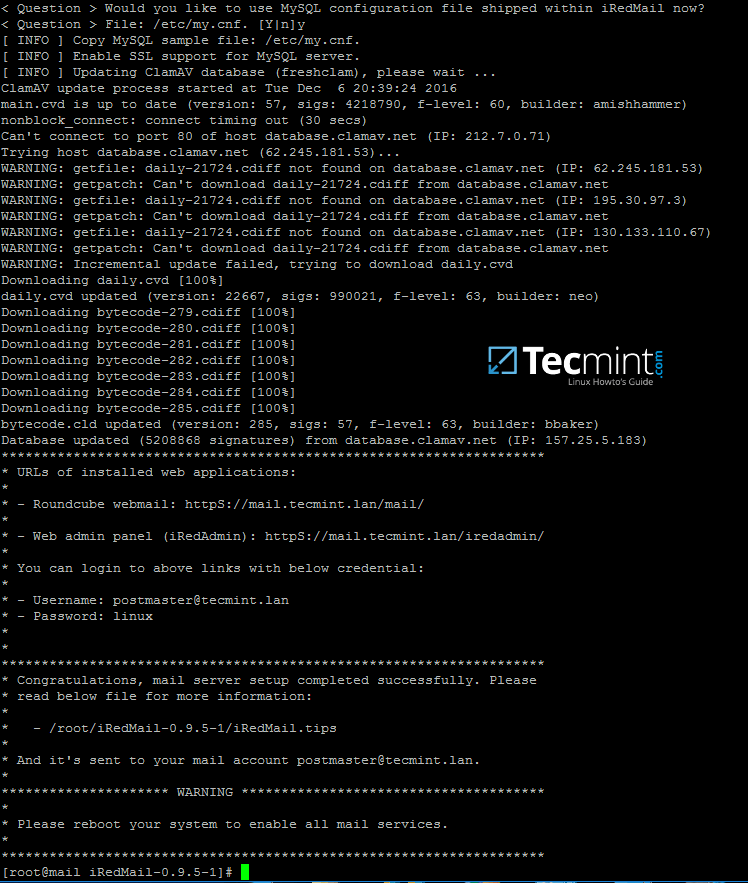
20. After the installation finishes the installer will provide some sensitive information, such as iRedAdmin credentials, web panel URL addresses and the file location with all parameters used at the installation process.
|
||
|
||
[
|
||
|
||
][16]
|
||
|
||
iRedMail Installation Summary
|
||
|
||
Read the displayed information above carefully and reboot the machine in order to enable all mail services by issuing the following command.
|
||
|
||
```
|
||
# init 6
|
||
```
|
||
|
||
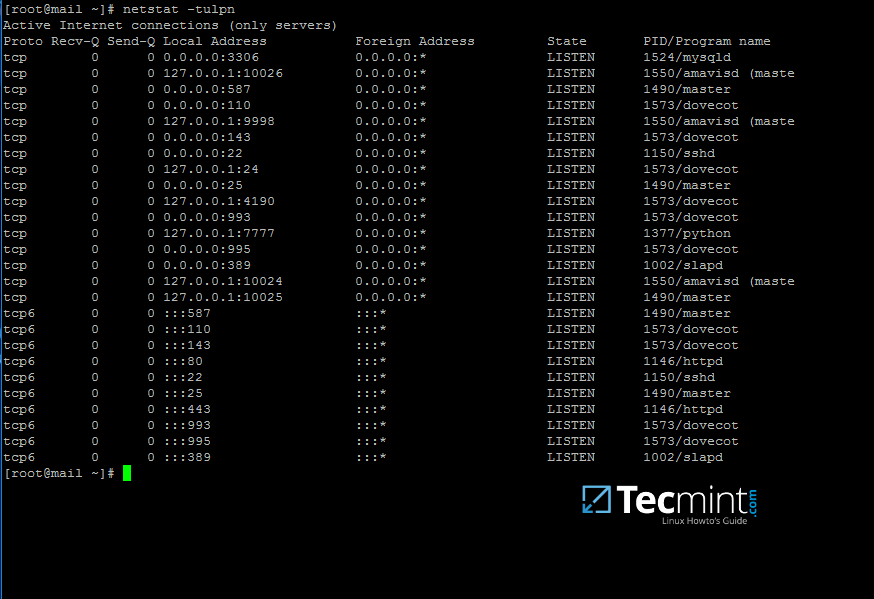
21. After the system reboots, login with an account with root privileges or as root and list all network sockets and their associated programs your mail server listens on by issuing the following command.
|
||
|
||
From the socket list you will see that your mail server covers almost all services required by a mail server to properly function: SMTP/S, POP3/S, IMAP/S and antivirus along with spam protection.
|
||
|
||
```
|
||
# netstat -tulpn
|
||
```
|
||
[
|
||
|
||
][17]
|
||
|
||
iRedMail Network Sockets
|
||
|
||
22. In order to view the location of all configuration files iRedMail has modified and the credentials used by iRedMail during the installation process for database administration, mail admin account and other accounts, display the contents of iRedMail.tips file.
|
||
|
||
The file is located in the directory where you’ve initially extracted the installation archive. Be aware that you should move and protect this file because it contains sensitive information about your mail server.
|
||
|
||
```
|
||
# less iRedMail-0.9.6/iRedMail.tips
|
||
```
|
||
|
||
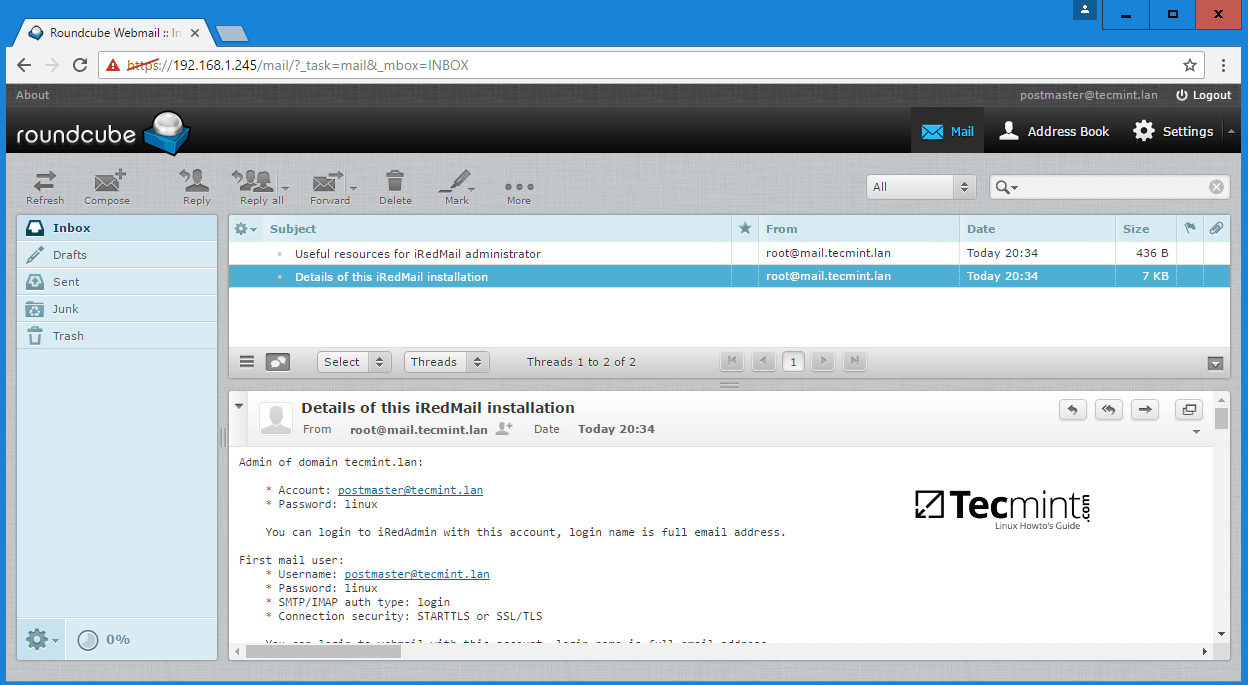
23. The file mentioned above which contain details about your mail server will also be automatically mailed to the mail server administrator account, represented by the postmaster account.
|
||
|
||
The webmail can be accessed securely via HTTPS protocol by typing your machine IP address in a browser. Accept the error generated in browser by the iRedMail self-signed web certificate and log in with the password chosen for postmaster@your_domain.tld account during the initial installation. Read and store this e-mail to a safe mailbox.
|
||
|
||
```
|
||
https://192.168.1.254
|
||
```
|
||
[
|
||

|
||
][18]
|
||
|
||
iRedMail Account Login
|
||
|
||
[
|
||
|
||
][19]
|
||
|
||
iRedMail Web Mail
|
||
|
||
That’s all! By now, you’ll have a full mail server configured on your premises which operates on its own, but not yet integrated with Samba4 Active Directory Domain Controller services.
|
||
|
||
On the next part we will see how to tamper iRedMail services (postfix, dovecot and roundcube configuration files) in order to query domain accounts, send, receive and read mail.
|
||
|
||
--------------------------------------------------------------------------------
|
||
|
||
作者简介:
|
||
|
||
I'am a computer addicted guy, a fan of open source and linux based system software, have about 4 years experience with Linux distributions desktop, servers and bash scripting.
|
||
|
||
--------------------------------------------------------------------------------
|
||
|
||
via: http://www.tecmint.com/install-iredmail-on-centos-7-for-samba4-ad-integration/
|
||
|
||
作者:[Matei Cezar][a]
|
||
译者:[译者ID](https://github.com/译者ID)
|
||
校对:[校对者ID](https://github.com/校对者ID)
|
||
|
||
本文由 [LCTT](https://github.com/LCTT/TranslateProject) 原创编译,[Linux中国](https://linux.cn/) 荣誉推出
|
||
|
||
[a]:http://www.tecmint.com/author/cezarmatei/
|
||
|
||
[1]:http://www.tecmint.com/install-samba4-active-directory-ubuntu/
|
||
[2]:http://www.tecmint.com/centos-7-3-installation-guide/
|
||
[3]:http://www.tecmint.com/install-samba4-active-directory-ubuntu/
|
||
[4]:http://www.tecmint.com/wp-content/uploads/2017/03/Verify-CentOS-7-Hostname.png
|
||
[5]:http://www.iredmail.org/download.html
|
||
[6]:http://www.tecmint.com/wp-content/uploads/2017/03/iRedMail-Setup-Wizard.png
|
||
[7]:http://www.tecmint.com/wp-content/uploads/2017/03/iRedMail-Mail-Storage-Path.png
|
||
[8]:http://www.tecmint.com/wp-content/uploads/2017/03/iRedMail-Preferred-Web-Server.png
|
||
[9]:http://www.tecmint.com/wp-content/uploads/2017/03/iRedMail-LDAP-Backend.png
|
||
[10]:http://www.tecmint.com/wp-content/uploads/2017/03/iRedMail-LDAP-Suffix.png
|
||
[11]:http://www.tecmint.com/wp-content/uploads/2017/03/iRedMail-Mail-Domain.png
|
||
[12]:http://www.tecmint.com/wp-content/uploads/2017/03/iRedMail-Mail-Domain-Administrator.png
|
||
[13]:http://www.tecmint.com/wp-content/uploads/2017/03/iRedMail-Optional-Components.png
|
||
[14]:http://www.tecmint.com/wp-content/uploads/2017/03/iRedMail-Configuration-Changes.png
|
||
[15]:http://www.tecmint.com/wp-content/uploads/2017/03/iRedMail-System-Configuration.png
|
||
[16]:http://www.tecmint.com/wp-content/uploads/2017/03/iRedMail-Installation-Summary.png
|
||
[17]:http://www.tecmint.com/wp-content/uploads/2017/03/iRedMail-Network-Sockets.png
|
||
[18]:http://www.tecmint.com/wp-content/uploads/2017/03/iRedMail-Account-Login.png
|
||
[19]:http://www.tecmint.com/wp-content/uploads/2017/03/iRedMail-Web-Mail.png
|
||
[20]:http://www.tecmint.com/author/cezarmatei/
|
||
[21]:http://www.tecmint.com/10-useful-free-linux-ebooks-for-newbies-and-administrators/
|
||
[22]:http://www.tecmint.com/free-linux-shell-scripting-books/
|