7.5 KiB
Convert Markdown files to word processor docs using pandoc
Living that plaintext life? Here's how to create the word processor
documents people ask for without having to work in a word processor
yourself.

If you live your life in plaintext, there invariably comes a time when someone asks for a word processor document. I run into this issue frequently, especially at the Day JobTM. Although I've introduced one of the development teams I work with to a Docs Like Code workflow for writing and reviewing release notes, there are a small number of people who have no interest in GitHub or working with Markdown. They prefer documents formatted for a certain proprietary application.
The good news is that you're not stuck copying and pasting unformatted text into a word processor document. Using pandoc , you can quickly give people what they want. Let's take a look at how to convert a document from Markdown to a word processor format in Linux using pandoc.
Note that pandoc is also available for a wide variety of operating systems, ranging from two flavors of BSD (NetBSD and FreeBSD) to Chrome OS, MacOS, and Windows.
Converting basics
To begin, install pandoc on your computer. Then, crack open a console terminal window and navigate to the directory containing the file that you want to convert.
Type this command to create an ODT file (which you can open with a word processor like LibreOffice Writer or AbiWord):
pandoc -t odt filename.md -o filename.odt
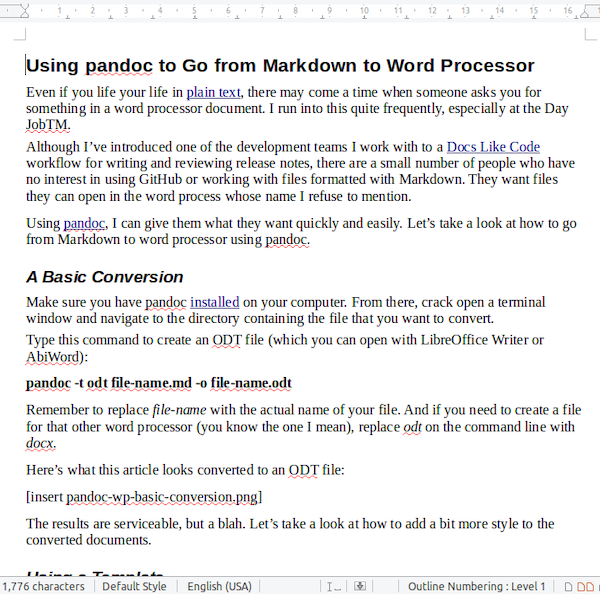
Remember to replace filename with the file's actual name. And if you need to create a file for that other word processor (you know the one I mean), replace odt on the command line with docx. Here's what this article looks like when converted to an ODT file:
These results are serviceable, but a bit bland. Let's look at how to add a bit more style to the converted documents.
Converting with style
pandoc has a nifty feature enabling you to specify a style template when converting a marked-up plaintext file to a word processor format. In this file, you can edit a small number of styles in the document, including those that control the look of paragraphs, headings, captions, titles and subtitles, a basic table, and hyperlinks.
Let's look at the possibilities.
Creating a template
In order to style your documents, you can't just use any template. You need to generate what pandoc calls a reference template, which is the template it uses when converting text files to word processor documents. To create this file, type the following in a terminal window:
pandoc -o custom-reference.odt --print-default-data-file reference.odt
This command creates a file called custom-reference.odt. If you're using that other word processor, change the references to odt on the command line to docx.
Open the template file in LibreOffice Writer, and then press F11 to open LibreOffice Writer's Styles pane. Although the pandoc manual advises against making other changes to the file, I change the page size and add headers and footers when necessary.
Using the template
So, how do you use that template you just created? There are two ways to do this.
The easiest way is to drop the template in your /home directory's .pandoc folder—you might have to create the folder first if it doesn't exist. When it's time to convert a document, pandoc uses this template file. See the next section on how to choose from multiple templates if you need more than one.
The other way to use your template is to type this set of conversion options at the command line:
pandoc -t odt file-name.md --reference-doc=path-to-your-file/reference.odt -o file-name.odt
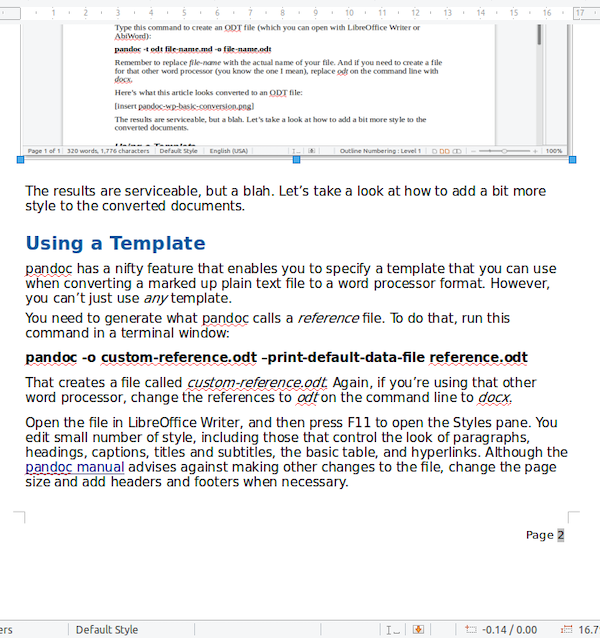
If you're wondering what a converted file looks like with a customized template, here's an example:
Choosing from multiple templates
Many people only need one pandoc template. Some people, however, need more than one.
At my day job, for example, I use several templates—one with a DRAFT watermark, one with a watermark stating FOR INTERNAL USE, and one for a document's final versions. Each type of document needs a different template.
If you have similar needs, start the same way you do for a single template, by creating the file custom-reference.odt. Rename the resulting file—for example, to custom-reference-draft.odt —then open it in LibreOffice Writer and modify the styles. Repeat this process for each template you need.
Next, copy the files into your /home directory. You can even put them in the .pandoc folder if you want to.
To select a specific template at conversion time, you'll need to run this command in a terminal:
pandoc -t odt file-name.md --reference-doc=path-to-your-file/custom-template.odt -o file-name.odt
Change custom-template.odt to your template file's name.
Wrapping up
To avoid having to remember a set of options I don't regularly use, I cobbled together some simple, very lame one-line scripts that encapsulate the options for each template. For example, I run the script todraft.sh to create a word processor document using the template with a DRAFT watermark. You might want to do the same.
Here's an example of a script using the template containing a DRAFT watermark:
pandoc -t odt $1.md -o $1.odt --reference-doc=~/Documents/pandoc-templates/custom-reference-draft.odt
Using pandoc is a great way to provide documents in the format that people ask for, without having to give up the command line life. This tool doesn't just work with Markdown, either. What I've discussed in this article also allows you to create and convert documents between a wide variety of markup languages. See the pandoc site linked earlier for more details.
via: https://opensource.com/article/19/5/convert-markdown-to-word-pandoc
作者:Scott Nesbitt 选题:lujun9972 译者:译者ID 校对:校对者ID

