mirror of
https://github.com/LCTT/TranslateProject.git
synced 2025-01-07 22:11:09 +08:00
286 lines
14 KiB
Markdown
286 lines
14 KiB
Markdown
|
||
在linux中使用gnome-screenshot进行截图的综合指南
|
||
============================================================
|
||
|
||
### 在本文中
|
||
|
||
1. [关于Gnome-screenshot][13]
|
||
2. [Gnome-screenshot安装][14]
|
||
3. [Gnome-screenshot用法/特点][15]
|
||
1. [捕获当前活动窗口][1]
|
||
2. [窗体边框][2]
|
||
3. [添加效果到窗口边框][3]
|
||
4. [对特定区域的截图][4]
|
||
5. [在截图中包含鼠标指针][5]
|
||
6. [延时截图][6]
|
||
7. [以交互模式运行这个工具][7]
|
||
8. [直接保存你的截图][8]
|
||
9. [复制到剪切板][9]
|
||
10. [多显示器情形下的屏幕截图][10]
|
||
11. [自动化屏幕截图过程][11]
|
||
12. [获取帮助][12]
|
||
4. [总结][16]
|
||
|
||
|
||
在应用市场中有好几种屏幕截图工具可以获得,但其中大多数都是基于GUI的。如果你花时间在linux命令行上工作,而且正在寻找一款优秀的功能丰富的基于命令行的屏幕截图工具,你可能会想尝试[gnome-screenshot][17]。在本教程中,我将使用易于理解的例子来解释这个实用程序。
|
||
|
||
请注意,本教程中提到的所有例子已经在Ubuntu 16.04 LTS上测试过,测试所使用的gonme-screenshot版本是3.18.0。
|
||
|
||
### 关于Gnome-screenshot
|
||
|
||
Gnome-screenshot是一款GNOME工具,顾名思义,它是一款用来对整个屏幕、一个特定的窗口或者用户所定义一些其他区域进行捕获的工具。该工具提供了几个其他的功能,包括对所捕获的截图的边界进行美化的功能。
|
||
|
||
### Gnome-screenshot安装
|
||
|
||
Ubuntu系统上已经预安装了gnome-screeshot工具,但是如果你出于某些原因需要重新安装这款软件程序,你可以使用下面的命令来进行安装:
|
||
|
||
> sudo apt-get install gnome-screeshot
|
||
|
||
一旦软件安装完成后,你可以使用下面的命令来启动它:
|
||
|
||
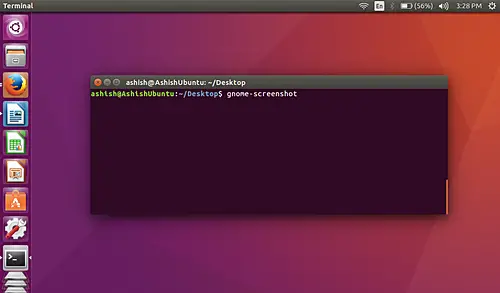
> gnome-screenshot
|
||
|
||
### Gnome-screenshot用法/特点
|
||
|
||
在这部分,我们将讨论gnome-screenshot是如何使用的和它提供的所有功能。
|
||
[
|
||
|
||
][18]
|
||
#### 捕获当前活动窗口
|
||
|
||
如何你需要的话,你可以使用-w选项限制到只对当前活动窗口截图。
|
||
|
||
> gnome-screenshot -w
|
||
|
||
[
|
||
|
||
][19]
|
||
|
||
#### 窗口边框
|
||
|
||
默认情况下,这个程序会将它捕获的窗口的边框包含在内,尽管还有一个明确的命令行选项-b可以启用此功能(以防你在某处想使用它)。以下是如何使用这个程序的:
|
||
|
||
> gnome-screenshot -wb
|
||
|
||
当然,你需要同时使用-w选项和-b选项,以便捕获的是当前活动的窗口(否则,-b将没有作用)。
|
||
|
||
继续向前且更重要的是,如果你需要的话,你也可以移除窗口的边框。可以使用-B选项来完成。下面是你可以如何使用这个选项的一个例子:
|
||
|
||
> gnome-screenshot -wB
|
||
|
||
下面是例子的截图:
|
||
|
||
[
|
||

|
||
][20]
|
||
|
||
#### 添加效果到窗口边框
|
||
|
||
在gnome-screenshot工具的帮助下,您还可以向窗口边框添加各种效果。这可以使用--border-effect选项来做到。
|
||
|
||
你可以添加这款程序所提供的任何效果,比如'shdow'效果(在窗口添加阴影)、'bordor'效果(在屏幕截图周围添加矩形区域)和'vintage'效果(使截图略微淡化,着色并在其周围添加矩形区域)。
|
||
|
||
> gnome-screenshot --border-effect=[EFFECT]
|
||
|
||
例如,运行下面的命令添加shadow效果:
|
||
|
||
> gnome-screenshot –border-effect=shadow
|
||
|
||
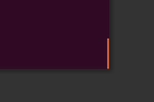
以下是shadow效果的示例快照:
|
||
|
||
[
|
||
|
||
][21]
|
||
|
||
请注意,上述屏幕截图主要集中在终端的一个角落,以便您清楚地看到阴影效果。
|
||
|
||
#### 对特定区域的截图
|
||
|
||
如何你需要,你还可以使用gnome-screenshot程序对你电脑屏幕的某一特定区域进行截图。这可以通过使用-a选项来完成。
|
||
|
||
> gnome-screenshot -a
|
||
|
||
当上面的命令被运行后,你的鼠标指针将会变成'+'这个符号。在这种模式下,你可以按住鼠标左键移动鼠标来对某个特定区域截图。
|
||
|
||
这是一个示例截图,其中我裁剪了我的终端窗口的一小部分。
|
||
|
||
[
|
||

|
||
][22]
|
||
|
||
#### 在截图中包含鼠标指针
|
||
|
||
默认情况下,每当你使用这个工具截图的时候,截的图中并不会包含鼠标指针。然而,这个程序是可以让你把指针包括进去的,你可以使用-p命令行选项做到。
|
||
|
||
> gnome-screenshot -p
|
||
|
||
这是一个示例截图:
|
||
|
||
[
|
||
|
||
][23]
|
||
|
||
#### 延时截图
|
||
|
||
截图时你还可以引入时间延迟。要做到这,你不得不给--delay选项赋予一个以秒为单位的值。
|
||
|
||
> gnome-screenshot –delay=[SECONDS]
|
||
|
||
例如:
|
||
|
||
> gnome-screenshot --delay=5
|
||
|
||
示例截图如下:
|
||
|
||
[
|
||

|
||
][24]
|
||
|
||
#### 以交互模式运行这个工具
|
||
|
||
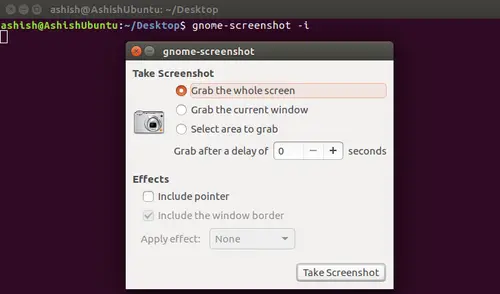
这个工具还允许你使用一个单独的-i选项来访问其所有功能。使用这个命令行选项,用户可以在运行这个命令时使用这个工具的一个或多个功能。
|
||
|
||
> gnome-screenshot -i
|
||
|
||
示例截图如下:
|
||
|
||
[
|
||
|
||
][25]
|
||
|
||
你可以从上面的截图中看到,-i选项提供了对很多功能的访问,比如截取整个屏幕、截取当前窗口、选择一个区域进行截图、延时选项和特效选项等都在交互模式里。
|
||
|
||
#### 直接保存你的截图
|
||
|
||
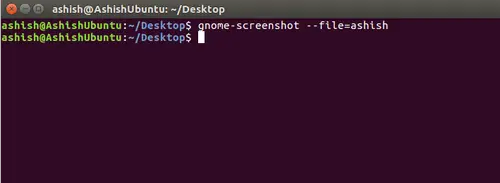
如果你需要的话,你可以直接将你截的图片从终端中保存到你当前的工作目录,这意味着,在这个程序运行后,它并不要求你为截取的图片输入一个文件名。这个功能可以使用--file命令行选项来获取,很明显,需要给它传递一个文件名。
|
||
|
||
> gnome-screenshot –file=[FILENAME]
|
||
|
||
例如:
|
||
|
||
> gnome-screenshot --file=ashish
|
||
|
||
示例截图如下:
|
||
|
||
[
|
||
|
||
][26]
|
||
|
||
#### 复制到剪切板
|
||
|
||
gnome-screenshot也允许你把你截的图复制到剪切板。这可以通过使用-c命令行选项做到。
|
||
|
||
> gnome-screenshot -c
|
||
|
||
[
|
||

|
||
][27]
|
||
|
||
在这个模式下,例如,你可以把复制的图直接粘贴到你的任何一个图片编辑器中(比如GIMP)。
|
||
|
||
#### 多显示器情形下的截图
|
||
|
||
如果有多个显示器连接到你的系统,你想对某一个进行截图,那么你可以使用--then命令行选项。需要给这个选项一个显示器设备ID的值(需要被截图的显示器的ID)。
|
||
|
||
> gnome-screenshot --display=[DISPLAY]
|
||
|
||
例如:
|
||
|
||
> gnome-screenshot --display=VGA-0
|
||
|
||
在上面的例子中,VAG-0是我正试图对其进行截图的显示器的ID。为了找到你想对其进行截图的显示器的ID,你可以使用下面的命令:
|
||
|
||
> xrandr --query
|
||
|
||
为了让你明白一些,在我的例子中这个命令产生了下面的输出:
|
||
|
||
>**$ xrandr --query**
|
||
Screen 0: minimum 320 x 200, current 1366 x 768, maximum 8192 x 8192
|
||
**VGA-0** connected primary 1366x768+0+0 (normal left inverted right x axis y axis) 344mm x 194mm
|
||
1366x768 59.8*+
|
||
1024x768 75.1 75.0 60.0
|
||
832x624 74.6
|
||
800x600 75.0 60.3 56.2
|
||
640x480 75.0 60.0
|
||
720x400 70.1
|
||
**HDMI-0** disconnected (normal left inverted right x axis y axis)
|
||
|
||
|
||
#### 自动化屏幕截图过程
|
||
|
||
正如我们之前讨论的,-a命令行选项可以帮助我们对屏幕的某一个特定区域进行截图。然而,我们不得不用鼠标手动选取这个区域。如果你想的话,你可以使用gnome-screenshot来自动化完成这个过程,但是在那种情形下,你将不得不使用一个名为xdotol的工具,它可以模仿敲打键盘甚至是点击鼠标这些事件。
|
||
|
||
例如:
|
||
|
||
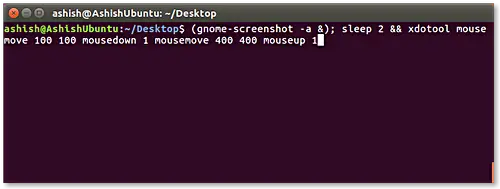
> (gnome-screenshot -a &); sleep 0.1 && xdotool mousemove 100 100 mousedown 1 mousemove 400 400 mouseup 1
|
||
|
||
mousemove子命令自动把鼠标指针定位到明确的X坐标和Y坐标的位置(上面例子中是100和100)。mousedown子命令触发一个与点击执行相同操作的事件(因为我们想左击,所以我们使用了参数1),然而mouseup子命令触发一个执行用户释放鼠标按钮的任务的事件。
|
||
|
||
所以总而言之,上面所示的xdotool命令做了一项本来不得不使用鼠标手动执行对同一区域进行截图的工作。特别说明,该命令把鼠标指针定位到屏幕上坐标为100,100的位置并选择封闭区域,直到指针到达屏幕上坐标为400,400的位置。所选择的区域随之被gnome-screenshot捕获。
|
||
|
||
这是上述命令的截图:
|
||
|
||
[
|
||
|
||
][28]
|
||
|
||
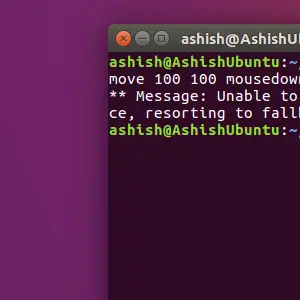
这是输出的结果:
|
||
|
||
[
|
||
|
||
][29]
|
||
|
||
想获取更多关于xdotool的信息,[请到这来][30]
|
||
|
||
#### 获取帮助
|
||
|
||
如果你有疑问或者你正面临一个与该命令行的其中某个选项有关的问题,那么你可以使用--help、-?或者-h选项来获取相关信息。
|
||
|
||
> gnome-screenshot -h
|
||
|
||
### 总结
|
||
|
||
我推荐你至少使用一次这个程序,因为它不仅对初学者来说比较简单,而且还提供功能丰富的高级用法体验。动起手来,尝试一下吧。
|
||
|
||
|
||
|
||
via: https://www.howtoforge.com/tutorial/taking-screenshots-in-linux-using-gnome-screenshot/
|
||
|
||
作者:[Himanshu Arora][a]
|
||
译者:[zhousiyu325](https://github.com/zhousiyu325)
|
||
校对:[校对者ID](https://github.com/校对者ID)
|
||
|
||
本文由 [LCTT](https://github.com/LCTT/TranslateProject) 原创编译,[Linux中国](https://linux.cn/) 荣誉推出
|
||
|
||
[a]:https://www.howtoforge.com/tutorial/taking-screenshots-in-linux-using-gnome-screenshot/
|
||
[1]:https://www.howtoforge.com/tutorial/taking-screenshots-in-linux-using-gnome-screenshot/#capturing-current-active-window
|
||
[2]:https://www.howtoforge.com/tutorial/taking-screenshots-in-linux-using-gnome-screenshot/#window-border
|
||
[3]:https://www.howtoforge.com/tutorial/taking-screenshots-in-linux-using-gnome-screenshot/#adding-effects-to-window-borders
|
||
[4]:https://www.howtoforge.com/tutorial/taking-screenshots-in-linux-using-gnome-screenshot/#screenshot-of-a-particular-area
|
||
[5]:https://www.howtoforge.com/tutorial/taking-screenshots-in-linux-using-gnome-screenshot/#include-mouse-pointer-in-snapshot
|
||
[6]:https://www.howtoforge.com/tutorial/taking-screenshots-in-linux-using-gnome-screenshot/#delay-in-taking-screenshots
|
||
[7]:https://www.howtoforge.com/tutorial/taking-screenshots-in-linux-using-gnome-screenshot/#run-the-tool-in-interactive-mode
|
||
[8]:https://www.howtoforge.com/tutorial/taking-screenshots-in-linux-using-gnome-screenshot/#directly-save-your-screenshot
|
||
[9]:https://www.howtoforge.com/tutorial/taking-screenshots-in-linux-using-gnome-screenshot/#copy-to-clipboard
|
||
[10]:https://www.howtoforge.com/tutorial/taking-screenshots-in-linux-using-gnome-screenshot/#screenshot-in-case-of-multiple-displays
|
||
[11]:https://www.howtoforge.com/tutorial/taking-screenshots-in-linux-using-gnome-screenshot/#automate-the-screen-grabbing-process
|
||
[12]:https://www.howtoforge.com/tutorial/taking-screenshots-in-linux-using-gnome-screenshot/#getting-help
|
||
[13]:https://www.howtoforge.com/tutorial/taking-screenshots-in-linux-using-gnome-screenshot/#about-gnomescreenshot
|
||
[14]:https://www.howtoforge.com/tutorial/taking-screenshots-in-linux-using-gnome-screenshot/#gnomescreenshot-installation
|
||
[15]:https://www.howtoforge.com/tutorial/taking-screenshots-in-linux-using-gnome-screenshot/#gnomescreenshot-usagefeatures
|
||
[16]:https://www.howtoforge.com/tutorial/taking-screenshots-in-linux-using-gnome-screenshot/#conclusion
|
||
[17]:https://linux.die.net/man/1/gnome-screenshot
|
||
[18]:https://www.howtoforge.com/images/taking-screenshots-in-linux-using-gnome-screenshot/big/gnome-default.png
|
||
[19]:https://www.howtoforge.com/images/taking-screenshots-in-linux-using-gnome-screenshot/big/activewindow.png
|
||
[20]:https://www.howtoforge.com/images/taking-screenshots-in-linux-using-gnome-screenshot/big/removeborder.png
|
||
[21]:https://www.howtoforge.com/images/taking-screenshots-in-linux-using-gnome-screenshot/big/shadoweffect-new.png
|
||
[22]:https://www.howtoforge.com/images/taking-screenshots-in-linux-using-gnome-screenshot/big/area.png
|
||
[23]:https://www.howtoforge.com/images/taking-screenshots-in-linux-using-gnome-screenshot/big/includecursor.png
|
||
[24]:https://www.howtoforge.com/images/taking-screenshots-in-linux-using-gnome-screenshot/big/delay.png
|
||
[25]:https://www.howtoforge.com/images/taking-screenshots-in-linux-using-gnome-screenshot/big/interactive.png
|
||
[26]:https://www.howtoforge.com/images/taking-screenshots-in-linux-using-gnome-screenshot/big/ashish.png
|
||
[27]:https://www.howtoforge.com/images/taking-screenshots-in-linux-using-gnome-screenshot/big/copy.png
|
||
[28]:https://www.howtoforge.com/images/taking-screenshots-in-linux-using-gnome-screenshot/big/automatedcommand.png
|
||
[29]:https://www.howtoforge.com/images/taking-screenshots-in-linux-using-gnome-screenshot/big/outputxdo.png
|
||
[30]:http://manpages.ubuntu.com/manpages/trusty/man1/xdotool.1.html
|