5.3 KiB
Linux FAQs with Answers--How to configure a Linux bridge with Network Manager on Ubuntu
Question: I need to set up a Linux bridge on my Ubuntu box to share a NIC with several other virtual machines or containers created on the box. I am currently using Network Manager on my Ubuntu, so preferrably I would like to configure a bridge using Network Manager. How can I do that?
Network bridge is a hardware equipment used to interconnect two or more Layer-2 network segments, so that network devices on different segments can talk to each other. A similar bridging concept is needed within a Linux host, when you want to interconnect multiple VMs or Ethernet interfaces within a host. That is one use case of a software Linux bridge.
There are several different ways to configure a Linux bridge. For example, in a headless server environment, you can use brctl to manually configure a bridge. In desktop environment, bridge support is available in Network Manager. Let's examine how to configure a bridge with Network Manager.
Requirement
To avoid any issue, it is recommended that you have Network Manager 0.9.9 and higher, which is the case for Ubuntu 15.04 and later.
$ apt-cache show network-manager | grep Version
Version: 0.9.10.0-4ubuntu15.1
Version: 0.9.10.0-4ubuntu15
Create a Bridge
The easiest way to create a bridge with Network Manager is via nm-connection-editor. This GUI tool allows you to configure a bridge in easy-to-follow steps.
To start, invoke nm-connection-editor.
$ nm-connection-editor
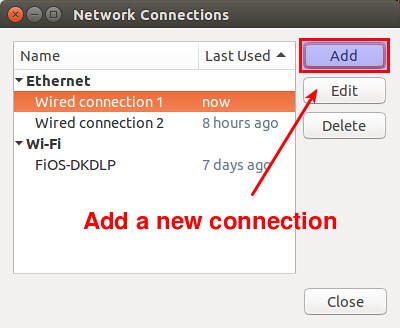
The editor window will show you a list of currently configured network connections. Click on "Add" button in the top right to create a bridge.
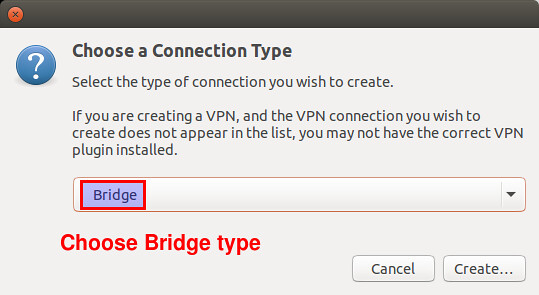
Next, choose "Bridge" as a connection type.
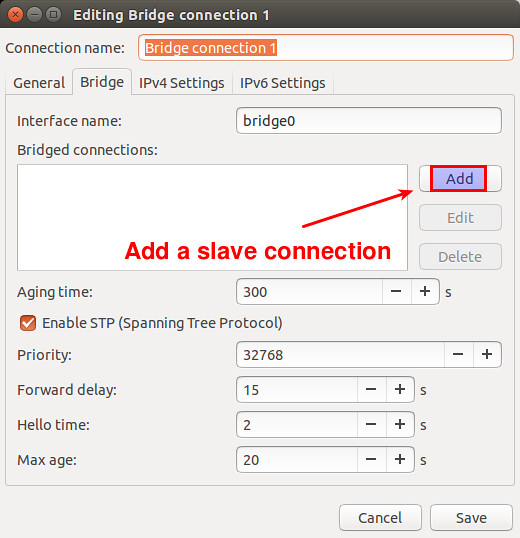
Now it's time to configure a bridge, including its name and bridged connection(s). With no other bridges created, the default bridge interface will be named bridge0.
Recall that the goal of creating a bridge is to share your Ethernet interface via the bridge. So you need to add the Ethernet interface to the bridge. This is achieved by adding a new "bridged connection" in the GUI. Click on "Add" button.
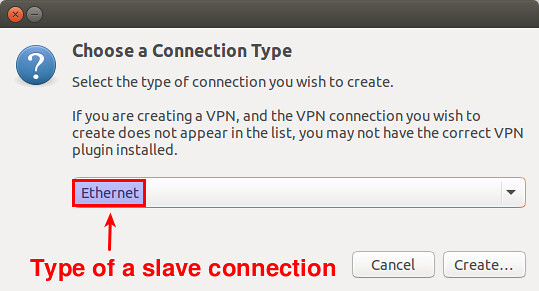
Choose "Ethernet" as a connection type.
In "Device MAC address" field, choose the interface that you want to enslave into the bridge. In this example, assume that this interface is eth0.
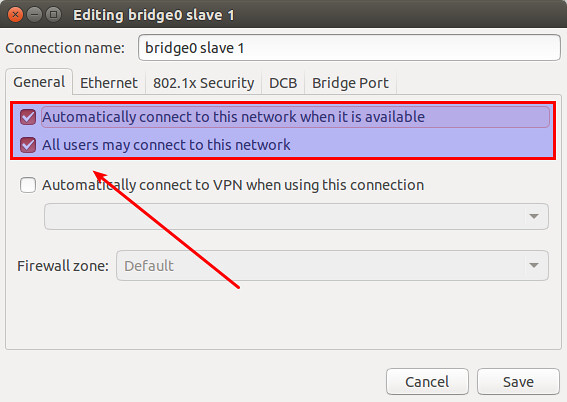
Click on "General" tab, and enable both checkboxes that say "Automatically connect to this network when it is available" and "All users may connect to this network".
Save the change.
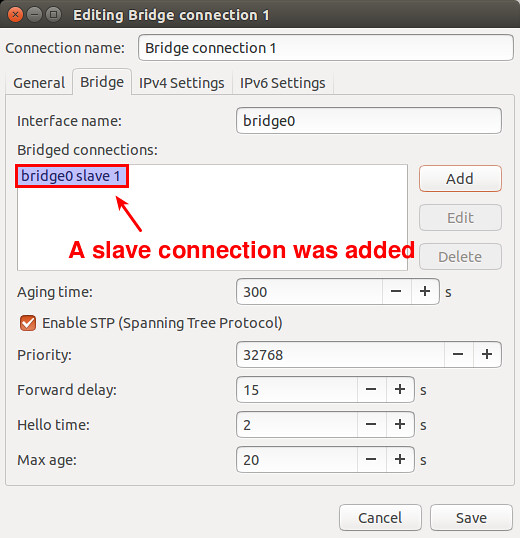
Now you will see a new slave connection created in the bridge.
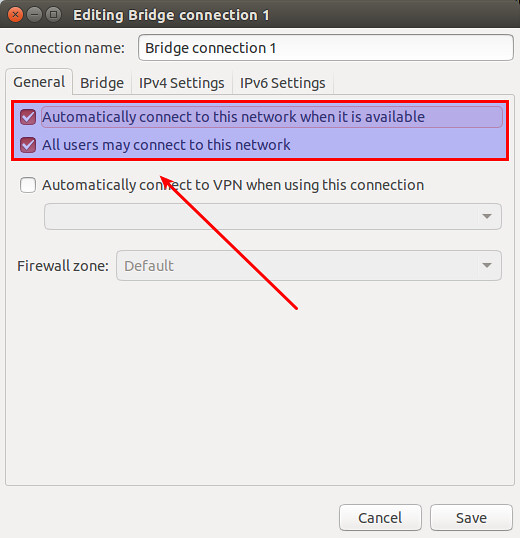
Click on "General" tab of the bridge, and make sure that top-most two checkboxes are enabled.
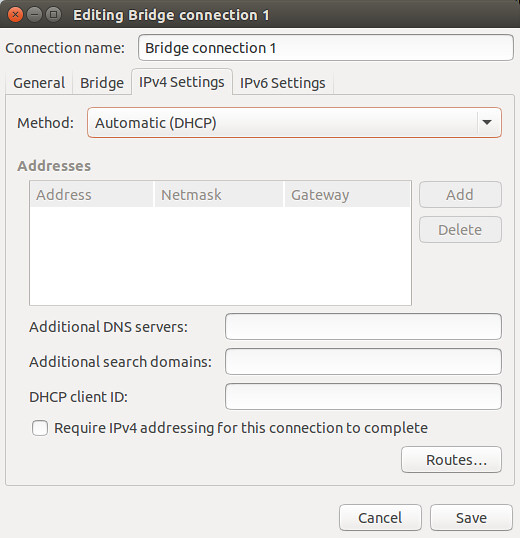
Go to "IPv4 Settings" tab, and configure either DHCP or static IP address for the bridge. Note that you should use the same IPv4 settings as the enslaved Ethernet interface eth0. In this example, we assume that eth0 is configured via DHCP. Thus choose "Automatic (DHCP)" here. If eth0 is assigned a static IP address, you should assign the same IP address to the bridge.
Finally, save the bridge settings.
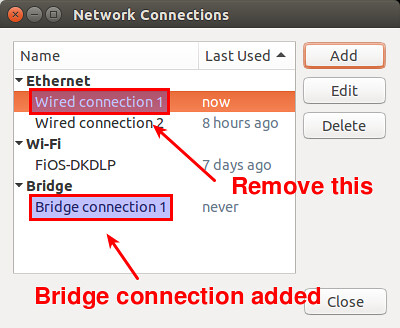
Now you will see an additional bridge connection created in "Network Connections" window. You no longer need a previously-configured wired connection for the enslaved interface eth0. So go ahead and delete the original wired connection.
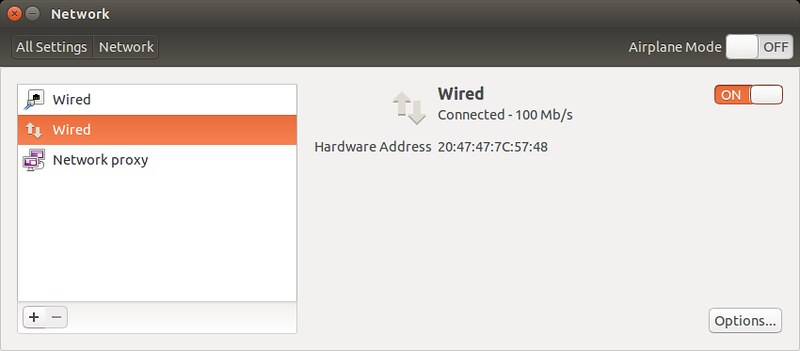
At this point, the bridge connection will automatically be activated. You will momentarily lose a connection, since the IP address assigned to eth0 is taken over by the bridge. Once an IP address is assigned to the bridge, you will be connected back to your Ethernet interface via the bridge. You can confirm that by checking "Network" settings.
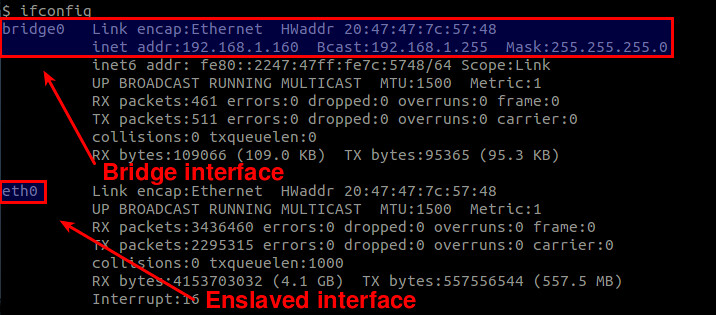
Also, check the list of available interfaces. As mentioned, the bridge interface must have taken over whatever IP address was possessed by your Ethernet interface.
That's it, and now the bridge is ready to use!
via: http://ask.xmodulo.com/configure-linux-bridge-network-manager-ubuntu.html
