19 KiB
An introduction to USB Device Emulation and how to take advantage of it
A big bunch of USB devices by Jose Ignacio Tornos Martinez
Introduction
Nowadays, the number of devices is getting bigger and bigger, and modern operating systems must try to support all types and several of them with every integration, with every release. Maintaining a large number of devices is difficult, expensive and also hard to test, specially for plug-and-play devices, like USB devices.
Therefore, it is necessary to create a mechanism to facilitate the maintenance and testing of old and new USB devices. And this is where USB device emulation comes in. In that way, a complete framework including a big bunch of emulated and validated USB devices will allow easier integration and release. The area of application would be very wide: earlier bug search/detection even during development, automatic tests, continuous integration, etc.
How to emulate USB devices
USB/IP project allows sharing the USB devices connected to a local machine so that they can be managed by another machine connected to the network by means of a TCP/IP connection.
Then USB/IP project consists of two parts:
- local device support (host) to allow remote access to every necessary control events and data
- remote control that catches every necessary control event and data to process like a normal driver
The procedure is valid for Linux and Windows, here I will focus only on Linux.
The idea behind emulation is to replace the remote device support with an application that behaves in the same way. In this way we can emulate devices with software applications that follow the commented USB/IP protocol specification.
In the following points I will describe how to configure and run the remote support and how to connect to our USB emulated device.
Remote support
Remote support is divided in two parts:
- kernel space to control a remote device as it was local, that is, to be probed by the normal driver.
- user space application to configure access to remote devices.
At this point, it is important to remark that the device emulators, after configuration by user space application, will communicate directly with the kernel space.
Local support has a very similar structure, but the focus of this article is device emulation.
Let’s analyze every part of remote support.
Kernel space
First of all, in order to get the functionality we need to compile the Linux Kernel with the following options:
CONFIG_USBIP_CORE=mCONFIG_USBIP_VHCI_HCD=m
These options enable the USB/IP virtual host controller driver, which is run on the remote machine.
Normal USB drivers need to be also included because they will be probed and configured in the same way from virtual host controller drivers.
Besides there are other important configuration options:
CONFIG_USBIP_VHCI_HC_PORTS=8CONFIG_USBIP_VHCI_NR_HCS=1
These options define the number of ports per USB/IP virtual host controller and the number of USB/IP virtual host controllers as if adding physical host controllers. These are the default values if CONFIG_USBIP_VHCI_HCD is enabled, increase if necessary.
The commented options and kernel modules are already included in some Linux distributions like Fedora Linux.
Let’s see an example of available virtual USB buses and ports that we will use later.
Default and real resources in example equipment:
$ lsusb Bus 002 Device 001: ID 1d6b:0003 Linux Foundation 3.0 root hub Bus 001 Device 002: ID 0627:0001 Adomax Technology Co., Ltd Bus 001 Device 001: ID 1d6b:0002 Linux Foundation 2.0 root hub $ lsusb -t /: Bus 02.Port 1: Dev 1, Class=root_hub, Driver=xhci_hcd/15p, 5000M /: Bus 01.Port 1: Dev 1, Class=root_hub, Driver=xhci_hcd/15p, 480M |__ Port 1: Dev 2, If 0, Class=Human Interface Device, Driver=usbhid, 480M$
Now, we will load the module vhci-hcd into the system (default configuration for CONFIG_USBIP_VHCI_HC_PORTS and CONFIG_USBIP_VHCI_NR_HCS):
$ sudo modprobe vhci-hcd $ lsusb Bus 004 Device 001: ID 1d6b:0003 Linux Foundation 3.0 root hub Bus 003 Device 001: ID 1d6b:0002 Linux Foundation 2.0 root hub Bus 002 Device 001: ID 1d6b:0003 Linux Foundation 3.0 root hub Bus 001 Device 002: ID 0627:0001 Adomax Technology Co., Ltd Bus 001 Device 001: ID 1d6b:0002 Linux Foundation 2.0 root hub $ lsusb -t /: Bus 04.Port 1: Dev 1, Class=root_hub, Driver=vhci_hcd/8p, 5000M /: Bus 03.Port 1: Dev 1, Class=root_hub, Driver=vhci_hcd/8p, 480M /: Bus 02.Port 1: Dev 1, Class=root_hub, Driver=xhci_hcd/15p, 5000M /: Bus 01.Port 1: Dev 1, Class=root_hub, Driver=xhci_hcd/15p, 480M |__ Port 1: Dev 2, If 0, Class=Human Interface Device, Driver=usbhid, 480M$
The remote USB/IP virtual host controller driver will only use the configured virtualized resources. Of course, emulated devices will work in the same way.
User space
The other necessary part in the USB/IP project is the user space tool usbip and needs to be used to configure the referred kernel space on both sides, although, in the same way, we only focus on the remote side, since the local side will be represented by the emulator.
That is, usbiptool will configure the USB/IP virtual controller (tcp client) in kernel space to connect to the device emulator (tcp server) in order to establish a direct connection between them for USB configuration, events, data, etc. exchange.
The tool is independent of the type of device and is able to provide information about available and reserved resources (see more information in the examples below).
The local USB/IP virtual host controller needs to specify the pair bus-port that will used for remote access, it will be the same for emulated devices, but in this case, this pair can be anything because there is no real device and resource reservation is not necessary.
This tool is found on the Linux Kernel repository in order to be totally synchronized with it.
Location of the tool on the Linux Kernel repository: ./tools/usb/usbip
In some distribution like Fedora Linux, the usbip utility can be installed by means of usbip package from repositories. If usbip utility or related package can not be found, follow the instruction in the available README file to compile and install. Suitable rpm package can also be generated from the usbip-emulatorrepository:
$ git clone https://github.com/jtornosm/USBIP-Virtual-USB-Device.git
$ cd USBIP-Virtual-USB-Device/usbip
$ make rpm
...
$
How to emulate USB devices
Emulators are generated in Python and C. I have started with C development (I will focus on this part), but the same could be done in Python.
For C development, compile emulation tools from the usbip-emulatorrepository:
$ git clone https://github.com/jtornosm/USBIP-Virtual-USB-Device.git
$ cd USBIP-Virtual-USB-Device/c
$ make
...
$
All the supported devices emulated at this moment will be generated:
- hid-keyboard
- hid-mouse
- cdc-adm
- hso
- cdc-ether
- bt
rpm package (usbip-emulator) can be also generated with:
$ make rpm
...
$
As examples, Vendor and Product IDs are hardcoded in the code.
Following three examples to show how emulation works. We are using the same equipment for the emulator and remote USB/IP but they could run in different equipment. Besides, we are reserving different resources so all the devices could be emulated at the same time.
Example 1: hso
From one terminal, let’s emulate the hso device:
(“1-1” is the pair bus-port for the USB device on the local machine, as we are emulating, it could be anything. It is only important because usbip tool will have to use the same name to request the emulated device)
$ hso -p 3241 -b 1-1
hso started....
server usbip tcp port: 3241
Bus-Port: 3-0:1.0
...
From another terminal, connect to the emulator:
(localhost because emulator is running in the same equipment and the same name for pair bus-port as the emulator)
$ sudo modprobe vhci-hcd $ sudo usbip --tcp-port 3241 attach -r 127.0.0.1 -b 1-1 usbip: info: using port 3241 ("3241") $
Now we can check that the new device is present:
(As we saw previously, for this example machine, bus 3 is virtualized)
$ ip addr show dev hso
0 3: hso0: <POINTOPOINT,MULTICAST,NOARP> mtu 1486 qdisc noop state DOWN group default qlen 10
link/none
$ rfkill list
0: hso-0: Wireless WAN
Soft blocked: no
Hard blocked: no
...
$ lsusb
...
Bus 003 Device 002: ID 0af0:6711 Option GlobeTrotter Express 7.2 v2
...
$ lsusb -t
...
/: Bus 03.Port 1: Dev 1, Class=root_hub, Driver=vhci_hcd/8p, 480M
|__ Port 1: Dev 2, If 0, Class=Vendor Specific Class, Driver=hso, 12M
...
$
In order to release resources:
$ sudo usbip port Imported USB devices ==================== Port 00: <Port in Use> at Full Speed(12Mbps) Option : GlobeTrotter Express 7.2 v2 (0af0:6711) 3-1 -> usbip://127.0.0.1:3241/1-1 -> remote bus/dev 001/002 $ sudo usbip detach -p 00 usbip: info: Port 0 is now detached! $
And we can check that the device is released:
$ ip addr show dev hso0
Device "hso0" does not exist.
$ rfkill list
...
$ lsusb
...
$
After this, we can emulate again or stop the emulated device from the first terminal (i.e. with Ctrl-C).
Example 2: cdc-ether
From one terminal, let’s emulate the cdc-ether device (root permission is required because raw socket needs to bind to specified interface for data plane):
(“1-1” is the pair bus-port for the USB device on the local machine, as we are emulating, it could be anything. It is only important because usbip tool will have to use the same name to request the emulated device)
$ sudo cdc-ether -e 88:00:66:99:5b:aa -i enp1s0 -p 3242 -b 1-1
cdc-ether started....
server usbip tcp port: 3242
Bus-Port: 1-1
Ethernet address: 88:00:66:99:5b:aa
Manufacturer: Temium
Network interface to bind: enp1s0
...
From another terminal connect to the emulator:
(localhost because emulator is running in the same equipment and the same name for pair bus-port as the emulator)
$ sudo modprobe vhci-hcd $ sudo usbip --tcp-port 3242 attach -r 127.0.0.1 -b 1-1 usbip: info: using port 3242 ("3242") $
Now we can check that the new device is present:
(As we saw previously, for this example machine, bus 3 is virtualized)
$ ip addr show dev eth0
4: eth0: <BROADCAST,MULTICAST,UP,LOWER_UP> mtu 1500 qdisc fq_codel state UNKNOWN group default qlen 1000
link/ether 88:00:66:99:5b:aa brd ff:ff:ff:ff:ff:ff
$ sudo ethtool eth0
...
Link detected: yes
$ lsusb
...
Bus 003 Device 003: ID 0fe6:9900 ICS Advent
...
$ lsusb -t
...
/: Bus 03.Port 1: Dev 1, Class=root_hub, Driver=vhci_hcd/8p, 480M
|__ Port 2: Dev 3, If 0, Class=Communications, Driver=cdc_ether, 480M
|__ Port 2: Dev 3, If 1, Class=CDC Data, Driver=cdc_ether, 480M
...
$
For this example, we can also test the data plane.
(IP forwarding is disabled in both sides)
First, we can configure the IP address in the emulated device:
$ sudo ip addr add 10.0.0.1/24 dev eth0 $ ip addr show dev eth0 4: eth0: <BROADCAST,MULTICAST,UP,LOWER_UP> mtu 1500 qdisc fq_codel state UNKNOWN group default qlen 1000 link/ether 88:00:66:99:5b:aa brd ff:ff:ff:ff:ff:ff inet 10.0.0.1/24 scope global eth0 valid_lft forever preferred_lft forever $
Second, for example, from other directly Ethernet connected machine (real or virtual) we can configure a macvlan interface in the same subnet to send/receive traffic (ping, iperf, etc.):
$ sudo ip link add macvlan0 link enp1s0 type macvlan mode bridge
$ sudo ip addr add 10.0.0.2/24 dev macvlan0
$ sudo ip link set macvlan0 up
$ ip addr show dev macvlan0
3: macvlan0@enp1s0: <BROADCAST,MULTICAST,UP,LOWER_UP> mtu 1500 qdisc noqueue state UP group default qlen 1000
link/ether d6:f1:cd:f1:cc:02 brd ff:ff:ff:ff:ff:ff
inet 10.0.0.2/24 scope global macvlan0
valid_lft forever preferred_lft forever
inet6 fe80::d4f1:cdff:fef1:cc02/64 scope link
valid_lft forever preferred_lft forever
$ ping 10.0.0.1
PING 10.0.0.1 (10.0.0.1) 56(84) bytes of data.
64 bytes from 10.0.0.1: icmp_seq=1 ttl=64 time=55.6 ms
64 bytes from 10.0.0.1: icmp_seq=2 ttl=64 time=2.19 ms
64 bytes from 10.0.0.1: icmp_seq=3 ttl=64 time=1.74 ms
64 bytes from 10.0.0.1: icmp_seq=4 ttl=64 time=1.76 ms
64 bytes from 10.0.0.1: icmp_seq=5 ttl=64 time=1.93 ms
64 bytes from 10.0.0.1: icmp_seq=6 ttl=64 time=1.65 ms
...
In order to release resources:
$ sudo usbip port
Imported USB devices
====================
...
Port 01: <Port in Use> at High Speed(480Mbps)
ICS Advent : unknown product (0fe6:9900)
3-2 -> usbip://127.0.0.1:3245/1-1
-> remote bus/dev 001/003
$ sudo usbip detach -p 01
usbip: info: Port 1 is now detached!
$
And we can check that the device is released:
$ ip addr show dev eth0 Device "eth0" does not exist. $ lsusb ... $
And of course, traffic from the other machine is not working:
From 10.0.0.2 icmp_seq=167 Destination Host Unreachable
From 10.0.0.2 icmp_seq=168 Destination Host Unreachable
From 10.0.0.2 icmp_seq=169 Destination Host Unreachable
From 10.0.0.2 icmp_seq=170 Destination Host Unreachable
...
After this, we can emulate again or stop the emulated device from the first terminal (i.e. with Ctrl-C).
Example 3: bt
From one terminal, let’s emulate the Bluetooth device:
(“1-1” is the pair bus-port for the USB device on the local machine, as we are emulating, it could be anything. It is only important because usbip tool will have to use the same name to request the emulated device)
$ bt -a aa:bb:cc:dd:ee:11 -p 3243 -b 1-1
bt started....
server usbip tcp port: 3243
Bus-Port: 1-1
BD address: aa:bb:cc:dd:ee:11
Manufacturer: Trust
...
From another terminal connect to the emulator:
(localhost because emulator is running in the same equipment and the same name for pair bus-port as the emulator)
$ sudo modprobe vhci-hcd $ sudo usbip --tcp-port 3243 attach -r 127.0.0.1 -b 1-1 usbip: info: using port 3243 ("3243") $
Now we can check that the new device is present:
(As we saw previously, for this example machine, bus 3 is virtualized)
$ hciconfig -a
hci0: Type: Primary Bus: USB
BD Address: AA:BB:CC:DD:EE:11 ACL MTU: 310:10 SCO MTU: 64:8
UP RUNNING PSCAN ISCAN INQUIRY
RX bytes:1451 acl:0 sco:0 events:80 errors:0
TX bytes:1115 acl:0 sco:0 commands:73 errors:0
Features: 0xff 0xff 0x8f 0xfe 0xdb 0xff 0x5b 0x87
Packet type: DM1 DM3 DM5 DH1 DH3 DH5 HV1 HV2 HV3
Link policy: RSWITCH HOLD SNIFF PARK
Link mode: SLAVE ACCEPT
Name: 'BT USB TEST - CSR8510 A10'
Class: 0x000000
Service Classes: Unspecified
Device Class: Miscellaneous,
HCI Version: 4.0 (0x6) Revision: 0x22bb
LMP Version: 3.0 (0x5) Subversion: 0x22bb
Manufacturer: Cambridge Silicon Radio (10)

$ rfkill list
...
1: hci0: Bluetooth
Soft blocked: no
Hard blocked: no
$ lsusb
...
Bus 003 Device 004: ID 0a12:0001 Cambridge Silicon Radio, Ltd Bluetooth Dongle (HCI mode)
...
$ lsusb -t
...
/: Bus 03.Port 1: Dev 1, Class=root_hub, Driver=vhci_hcd/8p, 480M
|__ Port 3: Dev 4, If 0, Class=Wireless, Driver=btusb, 12M
|__ Port 3: Dev 4, If 1, Class=Wireless, Driver=btusb, 12M
...
$
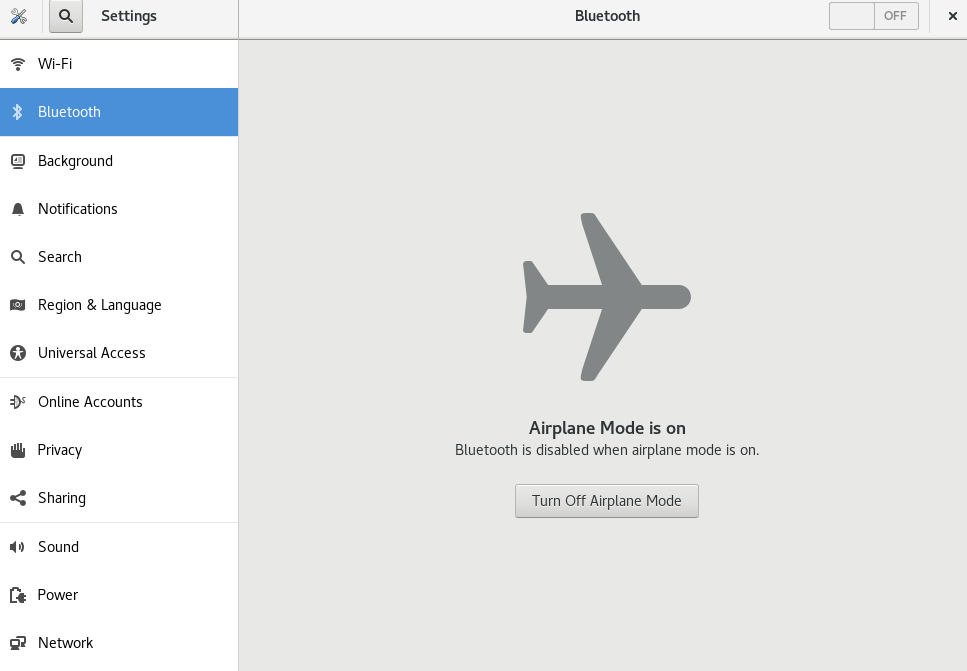
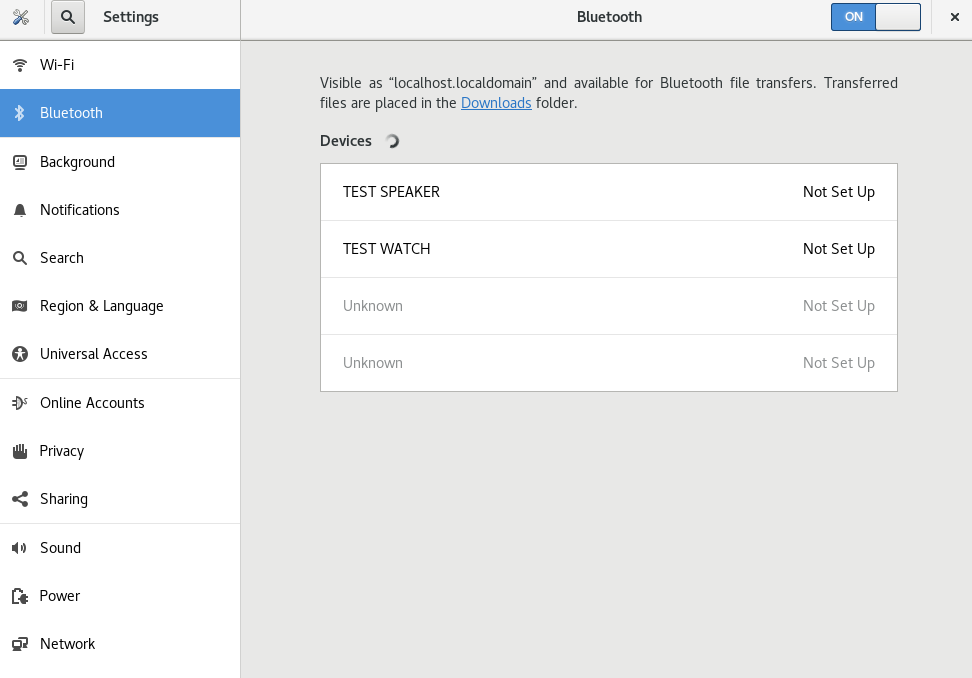
And we can turn off and turn on the emulated Bluetooth device, detecting several fake Bluetooth devices:
(At this moment, fake Bluetooth devices are not emulated/simulated so we can not set up)
In order to release resources:
$ sudo usbip port
Imported USB devices
====================
...
Port 02: <Port in Use> at Full Speed(12Mbps)
Cambridge Silicon Radio, Ltd : Bluetooth Dongle (HCI mode) (0a12:0001)
3-3 -> usbip://127.0.0.1:3243/1-1
-> remote bus/dev 001/002
$ sudo usbip detach -p 02
usbip: info: Port 2 is now detached!
$
And we can check that the device is released:
$ hciconfig
$ rfkill list
...
$ lsusb
...
$
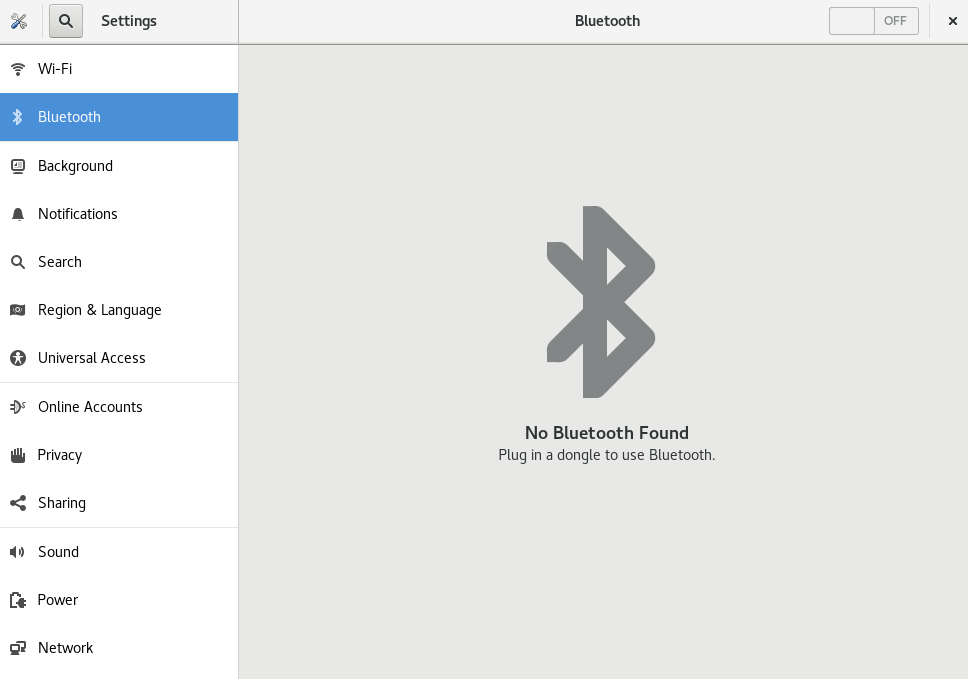
And of course, device is not detected (as before emulation):
After this, we can emulate again or stop the emulated device from the first terminal (i.e. with Ctrl-C).
Emulated vs real USB devices
When the real hardware and/or final device is not used to test, we can always feel insecure about the results, and this is the biggest hurdle that we will have to overcome to check the correct operation of the devices by means of emulation.
So, in order to be confident, emulation must be as close as possible to the real hardware and in order to get the most real emulation every aspect of the device must be covered (or at least the necessary ones if they are not related with other aspects). In fact, for a correct test, we must not modify the driver, that is, we must only emulate the physical layer, so that the driver is not able to know if the device is real or emulated.
Starting to test with the real hardware device is a very good idea to get a reference to build the emulator with the same features. For the case of USB devices, the device emulator building is easier because of the existing procedure to get remote control that complies with all the characteristics mentioned above.
Conclusion
USB device emulation is the best way to integrate and test the related features in an efficient, automatic and easy way. But, in order to be confident about the emulation procedure, device emulators need to be previously validated to confirm that they work in the same way as real hardware.
Of course, the USB device emulator is not the same as the real hardware device, but the commented method, thanks to the tested procedure to get remote control of the device, it’s very close to the real scenario and can help a lot to improve our release and testing processes.
Finally, I would like to comment that one of the best advantages of using software emulators is that we will be able to cause specific behaviors, in a simple way, that would be very difficult to reproduce with real hardware, and this could help to find issues and be more robust.
via: https://fedoramagazine.org/an-introduction-to-usb-device-emulation-and-how-to-take-advantage-of-it/
作者:Jose Ignacio Tornos Martinez 选题:lkxed 译者:译者ID 校对:校对者ID


