如何在 CentOS 7 中通过 HHVM 和 Nginx 安装 WordPress
========================
HHVM (HipHop Virtual Machine) 是一个用于执行以 PHP 和 Hack 语言编写的代码的虚拟环境。它是由 Facebook 开发的,提供了当前 PHP 7 的大多数功能。要在你的服务器上运行 HHVM,你需要使用 FastCGI 来将 HHVM 和 Nginx 或 Apache 衔接起来,或者你也可以使用 HHVM 中的内置 Web 服务器 Proxygen。
在这篇教程中,我将展示给你如何在 Nginx Web 服务器的 HHVM 上安装 WordPress。这里我使用 CentOS 7 作为操作系统,所以你需要懂一点 CentOS 操作的基础。
**先决条件**
* CentOS 7 - 64位
* Root 权限
### 步骤 1 - 配置 SELinux 并添加 EPEL 仓库
在本教程中,我们将使用 SELinux 的强制模式,所以我们需要在系统上安装一个 SELinux 管理工具。这里我们使用 `setools` 和 `setrobleshoot` 来管理 SELinux 的各项配置。
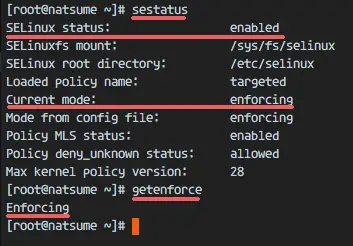
CentOS 7 已经默认启用 SELinux,我们可以通过以下命令来确认:
```
# sestatus
# getenforce
```
[][10]
如图,你能够看到,SELinux 已经开启了强制模式。
接下来就是使用 `yum` 来安装 `setools` 和 `setroubleshoot` 了。
```
# yum -y install setroubleshoot setools net-tools
```
安装好这两个后,再安装 EPEL 仓库。
```
# yum -y install epel-release
```
### 步骤 2 - 安装 Nginx
Nginx (发音:engine-x) 是一个高性能、低内存消耗的轻量级 Web 服务器软件。在 CentOS 中可以使用 `yum` 命令来安装 Nginx 包。确保你以 root 用户登录系统。
使用 `yum` 命令从 CentOS 仓库中安装 nginx。
```
# yum -y install nginx
```
现在可以使用 `systemctl` 命令来启动 Nginx,同时将其设置为跟随系统启动。
```
# systemctl start nginx
# systemctl enable nginx
```
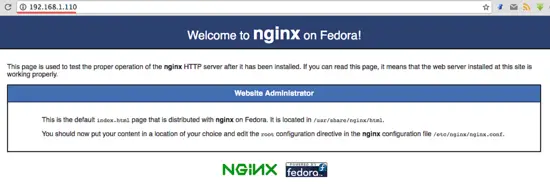
为确保 Nginx 已经正确运行于服务器中,在浏览器上输入服务器的 IP,或者如下使用 `curl` 命令检查显示结果。
```
# curl 192.168.1.110
```
我这里使用浏览器来验证。
[][11]
### 步骤 3 - 安装并配置 MariaDB
MariaDB 是由原 MySQL 开发者 Monty Widenius 开发的一款开源数据库软件,它由 MySQL 分支而来,与 MySQL 的主要功能保持一致。在这一步中,我们要安装 MariaDB 数据库并为之配置好 root 密码,然后再为所要安装的 WordPress 创建一个新的数据库和用户。
安装 mariadb 和 mariadb-server:
```
# yum -y install mariadb mariadb-server
```
启动 MariaDB 并添加为服务,以便随系统启动。
```
# systemctl start mariadb
# systemctl enable mariadb
```
现在 MariaDB 已经启动了,还需要为 mariadb/mysql 数据库配置 root 用户密码。输入以下命令来设置 MariaDB root 密码。
```
# mysql_secure_installation
```
提示设置 root 用户密码时,输入新密码进行设置:
```
Set root password? [Y/n] Y
New password:
Re-enter new password:
Remove anonymous users? [Y/n] Y
... Success!
Disallow root login remotely? [Y/n] Y
... Success!
Remove test database and access to it? [Y/n] Y
Reload privilege tables now? [Y/n] Y
... Success!
```
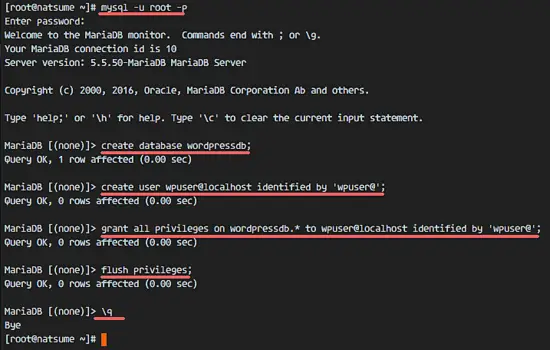
这样就设置好了 MariaDB 的 root 密码。现在登录到 MariaDB/MySQL shell 并为 WordPress 的安装创建一个新数据库 `wordpressdb` 和新用户 `wpuser`,密码设置为 `wpuser@`。为你的设置选用一个安全的密码。
登录到 MariaDB/MySQL shell:
```
# mysql -u root -p
```
接着输入你刚刚设置的 root 用户密码。
创建数据库和用户:
```
MariaDB [(none)]> create database wordpressdb;
MariaDB [(none)]> create user wpuser@localhost identified by 'wpuser@';
MariaDB [(none)]> grant all privileges on wordpressdb.* to wpuser@localhost identified by 'wpuser@';
MariaDB [(none)]> flush privileges;
MariaDB [(none)]> \q
```
[][12]
现在安装好了 MariaDB,并为 WordPress 创建好了数据库。
### 步骤 4 - 安装 HHVM
对于 HHVM,我们需要安装大量的依赖项。作为选择,你可以从 GitHub 下载 HHVM 的源码来编译安装,也可以从网络上获取预编译的包进行安装。在本教程中,我使用的是预编译的安装包。
为 HHVM 安装依赖项:
```
# yum -y install cpp gcc-c++ cmake git psmisc {binutils,boost,jemalloc,numactl}-devel \
> {ImageMagick,sqlite,tbb,bzip2,openldap,readline,elfutils-libelf,gmp,lz4,pcre}-devel \
> lib{xslt,event,yaml,vpx,png,zip,icu,mcrypt,memcached,cap,dwarf}-devel \
> {unixODBC,expat,mariadb}-devel lib{edit,curl,xml2,xslt}-devel \
> glog-devel oniguruma-devel ocaml gperf enca libjpeg-turbo-devel openssl-devel \
> mariadb mariadb-server libc-client make
```
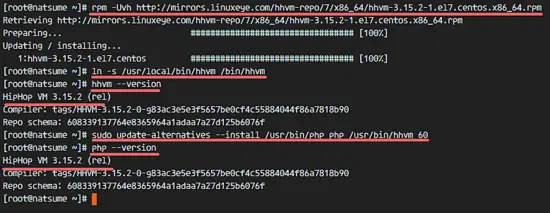
然后是使用 `rpm` 安装从 [HHVM 预编译包镜像站点][13] 下载的 HHVM 预编译包。
```
# rpm -Uvh http://mirrors.linuxeye.com/hhvm-repo/7/x86_64/hhvm-3.15.2-1.el7.centos.x86_64.rpm
# ln -s /usr/local/bin/hhvm /bin/hhvm
```
安装好 HHVM 之后使用如下命令按了验证:
```
# hhvm --version
```
为了能使用 PHP 命令,可以把 `hhvm` 命令设置为 `php`。这样在 shell 中输入 `php` 命令的时候,你会看到和输入 `hhvm` 命令一样的结果。
```
# sudo update-alternatives --install /usr/bin/php php /usr/bin/hhvm 60
# php --version
```
[][14]
### 步骤 5 - 配置 HHVM
这一步中,我们来配置 HHVM 以系统服务来运行。我们不通过端口这种常规的方式来运行它,而是选择使用 unix socket 文件的方式,这样运行的更快速一点。
进入 systemd 配置目录,并创建一个 `hhvm.service` 文件。
```
# cd /etc/systemd/system/
# vim hhvm.service
```
复制粘贴如下配置到文件中去。
```
[Unit]
Description=HHVM HipHop Virtual Machine (FCGI)
After=network.target nginx.service mariadb.service
[Service]
ExecStart=/usr/local/bin/hhvm --config /etc/hhvm/server.ini --user nginx --mode daemon -vServer.Type=fastcgi -vServer.FileSocket=/var/run/hhvm/hhvm.sock
[Install]
WantedBy=multi-user.target
```
保存文件退出 vim。
接下来,进入 `hhvm` 目录并编辑 `server.ini` 文件。
```
# cd /etc/hhvm/
# vim server.ini
```
将第 7 行 `hhvm.server.port` 替换为 unix socket,如下:
```
hhvm.server.file_socket = /var/run/hhvm/hhvm.sock
```
保存文件并退出编辑器。
我们已在 hhvm 服务文件中定义了 hhvm 以 `nginx` 用户身份运行,所以还需要把 socket 文件目录的属主变更为 `nginx`。然后我们还必须在 SELinux 中修改 hhvm 目录的权限上下文以便让它可以访问这个 socket 文件。
```
# chown -R nginx:nginx /var/run/hhvm/
# semanage fcontext -a -t httpd_var_run_t "/var/run/hhvm(/.*)?"
# restorecon -Rv /var/run/hhvm
```
服务器重启之后,hhvm 将不能运行,因为没有存储 socket 文件的目录,所有还必须在启动的时候自动创建一个。
使用 vim 编辑 `rc.local` 文件。
```
# vim /etc/rc.local
```
将以下配置粘贴到文件末行。
```
# mkdir -p /var/run/hhvm/
# chown -R nginx:nginx /var/run/hhvm/
# semanage fcontext -a -t httpd_var_run_t "/var/run/hhvm(/.*)?"
# restorecon -Rv /var/run/hhvm
```
保存文件并退出 vim。然后给文件赋予执行权限。
```
# chmod +x /etc/rc.local
```
重新加载 systemd 服务,启动 hhvm 并设置为随系统启动。
```
# systemctl daemon-reload
# systemctl start hhvm
# systemctl enable hhvm
```
要确保无误,使用 `netstat` 命令验证 hhvm 运行于 socket 文件。
```
# netstat -pl | grep hhvm
```
[][15]
### 步骤 6 - 配置 HHVM 和 Nginx
在这个步骤中,我们将配置 HHVM 已让它运行在 Nginx Web 服务中,这需要在 Nginx 目录创建一个 hhvm 的配置文件。
进入 `/etc/nginx` 目录,创建 `hhvm.conf` 文件。
```
# cd /etc/nginx/
# vim hhvm.conf
```
粘贴以下内容到文件中。
```
location ~ \.(hh|php)$ {
root /usr/share/nginx/html;
fastcgi_keep_conn on;
fastcgi_pass unix:/var/run/hhvm/hhvm.sock;
fastcgi_index index.php;
fastcgi_param SCRIPT_FILENAME $document_root$fastcgi_script_name;
include fastcgi_params;
}
```
然后,保存并退出。
接下来,编辑 `nginx.conf` 文件,添加 hhvm 配置文件到 `include` 行。
```
# vim nginx.conf
```
添加配置到第 57 行的 `server` 指令中。
```
include /etc/nginx/hhvm.conf;
```
保存并退出。
然后修改 SELinux 中关于 hhvm 配置文件的权限上下文。
```
# semanage fcontext -a -t httpd_config_t /etc/nginx/hhvm.conf
# restorecon -v /etc/nginx/hhvm.conf
```
测试 Nginx 配置并重启服务。
```
# nginx -t
# systemctl restart nginx
```
记住确保测试配置没有错误。
### 步骤 7 - 通过 HHVM 和 Nginx 创建虚拟主机
在这一步中,我们要为 Nginx 和 hhvm 创建一个新的虚拟主机配置文件。这里我使用域名 `natsume.co` 来作为例子,你可以使用你主机喜欢的域名,并在配置文件中相应位置以及 WordPress 安装过程中进行替换。
进入 nginx 的 `conf.d` 目录,我们将在该目录存储虚拟主机文件。
```
# cd /etc/nginx/conf.d/
```
使用 vim 创建一个名为 `natsume.conf` 的配置文件。
```
# vim natsume.conf
```
粘贴以下内容到虚拟主机配置文件中。
```
server {
listen 80;
server_name natsume.co;
# note that these lines are originally from the "location /" block
root /var/www/hakase;
index index.php index.html index.htm;
location / {
try_files $uri $uri/ =404;
}
error_page 404 /404.html;
location = /50x.html {
root /var/www/hakase;
}
location ~ \.php$ {
try_files $uri =404;
fastcgi_pass unix:/var/run/hhvm/hhvm.sock;
fastcgi_index index.php;
fastcgi_param SCRIPT_FILENAME $document_root$fastcgi_script_name;
include fastcgi_params;
}
}
```
保存并退出。
在这个虚拟主机配置文件中,我们定义该域名的 Web 根目录为 `/var/www/hakase`。目前该目录还不存在,所有我们要创建它,并变更属主为 nginx 用户和组。
```
# mkdir -p /var/www/hakase
# chown -R nginx:nginx /var/www/hakase
```
接下来,为该文件和目录配置 SELinux 上下文。
```
# semanage fcontext -a -t httpd_config_t "/etc/nginx/conf.d(/.*)?"
# restorecon -Rv /etc/nginx/conf.d
```
最后,测试 nginx 配置文件以确保没有错误后,重启 nginx:
```
# nginx -t
# systemctl restart nginx
```
### 步骤 8 - 安装 WordPress
在步骤 5 的时候,我们已经为 WordPress 配置好了虚拟主机,现在只需要下载 WordPress 和使用我们在步骤 3 的时候创建的数据库和用户来编辑数据库配置就好了。
进入 Web 根目录 `/var/www/hakase` 并使用 Wget 命令下载 WordPress:
```
# cd /var/www/hakase
# wget wordpress.org/latest.tar.gz
```
解压 `latest.tar.gz` 并将 `wordpress` 文件夹中所有的文件和目录移动到当前目录:
```
# tar -xzvf latest.tar.gz
# mv wordpress/* .
```
下一步,复制一份 `wp-config-sample.php` 并更名为 `wp-config.php`,然后使用 vim 进行编辑:
```
# cp wp-config-sample.php wp-config.php
# vim wp-config.php
```
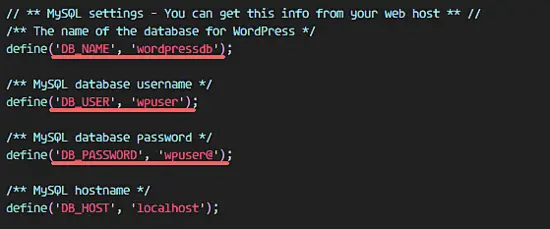
将 `DB_NAME` 设置为 `wordpressdb`、`DB_USER` 设置为 `wpuser` 以及 `DB_PASSWORD` 设置为 `wpuser@`。
```
define('DB_NAME', 'wordpressdb');
define('DB_USER', 'wpuser');
define('DB_PASSWORD', 'wpuser@');
define('DB_HOST', 'localhost');
```
保存并退出。
[][16]
修改关于 WordPress 目录的 SELinux 上下文。
```
# semanage fcontext -a -t httpd_sys_content_t "/var/www/hakase(/.*)?"
# restorecon -Rv /var/www/hakase
```
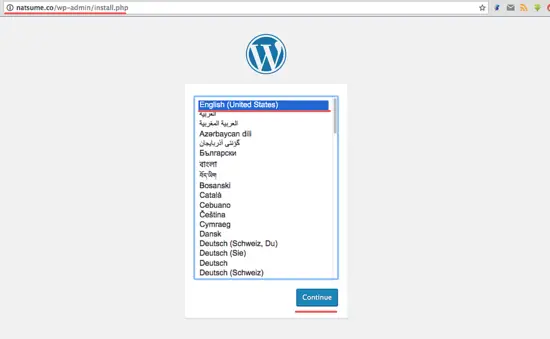
现在打开 Web 浏览器,在地址栏输入你之前为 WordPress 设置的域名,我这里是 `natsume.co`。
选择语言并点击<ruby>继续<rt>Continue</rt></ruby>。
[][17]
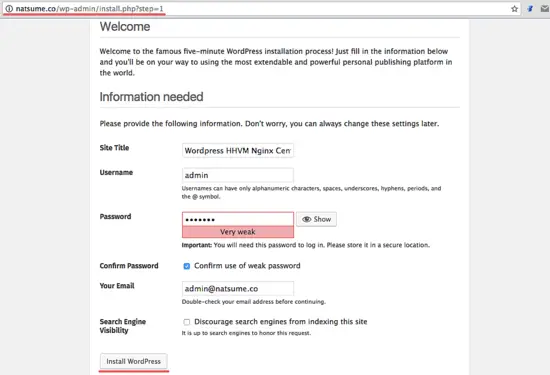
根据自身要求填写站点标题和描述并点击<ruby>安装 Wordpress<rt>Install Wordpress</rt></ruby>"。
[][18]
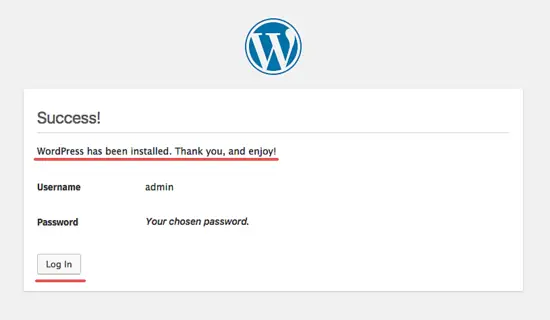
耐心等待安装完成。你会见到如下页面,点击<ruby>登录<rt>Log In</rt></ruby>来登录到管理面板。
[][19]
输入你设置的管理员用户账号和密码,在此点击<ruby>登录<rt>Log In</rt></ruby>。
[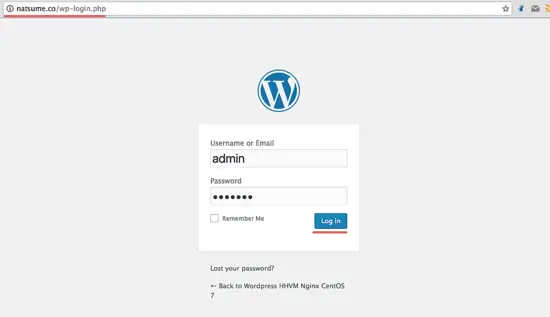][20]
现在你已经登录到 WordPress 的管理面板了。
[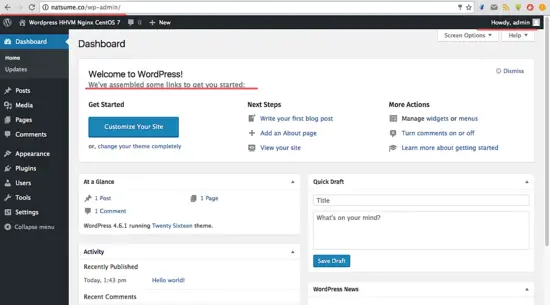][21]
Wordpress 的主页:
[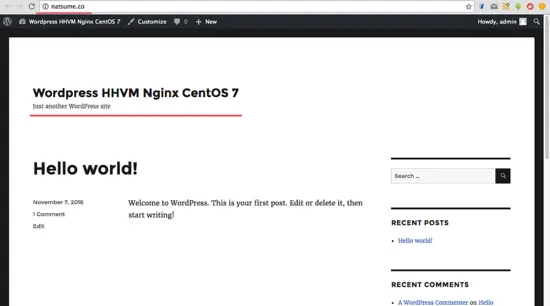][22]
至此,我们已经在 CentOS 7 上通过 Nginx 和 HHVM 成功安装 Wordpress。
### 参考链接
- https://www.nginx.com/blog/nginx-se-linux-changes-upgrading-rhel-6-6/
------------------------------------
译者简介:
[GHLandy](http://GHLandy.com) —— 划不完粉腮柳眉泣别离。
------------------------------------
via: https://www.howtoforge.com/tutorial/how-to-install-wordpress-with-hhvm-and-nginx-on-centos-7/
作者:[Muhammad Arul][a]
译者:[GHLandy](https://github.com/GHLandy)
校对:[wxy](https://github.com/wxy)
本文由 [LCTT](https://github.com/LCTT/TranslateProject) 原创编译,[Linux中国](https://linux.cn/) 荣誉推出
[a]:https://www.howtoforge.com/tutorial/how-to-install-wordpress-with-hhvm-and-nginx-on-centos-7/
[1]:https://www.howtoforge.com/tutorial/how-to-install-wordpress-with-hhvm-and-nginx-on-centos-7/#step-configure-selinux-and-add-the-epel-repository
[2]:https://www.howtoforge.com/tutorial/how-to-install-wordpress-with-hhvm-and-nginx-on-centos-7/#step-install-nginx
[3]:https://www.howtoforge.com/tutorial/how-to-install-wordpress-with-hhvm-and-nginx-on-centos-7/#step-install-and-configure-mariadb
[4]:https://www.howtoforge.com/tutorial/how-to-install-wordpress-with-hhvm-and-nginx-on-centos-7/#step-install-hhvm
[5]:https://www.howtoforge.com/tutorial/how-to-install-wordpress-with-hhvm-and-nginx-on-centos-7/#step-configure-hhvm
[6]:https://www.howtoforge.com/tutorial/how-to-install-wordpress-with-hhvm-and-nginx-on-centos-7/#step-configure-hhvm-and-nginx
[7]:https://www.howtoforge.com/tutorial/how-to-install-wordpress-with-hhvm-and-nginx-on-centos-7/#step-create-a-virtual-host-with-hhvm-and-nginx
[8]:https://www.howtoforge.com/tutorial/how-to-install-wordpress-with-hhvm-and-nginx-on-centos-7/#step-install-wordpress
[9]:https://www.howtoforge.com/tutorial/how-to-install-wordpress-with-hhvm-and-nginx-on-centos-7/#reference
[10]:https://www.howtoforge.com/images/how-to-install-wordpress-with-hhvm-and-nginx-on-centos-7/big/1.png
[11]:https://www.howtoforge.com/images/how-to-install-wordpress-with-hhvm-and-nginx-on-centos-7/big/2.png
[12]:https://www.howtoforge.com/images/how-to-install-wordpress-with-hhvm-and-nginx-on-centos-7/big/3.png
[13]:http://mirrors.linuxeye.com/hhvm-repo/7/x86_64/
[14]:https://www.howtoforge.com/images/how-to-install-wordpress-with-hhvm-and-nginx-on-centos-7/big/4.png
[15]:https://www.howtoforge.com/images/how-to-install-wordpress-with-hhvm-and-nginx-on-centos-7/big/5.png
[16]:https://www.howtoforge.com/images/how-to-install-wordpress-with-hhvm-and-nginx-on-centos-7/big/6.png
[17]:https://www.howtoforge.com/images/how-to-install-wordpress-with-hhvm-and-nginx-on-centos-7/big/7.png
[18]:https://www.howtoforge.com/images/how-to-install-wordpress-with-hhvm-and-nginx-on-centos-7/big/8.png
[19]:https://www.howtoforge.com/images/how-to-install-wordpress-with-hhvm-and-nginx-on-centos-7/big/9.png
[20]:https://www.howtoforge.com/images/how-to-install-wordpress-with-hhvm-and-nginx-on-centos-7/big/10.png
[21]:https://www.howtoforge.com/images/how-to-install-wordpress-with-hhvm-and-nginx-on-centos-7/big/11.png
[22]:https://www.howtoforge.com/images/how-to-install-wordpress-with-hhvm-and-nginx-on-centos-7/big/12.png