如何在 Debian 和 Ubuntu 上安装 MariaDB 10 ============================================================ MariaDB 是深受欢迎的数据库管理服务器软件 MySQL 的一个自由开源的分支。它由 MySQL 的原开发者在 GPLv2(通用公共许可证 2 版)下开发,并保持开源。 它被设计来实现 MySQL 的高兼容性。对于初学者,可以阅读 [MariaDB vs MySQL][5] 来了解关于它们的特性的更多信息。更重要的是,它被一些大公司/组织使用,比如 Wikipedia、WordPress.com 和 Google plus ,除此之外还有更多的。 在这篇文章中,我将向你们展示如何在 Debian 和 Ubuntu 发行版中安装 MariaDB 10.1 稳定版。 ### 在 Debian 和 Ubuntu 上安装 MariaDB 1、在安装之前 MariaDB 之前,你需要通过下面的命令导入仓库密匙并获取 MariaDB 仓库 **在 Debian 10 (Sid) 上** ``` $ sudo apt-get install software-properties-common $ sudo apt-key adv --recv-keys --keyserver keyserver.ubuntu.com 0xF1656F24C74CD1D8 $ sudo add-apt-repository 'deb [arch=amd64,i386] http://www.ftp.saix.net/DB/mariadb/repo/10.1/debian sid main' ``` **在 Debian 9 (Stretch) 上** ``` $ sudo apt-get install software-properties-common $ sudo apt-key adv --recv-keys --keyserver keyserver.ubuntu.com 0xF1656F24C74CD1D8 $ sudo add-apt-repository 'deb [arch=amd64] http://www.ftp.saix.net/DB/mariadb/repo/10.1/debian stretch main' ``` **在 Debian 8 (Jessie) 上** ``` $ sudo apt-get install software-properties-common $ sudo apt-key adv --recv-keys --keyserver keyserver.ubuntu.com 0xcbcb082a1bb943db $ sudo add-apt-repository 'deb [arch=amd64,i386,ppc64el] http://www.ftp.saix.net/DB/mariadb/repo/10.1/debian jessie main' ``` **在 Debian 7 (Wheezy) 上** ``` $ sudo apt-get install python-software-properties $ sudo apt-key adv --recv-keys --keyserver keyserver.ubuntu.com 0xcbcb082a1bb943db $ sudo add-apt-repository 'deb [arch=amd64,i386] http://www.ftp.saix.net/DB/mariadb/repo/10.1/debian wheezy main' ``` **在 Ubuntu 16.10 (Yakkety Yak) 上** ``` $ sudo apt-get install software-properties-common $ sudo apt-key adv --recv-keys --keyserver hkp://keyserver.ubuntu.com:80 0xF1656F24C74CD1D8 $ sudo add-apt-repository 'deb [arch=amd64,i386] http://www.ftp.saix.net/DB/mariadb/repo/10.1/ubuntu yakkety main' ``` **在 Ubuntu 16.04 (Xenial Xerus) 上** ``` $ sudo apt-get install software-properties-common $ sudo apt-key adv --recv-keys --keyserver hkp://keyserver.ubuntu.com:80 0xF1656F24C74CD1D8 $ sudo add-apt-repository 'deb [arch=amd64,i386,ppc64el] http://www.ftp.saix.net/DB/mariadb/repo/10.1/ubuntu xenial main' ``` **在 Ubuntu 14.04 (Trusty) 上** ``` $ sudo apt-get install software-properties-common $ sudo apt-key adv --recv-keys --keyserver hkp://keyserver.ubuntu.com:80 0xcbcb082a1bb943db $ sudo add-apt-repository 'deb [arch=amd64,i386,ppc64el] http://www.ftp.saix.net/DB/mariadb/repo/10.1/ubuntu trusty main' ``` 2、 然后,更新系统安装包列表,并像下面这样安装 MariaDB 服务器: ``` $ sudo apt-get update $ sudo apt-get install mariadb-server ``` 安装过程中,将会请求你配置 MariaDB 服务器;在下面的页面中设置一个安全的 root 用户密码: [  ][6] *为 MariaDB 设置新的 Root 密码* 再次输入密码并按下回车键来继续安装。 [ 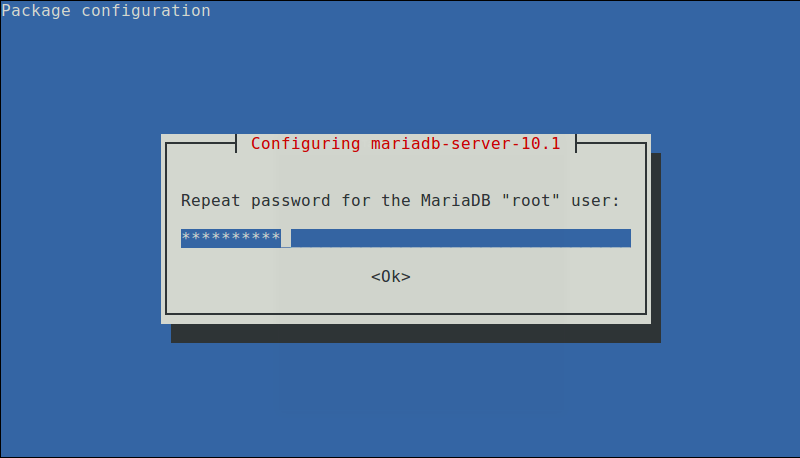 ][7] *再次输入 MariaDB 密码* 当 MariaDB 安装包安装完成以后,启动数据库服务器守护进程,同时启用它,使得在下次开机时它能够像下面这样自动启动: ``` ------------- On SystemD Systems ------------- $ sudo systemctl start mariadb $ sudo systemctl enable mariadb $ sudo systemctl status mariadb ------------- On SysVinit Systems ------------- $ sudo service mysql start $ chkconfig --level 35 mysql on OR $ update-rc.d mysql defaults $ sudo service mysql status ``` [ 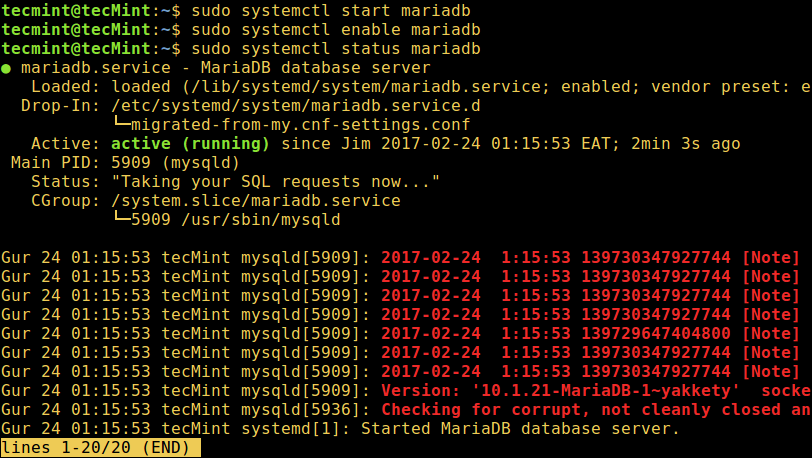 ][8] *开启 MariaDB 服务* 4、 然后,运行 `mysql_secure_installation` 脚本来保护数据库,在这儿你可以: 1. 设置 root 密码(如果在上面的配置环节你没有进行设置的话)。 2. 禁止远程 root 登录 3. 移除测试数据库 4. 移除匿名用户 5. 重载权限配置 ``` $ sudo mysql_secure_installation ``` [ 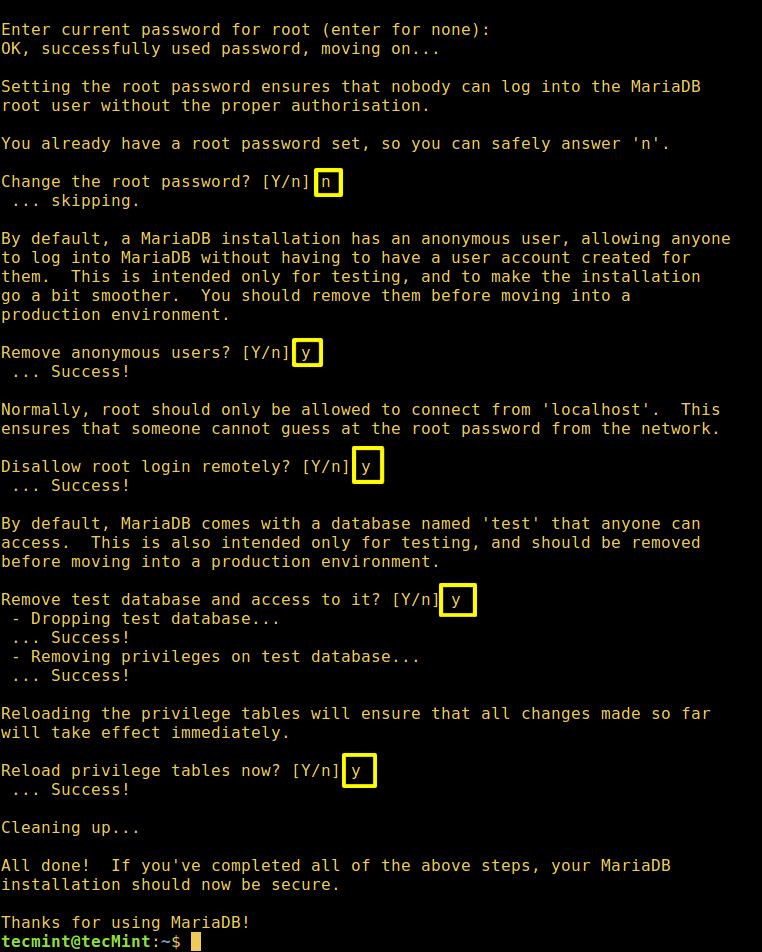 ][9] *保护 MariaDB 安装* 5、 一旦数据库服务器受保护以后,可以使用下面的 shell 命令查看已安装版本和登录 MariaDB: ``` $ mysql -V $ mysql -u root -p ``` [  ][10] *查看 MariaDB 版本* 开始学习 MySQL/MariaDB, 请阅读: 1. [MySQL / MariaDB 初学者学习指南 — Part 1][1] 2. [MySQL / MariaDB 初学者学习指南 — Part 2][2] 3. [MySQL 基本数据库管理命令 — Part III][3] 4. [针对数据库管理员的 20 个 MySQL (Mysqladmin) 命令 — Part IV][4] 查看在 Linux 中[监控 MySQL/MariaDB 性能][11]的四个有用的命令行工具,同时浏览 [15 个有用的 MySQL/MariaDB 性能调整和优化技巧][12]。 这就是本文的全部内容了。在这篇文章中,我向你们展示了如何在 Debian 和 Ubuntu 的不同发行版中安装 MariaDB 10.1 稳定版。你可以通过下面的评论框给我们提任何问题或者想法。 -------------------------------------------------------------------------------- 作者简介: Aaron Kili 是 Linux 和 F.O.S.S 爱好者,将来的 Linux 系统管理员和网络开发人员,目前是 TecMint 的内容创作者,他喜欢用电脑工作,并坚信分享知识。 -------------------------------------------------------------------------------- via: http://www.tecmint.com/install-mariadb-in-ubuntu-and-debian/ 作者:[Aaron Kili][a] 译者:[ucasFL](https://github.com/ucasFL) 校对:[wxy](https://github.com/wxy) 本文由 [LCTT](https://github.com/LCTT/TranslateProject) 原创编译,[Linux中国](https://linux.cn/) 荣誉推出 [a]:http://www.tecmint.com/author/aaronkili/ [1]:http://www.tecmint.com/learn-mysql-mariadb-for-beginners/ [2]:http://www.tecmint.com/learn-mysql-mariadb-advance-functions-sql-queries/ [3]:http://www.tecmint.com/gliding-through-database-mysql-in-a-nutshell-part-i/ [4]:http://www.tecmint.com/mysqladmin-commands-for-database-administration-in-linux/ [5]:https://mariadb.com/kb/en/mariadb/mariadb-vs-mysql-features/ [6]:http://www.tecmint.com/wp-content/uploads/2017/02/Set-New-Root-Password-for-MariaDB.png [7]:http://www.tecmint.com/wp-content/uploads/2017/02/Repeat-MariaDB-Password.png [8]:http://www.tecmint.com/wp-content/uploads/2017/02/Start-MariaDB-Service.png [9]:http://www.tecmint.com/wp-content/uploads/2017/02/sudo-mysql-secure-installation.png [10]:http://www.tecmint.com/wp-content/uploads/2017/02/Check-MariaDB-Version.png [11]:http://www.tecmint.com/mysql-performance-monitoring/ [12]:http://www.tecmint.com/mysql-mariadb-performance-tuning-and-optimization/ [13]:http://www.tecmint.com/author/aaronkili/ [14]:http://www.tecmint.com/10-useful-free-linux-ebooks-for-newbies-and-administrators/ [15]:http://www.tecmint.com/free-linux-shell-scripting-books/